
Subscribe to Our Youtube Channel
Related Manuals for Skyjack SJ30AJE


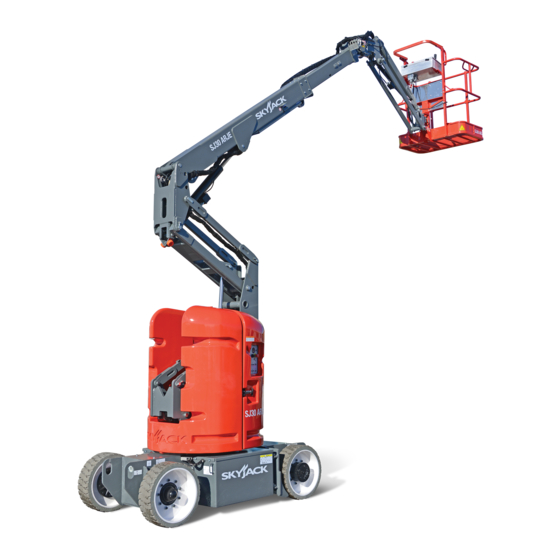
Summary of Contents for Skyjack SJ30AJE
- Page 1 SERVICE MANUAL SJ30AJE, SJ30ARJE ARTICULATING BOOM 196274AF November 2018 ANSI/CSA, CE, AS, KC...
- Page 2 This manual is based on Serial Numbers: SJ30AJE& SJ30ARJE: 90 000 001 to 90 999 999 Please refer to the website (www.skyjack.com) for contact information, other Serial Numbers, the most recent Technical Manuals, and USB software. Original instructions in English.
- Page 3 It may also be used to alert against unsafe practices. IMPORTANT IMPORTANT indicates a procedure essential for safe operation and which, if not followed, may result in a malfunction or damage to the MEWP . SJ30AJE, SJ30ARJE 196274AF...
- Page 4 Notes 196274AF SJ30AJE, SJ30ARJE...
-
Page 5: Table Of Contents
MEWP Torque Specifications ............29 SJ30AJE, SJ30ARJE... - Page 6 Platform Controls Schematic - SJ30AJE ANSI/CSA ........
- Page 7 4.2-34 No Jib Rotate Left from Platform Control Console ........112 SJ30AJE, SJ30ARJE...
- Page 8 Platform ............... . 130 196274AF SJ30AJE, SJ30ARJE...
- Page 9 5.6-11 ZAPI “Skyjack PC CAN Console” Software Guide ....... . .
- Page 10 Lubrication ..............188 196274AF SJ30AJE, SJ30ARJE...
-
Page 11: Section 1 - Scheduled Maintenance
Section 1 – Scheduled Maintenance 1.1 Read and Heed 1.1-5 Service Policy and Warranty Skyjack warrants each new product to be free of Skyjack is continuously improving and expanding defective parts and workmanship for the first 2 product features on its equipment, therefore, years or 3000 hours, whichever occurs first. -
Page 12: Maintenance And Service
MEWP . Before attempting any repair work, disconnect the main power connectors. Consult Skyjack’s Service Department for optional tires specifications and installation. Preventive maintenance is the easiest and least expensive type of maintenance. -
Page 13: Hydraulic System & Component Maintenance And Repair
The use of cloth to strain the oil should be avoided to prevent lint from getting into the system. 6. When removing any hydraulic component, be sure to cap and tag all hydraulic lines involved. Also, plug the ports of the removed components. SJ30AJE, SJ30ARJE 196274AF... -
Page 14: Railing Maintenance And Repair
Section 1 – Scheduled Maintenance Maintenance and Service 1.2-7 Railing Maintenance and Repair Skyjack MEWPs have been designed to ensure compliance with the relevant design standards applicable for that particular unit at the time of manufacture. As such, any repairs made to the... -
Page 15: Scheduled Maintenance
MEWP parked on a flat and level surface ▪ Legend Disconnect the batteries by disconnecting the ▪ Pass main power connectors. Fail Repair any damaged or malfunction ▪ components before operating MEWP . Repaired Keep records on all inspections. ▪ Not applicable SJ30AJE, SJ30ARJE 196274AF... -
Page 16: Owner's Annual Inspection Record
Figure 01 This decal is located on the controls side cowling. It must be completed after an annual inspection has been completed. Do not use the MEWP if an inspection has not been recorded in the last 13 months. Description Label Pictorial Description Label Pictorial Inspector Inspection Date Signature 196274AF SJ30AJE, SJ30ARJE... -
Page 17: Pre-Delivery/Maintenance Inspection Checklist
Furthermore, the undersigned confirms that all discrepancies have been corrected prior to using this machine. Owner: __________________________________________ / __________________________________________ / __________________________________________ Print Name Signature Date (DD/MM/YY) User: __________________________________________ / __________________________________________ / __________________________________________ Print Name Signature Date (DD/MM/YY) 210016AA Note: Visit www.skyjack.com for a printable copy of this form. SJ30AJE, SJ30ARJE 196274AF... -
Page 18: Scheduled Maintenance Inspections
Refer to the labels section in the operating manual the underside of the turret ▪ and ensure all labels are in place and are legible. the underside of the base ▪ the ground area under the MEWP ▪ 196274AF SJ30AJE, SJ30ARJE... -
Page 19: Control Compartment
Ensure there are no loose or missing parts and ▪ there is no visible damage. Main Manifold Ensure all fittings and hoses are properly ▪ tightened and there is no evidence of hydraulic leakage. Ensure there are no loose wires or missing ▪ fasteners. SJ30AJE, SJ30ARJE 196274AF... -
Page 20: Motor/Hydraulic Compartment
Add oil as needed. Refer to 2.9 Hydraulic Specifications recommended oil type. Hydraulic Filter Ensure the housing is secure and shows no ▪ visible damage or leakage. 196274AF SJ30AJE, SJ30ARJE... -
Page 21: Base
Ensure there are no loose or missing parts, tie serious injury. Replace tires with the exact, ▪ rod end studs are locked, and there is no visible Skyjack-approved types only. damage. SJ30AJE, SJ30ARJE 196274AF... - Page 22 B - Frequent Inspection sparks away. Do not smoke near the Replace the battery if it is damaged or ▪ batteries. incapable of holding a lasting charge. WARNING Use original or manufacturer-approved parts and components for the MEWP . 196274AF SJ30AJE, SJ30ARJE...
-
Page 23: 10 Platform
▪ and is free from dirt or obstruction. Platform Control Console Ensure all switches/controllers are returned to ▪ neutral. Ensure there are no loose or missing parts and ▪ there is no visible damage. SJ30AJE, SJ30ARJE 196274AF... -
Page 24: 11 Boom
Ensure all cylinders are properly secured and there is no evidence of hydraulic leakage. ▪ there is no evidence of leakage. Ensure all fittings and hoses are properly ▪ tightened and there is no evidence of damage. 196274AF SJ30AJE, SJ30ARJE... -
Page 25: 12 Optional Equipment/Attachments
Control Box Cover Ensure the control box cover is properly ▪ secured with no signs of visible damage. Air Line Ensure the air line is properly secured with no ▪ signs of visible damage. SJ30AJE, SJ30ARJE 196274AF... -
Page 26: Function Tests
Found there are detailed instructions for which tests to perform, as well as how to properly and successfully perform them. NOTE All-function motion alarm should sound while operating any boom and drive function. 196274AF SJ30AJE, SJ30ARJE... -
Page 27: Section 2 - Maintenance Tables And Diagrams
MEDIUM 90°, FEMALE, 37° JIC, SWIVEL 100R13 SHORT 90°, FEMALE, 37° JIC, SWIVEL SHORT 90°, FEMALE, 37° JIC, SWIVEL 100R17 FEMALE, 37° JIC, SWIVEL REUSABLE MALE PIPE THREAD FITTING 300 PSI REUSABLE MALE PIPE THREAD FITTING NO FITTING 300 PSI SJ30AJE, SJ30ARJE 196274AF... - Page 28 FEMALE, 37° JIC, SWIVEL 100R19 MEDIUM 90°, FEMALE, 37° JIC, SWIVEL FEMALE, 37° JIC, SWIVEL 100R19 LONG 90°, FEMALE, 37° JIC, SWIVEL FEMALE, 37° JIC, SWIVEL 100R19 LONG 90°, FEMALE, SAE ORFS, SWIVEL FEMALE, SAE ORFS, SWIVEL 100R15 196274AF SJ30AJE, SJ30ARJE...
-
Page 29: Mewp Torque Specifications
BOLT, Hex head, patch (3/8"-16 x 0.75", Grade 8) Rotary Actuator NUT, Torque Lock (3/4"-10, Grade C) BOLT, Hex head (1/2"-13 x 2.25", Grade 8) Load Cell BOLT, Hex head patch (ZP , M16 x 1.5 x 4.5, Grade 8.8) 1388AC SJ30AJE, SJ30ARJE 196274AF... -
Page 30: Torque Specifications For Fasteners (Us)
1460 3160 2360 1 1/2-6 ft-lb 1180 2630 1979 4284 3200 1/2-20 ft-lb 2200 1640 3560 2660 1 1/2-12 1329 2983 2224 4827 3606 NOTE: Lubed includes lubricants such as lubrizing, oil, grease, or uncured Loctite. 1374AA 196274AF SJ30AJE, SJ30ARJE... -
Page 31: Torque Specifications For Fasteners (Metric)
1468 1101 2101 1576 M33 x 3.50 1990 1493 2849 2137 ft-lb 1886 1415 2699 2024 M36 x 4.00 2557 1918 3659 2744 NOTE: Lubed includes lubricants such as lubrizing, oil, grease, or uncured Loctite. 1375AA SJ30AJE, SJ30ARJE 196274AF... -
Page 32: Torque Specifications For Hydraulic Couplings & Hoses
Min. Max. Min. Max. Min. Max. Min. Max. 1/4" 6.75 1/4" 3/8" 3/8" 1/2" 27.66 1/2" 5/8" 46.33 5/8" 3/4" 72.33 3/4" 1" 100.5 1" 1 1/4" 101.5 1 1/4" 1 1/2 1 1/2 2" 2" 1276AA 196274AF SJ30AJE, SJ30ARJE... -
Page 33: Tire Specifications
Do not use tires other than those specified for this machine. Do not mix different types of tires. Tires other than those specified can adversely affect stability. Failure to operate with matched, approved tires in good condition can result in death or serious injury. Replace tires with the exact, Skyjack-approved types only. Table 2.7 Maximum Platform Capacities... -
Page 34: Floor Loading Pressure
Locally Concentrated Pressure (LCP): Overall Uniform Pressure (OUP): Foot Print Area identified by test. Base Area = Length x Width Wheel Load Weight of MEWP + Capacity Foot Print Area Base Area Foot Print Area Base Width Base Length 196274AF SJ30AJE, SJ30ARJE... -
Page 35: Hydraulic Specifications
3000 psi 207 bar Bore 3 in 7.5 cm Rod Diameter 1.57 in 4.0 cm Master Cylinder Stroke 11 in 28.3 cm Maximum Operating Pressure 3000 psi 207 bar Test Pressure 3000 psi 207 bar 1211AD-1 1211AD-1 SJ30AJE, SJ30ARJE 196274AF... - Page 36 3000 psi 207 bar Shell Tellus T46 Standard -15°F to 100°F -26°C to 38°C Petro-Canada Hydrex MV46 Hydraulic Oil Biodegradable Shell Naturelle HF-E 46 -4°F to 194°F -20°C to 90°C Hydraulic Tank Capacity 4.3 gal 16.2 L 1211AD-2 196274AF SJ30AJE, SJ30ARJE...
-
Page 37: Specifications And Features - Ansi/Csa
226 kg Lift Capacity - Outdoor 500 lbs 226 kg 500 lbs 226 kg Lift Capacity Number of Persons - Indoor Number of Persons - Outdoor Wind rating 41 ft/s 12.5 m/s 41 ft/s 12.5 m/s 11384AA-1 SJ30AJE, SJ30ARJE 196274AF... - Page 38 LCP - Maximum with Load 236 psi 1627 kPa 236 psi 1627 kPa OUP - No Load 513 lb/ft² 24.6 kPa 513 lb/ft² 24.6 kPa OUP - With Load 530 lb/ft² 25.4 kPa 530 lb/ft² 25.4 kPa 1384AA-2 196274AF SJ30AJE, SJ30ARJE...
-
Page 39: Specifications And Features - Ce, As & Kc
227 kg 227 kg 227 kg Lift Capacity - Outdoor 227 kg 227 kg 227 kg Lift Capacity Number of Persons - Indoor Number of Persons - Outdoor Wind rating 12.5 m/s 12.5 m/s 12.5 m/s 1385AA-1 SJ30AJE, SJ30ARJE 196274AF... - Page 40 954 kPa 954 kPa Data LCP - Maximum with Load 1505 kPa 1505 kPa 1505 kPa OUP - No Load 21.4 kPa 20.8 kPa 21.4 kPa OUP - With Load 22.2 kPa 21.6 kPa 22.2 kPa 11385AA-2 196274AF SJ30AJE, SJ30ARJE...
-
Page 41: Reach Diagram - Sj30Aje
Reach Diagram - SJ30AJE Section 2 – Maintenance Tables and Diagrams Diagram 2.12 Reach Diagram - SJ30AJE 40 ft 35 ft 30 ft 25 ft 20 ft 15 ft 10 ft 5 ft 0 ft -5 ft 0 ft 5 ft... -
Page 42: Dimesion Diagram - Sj30Aje
Section 2 – Maintenance Tables and Diagrams Dimesion Diagram - SJ30AJE Diagram 2.13 Dimesion Diagram - SJ30AJE 77.5° 36’ 3” [11.1 m] 75° 2’ 11” 29’ 8” [0.90 m] [9.04 m] 4’ 1” [1.24 m] 5° 13’ 1” [4.00 m] 8’... -
Page 43: Reach Diagram - Sj30Arje
2.14 Reach Diagram - SJ30ARJE 10 ft 5 ft 5 ft 10 ft 35 ft 30 ft 25 ft 20 ft 15 ft 10 ft 5 ft -5 ft 0 ft 5 ft 10 ft 15 ft 20 ft 25 ft SJ30AJE, SJ30ARJE 196274AF... -
Page 44: Dimension Diagram - Sj30Arje
[0.30 m] 4” [0.10 m] 5’ 5” [1.65 m] 12’ 5” [3.78 m] 18’ 1” [5.51 m] 20’ 7” [6.26 m] 16’ 9” 2’ 6” [5.10 m] [0.76 m] 3’ 10” 3’ 11” [1.17 m] [1.19 m] 196274AF SJ30AJE, SJ30ARJE... -
Page 45: Section 3 - System Component Identification And Schematics
Section 3 – System Component Identification and Schematics SJ30AJE, SJ30ARJE 196274AF... -
Page 46: Electrical Symbol Chart
BREAKER RELAY SINGLE POLE VOLT METER DOUBLE THROW BEEPER PUSH BUTTON RELAY DOUBLE POLE CAPACITOR DOUBLE THROW ROTARY SWITCH DIODE RELAY DOUBLE POLE EMERGENCY SINGLE THROW POTENTIOMETER STOP BUTTON RELAY TRIPLE POLE DOUBLE THROW RESISTOR RHEOSTAT RELAY 196274AF SJ30AJE, SJ30ARJE... -
Page 47: Hydraulic Symbol Chart
BI DIRECTIONAL TWO POSITION HYDRAULIC FIXED ORIFICE THREE WAY VALVE MOTOR VARIABLE ADJUSTABLE TWO POSITION DISPLACEMENT FLOW CONTROL THREE WAY VALVE HYDRAULIC MOTOR THREE POSITION SERIES PARALLEL FOUR WAY HYDRAULIC CHECK VALVE CLOSED CENTER MOTOR CLOSED PORT SJ30AJE, SJ30ARJE 196274AF... -
Page 48: Wire Number And Color Code
This table is to be used as a wire number/color reference for all electrical drawings and schematics. All wire numbers will retain their origional color coding, for example if wire 7 is red, wire 7A, 7B, and 7C will also be red. 196274AF SJ30AJE, SJ30ARJE... -
Page 49: Hydraulic Parts List
192055 MANIFOLD, Jib (SJ30ARJE) 208880 ORIFICE (0.040") (main manifold) 209023 ORIFICE (0.025") (jib manifold) 192122 ORIFICE (0.020") (jib manifold) 192122 ORIFICE (0.020”) (jib manifold) 208880 ORIFICE (0.040”) (riser cylinder) 209056 PUMP , Main 192176 PUMP , Auxiliary SJ30AJE, SJ30ARJE 196274AF... - Page 50 208874 VALVE, Control (riser cylinder) 166050 VALVE, Control (flow enable) 166036 VALVE, Control (fly boom) 166036 VALVE, Control (jib cylinder) 166036 VALVE, Control (platform rotary actuator) 166036 VALVE, Control (jib rotary actuator) 209109 VALVE, Counterbalance (riser cylinder) 196274AF SJ30AJE, SJ30ARJE...
-
Page 51: Electrical Parts List
208881 COIL, 12 Volt (main boom up) 4H-224 208881 COIL, 12 Volt (steer left) 4H-223 208881 COIL, 12 Volt (steer right) 4H-34 209028 COIL, 24 Volt (jib down) (SJ30AJE) 4H-34 208882 COIL, 12 Volt (jib down) (SJ30ARJE) SJ30AJE, SJ30ARJE 196274AF... - Page 52 LIMIT SWITCH, Riser Down 192177 LIMIT SWITCH, Boom down 192178 LIMIT SWITCH, Fly in 147229 LIGHT, LED block (emergency stop) 164832 LIGHT, Pilot (tilt) 171501 LIGHT, Pilot (enable active) 164832 LIGHT, Pilot (overload) 171502 LIGHT, Pilot (low battery) 196274AF SJ30AJE, SJ30ARJE...
- Page 53 SWITCH, Riser up/down (base) 102853 SWITCH, Turret left/right (base) 102853 SWITCH, Boom up/down (base) 102853 SWITCH, Function enable (base) 102853 SWITCH, Work light (platform) 102853 SWITCH, Emergency pump (base) 102853 SWITCH, Emergency pump (platform) 166087 SWITCH, SGE reset (platform) SJ30AJE, SJ30ARJE 196274AF...
-
Page 54: Jib Valves And Port Identifications
SJ30AJE To Main Manifold (POUT) To Main Manifold (T2) 4H-36 Platform Left 4H-37 Platform Right To Jib Cylinder (Extend) 4H-35 Jib Up To Jib Cylinder (Retract) 4H-34 To Platform Rotator (Left) To Jib Rotator (Right) Jib Down 196274AF SJ30AJE, SJ30ARJE... -
Page 55: Main Manifold Hose Port Identification
To Riser Cylinder (Retract) To Swing Drive Motor To Steer Cylinder To Pumps To Steer Cylinder To Master Cylinder To Boom Lift Cylinder (Retract) To Hydraulic Tank To Master Cylinder To Boom Lift Cylinder (Extend) M192161AC - 1 SJ30AJE, SJ30ARJE 196274AF... -
Page 56: Main Manifold Electrical Component Identification
5H-32 Turret Left 2H-31 Riser Up 2H-30 Riser Down (located on riser cylinder) 5H-33 Turret Right 4H-40 Platform Level Down 4H-41 Platform Level Up 4H-14 Boom Up 4H-224 4H-223 Steer Left 4H-13 Steer Right Boom Down M192161AC-2 196274AF SJ30AJE, SJ30ARJE... -
Page 57: Main Manifold Component Identification
3.9 Main Manifold Component Identification Relief Valve Relief Valve Relief Valve Check Valve Relief Valve Test Port Check Valve Orifice DPOCV1 Check Valve Check Valve M192161AC-3 SJ30AJE, SJ30ARJE 196274AF... -
Page 58: Main Manifold Harness - Ansi/Csa, Ce & As
3.10 Main Manifold Harness - ANSI/CSA, CE & AS M192101AG 196274AF SJ30AJE, SJ30ARJE... -
Page 59: Main Manifold Harness - Kc
3.11 Main Manifold Harness - KC M209042AB SJ30AJE, SJ30ARJE 196274AF... -
Page 60: Control Cables & Harnesses
PIN 6 - RED/BLACK - 204 PIN 3 - WHITE PIN 3 - GREEN Riser Cylinder Harness Charger Harness SOCKET 1 - BLACK SOCKET 1 - BLACK SOCKET 2 - WHITE SOCKET 2 - WHITE M192194AD_M192196AD M192096AD, M207820AD M192194AB, 192111AC, 192181AB 196274AF SJ30AJE, SJ30ARJE... -
Page 61: Platform Limit Switch Harness - Kc
52 - BLACK 51A - WHITE 51A - WHITE S51A 52A - RED 51 - BLACK SCHEMATIC VIEW ID # COLOUR LABEL TERMINAL LABEL ID # COLOUR 121050 BLACK NOT USED WHITE WHITE 105359 GREEN BLACK 105359 M207314AC_M209079AA_M209806AA SJ30AJE, SJ30ARJE 196274AF... -
Page 62: Emergency Pump Base Controls Wiring
3.14 Emergency Pump Base Controls Wiring BLACK M211083AA 196274AF SJ30AJE, SJ30ARJE... -
Page 63: Direction Sensing Limit Switch Base Control Wiring
3.15 Direction Sensing Limit Switch Base Control Wiring BLACK WIRE WHITE WIRE M211101AA SJ30AJE, SJ30ARJE 196274AF... -
Page 64: High Speed Cut - Out Limit Switches Base Controls Wiring
3.16 High Speed Cut - Out Limit Switches Base Controls Wiring WHITE WIRE BLACK WIRE WHITE WIRE BLACK WIRE BLACK WIRE WHITE WIRE M211104AB 196274AF SJ30AJE, SJ30ARJE... -
Page 65: Overload Sensor Platform Controls Wiring
3.17 Overload Sensor Platform Controls Wiring WIRE 3 (BLACK) GREEN/YELLOW WIRE 1 (BLACK) WIRE 5 (BLACK) WIRE 4 (BLACK) WIRE 2 (BLACK) M211100AA SJ30AJE, SJ30ARJE 196274AF... -
Page 66: Footswitch Platform Controls Wiring
3.18 Footswitch Platform Controls Wiring BLACK WIRE WHITE WIRE M211102AA 196274AF SJ30AJE, SJ30ARJE... -
Page 67: Sge Platform Controls Wiring
3.19 SGE Platform Controls Wiring BLACK WIRE WHITE WIRE PIN 7 M211103AA SJ30AJE, SJ30ARJE 196274AF... - Page 68 196274AF SJ30AJE, SJ30ARJE...
-
Page 69: Hydraulic Schematic - Sj30Aje
3.20 Hydraulic Schematic - SJ30AJE JIB ELEVATION CYLINDER PLATFORM ROTART ACTUATOR DISPL: 132CC (8.05CI) CB10 CBBB-LHN CBBB-LHN CACA-LHN CACA-LHN 3000 PSI 3000 PSI 3300 PSI 3300 PSI 1.5:1 1.5:1 PLATFORM LEVELING PLATFORM CONTROL SLAVE CYLINDER VALVE ASSEMBLY 4H-35 4H-34 4H-37... -
Page 70: Hydraulic Schematic - Sj30Arje
5H-33 5H-32 2H-31 4H-39 4H-38 0.040" LEFT RIGHT DOWN RIGHT LEFT EXTEND RETRACT POUT 48VDC 2.54CC 2H-20A MOTOR 0.155CI 3300 3150 1500 FLOW 2100 ENABLE PRIMARY RETURN LINE FILTER (10 MICRON) 3.21 Hydraulic Schematic - SJ30ARJE M192070AD 196274AF SJ30AJE, SJ30ARJE... -
Page 71: Platform Controls Schematic - Sj30Aje Ansi/Csa
3.22 Platform Controls Schematic - SJ30AJE ANSI/CSA BOOM/TURRET JOYSTICK POWER 04 (RED/YELLOW) RED (+) 02 (WHITE) GROUND BLK (-) X-SIGNAL WHT (X) DRIVE/STEER BLUE Y-SIGNAL BLU (Y) JOYSTICK RISER UP/DOWN UP/DOWN PLATFORM LEVEL POWER 04 (YELLOW) 02 (WHITE) GROUND D-SIGNAL... -
Page 72: Platform Controls Schematic - Sj30Arje Ansi/Csa, Ce & As
WIRE 6 - 43 - PURPLE/RED WIRE 7 - 02 - WHITE JIB MANIFOLD HARNESS - 192112 FOOTSWITCH CABLE - 192112 X-SIG Y-SIG BLACK WIRE WHITE WIRE M207832AG 3.23 Platform Controls Schematic - SJ30ARJE ANSI/CSA, CE & AS 196274AF SJ30AJE, SJ30ARJE... -
Page 73: Platform Controls Schematic - Sj30Arje Kc
WIRE 6 - 43 - PURPLE/RED D118 WIRE 7 - 02 - WHITE D20A JIB MANIFOLD HARNESS - 192112 FOOTSWITCH CABLE - 192112 X-SIG BLACK WIRE Y-SIG WHITE WIRE M208958AE 3.24 Platform Controls Schematic - SJ30ARJE KC 196274AF SJ30AJE, SJ30ARJE... -
Page 74: Base Controls Schematic - Sj30Aje Ansi/Csa
3.25 Base Controls Schematic - SJ30AJE ANSI/CSA HOURMETER 3" CONNECTOR J1 259CR 208CR 60CR 162CR 60ACR 01DCR SOCKET 1 - PLUG SOCKET 2 - 3B 6" SOCKET 3 - B+ E-PUMP SOCKET 4 - 00 60 9A CANH SOCKET 5 - PLUG... -
Page 75: Base Controls Schematic - Sj30Arje Ansi/Csa & As
RED WIRE FROM BEEPER WIRE 3 - 04A - BLUE CANH WIRE 4 - 01A - WHITE CANL WIRE 5 - 30B - BLACK WIRE 6 - 204 - RED 3.26 Base Controls Schematic - SJ30ARJE ANSI/CSA & AS M207819AJ 196274AF SJ30AJE, SJ30ARJE... -
Page 76: Base Controls Schematic - Sj30Arje Ce
WIRE 2 - 60A - WHITE WIRE 2 - 02 - WHITE WIRE 4 - 01A - WHITE CANL WIRE 5 - 30B - BLACK WIRE 6 - 204 - RED HARNESS CONNECTION DIAGRAM 3.27 Base Controls Schematic - SJ30ARJE M207968AJ 196274AF SJ30AJE, SJ30ARJE... -
Page 77: Base Controls Schematic - Sj30Arje Kc
WIRE 2 - 60 - ORANGE CANH WIRE 3 - 04A - BLUE CANL WIRE 4 - 01A - WHITE WIRE 5 - 30B - BLACK WIRE 6 - 204 - RED HARNESS CONNECTION DIAGRAM 3.28 Base Controls Schematic - SJ30ARJE M208950AH 196274AF SJ30AJE, SJ30ARJE... -
Page 78: Electrical Schematic - Ansi/Csa
3.29 Electrical Schematic - ANSI/CSA 3.29 Electrical Schematic - ANSI/CSA M192071AH 196274AF SJ30AJE, SJ30ARJE... -
Page 79: Electrical Schematic - Ce
3.30 Electrical Schematic - CE 3.30 Electrical Schematic - CE M207303AH 196274AF SJ30AJE, SJ30ARJE... -
Page 80: Electrical Schematic - As
3.31 Electrical Schematic - AS 3.31 Electrical Schematic - AS M207304AH 196274AF SJ30AJE, SJ30ARJE... -
Page 81: Electrical Schematic - Kc
3.32 Electrical Schematic - KC 3.32 Electrical Schematic - KC M207305AI 196274AF SJ30AJE, SJ30ARJE... -
Page 82: Motor Controller Electrical Schematic
3.33 Motor Controller Electrical Schematic 3.33 Motor Controller Electrical Schematic M192071AH-2 196274AF SJ30AJE, SJ30ARJE... -
Page 83: Section 4 - Troubleshooting Information
This manual cannot “remedy” to the “probable cause” directly above it. cover all possible troubles and deficiencies that may See example below for clarification. occur. If a specific trouble is not listed, isolate the 1. Probable cause. Remedy. SJ30AJE, SJ30ARJE 196274AF... -
Page 84: Electrical System
19. Loose or broken wire #3B in boom cable A or its Check for continuity between pins #4 on cable A. connectors. Check for loose or corroded connections on cable connectors. Replace if wire is defective. 196274AF SJ30AJE, SJ30ARJE... - Page 85 CB1 to base emergency stop switch S2. 37. Defective base emergency stop switch S2. Check switch. Replace if defective. 38. Loose or broken wire #7 from base key switch Check continuity. Replace if defective. S3 to relay 60CR. SJ30AJE, SJ30ARJE 196274AF...
-
Page 86: All Controls Inoperative If Equipped With Elevate/Trackunit Telematics
12. Defective diode D7D. Check diode. Replace if defective. 13. Loose or broken wire 01A from D7D to motor Check continuity. Replace if defective. controller pin A24. 14. Defective telematics module. Check telematics assembly, repair or replace as required. 196274AF SJ30AJE, SJ30ARJE... -
Page 87: No Power To Platform
Check continuity. Replace if defective. base terminal block. 11. Defective relay 60CR. Check relay. Replace if defective. 12. Loose or broken wire #10 from base terminal Check continuity. Replace if defective. block to relay 162CR. 13. Platform overloaded. Remove excessive weight. SJ30AJE, SJ30ARJE 196274AF... -
Page 88: No Boom Up From Base Control Console
#2 to boom up valve 4H-14. 9. Loose or broken wire #02 from main manifold Check continuity. Replace if defective. harness plug to boom up valve 4H-14. 10. Defective boom up coil 4H-14. Check continuity and resistance through coil. Replace if defective. 196274AF SJ30AJE, SJ30ARJE... -
Page 89: No Boom Down From Base Control Console
6. Loose or broken wire #71 from motor control Check continuity. Replace if defective. harness A pin #20 to left motor controller pin #LM20. 7. Loose or broken wire #31 from base terminal Check continuity. Replace if defective. block to main manifold harness pin #6. SJ30AJE, SJ30ARJE 196274AF... -
Page 90: No Riser Down From Base Control Console
13. Loose or broken wire #30B or #02 from riser Check continuity. Replace if defective. down harness to riser down valve 2H-30B. 14. Defective riser down coil 2H-30B. Check continuity and resistance through coil. Replace if defective. 196274AF SJ30AJE, SJ30ARJE... -
Page 91: No Turret Rotate Left From Base Control Console
5. Loose or broken wire #71 from base terminal Check continuity. Replace if defective. block to motor control harness A. 6. Loose or broken wire #71 from motor control Check continuity. Replace if defective. harness A pin #20 to left motor controller pin #LM20. SJ30AJE, SJ30ARJE 196274AF... -
Page 92: 11 No Telescope Retract From Base Control Console
4H-38. 9. Loose or broken wire #02 from main manifold Check continuity. Replace if defective. harness plug to telescope retract valve 4H-38. 10. Defective telescope retract coil 4H-38. Check continuity and resistance through coil. Replace if defective. 196274AF SJ30AJE, SJ30ARJE... -
Page 93: 12 No Telescope Extend From Base Control Console
Check continuity. Replace if defective. harness A pin #22 to left motor controller pin #LM32. 7. Loose or broken wire #36 from base control Check continuity. Replace if defective. block to platform plug A pin #18 in base control console. SJ30AJE, SJ30ARJE 196274AF... -
Page 94: 14 No Platform Rotate Right From Base Control Console
11. Loose or broken wire #02 from platform terminal Check continuity. Replace if defective. block to platform rotate left valve 4H-37. 12. Defective platform rotate left valve coil 4H-37. Check continuity and resistance through coil. Replace if defective. 196274AF SJ30AJE, SJ30ARJE... -
Page 95: 15 No Jib Up From Base Control Console
11. Loose or broken wire #02 from platform terminal Check continuity. Replace if defective. Check block to jib up valve 4H-35. continuity. Replace if defective. 12. Defective platform jib up coil 4H-35. Check continuity and resistance through coil. Replace if defective. SJ30AJE, SJ30ARJE 196274AF... -
Page 96: 16 No Jib Down From Base Control Console
4H-34. 11. Loose or broken wire #02 from platform terminal Check continuity. Replace if defective. block to jib down valve 4H-34. 12. Defective platform jib down coil 4H-34. Check continuity and resistance through coil. Replace if defective. 196274AF SJ30AJE, SJ30ARJE... -
Page 97: 17 No Jib Rotate Right From Base Control Console
11. Loose or broken wire #02 from platform terminal Check continuity. Replace if defective. block to jib rotate right valve 4H-43. 12. Defective platform jib rotate right coil 4H-43. Check continuity and resistance through coil. Replace if defective. SJ30AJE, SJ30ARJE 196274AF... -
Page 98: 18 No Jib Rotate Left From Base Control Console
11. Loose or broken wire #02 from platform terminal Check continuity. Replace if defective. block to jib rotate left valve 4H-42. 12. Defective platform jib rotate left coil 4H-42. Check continuity and resistance through coil. Replace if defective. 196274AF SJ30AJE, SJ30ARJE... -
Page 99: 19 No Manual Platform Level Up From Base Control Console
16. Loose or broken wire #02 from turret harness pin Check continuity. Replace if defective. plug platform level up valve 4H-41. 17. Defective platform level up valve coil 4H-41. Check continuity and resistance through coil. Replace if defective. SJ30AJE, SJ30ARJE 196274AF... -
Page 100: 20 No Manual Platform Level Down From Base Control Console
9. Loose or broken wire #02 from main manifold Check continuity. Replace if defective. harness plug to platform level down valve 4H-40. 10. Defective platform level down coil 4H-40. Check continuity and resistance through coil. Replace if defective. 196274AF SJ30AJE, SJ30ARJE... -
Page 101: 21 All Controls Inoperative From Platform Control Console
Check for loose or corroded connections on cable connectors. Replace if wire is defective. 17. Loose or broken wire #208 from plug B pin #5 in Check continuity. Replace if defective. platform control console to relay 208CR1. SJ30AJE, SJ30ARJE 196274AF... -
Page 102: 22 No Boom Up From Platform Control Console
4H-14. 12. Loose or broken wire #02 from main harness to Check continuity. Replace if defective. boom up valve 4H-14. 13. Defective boom up valve coil 4H-14. Check continuity and resistance through coil. Replace if defective. 196274AF SJ30AJE, SJ30ARJE... -
Page 103: 23 No Boom Down From Platform Control Console
4H-13. 12. Loose or broken wire #02 from main manifold Check continuity. Replace if defective. harness to boom down valve 4H-13. 13. Defective boom down valve coil 4H-13. Check continuity and resistance through coil. Replace if defective. SJ30AJE, SJ30ARJE 196274AF... -
Page 104: 24 No Riser Up From Platform Control Console
2H-31. 14. Loose or broken wire #02 from main manifold Check continuity. Replace if defective. harness to riser up valve 2H-31. 15. Defective riser up valve coil 2H-31. Check continuity and resistance through coil. Replace if defective. 196274AF SJ30AJE, SJ30ARJE... -
Page 105: 25 No Riser Down From Platform Control Console
Check continuity. Replace if defective. block to relay 162CCR. 17. Defective relay 162CCR. Check relay. Replace if defective. 18. Loose or broken wire #02 from base terminal Check continuity. Replace if defective. block to riser down harness. SJ30AJE, SJ30ARJE 196274AF... -
Page 106: 26 No Turret Left From Platform Control Console
5H-32. 12. Loose or broken wire #02 from main manifold Check continuity. Replace if defective. harness to turret left valve 5H-32. 13. Defective turret left valve coil 5H-32. Check continuity and resistance through coil. Replace if defective. 196274AF SJ30AJE, SJ30ARJE... -
Page 107: 27 No Turret Right From Platform Control Console
5H-33. 12. Loose or broken wire #02 from main manifold Check continuity. Replace if defective. harness to turret right valve 5H-33. 13. Defective turret right valve coil 5H-33. Check continuity and resistance through coil. Replace if defective. SJ30AJE, SJ30ARJE 196274AF... -
Page 108: 28 No Telescope In From Platform Control Console
4H-38. 14. Loose or broken wire #02 from main manifold Check continuity. Replace if defective. harness to telescope in valve 4H-38. 15. Defective telescope in valve coil 4H-38. Check continuity and resistance through coil. Replace if defective. 196274AF SJ30AJE, SJ30ARJE... -
Page 109: 29 No Telescope Out From Platform Control Console
4H-39. 14. Loose or broken wire #02 from main manifold Check continuity. Replace if defective. harness to telescope out valve 4H-39. 15. Defective telescope out valve coil 4H-39. Check continuity and resistance through coil. Replace if defective. SJ30AJE, SJ30ARJE 196274AF... -
Page 110: 30 No Platform Rotate Left From Platform Control Console
7. Loose or broken wire #37 or #02 from platform Check continuity. Replace if defective. terminal block to rotate right valve 4H-37. 8. Defective rotate right valve coil 4H-37. Check continuity and resistance through coil. Replace if defective. 196274AF SJ30AJE, SJ30ARJE... -
Page 111: 32 No Jib Up From Platform Control Console
4. Defective riser switch S9. Check continuity through switch while activating the function between wires #34B and #34A. 5. Loose or broken wire #34A from riser switch S9 Check continuity. Replace if defective. to valve driver pin #14. SJ30AJE, SJ30ARJE 196274AF... -
Page 112: 34 No Jib Rotate Left From Platform Control Console
7. Loose or broken wire #42 or #02 from platform Check continuity. Replace if defective. terminal block to rotate left valve 4H-42. 8. Defective rotate left valve coil 4H-42. Check continuity and resistance through coil. Replace if defective. 196274AF SJ30AJE, SJ30ARJE... -
Page 113: 35 No Jib Rotate Right From Platform Control Console
4H-43. 8. Defective rotate right valve coil 4H-43. Check continuity and resistance through coil. Replace if defective. NOTE Platform level function will not operate if you are commanding any other boom function. SJ30AJE, SJ30ARJE 196274AF... -
Page 114: 36 No Manual Platform Level Up From Platform Control Console
4H-41. 13. Defective platform level up coil 4H-41. Check continuity and resistance through coil. Replace if defective. NOTE Platform level function will not operate if you are commanding any other boom function. 196274AF SJ30AJE, SJ30ARJE... -
Page 115: 37 No Manual Platform Level Down From Platform Control Console
12. Loose or broken wire #02 from main manifold Check continuity. Replace if defective harness to platform level down valve 4H-40. 13. Defective platform level down coil 4H-40. Check continuity and resistance through coil. Replace if defective SJ30AJE, SJ30ARJE 196274AF... -
Page 116: 38 Brake Will Not Release
4. Loose or broken wire “D” from base plug A pin Check continuity. Replace if defective. #24 to motor control harness A. 5. Loose or broken wire “D” from motor control Check continuity. Replace if defective. harness A to right motor controller pin #RM15. 196274AF SJ30AJE, SJ30ARJE... -
Page 117: 41 No Reverse Drive
Check continuity. Replace if defective. block to limit switch LS4. 8. Open or defective limit switch LS4. Ensure boom is fully retracted and horizontal or below. Adjust switch if required. Check continuity through switch. Replace if defective. SJ30AJE, SJ30ARJE 196274AF... -
Page 118: 43 No Left Steer
8. Loose or broken wire #224 or #7A from main Check continuity. Replace if defective. manifold harness to left steer valve 4H-224. 9. Defective left steer valve coil 4H-224. Check continuity and resistance through coil. Replace if defective. 196274AF SJ30AJE, SJ30ARJE... -
Page 119: 44 No Right Steer
Check continuity. Replace if defective. harness pin #9 to right motor controller pin #RM31. Turret position for direction sensor. 12 volt input from limit switch LS1 on wire 17. 0 volts= Platform over drive axle. 12 volts= Platform over steer axle. SJ30AJE, SJ30ARJE 196274AF... -
Page 120: Hydraulic System
2. Stuck or defective counterbalance valve CB1 or Clean valve. Check O-rings on valve. Repair or CB2. replace valve as required. 3. Defective lift cylinder C2. Check seals on cylinder. Replace as necessary. Replace cylinder if defective. 196274AF SJ30AJE, SJ30ARJE... -
Page 121: No Riser Boom Up
2. Stuck or defective relief valve RV3. Set valve to specifications. Check O-rings and clean valve. Repair or replace valve as required. 3. Worn or defective swing drive motor RA1. Check motor. Repair or replace if defective. SJ30AJE, SJ30ARJE 196274AF... -
Page 122: No Boom Extend
4. Stuck or defective counterbalance valve CB7 or Clean valve. Check O-rings on valve. Repair or CB8. replace valve as required. 5. Defective extension cylinder C5. Check seals on cylinder. Replace as necessary. Replace cylinder if defective. 196274AF SJ30AJE, SJ30ARJE... -
Page 123: 11 No Jib Down
4. Stuck or defective counterbalance valve CB9 or Clean valve. Check O-rings on valve. Repair or CB10. replace valve as required. 5. Defective rotary actuator RA2. Check actuator. Repair or replace as necessary. SJ30AJE, SJ30ARJE 196274AF... -
Page 124: 14 No Jib Rotation Right
4. Stuck or defective counterbalance valve CB11 or Clean valve. Check O-rings on valve. Repair or CB12. replace valve as required. 5. Defective rotary actuator RA3. Check actuator. Repair or replace as necessary. 196274AF SJ30AJE, SJ30ARJE... -
Page 125: 16 Platform Will Not Level Down Manually
6. Stuck or defective counterbalance valve CB5 or Clean valve. Check O-rings on valve. Repair or CB6. replace valve as required. 7. Defective leveling cylinder C7 or slave cylinder Check seals on cylinder. Replace as necessary. Replace cylinder if defective. SJ30AJE, SJ30ARJE 196274AF... -
Page 126: 18 No Left Steer
4.3-19 No Right Steer 1. Stuck or defective right steer valve 4H-223. Clean valve. Check operation of valve. Repair or replace valve as required. 2. Defective steer cylinder C1. Check seals on cylinder. Replace as necessary. Replace cylinder if defective. 196274AF SJ30AJE, SJ30ARJE... -
Page 127: Load Sensing System
Check diode. Replace if defective. 3. Load cell circuit not operating. Check for connections with wires #02 and #118 at platform terminal block. 4. Defective load cell. Defective if 0V is measured between wire #118 and #02 from platform terminal block. SJ30AJE, SJ30ARJE 196274AF... - Page 128 Notes 196274AF SJ30AJE, SJ30ARJE...
-
Page 129: Section 5 - Procedures
4. Turn the keyswitch to the off position 5. Disconnect one of the battery connectors. After completing any procedure which involves modifying, adjusting, or replacing any hydraulic or electrical components, perform all of the function tests given in your unit’s Operating Manual. SJ30AJE, SJ30ARJE 196274AF... -
Page 130: Platform
Increases an adjustable parameter. 1.2-2 <UP> selects the next item in the current menu’s list. 1.3-1 <SAVE> Saves the new data to EEPROM (permanent SAVE memory storage). ---- Simultaneously pressing <UP> and <DOWN> resets the HMI to menu screen 0. 196274AF SJ30AJE, SJ30ARJE... -
Page 131: Scm Character Functions Charts
Flow Enable RISER DN 2A Fn05A Riser Down RISER UP 2B Fn05B Riser Up BOOM DOWN Fn03A Main Boom Down BOOM UP Fn03B Main Boom Up ROTATE L Fn04A Turret Rotate Left ROTATE R Fn04B Turret Rotate Right SJ30AJE, SJ30ARJE 196274AF... -
Page 132: Scm Operating Values Chart
0 or 1 Jib Down Valve DOUT 7 0 or 1 Fly Out Valve DOUT 8 0 or 1 Fly In Valve 1387AA For Output (PWM) values, refer to 5.2-6 How to Set the SCM Valve Characteristics. 196274AF SJ30AJE, SJ30ARJE... -
Page 133: How To Unlock And Modify The Scm Settings
"How to Set the SCM Valve Pump Motor Speed" Characteristics" NOTE: 1. Recycle power to the OCM with the e-stop to re-enable the password protection. 2. If the OCM is inactive for more than 5 minutes, the password must be re-entered. 1217AB SJ30AJE, SJ30ARJE 196274AF... -
Page 134: How To Adjust The Scm Pump Motor Speed
17% / 32% Jib Down 15% / 27% Boom Down 15% / 50% NOTE: 1. Recycle power to the OCM with the e-stop to re-enable the password protection. 2. If the OCM is inactive for more than 5 minutes, the password must be re-entered. 1216AB 196274AF SJ30AJE, SJ30ARJE... -
Page 135: How To Set The Scm Valve Characteristics
PWM 8 0% - 100% NOTE: 1. Recycle power to the OCM with the e-stop to re-enable the password protection. 2. If the OCM is inactive for more than 5 minutes, the password must be re-entered. 1307AB SJ30AJE, SJ30ARJE 196274AF... -
Page 136: Scm Pin Voltage Reference
Pin 10 - Riser up selected. Proportional output on wire 31 to riser up valve 4H-31. 0 volts to 11.2 volts depending on position of joystick. Threshold= 4.5 volts. Test between pin 10 and 02 wire while operating boom down. 196274AF SJ30AJE, SJ30ARJE... - Page 137 Depending on position of Boom speed control potentiometer. Test between pin 23 and 02 wire while operating reverse drive. Pin 24 - Battery negative. Wire 02. Pin 25 - Battery negative. Wire 02. Pin 26 - Battery negative. Wire 02. SJ30AJE, SJ30ARJE 196274AF...
- Page 138 Pin 35 - Turret rotate right selected. Proportional output on wire 33 to turret rotate right valve 4H-33. 0 volts to 11.2 volts depending on position of joystick. Threshold= 6.9 volts. Test between pin 35 and 02 wire while operating turret rotate right. 196274AF SJ30AJE, SJ30ARJE...
-
Page 139: Platform Controller Voltage References
AI 1 Neutral Position = 4.2 - 4.8 Volts 12 Volts 12 Volts Forward = 4.9 - 8.5 Volts @ full stroke Right Steer Left Steer Reverse = 4.1 - 0.5 Volts @ full stroke Selected Selected SJ30AJE, SJ30ARJE 196274AF... -
Page 140: Telescope, Riser & Jib Switch Voltage References
WIRE#38A > >> 7.25V 4.83V P1-32 FLY TOGGLE SWITCH TELESCOPE OUT 250 OHMS 250 OHMS 250 OHMS 250 OHMS TELESCOPE IN WIRE WIRE#38A > >> 7.25V FLY TOGGLE SWITCH 2.41V P1-32 TELESCOPE OUT 250 OHMS 250 OHMS 196274AF SJ30AJE, SJ30ARJE... -
Page 141: Load Sensing System
5.3 Load Sensing System The Skyjack boom platform overload sensing system is based on load cell or electronic scale technology. The deck steel structure is isolated from the MEWP . The load cell is permanently bolted between the deck and the rotary actuator mount. -
Page 142: Verify Proper Operation Of The Load Sensing System
Result: All drive and boom function are disabled. 9. Remove the load from the platform. Result: All drive and boom function are enabled and all warning indicators are OFF. NOTE Refer to section 4 for load sensing system troubleshooting. 196274AF SJ30AJE, SJ30ARJE... -
Page 143: Calibration Of Load Sensing System (With "Teach In" Handset)
Result: The green power LED flashes, the orange LED is ON, the red alarm LED is OFF, the audible alarm is OFF, and the red error LED is OFF. 14. Re-cap the interface connector and place the provided “calibrated” label over the interface connector. SJ30AJE, SJ30ARJE 196274AF... -
Page 144: Boom & Jib
Links Fly Boom 1/32” Feeler Gauge Shim Wear Pad 5. Extend and retract the fly boom through the entire range of motion and observe for loose points. NOTE Always maintain squareness between the main and fly booms. 196274AF SJ30AJE, SJ30ARJE... -
Page 145: Master Cylinder Replacement
Attach the sling to a suitably rated lifting device, 4. Use tags or a paint marker to label the master and raise it until there is no slack in the sling. cylinder hoses (x4), indicating where they are connected to the cylinder. Front Back SJ30AJE, SJ30ARJE 196274AF... - Page 146 Working one at a time, remove the port plugs from the new cylinder and install the T fittings from the old cylinder. Cap the fittings with size 04 caps. Transfer the hose markings to the new cylinder. 196274AF SJ30AJE, SJ30ARJE...
- Page 147 31. Repeat the process with the other pin, adjusting the boom as needed with the lifting device to assist in alignment. 32. Place an oil pan and/or rags inside the riser under the cylinder to catch leaking oil. SJ30AJE, SJ30ARJE 196274AF...
- Page 148 38. Raise the boom to provide clearance, then use cylinder pin hole is accessible. the platform level switch on the base controls to fully raise and lower the platform 3 times. 39. Check for leaks at the master cylinder fittings and hoses. 196274AF SJ30AJE, SJ30ARJE...
-
Page 149: Jib Rotary Actuator Bolt Torque Sequence
5. Torque the center bolt to 1044 Nm (770 ft-lb). 5. Torque the center bolt to 512 Nm (380 ft-lb). SJ30AJE, SJ30ARJE 196274AF... -
Page 150: Turret
Dirt and/ or moisture cotamination will dictate that the oil should be changed more often. Under normal use and operating conditions, the hydraulic oil should be changed every two years. For oil specifications, refer 2.9 Hydraulic Specifications. 196274AF SJ30AJE, SJ30ARJE... -
Page 151: Hydraulic System Main Relief Valve Adjustment (Rv1)
6. Loosen the lock nut on the relief valve. 7. Turn the adjusting stem clockwise to increase the pressure and counterclockwise to decrease the pressure until 3300 psi is observed on the gauge. 8. Tighten the lock nut. SJ30AJE, SJ30ARJE 196274AF... -
Page 152: Emergency Pump Relief Valve Adjustment (Rv6)
6. Loosen the lock nut on the relief valve. 7. Turn the adjusting stem clockwise to increase the pressure and counterclockwise to decrease the pressure until 228 bar (3300 psi) is observed on the gauge. 8. Tighten the lock nut. 196274AF SJ30AJE, SJ30ARJE... -
Page 153: Riser Down Relief Valve Adjustment (Rv7)
7. Loosen the lock nut on the relief valve. 8. While the toggle switch is pressed down, turn the adjusting stem clockwise to increase pressure and counterclockwise to decrease pressure until 3250 psi is observed on the gauge. 9. Tighten the lock nut. SJ30AJE, SJ30ARJE 196274AF... -
Page 154: Platform Level Relief Valve Adjustment (Rv2)
210 bar (3050 psi) is observed on the gauge. 9. Tighten the lock nut. 9. Reinstall the lid, securing it with the wingnuts. 10. Swing the battery tray back into place, ensuring the latch catches. 11. Reconnect the main power connector. 196274AF SJ30AJE, SJ30ARJE... -
Page 155: Ring Gear Bolt Torque Sequence
5. Repeat with the torque wrench set to 115 Nm (85 ft-lb). 6. Repeat with the torque wrench set to 230 Nm (170 ft-lb). 7. Repeat the previous steps with the outer (lower) gear mounting bolts. SJ30AJE, SJ30ARJE 196274AF... -
Page 156: Electronic Tilt Switch Setup Procedure
Green LED learned. e. The green LED flashes and then the red LED turns on solid for 2 seconds. Results: The switch is verifying the new zero position. Red LED Red LED Green LED Green LED 196274AF SJ30AJE, SJ30ARJE... - Page 157 LED will be continually blinking). 8. Reprogram the Tilt Switch a. Press and hold the set up button for 3 seconds. Red LED Results: Both LEDs Green LED are OFF. b. Both LEDs flash. Red LED Green LED SJ30AJE, SJ30ARJE 196274AF...
- Page 158 Green LED operation. 9. Disconnect one of the main power connectors. 10. Push in the emergency stop buttons 11. Remove the chock or wheel blocks. 12. Proceed to Test and Verify Tilt Circuit. 196274AF SJ30AJE, SJ30ARJE...
-
Page 159: Motor Controller Thermal Sensor
Maximum current = 100% Maximum current = 75% Maximum current = 50% 85°C 90°C 95°C 105°C T(°C) Ambient Resistance (ohm) Temperature °C °F 1000 1030 1029 1062 1096 1089 1127 1164 1152 1194 1235 1216 1262 1309 1282 1334 1385 SJ30AJE, SJ30ARJE 196274AF... -
Page 160: Motor Controller Panel Pin Interface - Connector A
Pin 10 - 12 volt input from LS2 riser/ LS3 boom elevation limit switches and LS4 telescope limit switch on wire 59. 12 volts= full speed. 0 volts= creep speed (one or more limit switches open). Test for continuity between pin 10 and battery negative while in drive mode. 196274AF SJ30AJE, SJ30ARJE... - Page 161 Test continuity on wire 72 between pin 21 and base terminal block. Pin 22 - Base speed 3 input on wire 73. 8% of pump speed. Test continuity on wire 73 between pin 22 and base terminal block. SJ30AJE, SJ30ARJE 196274AF...
-
Page 162: Motor Controller Panel Pin Interface - Connector B
Test for 12 volts between pin 5 and battery negative while in Base position. Pin 6 - Negative output on wire 204 to relay 204CR for SGE system. No negative = Alarm and Light activated. Test for negative at pin 6 while SGE is not activated. 196274AF SJ30AJE, SJ30ARJE... -
Page 163: Motor Controller Connectors Pin Reference
Test between RM 10 and battery negative with both upper and lower E stop switches activated. RM 11 - Negative output on wire #223 through motor controller harness A pin #A16 to right steer valve. Test for negative at RM 11 while operating right steer. SJ30AJE, SJ30ARJE 196274AF... - Page 164 RM 27 - CAN L- Low level CAN-BUS voltage I/O. RM 28 - CAN H- High level CAN-BUS voltage I/O. RM 29 - Not used. RM 30 - Variable voltage input from steer sensor. 3.3 volts to 4.1 volts. 196274AF SJ30AJE, SJ30ARJE...
- Page 165 Test for 12 volts between LM 7 and battery negative without charger plugged in. LM 8 - Not used. LM 9 - Not used. LM 10 - E stop return- 48 volt input on wire 3C from motor controller harness A pin #A4. SJ30AJE, SJ30ARJE 196274AF...
- Page 166 LM 27 - CAN L- Low level CAN-BUS voltage I/O. LM 28 - CAN H- High level CAN-BUS voltage I/O. LM 29 - 12 volt input from riser down function on wire 30B. (Enable timer- Riser is gravity down No PMU active) 196274AF SJ30AJE, SJ30ARJE...
- Page 167 LM35 - SGE reset - 12 volt input through motor controller harness B pin #B4 on wire 01A from SGE reset switch S25. Emergency controls also provides reset. Test between LM 35 and battery negative while activating reset switch. SJ30AJE, SJ30ARJE 196274AF...
-
Page 168: Zapi Mdi-Can Display
Codes), the operator can solve the fault and correct the error. The codes tables contain the flash codes, the probable cause and the recommended remedy. If the Alarm information suggests a serious problem that can not be addressed by the codes tables, contact the Skyjack Service Department. -
Page 169: 10 Zapi Mdi-Can Controller Master Codes
1. Cycle keyswitch Failure in high current HW protection 2. Factory reset (Clear Eeprom) LOGIC FAIL #3 0XA17 circuit 3. Hardware problem in logic circuit card for high current (overload) protection. Internal issue. Replace controller. 1. Cycle keyswitch 2. Factory reset (Clear Eeprom) 0XA26 SENS. KO The current sensor is damaged. 3. One of the current sensor, used to measure the value on the motor phases, is damaged. Internal issue. Replace controller. One of the phases on the drive PHASE KO Check battery cables to the drive motors 0XA27 motors is open 1. Check wiring to Pump/ Motor Pump motor is low compared to 0XA28 PUMP VMN LOW 2. Test Motor PWM signal applied. 3. Replace Motor 1. Check wiring to Pump/ Motor Pump motor is high compared to PUMP VMN HIGH 2. Test Motor 0XA29 PWM signal applied. 3. Replace Controller if Motor tests OK. SJ30AJE, SJ30ARJE 196274AF... - Page 170 ‐ Motor connections ‐ Make sure motor phases windings/cables do not have leakages towards chassis ‐ If no problems are found on the motor/ cables, the problem is inside the controller, Replace controller. 1. Cycle keyswitch 0XA40 AUX. DRIV.SHRT. Mos for electric brake is shorted 2. Check for short or low ‐ impedence to electric brakes 3. Replace controller that shows the fault. At start‐up, the controller checks the battery voltage and verify it is within a window around the nominal value. Troubleshooting: ‐ Check that the controller SET BATTERY parameter value Controller rejects the battery voltage WRONG SET BAT. matches the battery nominal voltage. 0XA41 reading ‐ Check that TESTER MENU / BATTERY VOLTAGE parameter shows same value as the battery voltage measured with a voltmeter. If it does not match, then do an “ADJUST BATTERY” function. 1. Check wiring between controller and electric brake Driver of electric brake is damaged 2. Replace electric brakes 0XA42 AUX. DRIV.OPEN. (not able to close) 3. Replace controller that shows the fault. Lift and lower requested at the same Check joystick outputs. LIFT & LOWER 0XA49 time. Factory reset (Clear Eeprom) 196274AF SJ30AJE, SJ30ARJE...
- Page 171 1. Check battery for load induced voltage drop. Low voltage could be causing an under voltage condition. Over voltage/ under voltage 0XA54 LOGIC FAIL #1 Check battery cables. condition has been detected 2. Factory reset (Clear Eeprom) 3. Replace controller. 1. Cycle keyswitch Motor voltage feedback circuits are 0XA55 LOGIC FAIL #2 2. Factory reset (Clear Eeprom) damaged 3. Replace controller. 1. Cycle keyswitch Pump current sensor feedback is out PUMP I NO ZERO 2. Factory reset (Clear Eeprom) 0XA56 of permitted standby range 3. Replace controller. 1. Check battery voltage CAPACITOR CHARGE Startup test 0XA60 2. Check battery and motor cables Cause: The output of the controller thermal sensor is out of range. 0XA61 THERMIC SENS. KO Controller Troubleshooting: This type of fault is not related to external components; replace the controller. SJ30AJE, SJ30ARJE 196274AF...
- Page 172 MOTOR TEMPERATURE reading in the TESTER menu); 0XA65 check the sensor ohmic value and the sensor wiring. If the sensor is OK, improve the cooling of the motor. If the warning is present when the motor is cool, then the problem is inside the controller. Replace controller. Check that the controller SET BATTERY parameter value matches the battery normal voltage. Battery is <= 10% when the Check that the TESTER MENU/ BATTERY VOLTAGE BATTERY LOW parameter BATTERY CHECK is set to parameter shows same value as the battery voltage 0XA65 measured with a volt meter. If it does not match, then do a "ADJUST BATTERY" function. If above OK, Replace controller. Cause: The output of the motor thermal sensor is out of range. Troubleshooting: 05X67 SENS MOT TEMP KO Motor temp sensor damaged Check the sensor ohm value (at 20C the Sensor should read approx 600 Ohms) and the sensor wiring. If the sensor is OK, then the problem is inside the controller Replace controller. 1. Cycle keyswitch 2.Check that both nodes are present on the network using Alarm condition active. Waiting for WAITING FOR NODE Can Console. 05X68 communication between controllers 3. Check wiring to the missing controller. If everything OK. Replace controller with node missing. 196274AF SJ30AJE, SJ30ARJE...
- Page 173 0XA74 shorted (always ON) Replace controller 0XA75 CONTACTOR CLOSED Line contactor contacts are stuck Replace contactor Check wiring to coil of contactor for a short CONTACTOR DRIVER Driver unable to close contactor 0XA75 Replace contactor Repair wiring. Replace coil. If no issue found, CONT. DRV. EV1 Check coil/ check for open wiring 0XA75 Replace controller Repair wiring. Replace coil. If no issue found, 0XA75 CONT. DRV. EV2 Check coil/ check for open wiring Replace controller Repair wiring. Replace coil. If no issue found, CONT. DRV. EV3 Check coil/ check for open wiring 0XA75 Replace controller Repair wiring. Replace coil. If no issue found, CONT. DRV. EV4 Check coil/ check for open wiring 0XA75 Replace controller Repair wiring. Replace coil. If no issue found, 0XA75 CONT. DRV. EV5 Check coil/ check for open wiring Replace controller SJ30AJE, SJ30ARJE 196274AF...
- Page 174 Receives both forward and reverse 0XA80 FORWARD+BACWARD If condition is still present check wiring. signals at the same time If OK replace controller 1. Check for 12 volt output at DC/DC converter 0XA80 EMERGENCY No 12 volt input to controllers 2. Check fuse F2 3. Check for 12 volts at RM3 and LM3. Cause: This fault is signaled in following conditions: the frequency supplied to the motor is higher than 40 Hz and the signal feedback from the encoder has a jump higher than 40 Hz in few tens mSec. This condition is related to a malfunctioning of the encoder. Troubleshooting: ‐ Check both the electric and the mechanical encoder ENCODER ERROR Motor feedback sensor fault 0XA82 functionality, the wires connections. ‐ Check the encoder mechanical installation, if the encoder slips inside its compartment raising this alarm condition. ‐ Also the electromagnetic noise on the sensor bearing can be a cause for the alarm. In these cases try to replace the encoder. ‐ If the problem is still present after replacing the encoder, the failure is in the controller. Replace controller. 1. Cycle keyswitch 0XA89 POWERMOS SHORTED Internal Controller check 2. Factory reset (Clear Eeprom) 3. Replace controller. 196274AF SJ30AJE, SJ30ARJE...
- Page 175 Remedy Code 1. Check wiring. The pump accelator value is higher 2. Aquire joystick VACC. 0XA89 PUMP VACC NOT OK than the minmum value recorded, 3. Replace joystick/ switch. and the lift/ lower switches are open. Replace controller 1. Cycle keyswitch CURRENT GAIN Internal Controller check 2. Factory reset (Clear Eeprom) 0XA92 3. Replace controller. Cause: This alarm occurs when the A/D conversion of the analog inputs gives frozen value, on all of the converted signals, for more than 400msec. The goal of this diagnosis is to detect a failure of the A/D converter or a problem in the 0XA96 ANALOG INPUT Analog to digital failure code flow that omits the refreshing of the analog signal conversion. Troubleshooting: If the problem occurs permanently it is necessary to Replace controller 1. Cycle keyswitch Error on the parameters of the slip SLIP PROFILE 2. Factory reset (Clear Eeprom) 0XA99 profile setting. 3. Replace controller. SJ30AJE, SJ30ARJE 196274AF...
-
Page 176: 11 Zapi "Skyjack Pc Can Console" Software Guide
Section 5 – Procedures Base 5.6-11 ZAPI “Skyjack PC CAN Console” Software Guide Configure the USB-to-CAN Device After launcing the software it is necessary to configure the USB-to-CAN device. 1. From the drop down menu Configuration, select Can Device. The following window will open. - Page 177 (node 3.0) and a slave node (node 4.0). Node 3.0 is the Master Combi AC0 and drives the Right Traction Motor and the Hydraulic Pump Motor. Node 4.0 is the Slave ACE0 Inverter and drives the Left Traction Motor. SJ30AJE, SJ30ARJE 196274AF...
- Page 178 The status LED in the lower part of the window indicates successful operation, while the central part of the window contains information concerning the software version, node number, nominal battery voltage and current, the hour counter and finally, alarms (if present). 196274AF SJ30AJE, SJ30ARJE...
- Page 179 To make changes to the paramters, it is necessary to do both of the following: 1. From the drop down menu Configuration, select Enter Password. In the window that appears, enter the password 1122 and click OK. SJ30AJE, SJ30ARJE 196274AF...
- Page 180 6. Lastly, you can load a parameters list into the controller from a previouisly saved .csv file by clicking Open, and choosing the specific file. 7. To return to the main menu, you have to close the current window using the Close button. 196274AF SJ30AJE, SJ30ARJE...
- Page 181 10. You can see up to four measured variables at the same time. When you select the desired variable, you will be able to see its value in real time in the Test Value column, and also in the graphic chart below it. SJ30AJE, SJ30ARJE 196274AF...
- Page 182 11. In the Function menu you can open the alarm Logbook. This lists all alarms present, or which have occured during operation of the controller. In the table all alarms are listed with the number of occurences, the inverer temperature, and the time at which the event occurs. 196274AF SJ30AJE, SJ30ARJE...
- Page 183 2. You will see three settings: Throttle Neutral, Throttle Max, and Throttle Min. It is necessary to program each setting individually. 3. Throttle Neutral: With the joystick in the neutral position, click Aquire next to Throttle Neutral. The following dialogue box appears. SJ30AJE, SJ30ARJE 196274AF...
- Page 184 7. With the joystick at the maximum position, click Stop Teach. The dialogue box closes and the maximum value is stored. Note: do not release the joystick until Stop Teach has been pressed and the dialogue box closes. 196274AF SJ30AJE, SJ30ARJE...
- Page 185 10. With the joystick at the minimum position, click Stop Teach. The dialogue box closes and the minimum value is stored. Note: do not release the joystick until Stop Teach has been pressed and the dialogue box closes. 11. The traction joystick is now programmed. SJ30AJE, SJ30ARJE 196274AF...
- Page 186 3. Note that when installing the feedback device to the machine, when the wheels are in the straight ahead position, the reading from the device should be 1/2 the maximum value (approximately 5 V). 196274AF SJ30AJE, SJ30ARJE...
- Page 187 9. With the wheels at the fully left position, the voltage should be lower than the Set Steer 0-Pos value. Now click Stop Teach to store the value and close the dialogue box. 10. The steering feedback device is now programmed. SJ30AJE, SJ30ARJE 196274AF...
-
Page 188: Grease Points
2. Pump grease into the steer cylinder bearing grease nipple until new grease appears all around the bearing lip. Recommended Grease Swing Drive Ring Gear Mobilgrease XHP 462 Moly Steer Cylinder Grease Line to Ring Gear Swing Drive Steer Cylinder (3 places) Bearing 196274AF SJ30AJE, SJ30ARJE... - Page 190 www.skyjack.com...
Need help?
Do you have a question about the SJ30AJE and is the answer not in the manual?
Questions and answers