Advertisement
Quick Links
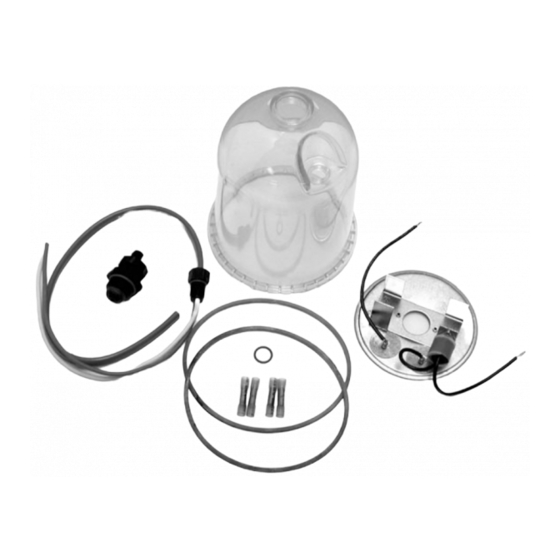
Feedthru Heater & Bowl Kit
For kit numbers: RK11- -1721
Tools Needed
S
Shop towels
S
Collection pan
S
Wire Cutter/Crimper
S
5/8" wrench
S
3/8" wrench
S
Heat Gun or Hair Dryer
S
Motor oil or Diesel Fuel
Installation Time
S
1 hour (average)
Installation Instructions
First become familiar with the illustration on the back of this page.
1. Remove the ground cable from the battery as a safety measure.
2. With a collection pan in place, drain the filter unit using the self--venting drain on the bottom of the bowl.
3. Remove the T--handle and lid on the filter assembly.
4. Remove and discard the O--ring on the T--handle and the gasket for the lid. Take caution to avoid
scratching the smooth sealing surfaces.
5. Remove and properly dispose of the element.
6. Using a 3/8" wrench, remove the four (4) bolts that hold the bowl ring to the filter housing base.
7. Pull the bowl ring and bowl off the housing and discard the O--ring that goes between the bowl and base.
8. With the filter element removed, slide the heater, with the thermostat(s) facing down, over the center tube
of the filter. For 150 watt models, the heater will rest at the base of the center tube and the heater bracket
will keep the heater from turning. For the 300 watt models, the heater will rest on the filter base and the
thermostat(s) will keep the heater from turning.
9. Pull the heater lead wires through the filter base and set aside.
10. Use a 5/8" wrench to thread the heater feedthru assembly (the yellow and red wire with the molded plastic
plug) through the bowl as shown in the picture on the back of this page. Make sure the plug is tightened
snugly (10 inch pounds).
11. Strip off about 1/4" of insulation from the yellow and red wires.
12. For kits other than RK11--1721--02 (300 watt, 12 volt), crimp a splice connector to the red and yellow wires.
Note: the 300 watt 12 volt heater already has the splice connectors attached to the heater lead, so it is
not necessary to attach them to the red and yellow wires (they are used later).
13. Slide one of the two 5" diameter gaskets over the red and yellow wires.
14. Crimp the yellow wire to either one of the heater wires protruding through the bowl and crimp the red wire
to the remaining heater wire (the heaters are designed to run on either polarity).
15. Use a heat gun or a hair dryer to shrink fit the splice connectors. Once heated, the connectors will seal
the crimp.
16. Apply lubricant (motor oil or diesel fuel) to the bowl gasket.
17. Re--attach the bowl to the base with the bowl ring and the 3/8" bolts that were removed earlier. Tuck the
remaining lengths of wire into the bowl as you attach it to the base. Tighten the bolts snugly (55 to 65
inch pounds).
Installation Instructions
RK11- -1721- -01 (150 watt, 24 volt)
RK11- -1721- -02 (300 watt, 12 volt)
RK11- -1721- -03 (300 watt, 24 volt)
(150 watt, 12 volt)
Kit number RK11--1721
Parker Hannifin Corporation
Racor Division
PO Box 3208, 3400 Finch Rd.
Modesto, CA 95353 USA
209--521--7860/800--344--3286
www.parker.com/racor
e--mail: racor@parker.com
Advertisement

Summary of Contents for Parker Racor RK11-1721
- Page 1 (150 watt, 12 volt) RK11- -1721- -01 (150 watt, 24 volt) RK11- -1721- -02 (300 watt, 12 volt) RK11- -1721- -03 (300 watt, 24 volt) Parker Hannifin Corporation Racor Division PO Box 3208, 3400 Finch Rd. Tools Needed Modesto, CA 95353 USA...
- Page 2 Racor’s policy is one of continual improvement in design and manufacturing to insure still finer products; therefore, specifications, equipment and product information, while correct at the time of publication, is subject to change without notice. Copyright, Parker Hannifin Corporation, December 2000. Part Number 11--1766, Rev. A...


