Table of Contents
Advertisement
Available languages
Available languages
Quick Links
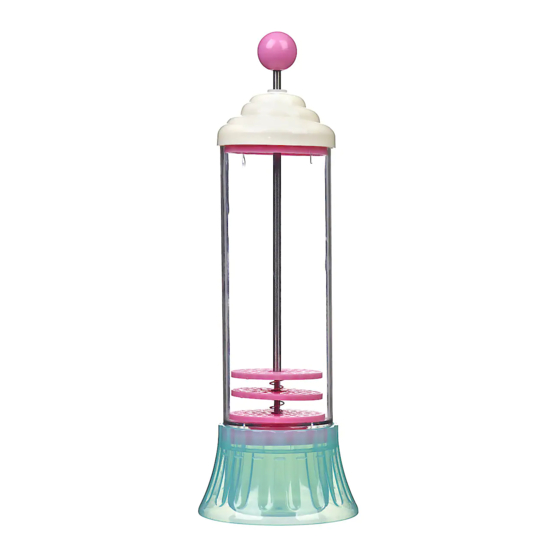
Pump-Action Cream Whipper
Art.no
44-1289
Please read the entire instruction manual before using the product and then
save it for future reference. We reserve the right for any errors in text or images
and any necessary changes made to technical data. In the event of technical
problems or other queries, please contact our Customer Services.
Operating instructions
1. Make sure that the bottom of
the cream whipper is securely
fixed to the cylinder.
2. Twist off the lid, lift out the whisk
rod and pour max 225 ml cream
into the cylinder.
GREAT BRITAIN
customer service tel: 0845 300 9799 e-mail customerservice@clasohlson.co.uk internet www.clasohlson.com/uk
3. Replace the whisk rod and twist
the lid back on.
4. Pump the whisk up and down
in a slow, smooth action until
the cream thickens.
5. Detach the bottom of the whipper
and twist the nozzle of your
choice onto the end.
Advertisement
Table of Contents

Subscribe to Our Youtube Channel
Summary of Contents for Clas Ohlson 44-1289
- Page 1 Pump-Action Cream Whipper 3. Replace the whisk rod and twist the lid back on. Art.no 44-1289 4. Pump the whisk up and down in a slow, smooth action until Please read the entire instruction manual before using the product and then the cream thickens. save it for future reference. We reserve the right for any errors in text or images and any necessary changes made to technical data.
-
Page 2: Care And Maintenance
6. Lift the rod all the way up 9. If you need to stop piping for to the lid so that the discs a while, the cream whipper and the spring are squeezed should be stood upright together to free the cream on the base (except when between the discs. the longest nozzle is used). - Page 3 Pumpvispset 3. Skruva tillbaka locket. 4. Dra pumpen upp och ner med Art.nr 44-1289 långa, lugna tag tills grädden får fast konsistens. Läs igenom hela bruksanvisningen före användning och spara den sedan för framtida bruk. Vi reserverar oss för ev. text- och bildfel samt ändringar av tekniska data.
-
Page 4: Skötsel Och Underhåll
6. Dra upp pumpen helt mot locket 9. Låt pumpvispen stå i stället så att diskarna och fjädern (utom när det längsta sprits- trycks ihop för att tömma munstycket används) när du diskarna på grädde. gör ett avbrott i arbetet. 10. - Page 5 Pumpevisp 3. Skru på lokket igjen. 4. Dra pumpen opp og ned Art.nr 44-1289 med lange, rolige bevegelser til kremen får fast konsistens. Les gjennom hele bruksanvisningen før bruk og ta vare på den for ev. senere bruk. Vi reserverer oss for ev. tekst- og bildefeil samt endringer av tekniske data.
-
Page 6: Stell Og Vedlikehold
6. Dra pumpen helt opp mot lokket 9. La pumpevispen stå i stativet så skivene og fjæren trykkes (bortsett fra når det lengste sammen for å tømme skivene sprøyte munnstykket er for krem. montert på) når du har et avbrudd i arbeidet. 10. - Page 7 Pikasekoitin 3. Kierrä kansi takaisin paikalleen. 4. Vedä pumppua ylös ja alas pitkin, Tuotenro 44-1289 rauhallisin vedoin, kunnes kerma on valmista. Lue käyttöohje ennen tuotteen käyttöönottoa ja säilytä se tulevaa tarvetta varten. Pidätämme oikeuden teknisten tietojen muutoksiin. Emme vastaa mahdollisista teksti- tai kuvavirheistä. Jos laitteeseen tulee teknisiä...
-
Page 8: Huolto Ja Puhdistaminen
6. Tyhjennä kerma levyjen välistä 9. Aseta pikasekoitin telineeseen, vetämällä pumppu kohti kantta jos keskeytät pursottamisen niin, että levyt ja jousi osuvat (paitsi jos käytät pisintä toisiinsa. pursotinsuutinta). 10. Kun olet valmis, vedä pumpun varsi uudelleen kiinni kanteen ja irrota 7. - Page 9 Schlagsahnebereiter 3. Den Deckel wieder andrehen. 4. Den Pumphebel ruhig und Art.Nr. 44-1289 gleichmäßig hochziehen und herunterdrücken, bis die Sahne Vor Inbetriebnahme die komplette Bedienungsanleitung durchlesen und eine feste Konsistenz bekommt. aufbewahren. Irrtümer, Abweichungen und Änderungen behalten wir uns vor. Bei technischen Problemen oder anderen Fragen freut sich unser Kundenservice über eine Kontaktaufnahme.
-
Page 10: Pflege Und Wartung
6. Den Pumphebel vollständig 9. Das Gerät kann zwischen den bis zum Deckelziehen, sodass Arbeitsvorgängen im Ständer die Scheiben und die Feder abgestellt werden (jedoch nicht, zusammengedrückt werden. wenn die längste Spritztülle benutzt wird). 10. Wenn die Arbeit beendet ist, den Pumphebel vollständig nach oben 7.


Need help?
Do you have a question about the 44-1289 and is the answer not in the manual?
Questions and answers