Table of Contents
Advertisement
Quick Links
Advertisement
Table of Contents

Related Manuals for Grundig GEKMD 45000 B


Summary of Contents for Grundig GEKMD 45000 B
- Page 1 OVEN USER INSTRUCTIONS GEKMD 45000 B www.grundig.com...
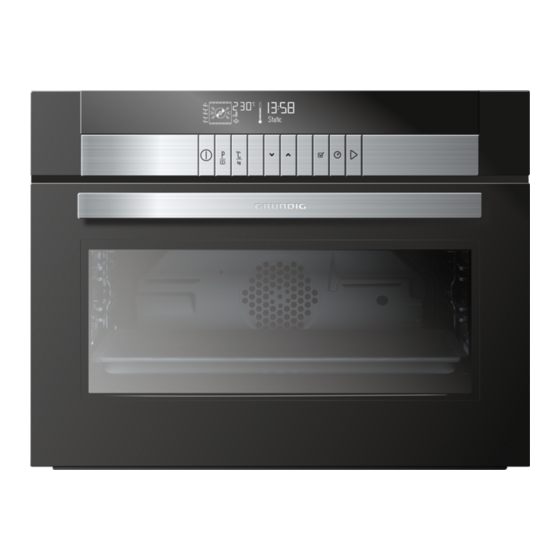
- Page 3 1. Door window glass 4. Water tank 2. Safety catches 5. Control panel 3. Lamp rack 6. Shelf guides 1. ON / OFF key 5. Plus key (increase) 2. Program selection key 6. Timer key 3. Temperature key 7. Clock / Time key 4.
-
Page 4: Table Of Contents
Safety Information Description of your oven Package contents Preparation Basic Functions Special Functions Water feeding When the oven is working Use of accessories Cooking with Steam Cooking with the Grill Cooking with Hot Air Settings Care and maintenance Oven cleaning What should I do if the oven doesn’t work? Technical characteristics... -
Page 5: Safety Information
Safety Information Internally the appliance Warning! • Before the installation becomes hot when in op- • and use of the appliance, eration. Do not touch the carefully read the supplied heating elements that are instructions. The manu- in the appliance. Always facturer is not responsible use oven gloves to remove if an incorrect installa-... - Page 6 Safety Information The grills can bear a maxi- If the appliance has a child • • mum load of 8 kg. To avoid safety device, we recom- damaging the oven, do not mend that you activate it. exceed this load. Children under 3 years must not be left unsuper- Children and vulnerable people...
- Page 7 Safety Information If the electrical connection Please follow the instruc- • • is done through a plug and tions regarding cleaning in this remains accessible the section “Oven Cleaning after installation, then it is and Maintenance”. not necessary to provide Repairs the mentioned separation Warning!
-
Page 8: Description Of Your Oven
Description of your oven Description of Functions Symbol Function Foods Cooking all sorts of vegetables, rice, cereals and meat. Steam Extracting juice from berries. Simultaneous defrosting and cooking of vegetables. Hot Air Roasting and baking. Cooking meals with hot damp circulating air. Hot Air + Steam Cooking potatoes, rice. -
Page 9: Package Contents
Package contents Note: Non perforated Stainless Steel Tray • Accessories supplied can vary depending on the product model. Baking tin. Use together with the Not every accessory described wire shelf and the perforated cook- in the user manual may exist on ing tray as a drip tray. -
Page 10: Preparation
Preparation Note: • The oven will not operate until the clock and the water hardness pa- • After your steam oven is first rameter is set. plugged in or after a power fail- ure, the clock display will flash to •... - Page 11 Preparation Control Panel 1. ON / OFF key 6. Alarm (Timer) key 2. Program selection key 7. Clock / Duration key 3. Temperature key 8. Start key 4. Minus key (decrease) 5. Plus key (increase) Setting the clock To set the clock, proceed as fol- lows: 1.
- Page 12 Preparation Water Hardness setting 1. Press the “ ” and “ ” keys (aprox. 5 sec.). “MED” starts to flash in the display (not necessary if your Steam oven is first plugged in or after a power failure). 2. Press the “ ”...
- Page 13 Preparation Do not use harsh abrasive cleaners or sharp metal scrapers to clean the oven door glass since they can scratch the surface, which may re- sult in shattering of the glass. First use 1. Take all baking trays and wire shelf out of the oven.
-
Page 14: Basic Functions
Basic Functions Warning: 4. Press the Temperature key to change the temperature. (If you • Hot surfaces cause burns! Prod- do not press this key, the oven uct may be hot when it is in use. operates at the default tempera- Never touch the heating elements, ture). - Page 15 Basic Functions 3. Press the Program Selection key Hot air function to validate the function. The respec- tive function number (2) and default time remain illuminated. 4. Press the Duration (Clock) key to change the operating time. The re- spective light will start to flash .
- Page 16 Basic Functions Steam + Hot-Air function 9. Press the Duration key again to validate. 10. Press the Start key . The oven will start to operate. Grill + Fan function Use this function for crispy roast meat, fish, poultry or French fries 1.
-
Page 17: Special Functions
Special Functions Auto cooking function A Auto cooking function B (Vegetables and Fruits) (Regenerating/ Sterilizing) Use this function to cook vegeta- Use this function to regenerate and bles and fruits as described in the sterilize as described in the table table below. - Page 18 Special Functions Auto cooking function C Delayed Start (End of cooking time) (Bread, Gratin / Pizza) Use this function to program the start of the cooking time to a differ- ent time. Use this function to cook fresh and precooked food as described in the table below.
- Page 19 Special Functions Using the Meat Probe The meat probe indicator light blinks and the the default tem- perature (65ºC) blinks in the Temperature indicator display. Note: • If 65ºC does not appear in the Temperature Indicator display, 1. Meat probe slot make sure that the connection 2.
- Page 20 Special Functions Note: • If you remove the meat probe be- fore cooking is complete, oven • If you use the meat probe with- continues to operate with the out stabbing the sensor end into function and temperature you the meat, sensor end detects the have previously set.
- Page 21 Special Functions Pre-heating (Booster) Oven Inner Temperature (Heating phases) Use the Booster (quick heating) function to make the oven reach the desired temperature faster. Select the desired cooking function and its Oven Inner Temperature parameters and then: indicator will light its 4 different 1.
-
Page 22: Water Feeding
Water feeding Filling the water tank Warning! • Only fill the water tank up to a All functions require the water tank maximum of 0.5 litres to ensure to be full. that the water does not overflow Fill the water tank up with cold, when it is pumped back to the fresh drinking water (approximate- water tank. - Page 23 Water feeding Warning! • The water in the tank may be hot. DANGER OF BURNS! After the water is pumped back to the water tank, the display will show the message “DEP” requiring the following actions: 1. Remove and empty the water tank.
-
Page 24: When The Oven Is Working
When the oven is working Interrupting a cooking cycle Cancelling a cooking cycle You can stop the cooking process at If you wish to cancel the cooking any time by pressing the OFF process, press the OFF key twice. once. You will then hear 3 beeps and the The oven incorporates a steam-re- message “End”... - Page 25 When the oven is working The cooling fan can continue to run for a certain length of time after the appliance has been switched off. This is a normal function that is meant to reduce the temperature inside the oven. When the display shows the word “DEP”, this means that the water was pumped and that the water...
-
Page 26: Use Of Accessories
Use of accessories The perforated container is suita- ble for cooking fresh or deep fro- zen vegetables, meat and poultry. In this case it is important that the non-perforated container is intro- duced into the first level. This way, dripping liquids are collected and the appliance does not get dirty. -
Page 27: Cooking With Steam
Cooking with Steam Steam cooking - Fish Tempera- Fish Quantity Time min. Container Level ture ºC Gilthead sea bream 800-1200 g 30-40 Perforated Trout 4 x 250 g 20-25 Perforated Salmon filet 500-1000 g 15-25 Perforated Salmon trout 1000-1200 g 25-35 Perforated King prawns... - Page 28 Cooking with Steam Steam cooking Vegetables Temperature Vegetables Time (min) Container Level ºC Eggplant/Aubergine in slices 15-20 Perforated Beans 35-45 Perforated Broccoli florets with stalk 25-30 Perforated Broccoli florets without stalk 100 15-20 Perforated Cauliflower florets 25-30 Perforated Cauliflower whole head 40-45 Perforated Peas...
- Page 29 Cooking with Steam Steam cooking - Side dishes Temperature Time Side dishes Quantity Container Level ºC (min) Rack, glass Pearl barley + Liquid 200g + 400 ml 100 30-35 bowl Rack, glass Semolina + Liquid 200g + 300 ml 100 10-20 bowl Rack, glass...
- Page 30 Cooking with Steam Steam cooking - Blanch Temperature Time Vegetables Quantity Container Level ºC (min) e.g. Beans, Leek 10-12 Perforated 2 Curly Kale 1000-2000 g 100 12-16 Perforated 2 Savoy cabbage 10-20 12-15 Perforated 2 White cabbage, whole 2000-2500 g 100 30-45 Perforated 1 Tomatoes, peeled...
- Page 31 Cooking with Steam Two level cooking Time: Vegetables and potatoes 25- 35 Min. Some suggestions: Time: Fish – depending on type – When cooking with two levels the 15-25 Min. grill always belongs to the 2nd or Select the longest cooking time. 3rd level of insertion from the bot- Because of the different levels the tom to the top.
-
Page 32: Cooking With The Grill
Cooking with the Grill For good results with the grill, use 4. If the grill is used for extend- the grid iron supplied with the oven. ed period of time it is normal to find that the elements will switch Fit the grid iron in such a way that it themselves off temporarily due to doesn’t come into contact with the... - Page 33 Cooking with the Grill Heat up the grill beforehand for 2 minutes. Unless indicated other- wise, use the grid iron. Place the grid on a bowl so that the water and the fat can drop. The times shown are merely indicative and can vary as a function of the composition and quantity of the food, as well as the final condition wished for.
-
Page 34: Cooking With Hot Air
Cooking with Hot Air Roasting and baking Standing Quantity Power Temper- Time Type Time Comments (Watt) ature ºC (min) (min) Beef Do not put lid 1000 160/170 80/90 stew on container Do not put lid Pork loin 500/600 180/190 35/40 on container Put lid on container. - Page 35 Cooking with Hot Air Cooking – Cakes Tempera- Type Container Level Time (min) ture Walnut cake Spring-form type tin 170/180 30/35 Fruit tart Spring-form type tin 150/160 35/45 Fruit cakes Cake tin with central hole 170/190 30/45 Savoury tarts Spring-form type tin 160/180 50/70 Simple cake...
- Page 36 Cooking with Hot Air If the cake is very dry Make small holes in the cake with a tooth pick after baking has finished. Then sprinkle the cake with some fruit juice or alcoholic drink. Next time increase the temperature by about 10ºC and reduce the baking time.
-
Page 37: Settings
Settings Setting the clock To set the brightness, proceed as To set the clock, proceed as follows follows (in standby mode/OFF): (in standby mode/OFF): 1. Press the Clock key with short 1. Press the Clock key. The clock intervals until the he Brightness symbol and the time display start Setting symbol starts blinking. - Page 38 Settings Note: function light starts to flash (not necessary if your Steam oven • To de-activate the Safety Block is first plugged in or after a power while its ON you can also short failure). press twice the “ ” key and then press the Clock key.
- Page 39 Settings Water hardness Type Display French Ca + Mg English deg. German deg. deg. (ppm) [°eH] [°dH] [°dF] Soft water 0 to 150 0 to 11 0 to 15 0 to 8 SOFT Medium 151 to 350 12 to 25 16 to 35 9 to 20 water Hard water...
-
Page 40: Care And Maintenance
Care and maintenance Cleaning the cooking space Avoid using abrasive cleaners such as scouring pads, steel wool, etc. as they can damage the surface. Wipe the cooking space clean using a damp cloth whilst the appliance is still warm. Finish off by drying the cooking space. - Page 41 Care and maintenance Removing the appliance door 1. Open the appliance door as far as it will go 4. To reassemble, push the hinges into the holes from the front. 5. Open the appliance door as far as it will go and remove the pins. 2.
- Page 42 Care and maintenance Descaling Note: • The oven will let you finnish cook- Whenever steam is produced, irre- ing in case this 3 hours period spective of the hardness of the lo- ends prior to the cooking time cal water supply (i.e. the limescale programmed.
- Page 43 Care and maintenance Descaling procedure 7. Fill the water tank with 1.0 litres of cold water and put the water tank back. 8. Press the Start key . The first rinsing cycle starts. 9. When the Descale display shows again “1.0 L” flashing and the oven emits a new beep, remove and empty the water tank.
-
Page 44: Oven Cleaning
Oven cleaning Warning! Oven interior • Cleaning should be done with the After use, remove any water on the oven power switched off. Take the bottom of the cooking space with a plug out of the socket or switch off soft cloth. -
Page 45: What Should I Do If The Oven Doesn't Work
What should I do if the oven doesn’t work? Warning! • You have selected the correct op- erating times and temperature • Any type of repair must only be setting. done by a specialised technician. Any repair done by a person not •... - Page 46 What should I do if the oven doesn’t work? Replacing the light bulb To replace the light bulb, proceed as follows: • Disconnect the oven from the power supply. Take the plug out of the socket or switch off the oven’s power circuit.
-
Page 47: Technical Characteristics
Technical characteristics Display Messages Display Description Descaling Soft water. SOFT Medium water. HARD Hard water. Appliance must be descaled. Flasing - descaling starts. Feed 0.5 litre descaling solution into the water tank. 0.5 L Feed 1 litre cold water into the water tank for rinsing. 1.0 L Water level Insufficient water in water tank. -
Page 48: Environmental Protection
Environmental protection Compliance with the WEEE Package information Directive and Disposing of the Packaging materials of the Waste Product: product are manufactured from recyclable materials This product complies with EU in accordance with our WEEE Directive (2012/19/EU). This National Environment Regulations. product bears a classification sym- Do not dispose of the packaging bol for waste electrical and elec-... -
Page 49: Installation Instructions
Installation instructions Product must be installed by a qual- Check that the oven door closes ified person in accordance with the correctly and that the interior of the regulations in force. The manufac- door and the front of the oven open- turer shall not be held responsible ing are not damaged. - Page 50 Installation instructions Danger! Warning! • The product must be connected • The oven must be earthed! to the mains supply only by an au- The manufacturer and retailers do thorized and qualified person. The not accept responsibility for any product’s warranty period starts damage that may be caused to per- only after correct installation.
-
Page 51: Installation
Installation 1. Push oven completely into the cabinet and centre it. 2. Open door fasten appliance to the cabinet using the four screws provided. Insert the screws through the front holes. - Page 52 www.grundig.com...
Need help?
Do you have a question about the GEKMD 45000 B and is the answer not in the manual?
Questions and answers