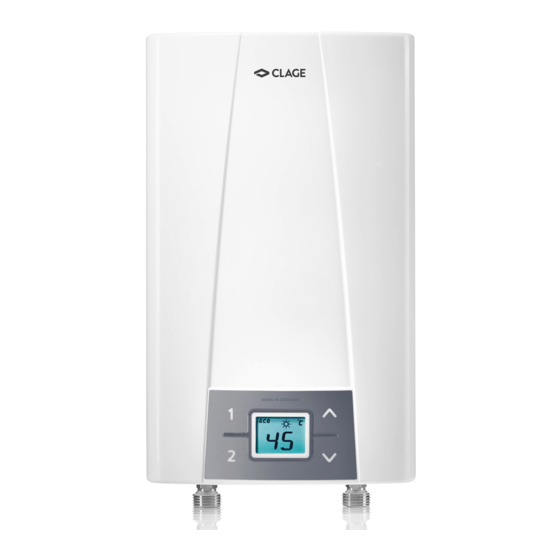
clage E-compact CEX 9 Series Installing Instructions For The Professional
Instant water heater
Hide thumbs
Also See for E-compact CEX 9 Series:
- Installing instructions for the professional (40 pages) ,
- Operating instructions manual (20 pages) ,
- Instructions for the user (12 pages)

Subscribe to Our Youtube Channel
Related Manuals for clage E-compact CEX 9 Series


Summary of Contents for clage E-compact CEX 9 Series
- Page 1 Инструкции по монтажу для специалиста Installing instructions for the professional Компактный проточный водонагреватель CEX 9 E-compact instant water heater CEX 9...
-
Page 2: Table Of Contents
CEX 9 ELECTRONIC MPS ® Contents Оглавление 1. Обзор ..........3 1. -
Page 3: Обзор
CLAGE 1. Обзор 1. Overview При заказе запасных частей просим указывать модель и When ordering spare parts, please always specify the appliance серийный номер прибора. model and serial number. Проходная изоляционная втулка Grommet Нижняя часть Соединительные клеммы Bottom part Connecting terminal Датчик... -
Page 4: Инструкции По Технике Безопасности
предназначены для конечного пользователя. cal specifications of the appliance. Инструкции в последней редакции можно найти на сайте The latest version of the instructions can be found online at www.clage-russia.ru или www.clage.com. www.clage.com. • Do not use the appliance until it has • Эксплуатация прибора запрещена, если... - Page 5 CLAGE 2. Инструкции по технике безопасности 2. Safety instructions • The appliance must never be исключительно для нагрева водопроводной воды. exposed to frost. • Эксплуатация прибора при • The values stated on the rating plate must be observed. минусовых температурах в помещении запрещена.
-
Page 6: Технические Характеристики
CEX 9 ELECTRONIC MPS ® 3. Technical specifications 3. Технические характеристики Модель CEX 9 ELECTRONIC MPS Model ® Класс энергоэффективности Energy efficiency class Номинальная мощность (номинальный ток) 6,0 / 9,6 кВт (27,3 / 40 A) Rated capacity / rated current Мощность... -
Page 7: Стандартные Варианты Установки
CLAGE 5. Стандартные варианты установки 5. Typical installations Прямое подключение: Водоснабжение одной Прямое подключение: Водоснабжение нескольких водоразборной точки водоразборных точек Direct connection: Supply for one outlet Direct connection: Supply for multiple outlets Рекомендованная лейка: CXH (кат. № 0300-0086) Recommended handset: CXH (art.no. -
Page 8: Монтаж
CEX 9 ELECTRONIC MPS ® 6. Монтаж 6. Installation Необходимо соблюдать следующие The following regulations must be observed: нормативные положения: • EN 806 • EN 806 • Монтаж должен проводиться • Installation must comply with all statutory regulations, as well as с соблюдением требований стандартов... -
Page 9: Установка Прибора
CLAGE 6. Монтаж 6. Installation Установка прибора Mounting the appliance 1. Тщательно промойте трубы перед 1. Thoroughly rinse the water supply pipes before installation to remove их монтажом для удаления из них загрязнений. soiling from the pipes. 2. Hold the appliance on the wall, and 2. -
Page 10: Электроподключение
CEX 9 ELECTRONIC MPS ® 7. Электроподключение 7. Electrical connection Выполняется специалистом! Only by a specialist! Монтажная схема Wiring diagram Пожалуйста, соблюдайте: Please observe: • VDE 0100 • VDE 0100 • The installation must comply with • Монтаж должен выполняться в соответствии с нормативами и current IEC and national local regu... - Page 11 CLAGE 7. Электроподключение 7. Electrical connection 1. Демонтируйте кабель питания 1. Dismantle off the power cable so that и заведите его с оболочкой в you can insert the cable with the clad- ding through the water splash protec- прибор через брызгозащитную...
-
Page 12: Ввод В Эксплуатацию
CEX 9 ELECTRONIC MPS ® 8. Ввод в эксплуатацию 8. Initial operation Before making the electrical connec Перед выполнением электроподключения заполните tion, fill the mains and the appliance прибор водой, несколько раз with water by carefully opening and closing the hot water tap in order to открыв... -
Page 13: Пульт Ду
CLAGE 9. Erstinbetriebnahme 8. Ввод в эксплуатацию 9. Initial operation 8. Initial operation монтажа с помощью кнопок со 8. Explain the user how the instantane- стрелками вверх и вниз : 8.8 или ous water heater works and hand over the operating instructions. -
Page 14: Уровень Блокировки
CEX 9 ELECTRONIC MPS ® 8. Ввод в эксплуатацию 8. Initial operation Уровень блокировки Lock level Рабочий режим прибора можно The operating mode of the appliance can be restricted. The service menu can be ограничить. Сервисное меню используется для настройки прибора. used to configure the appliance. -
Page 15: Сервисное Меню
CLAGE 9. Сервисное меню 9. Service menu В сервисном меню представлены The service menu offers an overview of system parameters and is used for системные параметры. Данное diagnostics. меню используется для диагностики неполадок. Press key and key simultaneously Enter service menu for at least 2 seconds to call up the serv-... - Page 16 CEX 9 ELECTRONIC MPS ® 9. Сервисное меню 9. Service menu неисправностей” в лицевой панели). ones each shifted 1 position backwards. С помощью кнопок со стрелками и “LL“: Lock level отображаются в хронологическом The operating mode of the appliance can порядке...
- Page 17 CLAGE 9. Сервисное меню 9. Service menu “tL”: Макс. температура “IIC“: Signal Порядок следования элементов Предельную температуру можно Information about the quality of the radio сервисного меню: contact when a diagnostic display is con- установить на любое значение в рамках...
-
Page 18: Окружающая Среда И Переработка
CEX 9 ELECTRONIC MPS ® 10. Окружающая среда и переработка 10. Environment and recycling Прибор изготовлен из Your product was manufactured from высококачественных материалов и high-quality, reusable materials and components. Please respect in case of деталей многократного использования. Обратите внимание: электротехнические discarding that electrical devices should устройства... - Page 19 CLAGE...
- Page 20 CEX 9 ELECTRONIC MPS ®...
- Page 21 CLAGE...
- Page 24 Тел.: +49 4131 8901-0 Тел.: +7 495 7418510 Факс: +49 4131 83200 Факс: +7 495 7418510 Эл. почта: service@clage.de Эл. почта: info@clage-russia.ru Интернет: www.clage.de Интернет: www.clage-russia.ru Справочная таблица Quick reference guide Кнопка со стрелкой вверх Программная кнопка 1 Arrow key up Programme button 1 Программная...
Need help?
Do you have a question about the E-compact CEX 9 Series and is the answer not in the manual?
Questions and answers