Table of Contents
Advertisement
Advertisement
Table of Contents

Related Manuals for senseFly eBee X


Summary of Contents for senseFly eBee X
- Page 1 X Drone User Manual Revision 1.7 / October 2019 © 2019 senseFly...
- Page 3 User Manuals. Civil aviation regulations senseFly products (“Product(s)”) are subject to Civil Aviation regulations. Regulations may vary depending on the country where you intend to operate your Product. ALL USE OF THE PRODUCT INCLUDING, BUT NOT LIMITED TO, THE USE CONFORM TO THE APPLICABLE LAW OF THE COUNTRY IN WHICH THE PRODUCT IS OPERATED, IS UNDER THE CLIENT’S SOLE RESPONSIBILITY.
- Page 4 (associated, for example, with the use of manual, assisted or interac- tive flight modes), damage due to take-off or landing location with obstacles, damage due to low altitude or close object flight, damage due to loss of data radio connection, damage due to strong wind, rain, water, humidity, cor-...
- Page 5 Intellectual Property Rights. senseFly, eBee, albris and related logos are registered trademarks of senseFly. You may not use or register, in whole or in part, registered trademarks without express authorization from their respective owners.
- Page 6 FCC and iC compliance statements This device complies with part 15 of the FCC Rules and Industry Canada License-exempt RSS standard(s). Operation is subject to the following two conditions: 1. This device may not cause harmful interference, and 2. This device must accept any interference received, including interference that may cause undesired opera- tion.
- Page 7 You can also contact senseFly or the reseller from which you purchased your drone who may provide recycling ser- vices or be part of a recycling scheme.
- Page 8 Please consult the my.senseFly website for the latest release. Copyright © 2019 senseFly. All rights reserved. REPRODUCTION, USE OR DISCLOSURE OF ALL OR IN PART OF THIS DOCUMENT TO THIRD PARTIES WITHOUT THE PRIOR WRITTEN PERMISSION OF SENSEFLY IS STRICTLY PROHIBITED.
- Page 9 Website: http://www.sensefly.com Technical support senseFly and our resellers are dedicated to providing you with full professional product support. To submit a support ticket and/or view your outstanding tickets, please use our customer portal, my.senseFly (http://my.senseFly.com). Log in with the same account details you used to download your drone’s software (see the separate software infor- mation document in your eBee X’s case).
- Page 11 Congratulations on your purchase of the eBee X, a large-coverage photogrammet- ric mapping system for survey-grade accuracy on demand. The eBee X includes built-in RTK/PPK functionality that can be activated either out of the box or later when required, providing you with survey-grade accuracy, without the need for ground control points.
-
Page 12: About This User Manual
• A camera user manual A guide to using your drone’s camera. With these, you have a complete guide to using the eBee X. You’ll find all the user manuals you need within eMotion’s Help function tab. All senseFly user manuals ∗... - Page 13 Units used in this user manual In general, dimensions are given in the appropriate SI units with, when relevant, the Imperial unit in brackets, for example, 30 m (98 ft). Dimension Units used Distance km (mi) kilometres (miles) Length m (ft) metres (feet) Length cm (in)
-
Page 14: Package Contents
Depending on your order, your camera may be sold separately and your package may include other items, such as additional cameras. Please verify upon delivery that your package is complete. In case of a missing item, please contact senseFly or your eBee X reseller immediately. -
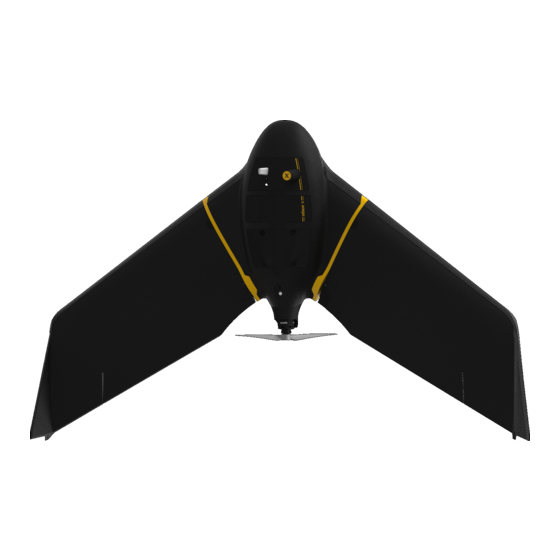
Page 15: Hardware Features
3 Hardware features... - Page 16 4. Camera compartment: The eBee X features a built-in camera for taking aerial images stored within the camera compartment. 5. Central body: This is the core of the eBee X and includes all the electronics, actuators and communications hardware on-board the drone.
- Page 17 12. Ambient temperature sensor: Meaasures the temperature of the air out- side the drone. 13. Ailerons: Used to control the eBee X while in flight. 14. GNSS/RTK Antenna: The advanced GNSS antenna, capable of capturing several GNSS signals, is used for navigation and to increase geotagging pre- cision.
-
Page 18: Emotion Flight Planning And Control Software
field. Once the drone is launched, you can use eMotion’s wireless connection with your eBee X to track its position, monitor the progress of your mapping flight and send commands. -
Page 19: About Your Ebee X's Drone License
Drone panel’s Parameters tab. 6 About your eBee X’s RTK/PPK license The eBee X includes built-in RTK/PPK functionality that can be activated straight away or later, when required. 6.1 How to activate RTK/PPK You will download an activation file during drone registration, then use eMotion to activate PPK/RTK on your drone: 1. - Page 20 5. Under eBee Plus upgrade in the right-hand Drone panel’s Parameters tab, click Browse. 6. Locate on your computer the activation file you downloaded from my.senseFly. 7. Click Start upgrade. For full instructions on using your drone’s RTK/PPK capability, see your eMotion user manual.
-
Page 21: Table Of Contents
Weather check ......10 Getting the eBee X ready to fly 10.1 Step 1: Perform a general inspection .... - Page 22 11.14 Cleaning the eBee X ......11.15 Storing the eBee X ......
- Page 23 11.16.2 Propeller ......11.17 Repairing the eBee X ......
-
Page 25: Using Your Ebee X
Part I Using your eBee X... -
Page 26: Safety Precautions
X. • Power the drone off before handling it Power the eBee X off before picking it up. Never attempt to pick the eBee X up while the propeller is turning. -
Page 27: Operational Guidelines
flying near people or animals. • Do not fly in high winds The eBee X must not take off at all if the wind speed exceeds the maximum allowed for flight. See Weather check on page 33. • Do not fly in bad weather Do not fly in rain, snow, hail, fog, a sandstorm or dust storm. - Page 28 Using your eBee X • Set an appropriate working area Set a working area that prevents your drone from flying outside communi- cations range, above the legal altitude limit, into prohibited airspace such as private property or a nearby airport, or into a hazardous area. See the eMotion user manual.
-
Page 29: Before You Fly
9 Before you fly 9.1 Charging your batteries Before leaving for the field to perform a flight, be sure to fully charge your eBee X batteries¹. The eBee X’s camera takes its power from the drone’s battery. It does not have its own battery. - Page 30 Using your eBee X How to charge your eBee X batteries for flight 5V/2A Task System...
-
Page 31: Connecting & Disconnecting The Battery
Operational guidelines • Plug the charger in and allow it to start up. • Plug both the charging (1) and balancing (2) plugs into the charger. • Connect the charging cable to the battery. • Long press the channel control button for the battery you have connected. •... - Page 32 Keeping LiHV batteries, like those used in your eBee X, fully-charged or discharged for long periods can reduce their performance and lifetime. If you will not be using an eBee X battery for more than 2 weeks, you must store it at approximately 70% charge.
-
Page 33: Weather Check
Operational guidelines 9.3 Weather check Before each flight, you should be aware of the weather conditions. The eBee X is a small drone that cannot fly in heavy rain or strong wind conditions. Icing condi- tions must also be avoided. In case of doubt, make sure to check a weather bul- letin including wind estimations in the flight area. -
Page 34: Getting The Ebee X Ready To Fly
Using your eBee X 10 Getting the eBee X ready to fly The eBee X’s simple design means it can go from the box to being ready for flight in minutes. We recommend that you perform the following steps before every flight to ensure that the platform is best prepared for flight. - Page 35 Getting the eBee X ready to fly holes in the probe are free of obstructions. 3. Verify that the ground sensor is clean, dry and free of obstructions. 4. Verify that the wing struts are not split or damaged in any way.
-
Page 36: Step 2: Install The Propeller
Using your eBee X 10.2 Step 2: Install the propeller Mount the propeller on the motor axis. Secure the propeller using three attach- ment rubber bands as illustrated above. Ensure that the propeller is lying flat against the motor mount, and that the rubber bands do not show cracks or any... - Page 37 Getting the eBee X ready to fly Caution: Always use 3 rubber bands to secure the propeller. Failure to do so may result in the loss of the propeller in flight. Note: After extensive use, the rubber bands may develop cracks. This is normal and is caused by the ageing of the rubber material.
-
Page 38: Step 3: Install The Camera
2. Make sure the SD card is not full. Insert it into the camera and close the cover. 3. Plug the camera connector into the socket within the eBee X’s camera bay. 4. Install the camera into the drone’s camera bay. - Page 39 Getting the eBee X ready to fly Caution: Connect only compatible senseFly cameras to the drone’s camera port. Never try to connect anything else.
-
Page 40: Step 4: Attach The Wings
Using your eBee X 10.4 Step 4: Attach the wings Attach the wings to the central body by inserting the wing struts into the recepta- cles in the central body (1). Ensure that the ailerons are properly aligned with the servo connection mechanism (2) before pushing the wings fully into the central body until they click. -
Page 41: Step 5: Install And Connect The Battery For Flight
Getting the eBee X ready to fly 10.5 Step 5: Install and connect the battery for flight... - Page 42 Using your eBee X 1. Lay the drone flat on the ground outside, on its belly, in a place that has a clear view of the sky, for example, where you intend to take off from. The drone must not be inclined more than 10° to start up properly.
- Page 43 Pre-flight checks may last from a few seconds to several minutes in the case of poor GNSS signal reception. As these satellite signals are required for the checks to complete, be sure to place the eBee X outside with a clear view of the sky.
-
Page 44: Step 6: Connect To Emotion
When a connection is established eMotion’s Status Panel will indicate the current state of the drone. While the eBee X obtains its location the Status Panel will in- dicate ‘GNSS: Waiting for signals... ’ . During this time the status LED on the drone will pulse blue. -
Page 45: Flying The Ebee
X in flight. 11.1 About the communication link Your eBee X must be in contact with eMotion through the ground modem at all times. To maintain this connection the ground modem’s signal must be able to reach the eBee X. - Page 46 Using your eBee X nection you may still command your drone to return to Home using eMotion. The strength of the connection between the drone and eMotion is indicated in eMotion and by the LEDs on the ground modem (see Understanding the ground modem LED indicator on page 48).
- Page 47 Note: You can raise your ground modem up to 3 m (16 ft) using a tripod or light stand. The eBee X’s ground modem is not equipped with a screw mount and will also need a holder. You can find senseFly accessory recommendations on my.senseFly:...
-
Page 48: Understanding The Ground Modem Led Indicator
When you power on the modem by connecting it to your computer, the red LEDs will briefly shine, then switch off while the modem is starting up. After approxi- mately one minute, when the modem is ready, the LEDs will indicate the status of the connection to your eBee X: LED(s) Connection strength... - Page 49 • Unplug the USB cable from your computer then plug it back into another of your computer’s USB ports. • Change the USB cable, for example, use a shorter cable. • Restart your computer. • Contact senseFly or your reseller.
-
Page 50: Take-Off And Landing Spots
Using your eBee X 11.4 Take-off and landing spots The Take-off and landing phase of a flight includes the locations and actions related to the drone’s take-off and landing and includes the following: • Take-off spot: The point from which the drone is launched, automatically set to the loca- tion calculated from GNSS signals by the drone. - Page 51 The eBee X should always be launched against the wind. Select a take-off spot clear of obstacles (buildings, rocks, power lines, hills, trees, etc) within a distance...
-
Page 52: Placing Home
Note: Some situations can make the ground sensor misjudge the drone’s height above ground and can cause an imprecise landing. In these cases you can disable the ground sensor. The eBee X will instead land where it expects the ground to be, using only altitude informa- tion from its barometer, resulting in lower landing accuracy. - Page 53 Flying the eBee X altitude it will then fly towards Home. Set Home’s altitude with care. It should be at least 20 m (66 ft) higher than the surrounding obstacles to avoid the risk of a crash, but should not be set too high to reduce the effect of potentially high winds and altitude and to prevent the drone...
-
Page 54: Take-Off
Using your eBee X 11.6 Take-off Once you’ve planned your mission and the eBee X is powered on with a solid green status LED you are ready to launch it. Launching your drone safely 15 cm (6 in) Do not hold the drone near the ends of the wings... - Page 55 Flying the eBee X Caution: Keep the propeller area clear at all times during the launch procedure. A safety distance of at least 15 cm (6 in) between the propeller and any part of your body, clothing or any object must be maintained.
- Page 56 Using your eBee X Step 1: Orientate horizontally and against the wind shake 3x Horizontal Not horizontal green blue status LED: status LED: solid pulse Orientate yourself against the direction of the wind, and confirm that the take-off direction in front of you is free of obstacles.
- Page 57 Flying the eBee X Hold the drone horizontally with the nose pointed against the wind and level wings. Caution: Do not hold the drone with your hands at the ends of its wings. Note: If the drone detects a condition that prevents correct take-off...
- Page 58 LED: pulse Shake the eBee X back and forth 3 times longitudinally (within approx. 3 seconds) to begin the motor power-up sequence. The power-up sequence has 2 stages: 1. The motor runs at low power for a few seconds and at the same time, the drone moves its ailerons up and down several times.
- Page 59 Flying the eBee X 2. The motor spins up to full power, ready for take-off. The status LED will pulse blue until the motor is at full power and ready for take-off. Caution: Take great care not to touch the spinning propeller with your clothes or a part of your body.
- Page 60 Using your eBee X Step 3: Launch the eBee X green status LED: solid 45˚ 45˚ Take 1 or 2 steps Push and release blue status LED: pulse Always orientate the drone against the wind for take-off! motor ready for take-off...
- Page 61 Start, the drone will circle around the waypoint 1-2 times to estimate the wind and calibrate its sensors before starting its mission⁹. ⁹ The eBee X may also be programmed to wait at Start for a command before starting its mission. See your eMotion user manual for more information.
-
Page 62: Landing
After finishing a mapping mission the drone will, by default¹⁰, return to Home and automatically initiate a landing. The eBee X can perform either a Linear or Steep landing. Linear landing is the default and recommended landing type. The landing process uses an LiDAR ground sensor to detect the proximity of the ground. - Page 63 Caution: Landing between tall obstacles is not recommended; they may disturb the GNSS signals your eBee X needs to be able to navi- gate. Caution: If the drone is forced to land downwind in strong wind con- ditions, or with certain Warnings or Critical failures active, it may not be able to slow enough during its descent.
- Page 64 We recommend you immediately import the images and flight data after each flight (see your eMotion user manual) before putting the eBee X back in its case for storage. Your images and flight data are stored on the camera’s SD card.
- Page 65 9. Landing A typical Linear landing follows these steps: 1. The eBee X flies towards Home (defined by the user within eMotion; default altitude is 75 m (250 ft) above the landing altitude). The drone will fly to Home at whichever altitude is the highest; its current altitude or Home’s altitude.
- Page 66 Using your eBee X This altitude depends on the difference in altitude between Home and the landing spot: • If Home is more than 75 m (250 ft) above the landing spot, the drone will descend to 75 m (250 ft) before starting the downwind leg.
- Page 67 Flying the eBee X Ensure that a circle of radius of 15 m (49 ft) around the landing spot is obstacle- free. If there are obstacles further away, ensure that the top of the obstacles is no higher than a line that ascends at a 15°angle from a point on the ground 60 m (197 ft) from the landing spot.
- Page 68 The eBee X’s ground sensor can typically begin detecting ground proximity at a distance of 60 m (197 ft). If, during a Linear landing, the drone reaches an estimate altitude of 20 m/ATO (66 ft/ATO) –...
- Page 69 Flying the eBee X Steep landing The drone descends at a steep angle (35°). The landing strip has the landing point at its centre, giving the drone the choice of two approach directions. To avoid landing with a tailwind and overshooting, the drone decides itself from which of these directions it will land.
- Page 70 Using your eBee X A typical Steep landing follows these steps: 1. The eBee X flies towards Home (defined by the user within eMotion; default altitude is 75 m (250 ft) above the landing altitude). The drone will fly to Home at whichever altitude is the highest;...
- Page 71 Flying the eBee X • Ensure that a circle of radius of 5 m (16 ft) around the landing spot is obstacle- free. If there are obstacles further away, ensure that the top of the obstacles is no higher than a line that ascends at a 30°angle from the landing spot.
-
Page 72: Potential In-Flight Errors
Using your eBee X Caution: Hard Steep landings may be more common in winds below 5 m/s (10 kts). Short Steep landings may occur in winds above 10 m/s (19 kts). Take care in changing winds. 11.8 Potential in-flight errors The drone can encounter two types of error messages while flying: Warnings and... - Page 73 Flying the eBee X Preflight Checks running Pulsing Blue Preflight Checks OK Pulsing Green Take off: Wrong angle Blinking Green Take off: Ready for launch Constant Green Preflight Check Issue Blinking Red Update issue Constant Red USB connection for reading logs and files ready...
-
Page 74: Autonomous Controller And Modes Of Flight
Using your eBee X 11.10 Autonomous controller and modes of flight During a typical flight the autonomous controller on the eBee X will switch be- tween various modes depending on its flight plan and the commands that it re- ceives from eMotion¹². The controller changes between modes during a typical mission as shown in the figure above. - Page 75 Flying the eBee X The following mode changes might occur during a typical flight: • After being switched on and running pre-flight checks the drone will enter Idle mode until it is ready to be launched. Shaking the drone back and forth three times initiates the take-off...
- Page 76 Using your eBee X • Triple-clicking the LAND NOW in eMotion will cause the drone to initiate an emergency landing procedure and spiral down to the ground at its current location and switch to Emergency Landing mode. • After returning Home (if in Circle Home Waypoint mode) the drone will ei- ther: –...
-
Page 77: Maintenance And Repair Of The Ebee
To check which version of eMotion you have installed, click About eMotion on its Welcome page. Your eBee X’s firmware version is also shown in eMotion when it’s ¹⁷ provided that there is an internet connection... -
Page 78: How To Update The Ebee X's Firmware
Since the high- est level of flight safety can only be achieved with the latest soft- ware release, senseFly can only offer warranty service for products that have been properly updated. -
Page 79: Full Airframe And Sensor Inspection
²¹ every 10 flight hours, on removal from extended storage and after any repair, heavy landing or other unexpected incident. This will give the aircraft a safety rate comparable to manned aircraft and keep the eBee X in good operating condition. - Page 80 Maintenance and repair of the eBee X Check 1: Motor and Servos The eBee X uses a brushless DC motor to turn its propeller and generate thrust. The servos are the two actuators connected through a servo connection mechanism to both ailerons.
- Page 81 The artificial horizon should follow smoothly the motion of the eBee X and it should not drift when the drone is not moving. In case of doubt, take a short video and follow the instructions in Reporting a problem with your eBee X on page 89 for ad- vice.
- Page 82 Maintenance and repair of the eBee X Check 4: Air speed sensor The air speed sensor is connected to the pitot probe by a pair of tubes. To check it, follow these steps: 1. Visually check the pitot probe. Make sure that it is properly fixed to the airframe.
-
Page 83: Cleaning The Ebee
Flying the eBee X 11.14 Cleaning the eBee X Use a damp cloth to wipe off dirt from the eBee X’ sensor modules, wings, body, motors and propellers. Use the cloth, cleaning fluid and cleaning tool provided to clean the camera lense and ground sensor. -
Page 84: Propeller
Expanded Polypropylene (EPP). If you have doubts about the extent of the damage, always contact a certified eBee X reseller to verify if the damage can be easily repaired by yourself or if you need to send your drone in for repair to senseFly. -
Page 85: Battery Care And Safety
11.18 Battery care and safety Proper care of your eBee X’s battery is important to prevent damage to your drone and to maximise flight time. Frequent altitude changes, presence of wind, use of old batteries and/or frequent photo acquisition may significantly reduce the flight endurance. - Page 86 Caution: The batteries delivered with your drone are designed to be charged only with approved senseFly chargers. senseFly cannot be held responsible for any consequences resulting from using any other charger. In particular, using a charger improperly configured or designed for other types of batteries may lead the battery to be permanently damaged or to catch fire.
- Page 87 Dispose of the battery safely. Maximising safety and battery lifetime If treated well, your eBee X’s batteries have the potential to last for many cycles (charging then discharging). As a general rule, the lower you push the battery charge during your flights, the shorter the lifetime of the battery will be.
- Page 88 Deep discharge eBee X batteries’ 4 cells must remain balanced and stay above a minimum volt- age. Following a deep discharge —one or more of the cells are pushed below 2.5 V —they become damaged, affecting the reliability of the battery. If this has happened to a battery, it will be no longer possible to charge that battery.
-
Page 89: Locating A Lost Ebee X In The Field
11.20 Reporting a problem with your eBee X If there is a problem with your eBee X, whether it is a software malfunction, dam- aged airframe or any other problem, we recommend the following actions: 1. - Page 90 • Photos or video of the eBee X airframe, if required. Note: In order to provide support, senseFly may request the flight log files for inspection. ²⁴ http://my.sensefly.com ²⁵ see your eMotion user manual for instructions on retrieving this file from the eBee X...
- Page 91 Maintenance and inspection log Date A/C model Hours General/Full Maintenance activity Inspected by...
-
Page 93: Specifications
Part III Specifications... - Page 94 Drone Wingspan 116 cm (45.7 in) Nominal take-off weight 1.1 kg (2.4 lbs) approx. Maximum take-off weight 1.7 kg (3.7 lbs) Propulsion Low-noise, electric brushless motor Compatible sensors S.O.D.A. 3D, Aeria X, Duet T, Parrot Sequoia+, S.O.D.A., S.O.D.A. Corridor, RedEdge-MX Material EPP foam, carbon structure &...
- Page 95 Communication devices Ground modem Frequency 2.4 GHz Nominal range²⁷ approx. 3 km (2 mi) Maximum working range²⁷ approx. 8 km (5 mi) Certification FCC, IC, CE, JP ²⁷ can vary greatly depending on external factors such as cruise altitude, presence of obstacles and radio-frequency interference.
- Page 96 ATO Above the Take-off Altitude Your eBee X’s altitude can be shown and set in eMotion using ATO. Altitudes in ATO are relative to the place your eBee X started its motor just before take-off. GNSS Global Navigation Satellite System A network of satellites that transmit signals that GNSS receivers can use to calculate their position on the Earth.
- Page 97 http://my.sensefly.com...
Need help?
Do you have a question about the eBee X and is the answer not in the manual?
Questions and answers