Table of Contents
Advertisement
Quick Links
Advertisement
Table of Contents

Related Manuals for Gorenje EITP6574XPD


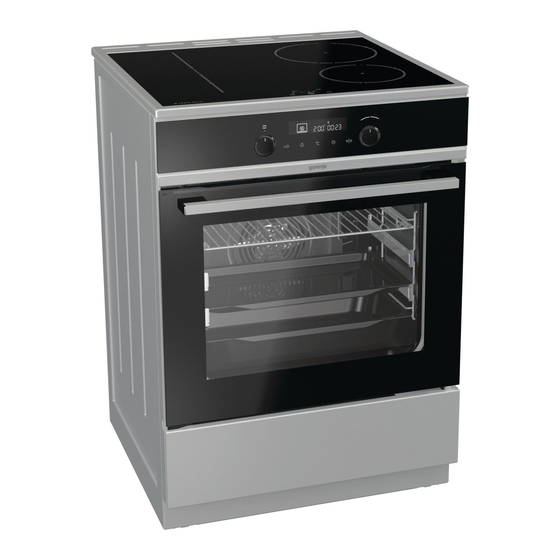
Summary of Contents for Gorenje EITP6574XPD
- Page 2 Instructions for use are also available at our website: http://www.gorenje.com GORENJE gospodinjski aparati, d.o.o. Partizanska cesta 12 SI-3320 Velenje, SLOVENIA info@gorenje.com Important information Tip, note...
-
Page 3: Important Safety Instructions
IMPORTANT SAFETY INSTRUCTIONS CAREFULLY READ THE INSTRUCTIONS AND SAVE THEM FOR FUTURE REFERENCE. This appliance may only be used by children aged 8 years and above and persons with reduced physical, sensory or mental capabilities or lack of experience and knowledge if supervision or instructions are provided to them concerning use of the appliance in a safe way and if they understand the hazards involved. - Page 4 CAUTION: possibility of tilting. WARNING: In order to prevent tipping of the appliance, stabilising means must installed. Refer to the instructions for installation. WARNING: Before replacing the light bulb, make sure the appliance has been disconnected from the mains power, in order to prevent the hazard of an electric shock.
- Page 5 WARNING: Use only hob guards designed by the manufacturer of the cooking appliance or indicated by the manufacturer of the appliance in the instructions for use as suitable or hob guards incorporated in the appliance. The use of inappropriate guards can cause accidents.
- Page 6 Oven door become very hot during operation. A fourth glass is installed for extra protection, reducing the temperature of the outside surface. Oven door hinges may be damaged when under excessive load. Do not place heavy pans on open oven door and do not lean against open oven door when cleaning the oven cavity.
- Page 7 Pyrolytic cleaning involves very high temperatures that may cause smoke and fumes to be released from food residues. We recommend that you ensure thorough ventilation of the kitchen during the pyrolytic cleaning process. Small animals, or pets, are highly sensitive to any fumes released during pyrolytic cleaning of ovens.
-
Page 8: Before Connecting The Appliance
As a result of the automatic cleaning, the oven cavity and oven equipment cleaned in such way may discolour and loose some shine, which has no influence on function. BEFORE CONNECTING THE APPLIANCE Carefully read the instructions for use before connecting the appliance. Repair or any warranty claim resulting from incorrect connection or use of the appliance shall not be covered by the warranty. -
Page 9: Control Unit
APPLIANCE DRAWER There is a safety latch on the grid. Therefore, Do not store combustible, explosive, lift the grid slightly at the front when pulling it out volatile or temperature-sensitive items from the oven. (such as paper, dish cloths, plastic bags, cleaners or detergents and spray cans) The grid or the tray should always be inserted into in the oven's storage drawer, as they... -
Page 10: Before Using The Appliance For The First Time
Disconnect the damaged hotplate from the main USING THE APPLIANCE immediately and do not use it. Using the glass ceramic hob as a storage area BEFORE USING THE APPLIANCE FOR may result in scratches or other damage to it. THE FIRST TIME ... -
Page 11: Induction Cookware
INDUCTION COOKWARE Only use cookware suitable for electric and COOKWARE SUITABLE induction cooking, with a: thick bottom (at least 2.25 mm) INDUCTION HOB flat bottom. The induction will work correctly if you use suitable cookware. Cooking zone Minimum pan bottom ... - Page 12 If a dish takes a long time to cook, use a pressure HOB CONTROL After connecting the glass ceramic hob to the cooker. Make sure there is always suficient liquid in the pressure cooker. Putting an empty pot on power mains, all symbols on the display will light up briefly.
- Page 13 TURNING HOTPLATES OFF REMAINING HEAT INDICATOR Glass ceramic hob also features remaining heat indicator ʺHʺ. Hotplates are not heated directly, but First, select the cooking zone you wish to switch through return heat radiating from the dish. As long as the symbol ʺHʺ...
- Page 14 Maximum continuous operation of a particular hotplate is limited, and the duration is displayed in the above chart. When the hotplate is switched off by the safety mechanism, the indicator displays symbols ʺ0ʺ, or ʺHʺ in case there is any remaining heat left.
-
Page 15: Safety Functions And Error Display
During cooking, the baking pan is being heating NOISE AND SOUNDS DURING INDUCTION up. Be careful not to burn yourself. COOKING Make sure that you do not cover the control panel Noises Cause when placing the baking pan on the hob. sounds ACTIVATION OF THE BRIDGE ZONES Induction-... -
Page 16: Electronic Timer
ELECTRONIC TIMER After a few minutes of idling, the appliance will 1. Cooking system selector knob switch to standby mode. 2. Child lock key 3. Oven lighting ON/OFF key CHANGING THE CLOCK SETTING 4. Temperature key Clock settings may be changed when no timer 5. - Page 17 System Description System Description Suggested Suggested temperature temperature °C °C Cooking systems Cooking systems GRILL PYROLYSIS Only grill heater, a part of the This function allows automatic large grill set, will operate. This cleaning oven cavity/ system is used for grilling a interior using high temperature (approx.
- Page 18 SELECTING ADDITIONAL FUNCTIONS Setting the cooking time In this mode, you can define the duration of oven Activate/deactivate the functions by pressing the operation desired key or a combination of keys. (cooking time). Set the desired cooking time. First set the minutes, then the hours. Icon and cooking Some functions are not available with some time are displayed on the display unit.
-
Page 19: Rapid Preheating
display dimmer (one, two, or three bars). After three steam could evaporate from it and condense on the seconds, the setting will be automatically saved. front panel and the oven door. Guides cooking levels STANDBY Display lighting can be automatically switched off after 10 minutes if it is not used. - Page 20 Only grill heater, a part of the large grill set, will Impale the meat on the skewer and tighten the operate (GRILL). screws. Place the skewer handle on the front skewer support Preheat the infrared (grill) heater for five minutes. and insert the tip into the opening in the right hand Maximum temperature when using Grill and Large side of the rear oven cavity wall (the opening is...
-
Page 21: Maintenance And Cleaning
MAINTENANCE & CLEANING BOTTOM HEATER AND FAN This is used for baking leavened but low-rising Be sure to unplug the appliance from the pastry and for preserving fruit and vegetables. Use power supply and wait for the appliance the second guide from the bottom and a rather to cool down. - Page 22 Steel wool, coarse cleaning sponges, and abrasive powders may scratch the surface. The surface may also be damaged by aggressive spray cleaners and unsuitable liquid cleaners. Immediately remove any sugar or sugar-laden food from the glass ceramic hob using a scraper, even if the hob is still hot, as sugar may permanently damage the glass ceramic surface.
-
Page 23: Removing And Cleaning Wire And Telescopic Extendible Guides
If you also clean baking pans with the pyrolytic cleaning process, then the bottom of the oven may not be entirely cleaned at the end of the process. REMOVING AND CLEANING WIRE AND TELESCOPIC EXTENDIBLE GUIDES Only use conventional cleaners to clean the guides. Turn the COOKING SYSTEM SELECTOR KNOB to Hold the guides by the bottom side and pull them ”P”. -
Page 24: Replacing The Bulb
REPLACING THE BULB The bulb is a consumable and therefore not covered by warranty. Before changing the bulb, remove the trays, the grid, and the guides. Disconnect the appliance from the power mains! Halogen lamp: G9, 230 V, 25 W. (Regular bulb E14, 230 V, 25 W - depending on the model.) 3. -
Page 25: Removing And Inserting The Oven Door Glass Pane
Removing and inserting the oven door glass pane (depending on the model) Provide these steps in reverse order at Screw out the screws on the door left and right sides returning the door back. If the door does not open or and pull out the upper lath. -
Page 26: Troubleshooting Table
TROUBLESHOOTING TABLE Problem/error Cause The main fuse in your home Call a service technician. trips often. Make sure the power of all appliances switched on does not exceed the capacity of the power mains in your home. The oven lighting does not The process of changing the light bulb is described in the chapter "Cleaning work. -
Page 27: Installation And Connection Instructions
INSTALLATION AND CONNECTION INSTRUCTIONS According to the plan attach the holder to the wall with the added screws and anchors. If the attached screws and anchors cannot be used, use APPLIANCE PLACEMENT (mm) others that will ensure a secure installation on the wall. -
Page 28: Clamp Protection
Follow these steps: connecting cord (previously CGLG 5Cx1,5), (circuit 1. Rotate the height adjustment screws (see figure breaker 3x16 A). 1) to adjust the height of the cooker to the correct For single-phase connection use an H05VV-F3G-4 position. (previously GGLG 3Cx4), (circuit breaker 32 - 40 A 2. - Page 29 DISPOSAL Packaging is made of environmentally friendly materials that can be recycled, disposed of, or destroyed without any hazard to the environment. To this end, packaging materials labelled appropriately. The symbol on the product or its packaging indicates that the product should not be treated as normal household waste.
-
Page 30: Cooking Test
COOKING TEST Tested in compliance with the EN 60350-1 standard. BAKING Dish Equipment Guide System Temperature Cooking time (°C) (from the (minutes) bottom) Cookies 140-150* 25-40 single level Cookies 140-150* 25-40 single level shallow enamel-coated baking sheet Cookies 140-150* 2, 3 30-45 two levels Cookies...
Need help?
Do you have a question about the EITP6574XPD and is the answer not in the manual?
Questions and answers