Table of Contents
Advertisement
Available languages
Available languages
Quick Links
Advertisement
Chapters
Table of Contents

Related Manuals for SOMFY Oximo 50 S auto RTS


Summary of Contents for SOMFY Oximo 50 S auto RTS
- Page 1 Oximo 50 S auto RTS...
- Page 2 63 Por la presente, Somfy declara que el producto cumple con los requisitos básicos y demás disposiciones de la directiva 1999/5/CE. Puede consultar la declaración de conformidad en la siguiente dirección de Internet: www.somfy.com/ce. Utilizable en UE, CH y NO.
-
Page 3: Table Of Contents
6.2 Contrôle du sens de rotation 1. Introduction Le moteur Oximo 50 S auto RTS est un moteur sans réglage : un simple branche- ment permet son utilisation. Le moteur Oximo 50 S auto RTS apprend ses fins de course automatiquement. -
Page 4: Consignes Générales De Sécurité
Toute utilisation hors du domaine d’application défini par Somfy est non conforme. Elle entraînerait, comme tout irrespect des instructions figurant dans cette notice, l’exclusion de la responsabilité et de la garantie Somfy. -
Page 5: Contenu Du Kit
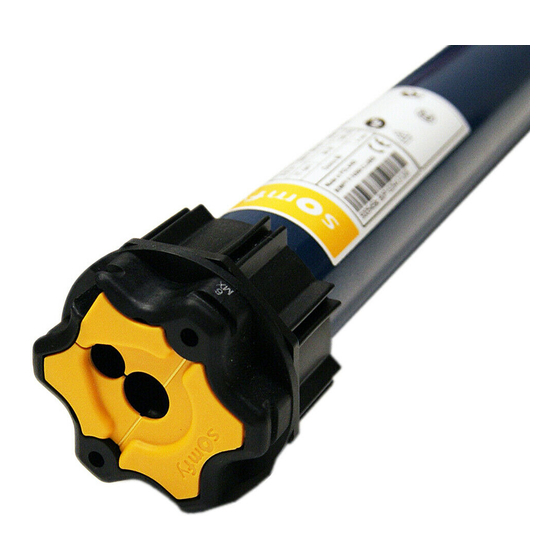
Remarque : Utiliser au moins 2 verrous ou 2 liens rigides pour fixer le volet roulant au tube d’enroulement. 3. Contenu du kit Le moteur Oximo 50 S auto RTS est composé de deux éléments indissociables : le module tubulaire S (D). le module Oximo RTS (E), 4. -
Page 6: Préparation Du Module Tubulaire S
4.5 Montage du module Oximo RTS avec le tube équipé du module tubulaire S Monter le tube équipé du module tubulaire S (D) sur le support embout (J). Copyright © 2008 Somfy SAS. All rights reserved. -
Page 7: Câblage
(L). Mettre l’anneau d’arrêt (M) en place. 5. Câblage Couper l’alimentation secteur. Connecter le moteur Oximo 50 S auto RTS selon les informations du tableau ci-dessous : 230 V / 50 Hz ~ Câble a Marron... -
Page 8: Contrôle Du Sens De Rotation
PROG. 7. Réglages spécifiques facultatifs 7.1 Position favorite 7.1.1 Définition Le moteur Oximo 50 S auto RTS est livré avec une position favorite pré-programmée qui correspond à une fermeture presque complète du volet roulant (lames ajourées). 7.1.2 Activation de la position favorite Faire faire 2 cycles complets de Montée et de... -
Page 9: Ajout/Suppression De Points De Commande Rts Et Rt
7.2.1 Point de commande RTS Prendre un point de commande RTS (K) enre- gistré dans le moteur Oximo 50 S auto RTS. PROG. PROG. Faire un appui long sur le bouton PROG du point de commande RTS (K) enregistré, jusqu’au... -
Page 10: Ajout/Suppression De Capteurs Rts
« Activation de la position favorite ». Ceci permet une utilisation du capteur. Prendre un point de commande RTS (K) enre- gistré dans le moteur Oximo 50 S auto RTS. Faire un appui long sur le bouton PROG du point de commande RTS (K) enregistré, jusqu’au va-et-vient du volet roulant : PROG. -
Page 11: Fonctionnement Avec Un Capteur Sunis Rts
Le volet roulant reste en position initiale. 8.2 Fonctionnement avec un capteur Sunis RTS Si le moteur Oximo 50 S auto RTS est associé à un capteur Sunis RTS, que la fonction Soleil est activée, et que la position favorite est activée alors le volet roulant se déplacera en fonction des informations transmises par le capteur Sunis RTS, sauf... -
Page 12: Un Problème Avec Le Moteur
Le câblage est incorrect. Contrôler le câblage et le modifier si fonctionne pas. besoin. Le moteur Oximo 50 S auto RTS est Attendre que le moteur Oximo 50 S au thermique. auto RTS refroidisse. Le câble utilisé est non conforme. -
Page 13: Retour En Configuration D'origine
Le volet roulant se met en mouvement quel- ques secondes. Remarque : si le volet roulant est en fin de course haute ou basse alors il effectuera un bref va-et- 2 sec. vient. Copyright © 2008 Somfy SAS. All rights reserved. -
Page 14: Caractéristiques Techniques
Indice de protection IP 44 Nombre maximal de Alimentation 230V / 50 Hz ~ points de commandes associés Nombre maximal de Température d’utilisation - 20 °C à + 70 °C capteurs associés Copyright © 2008 Somfy SAS. All rights reserved. -
Page 15: Einleitung
6.2 Prüfen der Drehrichtung 1. Einleitung Der Antrieb Oximo 50 S auto RTS bedarf keiner Einstellungen: Er ist nach dem Anschließen sofort betriebsbereit. Die Endlageneinstellung erfolgt automatisch. Der Antrieb Oximo 50 S auto RTS besteht aus zwei Komponenten, die voneinander getrennt nicht funktionieren: •... -
Page 16: Allgemeine Sicherheitshinweise
Normen und Gesetze befolgen, und ihre Kunden über die Bedienungs- und Wartungsbedingungen des Produkts informieren. Jede Verwendung, die nicht dem von Somfy bestimmten Anwendungsbereich ents- pricht, gilt als nicht bestimmungsgemäß. Im Falle einer nicht bestimmungsgemäßen Verwendung, wie auch bei Nicht-Befolgung der Hinweise in dieser Anleitung, entfällt die Haftung und Gewährleistungspflicht von Somfy. -
Page 17: Komponenten
Hochschiebesicherungen bzw. feste Wellenverbinder, um den Rollladen an der Welle zu befestigen. 3. Komponenten Der Antrieb Oximo 50 S auto RTS besteht aus zwei Komponenten, die voneinander getrennt nicht funktionieren: Rohrmodul S (D), Oximo RTS-Modul (E). 4. Installation Beachten Sie die in der Anleitung vorgeschriebene Montagereihenfolge! 4.1 Montage des Oximo RTS-Moduls... -
Page 18: Vorbereitung Des Rohrmoduls S
Adapter angebracht werden, nicht am Rohrmodul S. 4.5 Einbau des Oximo RTS-Moduls und der mit dem Rohrmodul S ausgerüsteten Welle Bringen Sie die mit dem Rohrmodul S ausgerüs- tete Welle (D) am Gegenlager (J) an. Copyright © 2008 Somfy SAS. All rights reserved. -
Page 19: Verkabelung
Welle (D) am Lager (L) an. Bringen Sie den Federring (M) an. 5. Verkabelung Unterbrechen Sie die Spannungsversorgung. Welle Schließen Sie den Antrieb Oximo 50 S auto RTS gemäß den Angaben in unten stehender Tabelle 230 V / 50 Hz ~ Kabel a Braun... -
Page 20: Prüfen Der Drehrichtung
Der Antrieb bestätigt mit einer kurzen Auf-/ PROG. Ab-Bewegung. 7. Zusätzliche Einstellungen 7.1 Lieblingsposition 7.1.1 Definition Der Antrieb Oximo 50 S auto RTS wird vorprogram- miert geliefert. Die programmierte Lieblingsposition entspricht der fast vollständigen Schließung des Rollladens (Lüftungsschlitze sichtbar). 7.1.2 Aktivierung der Lieblingsposition ("my"-Position) Lassen Sie den Rollladen 2 vollständige Auf-... -
Page 21: Hinzufügen Und Löschen Von Rts/Rt Funksendern
Stellen Sie einen Kontakt zwischen der PROG Löschen Kontaktfläche und der Batteriehalterung des Inis RT/Inis RTS (M) her: Der Antrieb bestätigt mit einer kurzen Auf-/ Ab-Bewegung. Der Inis RT / Inis RTS (M) Funksender ist eingelernt/gelöscht. PROG. PROG. Copyright © 2008 Somfy SAS. All rights reserved. -
Page 22: Hinzufügen/Löschen Von Rts-Sensoren
RTS Funksenders (K), bis der Antrieb mit einer kurzen Auf-/Ab-Bewegung PROG. PROG. bestätigt: Der Antrieb Oximo 50 S auto RTS ist jetzt in Lernbereitschaft. Löschen Drücken Sie kurz auf die PROG-Taste des RTS Sensors (N), der hinzugefügt oder gelöscht werden soll: Der Antrieb bestätigt mit einer kurzen Auf-/... -
Page 23: Betrieb Mit Einem Sunis Rts-Sensor
Position. 8.2 Betrieb mit einem Sunis RTS-Sensor Wird der Antrieb Oximo 50 S auto RTS in Verbindung mit dem Sunis RTS-Sensor genutzt und sind die Funktion Sonnenautomatik und die Lieblingsposition aktiviert, bewegt sich der Rollladen entsprechend der von dem Sunis RTS-Sensor gesende- ten Informationen. -
Page 24: Haben Sie Ein Problem Mit Dem Antrieb
Welle muss richtig montiert. Hochschiebesicherungen bzw der geändert werden. festen Wellenverbinder), setzen Sie den Antrieb Oximo 50 S auto RTS auf die Werkseinstellungen zurück und führen Sie die Installation vollständig, ab dem Kapitel „Installation“, vollstän- dig durch. Die Lieblingsposition... -
Page 25: Zurücksetzen Auf Werkseinstellung
Oximo 50 S auto RTS 9.2 Zurücksetzen auf Werkseinstellung Das Zurücksetzen löscht alle gespeicherten Funksender, Sensoren und Lieblingspositionen und setzt die Drehrichtung des Antriebs Oximo 50 S auto RTS zurück. Achtung! Führen Sie die doppelte Spannungsunterbrechung nur an dem Antrieb durch, der zurückgesetzt werden soll! -
Page 26: Technische Daten
Schutzart IP 44 Max. Anzahl RTS Betriebsspannung 230V/50 Hz ~ Funksender, die einge- lernt werden können. Max. Anzahl RTS Temperaturbereich - 20 °C bis + 70 °C Sensoren, die eingelernt werden können. Copyright © 2008 Somfy SAS. All rights reserved. - Page 27 10. Caratteristiche tecniche 6.2 Controllo del senso di rotazione 1. Introduzione Il motore Oximo 50 S auto RTS è un motore senza regolazione: un semplice collega- mento ne permette l'utilizzo. Il motore Oximo 50 S auto RTS memorizza i finecorsa automaticamente.
- Page 28 Non utilizzare per scopi diversi dal campo di applicazione dichiarato da Somfy. Ciò comporta, così come il mancato rispetto delle istruzioni riportate nel presente manuale, l'annullamento della responsabilità...
- Page 29 2 cintini rigidi per fissare la tapparella al tubo di avvolgimento. 3. Contenuto del kit Il motore Oximo 50 S auto RTS è composto da due elementi inseparabili: il modulo tubolare S (D). il modulo Oximo RTS (E), 4.
- Page 30 fissati sul modulo tubolare S ma esclusivamente sulla ruota. 4.5 Montaggio del modulo Oximo RTS con il tubo dotato del modulo tubolare S Montare il tubo dotato del modulo tubolare S (D) sul supporto calotta (J). Copyright © 2008 Somfy SAS. All rights reserved.
- Page 31 Montare il tubo dotato del modulo tubolare S (D) sul supporto motore (L). Fissare la molla di fissaggio (M). 5. Cablaggio Disinserire l’alimentazione di rete. Connettere il motore Oximo 50 S auto RTS secondo le informazioni della tabella riportata di seguito: 230 V / 50 Hz ~ Cavo...
- Page 32 7. Regolazioni specifiche facoltative 7.1 Posizione preferita 7.1.1 Descrizione Il motore Oximo 50 S auto RTS viene fornito con una posizione preferita preimpostata, che corris- ponde alla chiusura quasi completa della tappa- rella (stecche semi-aperte). 7.1.2 Attivazione della posizione preferita Far fare alla tapparella 2 cicli completi di Salita e Discesa fino al finecorsa alto e basso per atti-...
- Page 33 RT / Inis RTS (M): La tapparella effettua un movimento di salita/ Risoluzione discesa, L’Inis RT / Inis RTS (M) è stato registrato o eliminato dal motore. PROG. PROG. Copyright © 2008 Somfy SAS. All rights reserved.
- Page 34 RTS (K) già registrato, fino al breve movi- mento di salita/discesa della tapparella: PROG. PROG. Il motore Oximo 50 S auto RTS è in modalità programmazione. Premere brevemente il pulsante PROG del Risoluzione sensore RTS (N) da aggiungere o eliminare:...
- Page 35 8.2 Funzionamento con un sensore Sunis RTS Se il motore Oximo 50 S auto RTS è associato ad un sensore Sunis RTS, la funzione Sole e la posizione preferita sono attivate, la tapparella si sposterà in funzione delle informazioni trasmesse dal sensore Sunis RTS, salvo nel caso in cui la tapparella si trovi al finecorsa basso.
- Page 36 Il cablaggio non è corretto. Controllare il cablaggio e modificarlo, funziona. se necessario. Il motore Oximo 50 S auto RTS è in Attendere che il motore Oximo 50 S modalità termica. auto RTS si raffreddi.. Il cavo utilizzato non è conforme.
- Page 37 9.2 Ritorno alla configurazione originale Questo reset elimina tutti i trasmettitori, i sensori, le posizioni preferite memorizzate e reinizializza il senso di rotazione del motore Oximo 50 S auto RTS. Attenzione! Effettuare il doppio taglio di corrente solo con il motore da resettare!
- Page 38 Frequenza radio 433,42 MHz Grado di protezione: IP 44 Numero massimo di Alimentazione 230V/50 Hz ~ trasmettitori Numero massimo di Temperatura di utilizzo da - 20 °C a + 70 °C sensori Copyright © 2008 Somfy SAS. All rights reserved.
- Page 39 De Oximo 50 S auto RTS motor is ontworpen voor de aandrijving van rolluiken met starre verbindingen en geselecteerde stoppers volgens de hieronder beschreven gebruiksvoorwaarden. De Oximo 50 S auto RTS motor is geschikt voor montage aan de linker- of aan de rechterkant. De Oximo 50 S auto RTS motor heeft: een obstakeldetectie die het rolluik beschermt tijdens het neerlaten.
- Page 40 Elk gebruik buiten het door Somfy bepaalde toepassingsgebied is niet conform. Hierdoor en door het negeren van de instructies in deze handleiding, vervallen iedere aansprakelijkheid en garantie van Somfy.
- Page 41 Opmerking: Gebruik ten minste 2 starre verbin- dingen voor het bevestigen van het rolluik aan de oprolbuis. 3. Inhoud van de set De Oximo 50 S auto RTS motor bestaat uit twee bij elkaar behorende onderdelen: de buismodule S (D). de Oximo RTS module (E), 4.
- Page 42 4.5 Montage van de Oximo RTS module met de buis voorzien van de buismo- dule S Monteer de buis voorzien van de buismodule S (D) op de eindsteun (J). Copyright © 2008 Somfy SAS. All rights reserved.
- Page 43 (D) op de motorsteun (L). Plaats de borgring (M). 5. Bedrading Schakel de stroomtoevoer uit. Sluit de Oximo 50 S auto RTS motor aan volgens de informatie in de tabel hieronder: 230 V / 50 Hz ~ Kabel a Bruin...
- Page 44 Het rolluik gaat kort op en neer. PROG. 7. Facultatieve afstellingen 7.1 Favoriete positie 7.1.1 Definitie De Oximo 50 S auto RTS motor wordt geleverd met een voorgeprogrammeerde favoriete positie, die overeenkomt met een bijna compleet gesloten rolluik (lichtdoorlatende lamellen). 7.1.2 Activeren van de favoriete positie...
- Page 45 De procedure voor het toevoegen of wissen van een zender is gelijk. 7.2.1 RTS bedieningspunt Gebruik een RTS bedieningspunt (K) dat is inge- lezen in de Oximo 50 S auto RTS motor. PROG. PROG. Druk lang op de PROG toets van het ingelezen...
- Page 46 RTS bedieningspunt (K) tot het rolluik kort op en neer gaat: PROG. PROG. De Oximo 50 S auto RTS motor is in de programmeermodus. Druk kort op de PROG toets van de RTS sensor Oplossing (N) die toegevoegd of gewist moet worden:...
- Page 47 Het rolluik blijft in de beginstand. 8.2 Werking met een Sunis RTS sensor Als er een Sunis RTS sensor op de Oximo 50 S auto RTS motor geprogrammeerd is, en als de zonfunctie geactiveerd is, en als de favoriete positie geactiveerd is, dan zal het rolluik zich verplaatsen naargelang de informatie van de Sunis RTS sensor, behalve als het rolluik in het onderste eindpunt staat.
- Page 48 Het rolluik werkt niet. De aansluiting is niet correct. Controleer de aansluiting en wijzig deze indien nodig. De Oximo 50 S auto RTS motor is te Wacht tot de Oximo 50 S auto RTS warm geworden. motor is afgekoeld. De gebruikte kabel is niet conform.
- Page 49 9.2 Terug naar de oorspronkelijke configuratie Dit resetten verwijdert alle geprogrammeerde bedieningspunten, sensoren, favoriete posities en reset de draairichting van de Oximo 50 S auto RTS motor. Waarschuwing! Voer de dubbele stroomonderbreking alleen uit op de motor die gereset moet worden!
- Page 50 Druk op de PROG toets van het nieuwe RTS bedieningspunt (L) tot de zonwering kort op- en neer gaat: alle RTS bedieningspunten zijn gewist en het nieuwe RTS bedieningspunt (L) PROG. is in de Oximo 50 S auto RTS motor ingelezen. Volg procedures hoofdstuk "Facultatieve afstellingen"...
-
Page 51: Introduction
The Oximo 50 S auto RTS motor can be mounted either on the right or the left. The Oximo 50 S auto RTS motor is fitted with: obstacle protection to protect the roller shutter when it is being lowered. -
Page 52: General Safety Advice
Any usage outside of applications defined by Somfy constitutes non-compliance, and is therefore not covered by the guarantee. In this event, as for all usage not consis- tent with the instructions given herein, Somfy accepts no responsibility for harm or damage. -
Page 53: Kit Contents
Caution: Use at least 2 bolts or 2 rigid links to attach the roller shutter to the roller tube. 3. Kit contents The Oximo 50 S auto RTS motor comprises two inseparable components: the s tubular module (D). the Oximo RTS module (E), 4. -
Page 54: Preparing The S Tubular Module
S tubular module. 4.5 Fitting the Oximo RTS module with the tube fitted with the S tubular module Fit the tube complete with S tubular module (D) to the end bracket (J). Copyright © 2008 Somfy SAS. All rights reserved. -
Page 55: Wiring
(L). Fit the stop ring (M). 5. Wiring Turn off the power supply. Connect the Oximo 50 S auto RTS motor accor- ding to the information in the table below: 230V/50 Hz ~ Wire a Brown... -
Page 56: Controlling The Direction Of Rotation
7. Optional specific settings 7.1 Favourite position 7.1.1 Definition The Oximo 50 S auto RTS motor is supplied with a pre-programmed favourite position which corres- ponds to almost complete closure of the roller shut- ter (slats in sun protection position). -
Page 57: Adding/Deleting Rts And Rt Control Points
Inis RT/Inis RTS (M) : The roller shutter moves up and down, Deletion The Inis RT/Inis RTS (M) has been program- med or deleted from the motor. PROG. PROG. Copyright © 2008 Somfy SAS. All rights reserved. -
Page 58: Adding/Deleting Rts Sensors
S tubu- lar module from the roller tube, etc.) requires the original Oximo 50 S auto RTS motor settings to be restored and complete installation of the Oximo 50 S auto RTS motor to be carried out again as set out in the section entitled “Installation”. -
Page 59: Operation With A Sunis Rts Sensor
The roller shutter remains in the initial position. 8.2 Operation with a Sunis RTS sensor If the Oximo 50 S auto RTS motor is linked to a Sunis RTS sensor, with the Sun func- tion activated and the favourite position activated, then the roller shutter will move in accordance with the information sent by the Sunis RTS sensor, except if the roller shutter is in the lower end limit position. -
Page 60: Problems With The Motor
RTS motor. The Oximo 50 S auto The installation of the Oximo 50 S Fit the Oximo 50 S auto RTS motor on RTS motor is attached auto RTS motor does not meet requi- the other side of the roller tube, restore to the wrong side of rements for the site. -
Page 61: Restoring The Original Configuration
9.2 Restoring the original configuration This reset deletes all the stored control points, sensors and favourite positions and reinitialises the direction of rotation of the Oximo 50 S auto RTS motor. Caution! Only switch off the current for the motor to be reset! -
Page 62: Technical Data
Radio frequency 433.42 MHz Index protection rating IP 44 Maximum number of Power supply 230V/50 Hz ~ connected control points Maximum number of Operating temperature - 20°C to + 70°C connected sensors Copyright © 2008 Somfy SAS. All rights reserved. - Page 63 6.2 Verificación del sentido de rotación 1. Introducción El motor Oximo 50 S auto RTS es un motor que no requiere ajustes: es posible utilizarlo mediante una simple conexión. El motor Oximo 50 S auto RTS memoriza automáticamente los finales de carrera.
- Page 64 Oximo 50 S auto RTS Guía de instalación Cualquier uso diferente de la aplicación establecida por Somfy invalida la garantía del producto. Esto, junto con cualquier incumplimiento de las instrucciones que figu- ran en esta guía, conllevará la exclusión de la responsabilidad y garantía por parte de Somfy.
- Page 65 Nota: utilice un mínimo de 2 uniones rígidas para fijar la persiana enrollable al tubo de enrollamiento. 3. Contenido del kit El motor Oximo 50 S auto RTS consta de dos elementos indisociables: el módulo tubular S (D). el módulo Oximo RTS (E), 4.
- Page 66 fijarse en el módulo tubular, sólo en la rueda. 4.5 Montaje del módulo Oximo RTS con el tubo equipado con el módulo tubular S Monte el tubo equipado con el módulo tubular S (D) en el soporte del acoplador (J). Copyright © 2008 Somfy SAS. All rights reserved.
- Page 67 (D) en el soporte del motor (L). Ponga la anilla de tope (M) en su lugar. 5. Cableado Corte la alimentación eléctrica. Conecte el motor Oximo 50 S auto RTS según la información de la siguiente tabla: 230 V/50 Hz ~ Cable A Marrón...
- Page 68 7. Ajustes específicos opcionales 7.1 Posición favorita 7.1.1 Definición El motor Oximo 50 S auto RTS se suministra con una posición favorita pre-programada que corres- ponde al cierre casi completo de la persiana (lamas en posición de protección solar).
- Page 69 El procedimiento para añadir o borrar puntos de mando es el mismo. 7.2.1 Punto de mando RTS Tome un punto de mando RTS (K) registrado en el motor Oximo 50 S auto RTS. PROG. PROG. Haga una pulsación mantenida en el botón...
- Page 70 (desmontaje de las uniones rígidas, sacar el motor tubular S del tubo de enrollamiento, etc.) requiere volver a poner el motor Oximo 50 S auto RTS en su configuración original y volver a hacer la instalación completa del motor Oximo 50 S auto RTS desde el capítulo "Instalación".
- Page 71 8.2 Funcionamiento con un sensor Sunis RTS Si el motor Oximo 50 S auto RTS se combina con un sensor Sunis RTS con la función Sol y con la posición favorita activadas, la persiana enrollable se desplazará en función de la información enviada por el sensor Sunis RTS, salvo si la persiana enrollable está...
- Page 72 fijación de la montadas. las uniones rígidas), vuelva a poner persiana al tubo de el motor Oximo 50 S auto RTS en su enrollamiento. configuración original y repita toda la instalación del motor Oximo 50 S auto RTS desde el capítulo "Instalación".
- Page 73 Esta puesta a cero elimina todos los puntos de mando, sensores, posiciones favori- tas registradas y reinicializa el sentido de rotación del motor Oximo 50 S auto RTS. Atención: tan solo debe realizarse el doble corte de corriente en el motor que hay que poner a cero (Reset) Atención: no utilice el punto de mando de tipo Inis RT/Inis RTS para realizar la...
- Page 74 RTS y PROG. queda registrado el nuevo punto de mando RTS (L) en el motor Oximo 50 S auto RTS. Siga los procedimientos del capítulo "Ajustes específicos opcionales" para añadir puntos de mando RTS.
- Page 75 O motor Oximo 50 S auto RTS pode ser montado tanto à esquerda como à direita. O motor Oximo 50 S auto RTS está equipado com: uma protecção anti-obstáculos para proteger o estore na descida.
- Page 76 Qualquer utilização fora do âmbito de aplicação definido pela Somfy é não conforme. Ela acarretaria, como qualquer outro incumprimento das instruções fornecidas neste guia, a anulação da responsabilidade e da garantia Somfy.
- Page 77 Observação: Utilizar, no mínimo, 2 fechos ou 2 uniões rígidas para fixar o estore ao tubo de enrolamento. 3. Conteúdo do kit O motor Oximo 50 S auto RTS é composto por dois elementos inseparáveis: o módulo tubular S (D), o módulo Oximo RTS (E).
- Page 78 4.5 Montagem do módulo Oximo RTS no tubo de enrolamento equipado com o módulo tubular S Montar o tubo de enrolamento equipado com o módulo tubular S (D) no suporte da extremidade (J). Copyright © 2008 Somfy SAS. All rights reserved.
- Page 79 S (D) no suporte do motor (L). Instalar o clip de suporte (M). 5. Cablagem Cortar a alimentação do sector. Ligar o motor Oximo 50 S auto RTS de acordo com as informações do seguinte quadro: 230 V / 50 Hz ~ Cabo...
- Page 80 7. Regulações específicas facultativas 7.1 Posição preferida 7.1.1 Definição O motor Oximo 50 S auto RTS é fornecido com uma posição preferida pré-programada que corresponde a um fecho quase completo do estore (lâminas abertas). 7.1.2 Activação da posição preferida Efectuar 2 ciclos completos de Subida e de Descida do estore até...
- Page 81 O procedimento a seguir para adicionar ou apagar um ponto de comando é idêntico. 7.2.1 Ponto de comando RTS Seleccionar um ponto de comando RTS (K) memorizado no motor Oximo 50 S auto RTS. PROG. PROG. Pressionar prolongadamente o botão PROG do ponto de comando RTS (K) memorizado, até...
- Page 82 (desmontagem das uniões ou dos fechos, saída do módulo tubular S do tubo de enrolamento, etc.) requerem a reconfiguração de origem e reinstala- ção completa do motor Oximo 50 S auto RTS, a partir do capítulo «Instalação». O sentido de rotação pode ser modificado a qual- quer momento: Colocar o estore numa posição qualquer: o...
- Page 83 O estore mantém-se na posição inicial. 8.2 Funcionamento com um sensor Sunis RTS Se o motor Oximo 50 S auto RTS estiver associado a um sensor Sunis RTS, e a função Sol e a posição preferida estiverem activas, o estore deslocar-se-á em função das informações transmitidas pelo sensor Sunis RTS, excepto se se encon-...
- Page 84 O estore não A cablagem está incorrecta. Verificar a cablagem e modificá-la, se funciona. necessário. O motor Oximo 50 S auto RTS está Aguardar que o motor Oximo 50 S em modo térmico. auto RTS arrefeça. O cabo utilizado não está conforme.
- Page 85 Seguir os procedimentos do capítulo «Colocação em serviço» para validar a regulação automática do motor Oximo 50 S auto RTS. 9.3 Substituição de um ponto de comando RTS perdido ou danificado Esta reposição a zero apaga todos os pontos de comando, mas, em contrapartida, os sensores, a posição preferida, o sentido de rotação e os fins de curso permane-...
- Page 86 433,42 MHz Índice de protecção IP 44 Número máximo de Alimentação 230V/50 Hz ~ pontos de comando associados Temperatura de Número máximo de - 20 °C a + 70 °C utilização sensores associados Copyright © 2008 Somfy SAS. All rights reserved.
- Page 87 Oximo 50 S auto RTS Copyright © 2008 Somfy SAS. All rights reserved.
- Page 88 Oximo 50 S auto RTS Somfy. Copyright © 2008 Somfy SAS. All rights reserved.
- Page 89 Oximo 50 S auto RTS Oximo RTS (E). Copyright © 2008 Somfy SAS. All rights reserved.
- Page 90 Oximo 50 S auto RTS L1 = … Ø > 47 e = 4 mm, l = 28 mm 15 mm 5 mm 20 mm Copyright © 2008 Somfy SAS. All rights reserved.
- Page 91 Oximo 50 S auto RTS 230 V / 50 Hz ~ 230 V 50 Hz Copyright © 2008 Somfy SAS. All rights reserved.
- Page 92 Oximo 50 S auto RTS PROG. RTS. Copyright © 2008 Somfy SAS. All rights reserved.
- Page 93 Oximo 50 S auto RTS PROG. PROG. PROG. PROG. PROG. PROG. PROG. PROG. Copyright © 2008 Somfy SAS. All rights reserved.
- Page 94 Oximo 50 S auto RTS PROG. PROG. PROG. PROG. Copyright © 2008 Somfy SAS. All rights reserved.
- Page 95 Oximo 50 S auto RTS Copyright © 2008 Somfy SAS. All rights reserved.
- Page 96 Oximo 50 S auto RTS Oximo 50 S auto RTS. 50 S auto RTS 50 S auto RTS. Copyright © 2008 Somfy SAS. All rights reserved.
- Page 97 Oximo 50 S auto RTS PROG. RTS. Copyright © 2008 Somfy SAS. All rights reserved.
- Page 98 Oximo 50 S auto RTS PROG. Oximo 50 S auto RTS. 433,42 MHz IP 44 230V/50 Hz ~ Copyright © 2008 Somfy SAS. All rights reserved.
- Page 99 Oximo 50 S auto RTS Oximo 50 S auto Oximo 50 S auto RTS • Oximo RTS, • Oximo 50 S auto RTS Oximo 50 S auto RTS Oximo 50 S auto RTS Somfy Copyright © 2008 Somfy SAS. All rights reserved.
- Page 100 Oximo 50 S auto RTS Somfy, Somfy " " 2.2.1 Oximo RTS Oximo RTS Oximo RTS! 2.2.2 Oximo RTS! 2.3.1 • • ( ). Somfy, Somfy. Copyright © 2008 Somfy SAS. All rights reserved.
- Page 101 Oximo 50 S auto RTS 2.3.2 Oximo 50 S auto RTS S (D). Oximo RTS (E), Oximo RTS Somfy. Oximo RTS Oximo RTS (E). Oximo RTS (E) Copyright © 2008 Somfy SAS. All rights reserved.
- Page 102 S (D). (L1) L1 = … (Ø > 47 Ø > 47 e = 4 ; l = 28 Ø 5 Ø 4,8 :: L1 - 5, Oximo RTS S (D) (J). Copyright © 2008 Somfy SAS. All rights reserved.
- Page 103 S (D). S (D) (L). ( ). OFF ( Oximo 50 S auto RTS / 50 (L1) RTS. Oximo RTS Inis RT / Inis RTS! " " / " ON ( " RTS: Copyright © 2008 Somfy SAS. All rights reserved.
- Page 104 " " " " "STOP/my " "PROG" ( PROG. ( · 7.1.1 Oximo 50 S auto RTS 7.1.2 · · · 7.1.3 · · (my), " " " " RTS. "STOP/my " Copyright © 2008 Somfy SAS. All rights reserved.
- Page 105 Inis RT / Inis RTS (K), Oximo 50 S auto RTS. PROG RTS (K) PROG. PROG. PROG ( Inis RT / Inis RTS (M): Inis RT / Inis RTS (M) PROG. PROG. Copyright © 2008 Somfy SAS. All rights reserved.
- Page 106 Oximo 50 S auto RTS. PROG. PROG. . .) Oximo 50 S auto Oximo 50 S auto RTS, " ". " " " " "STOP/my " " " 8.1.1 · · · Copyright © 2008 Somfy SAS. All rights reserved.
- Page 107 8.1.2 · STOP/my: (my). 8.1.3 · ·STOP STOP/my: 8.1.4 8.1.5 · · Oximo auto Sunis RTS Oximo 50 S auto RTS Sunis RTS Soleil ( Sunis RTS, 8.2.1 Sunis RTS, (my) ( Copyright © 2008 Somfy SAS. All rights reserved.
- Page 108 Oximo 50 auto RTS S auto RTS Oximo 50 S auto RTS Oximo 50 S auto RTS, " ". Oximo 50 S auto RTS " ". Oximo 50 S auto RTS, " ". Copyright © 2008 Somfy SAS. All rights reserved.
- Page 109 ON ( "PROG" ( RTS ( ): PROG. RTS, (my) Oximo 50 S auto RTS " ". · · · · ·RTS OFF ( ON ( 5 - 15 ON ( OFF ( Copyright © 2008 Somfy SAS. All rights reserved.
- Page 110 PROG ( RTS (L) PROG. ( RTS (L) Oximo 50 S auto RTS. " ". 433,42 · IP 44 · · 230 /50 · - 20 °C · · 70 °C · Copyright © 2008 Somfy SAS. All rights reserved.
- Page 111 Nap d Oximo 50 S auto RTS mo e by zamontowany zarówno z prawej, jak i z lewej strony. Nap d Oximo 50 S auto RTS jest wyposa ony w: zabezpieczenie przed przeszkodami, chroni ce p aszcz rolety podczas jej prze- suwania w dó...
- Page 112 , oraz przekaza klientom informacje dotycz ce warunków u ytkowania i konserwacji produktu. U ywanie produktu poza zakresem zastosowania okre lonym przez Somfy jest niedozwolone. Spowodowa oby ono, podobnie jak nieprzestrzeganie wskazówek figuruj cych w niniejszej instrukcji, zwolnienie producenta z odpowiedzialno ci oraz utrat gwarancji Somfy.
- Page 113 Uwaga: U y co najmniej 2 rygli lub 2 wieszaków blokuj cych w celu zamocowania rolety na rurze nawojowej. 3. Zawarto zestawu Nap d Oximo 50 S auto RTS sk ada si z dwóch nieroz cznych elementów: wk adka rurowa S (D). modu Oximo RTS (E), 4. Monta...
- Page 114 S, lecz tylko do zabieraka. 4.5 Monta modu u Oximo RTS z rur nawojow wyposa on we wk adk rurow S Zamontowa nawojow wyposa on wk adk rurow S (D) w uchwycie kapsla (J). Copyright © 2008 Somfy SAS. All rights reserved.
- Page 115 W o y na miejsce pier cie ustalaj cy (M). 5. Okablowanie Wy czy zasilanie. Pod czy nap d Oximo 50 S auto RTS, zgodnie ze wskazówkami znajduj cymi si w poni szej tabeli: 230 V / 50 Hz ~ Przewód...
- Page 116 Roleta wykonuje krótki ruch w jednym kieru- PROG. nku i z powrotem. 7. Dodatkowe ustawienia specjalne 7.1 Po o enie komfortowe 7.1.1 Definicja Nap d Oximo 50 S auto RTS jest dostarczany ze wst pnie zaprogramowanym po o eniem komfor- towym odpowiadaj cym prawie ca kowitemu zamkni ciu rolety (niewielki prze wit mi dzy lamelami).
- Page 117 RTS i RT Procedura obowi zuj ca przy dodawaniu lub kaso- waniu nadajnika jest identyczna. 7.2.1 Nadajnik RTS nadajnik RTS (K) zapisany w pami ci nap du Oximo 50 S auto RTS. PROG. PROG. Wcisn d u ej przycisk PROG nadajnika RTS...
- Page 118 (K) wpisanego do pami ci, przytrzymuj c do momentu a roleta wykona ruch w jednym kieru- PROG. PROG. nku i z powrotem: Nap d Oximo 50 S auto RTS znajduje si w trybie programowania. Wykasowanie Wcisn krótko przycisk PROG czujnika RTS (N), który b dzie dodany lub wykasowany:...
- Page 119 Roleta pozostaje w pocz tkowym po o eniu. 8.2 Dzia anie z czujnikiem Sunis RTS Je eli nap d Oximo 50 S auto RTS jest zaprogramowany z czujnikiem Sunis RTS, zosta a w czona funkcja S o ce oraz po o enie komfortowe, roleta przesuwa si zgodnie z informacjami przekazywanymi przez czujnik Sunis RTS, chyba e znajduje si w dolnym po o eniu granicznym.
- Page 120 Rozwi zania Roleta nie dzia a. Okablowanie jest nieprawid owe. Sprawdzi okablowanie i zmodyfikowa w razie potrzeby. Nap d Oximo 50 S auto RTS uleg Poczeka na ostygni cie nap du przegrzaniu. Oximo 50 S auto RTS. Zastosowany przewód jest Sprawdzi zastosowany przewód...
- Page 121 Wyzerowanie parametrów powoduje wykasowanie wszystkich zapisanych w pami ci nadajników, czujników, po o e komfortowych oraz ustawienie pocz tkowego kieru- nku obrotu nap du Oximo 50 S auto RTS. Uwaga! Zasilanie mo na dwukrotnie wy czy tylko w przypadku nap du, którego...
- Page 122 RTS zostaj PROG. wykasowane, a nowy nadajnik RTS (L) zostaje wpisany w nap dzie Oximo 50 S auto RTS. Zastosowa procedury opisane w rozdziale "Dodatkowe ustawienia specjalne", aby doda nadajniki RTS.
- Page 123 6.2 Kontrola sm ru otá ení 1. Úvod Pohon Oximo 50 S auto RTS je pohon nevy adující se ízení: lze ho pou ít hned po zapojení. Pohon Oximo 50 S auto RTS si nastaví koncové polohy automaticky. Pohon Oximo 50 S auto RTS se skládá ze dvou neodd liteln ch ástí: •...
- Page 124 Oximo 50 S auto RTS Návod k pou ití Pou ití v robku pro jin ú el, ne stanoví v robce - firma Somfy - není dovoleno. Pou ití v robku pro jin ú el, ne je stanoveno, nebo nedodr ení pokyn tohoto návodu má...
- Page 125 Upozorn ní: Pro upevn ní rolety k h ídeli pou ijte v dy nejmén dva rouby nebo dva pevné záv sy. 3. Obsah sady Pohon Oximo 50 S auto RTS se skládá ze dvou neodd liteln ch ástí: trubkov pohon Oximo S (D), modul Oximo RTS (E), 4.
- Page 126 4.5 Sestavení modulu Oximo RTS a h ídele s osazen m pohonem Oximo S Vlo te h ídel (D), osazenou trubkov m pohonem Oximo S, do protilo iska (J). Copyright © 2008 Somfy SAS. All rights reserved.
- Page 127 Nasa te hlavu trubkového pohonu Oximo S (D) do ulo ení (L). Nasa te pru n pojistn krou ek (M). 5. Zapojení Vypn te sí ové napájení (jisti em apod.). Zapojte pohon Oximo 50 S auto RTS podle tabulky: 230V/50 Hz ~ Vodi a Hn d Fáze (L)
- Page 128 PROG. 7. Dal í mo nosti nastavení 7.1 Mezipoloha 7.1.1 Definice Pohon Oximo 50 S auto RTS si automaticky nastaví mezipolohu, která odpovídá spu t né rolet s pootev en mi v tracími t rbinami (roleta ve stínicí poloze). 7.1.2 Aktivace mezipolohy Pro uvedení...
- Page 129 PROG: Roleta provede krátk pohyb nahoru a dol . Ovláda Inis RT / Inis RTS (M) je nau en do/ Vymazání vymazán z pam ti pohonu. PROG. PROG. Copyright © 2008 Somfy SAS. All rights reserved.
- Page 130 Oximo 50 S auto RTS do v robního nastavení podle kapitoly 9.2 a provést znovu cel postup nasta- vení pohonu Oximo 50 S auto RTS od kapitoly 6 „Uvedení do provozu“. Sm r otá ení lze zm nit kdykoliv: Nastavte roletu do libovolné...
- Page 131 Spolupráce s bezdrátov mi slune ními idly (nap . Sunis WireFree RTS) je mo ná pouze tehdy, kdy je idlo nau eno do pam ti pohonu Oximo 50 S auto RTS, je zapnuta funkce slune ní automatiky a je aktivována (ulo ena) mezipoloha. Roleta je pak ízena signály z idla.
- Page 132 Funkci ru í jiné rádiové za ízení. Vypn te rádiová za ízení v okolí. Pohon Oximo 50 Pohon Oximo 50 S auto RTS je p íli Stiskn te tla ítka ovláda e Nahoru S auto RTS se blízko sv m koncov m polohám nebo nebo Dol , abyste pohon Oximo 50 S otá...
- Page 133 Obnovte napájení ze sít : Roleta se po krátké prodlev na n kolik sekund rozjede. Upozorn ní: pokud se roleta nachází v horní nebo dolní koncové poloze, provede pouze krátk pohyb nahoru a dol . Copyright © 2008 Somfy SAS. All rights reserved.
- Page 134 IP 44 Maximální kapacita Napájení 230V/50 Hz ~ pam ti ovláda (v etn bezdrátov ch idel) Maximální po et bezdrá- Provozní teplota - 20 °C a + 70 °C tov ch idel Copyright © 2008 Somfy SAS. All rights reserved.
- Page 135 Az Oximo 50 S auto RTS motor, a továbbiakban szerepl , merev felfogatókkal és ütköz kkel szerelt red nyök m ködtetésére használható. Az Oximo 50 S auto RTS motor jobb és bal oldalra azonos módon szerelhet fel. Az Oximo 50 S auto RTS motor rendelkezik a következ funkciókkal: akadályérzékelés, le irányban a red nyszerkezet megóvása érdekében.
- Page 136 A Somfy által meghatározott alkalmazási területt l eltér használat nem elfoga- dott. Ebben az esetben, valamint a jelen útmutatóban szerepl el írások be nem tartása esetén a Somfy nem vállalja a felel sséget és nem viseli a garanciális kötelezettségeket. 2.2 Általános biztonsági el írások A használat szabályain kívül betartandó...
- Page 137 Megjegyzés: A red ny red nytengelyre történ rögzítéséhez legalább 2 rögzít elemet vagy 2 merev felfogatót használjon. 3. A készlet tartalma Az Oximo 50 S auto RTS motor két nem szétválasztható elemb l áll: "S" cs modul (D). Oximo RTS modul (E), 4.
- Page 138 "S" cs modulra nem. 4.5 Az Oximo RTS modul és az "S" cs modullal ellátott tengely felszere- lése Szerelje fel az "S" cs modullal felszerelt red nytengelyt (D) a tartóelemre (J). Copyright © 2008 Somfy SAS. All rights reserved.
- Page 139 (D) a motor tartóelemére (L). Helyezze el a rögzít gy r t (M). 5. Vezetékezés Kapcsolja ki a hálózati táplálást. Csatlakoztassa az Oximo 50 S auto RTS motort az alábbi táblázatban szerepl információk alapján: 230 V / 50 Hz ~ Vezeték...
- Page 140 7. Egyéni beállítások PROG. 7.1 Kedvenc pozíció 7.1.1 Meghatározás Az Oximo 50 S auto RTS motor el re beprogra- mozott kedvenc pozícióval rendelkezik, amely a red ny csaknem teljesen leengedett helyzetének felel meg (nyílások a lécek között). 7.1.2 A kedvenc pozíció behívása A kedvenc pozíció...
- Page 141 A vezérl egységek hozzáadása vagy törlése esetén végrehajtandó eljárás megegyezik. 7.2.1 RTS vezérl egység Vegyen el egy RTS vezérl egységet (K), amely el van mentve az Oximo 50 S auto RTS motorban. PROG. PROG. Nyomja meg hosszan az elmentett RTS vezérl egység (K) PROG gombját, amíg a...
- Page 142 Ez lehet vé teszi az érzékel használatát. Vegyen el egy RTS vezérl egységet (K), amely el van mentve az Oximo 50 S auto RTS motorban. Nyomja meg hosszan az elmentett RTS vezérl egység (K) PROG gombját, amíg a PROG.
- Page 143 A red ny kiindulási helyzetben marad. 8.2 M ködés Sunis RTS érzékel vel Ha az Oximo 50 S auto RTS motorhoz Sunis RTS érzékel kapcsolódik, a napsütés funkció aktív, és a kedvenc pozíció be van kapcsolva, a red ny a Sunis RTS érzékel által adott információknak megfelel en mozdul el, kivéve, ha eléri az alsó...
- Page 144 Ellen rizze a vezetékezést és m ködik. módosítsa, ha szükséges. Az Oximo 50 S auto RTS motor Várjon, amíg az Oximo 50 S auto RTS h védelmi üzemmódban van. motor kih l. Az alkalmazott vezeték nem Ellen rizze az alkalmazott vezetéket megfelel .
- Page 145 9.2 Visszatérés az eredeti konfigurációra Ez az alaphelyzetbe állítás törli az összes vezérl egységet, érzékel t, a memorizált kedvenc pozíciókat és inicializálja az Oximo 50 S auto RTS motor forgásirányát. Figyelem! Az áramellátás kett s megszakítását csak az alaphelyzetbe állítandó...
- Page 146 433,42 MHz Védettségi fokozat IP 44 A kapcsolódó Tápfeszültség 230V/50 Hz ~ vezérl egységek maxi- mális száma -20 °C és +70 °C A kapcsolódó érzékel k Használati h mérséklet között maximális száma Copyright © 2008 Somfy SAS. All rights reserved.
- Page 147 Oximo 50 S auto RTS NOTES Copyright © 2008 Somfy SAS. All rights reserved.
- Page 148 Tel: +972 (0) 3 952 55 54 Tel. +351 229 396 840 United Arab Emirates: Czech Republic: Italy: Romania: Somfy Gulf Jebel Ali Free Zone Somfy, spol. s.r.o. Somfy Italia s.r.l Somfy SRL Tel: +971 (0) 4 88 32 808 Tel: (+420) 296 372 486-7 Tel: +39-024847181 Tel.: +40 - (0)368 - 444 081...
Need help?
Do you have a question about the Oximo 50 S auto RTS and is the answer not in the manual?
Questions and answers