Table of Contents
Advertisement
Available languages
Available languages
www.somfy.com
Oximo 50 S Auto io
FR
Notice Installateur
DE
Installationsanleitung
IT
Guida d'installazione
NL
Handleiding installateur
EN
Installer Guide
ES
Guía de instalación
PT
Guia para o técnico de instalação
EL
DA
Installationsvejledning
FI
Asennusopas
SV
Installationshandbok
NO
Installasjonsguide
μ
Advertisement
Chapters
Table of Contents

Related Manuals for SOMFY Oximo 50 S Auto io


Summary of Contents for SOMFY Oximo 50 S Auto io
- Page 1 Oximo 50 S Auto io Notice Installateur Guia para o técnico de instalação Installationsanleitung μ Guida d’installazione Installationsvejledning Handleiding installateur Asennusopas Installer Guide Installationshandbok Guía de instalación Installasjonsguide...
- Page 2 Nota EDERLANDS Bij deze verklaart Somfy dat het product voldoet aan de essentiële eisen en aan de andere beschikkingen van richtlijn 1999/5/CE. Een conformi- teitsverklaring staat ter beschikking op de website www.somfy.com/ce. Aan de afbeeldingen kunnen geen rechten worden ontleend.
-
Page 3: Table Of Contents
• Tubular S Module : élément qui contient la partie entraînement du moteur. L’Oximo 50 S Auto io est conçu pour motoriser les volets roulants équipés de liens rigides et de butées, sélectionnés selon les conditions d’utilisation décrites ci-après. L’Oximo 50 S Auto io se monte indifféremment à droite ou à gauche. -
Page 4: Sécurité
Sécurité et responsabilité Avant d’installer et d’utiliser ce produit, lire attentivement cette notice. Ce produit Somfy doit être installé par un professionnel de la motorisation et de l'automatisation de l'habitat auquel cette notice est destinée. L’installateur doit par ailleurs, se conformer aux normes et à la législation en vigueur dans le pays d’installation, et informer ses clients des conditions d’utilisation et de maintenance du produit. -
Page 5: Contenu Du Kit
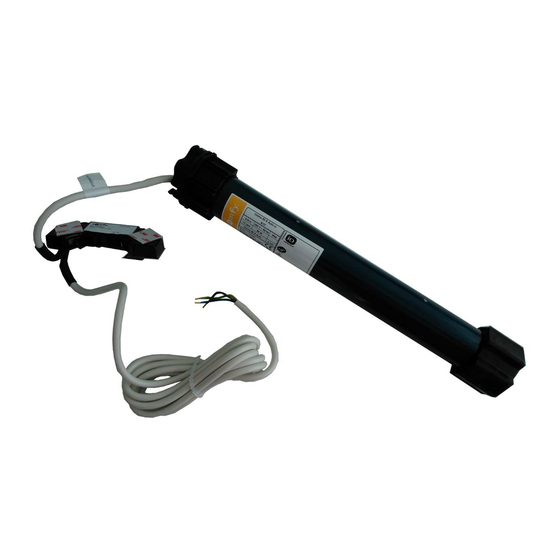
Utiliser au moins 2 verrous ou 2 liens rigides pour fixer le volet roulant au tube d’enroulement. CONTENU DU KIT L’Oximo 50 S Auto io est composé de deux éléments indissociables : le Tubular S Module (D), l’Oximo io Module (E). -
Page 6: Préparation Du Tube
- Connecter le moteur selon le tableau ci-dessous : 230 V ~ 50 Hz Câble moteur 3 x 0,75 mm 230 V 1 Marron Phase 50 Hz 2 Bleu Neutre 3 x 1,5 mm 3 Vert-Jaune Terre ( ) Copyright © 2010 Somfy SAS. All rights reserved. -
Page 7: Mise En Service
MISE EN SERVICE La notice ne décrit que la mise en service à l’aide d’un point de commande local io Somfy de type Situo io. Pour une mise en service à l’aide de tout autre point de commande io, se référer à la notice correspondante. -
Page 8: Vérification Du Sens De Rotation Du Moteur
La détection automatique des obstacles permet de protéger le tablier du volet roulant et de dégager les obstacles : Si le tablier du volet roulant rencontre un obstacle à la descente : Soit le volet roulant s’arrête automatiquement. Soit il s’arrête et remonte automatiquement. Copyright © 2010 Somfy SAS. All rights reserved. -
Page 9: Fonctionnement Avec Un Capteur Soleil Io Somfy
Protection contre le gel La protection contre le gel fonctionne comme la détection des obstacles : Si l’Oximo 50 S Auto io détecte une résistance, il ne se met pas en marche pour protéger le tablier du volet roulant : Le volet roulant reste en position initiale. -
Page 10: Remplacement D'un Point De Commande Io Somfy Perdu Ou Cassé
Toute modification de l’installation (démontage des liens ou des verrous, sortie du Tubular S Module du tube d’enroulement, etc.) nécessite de remettre le moteur Oximo 50 S Auto io en configuration d’origine et de reprendre l’installation complète du moteur Oximo 50 S Auto io à... - Page 11 • Rohrmodul S: Die Komponente mit den Antriebsteilen des Motors. Der Oximo 50 S Auto io wurde zum Antrieb von Rollläden mit festen Wellenverbindern und Stoppern, unter den im Folgenden beschriebenen Einsatzbedingungen, entwickelt. Der Antrieb Oximo 50 S Auto io kann sowohl rechts als auch links montiert werden.
-
Page 12: Sicherheitshinweise
Sicherheit und Gewährleistung Lesen Sie bitte vor der Montage und Verwendung dieses Produktes diese Installationsanleitung sorgfältig durch. Dieses Somfy-Produkt muss von einer fachlich qualifizierten Person für Antriebe und Automatisierungen im Haustechnikbereich (Elektrofachkraft nach DIN VDE 1000-10) installiert werden. Die fachlich qualifizierte Person muss außerdem alle im Installationsland geltenden Normen und Gesetze befolgen, und ihre Kunden über die Bedienungs- und Wartungsbedingungen des Produkts informieren. -
Page 13: Komponenten
Verwenden Sie mindestens 2 Hochschiebesicherungen bzw. 2 feste Wellenverbinder, um den Rollladen an der Welle zu befestigen. KOMPONENTEN Der Antrieb Oximo 50 S auto io besteht aus zwei Komponenten, die voneinander getrennt nicht funktionieren: dem Rohrmodul S (D), dem Oximo io-Modul (E). -
Page 14: Vorbereiten Der Welle
Schließen Sie den Antrieb entsprechend der nachstehenden Tabelle an: 3 x 0,75 mm 230 V ~ 50 Hz Antriebskabel 230 V 50 Hz Braun Phase (L) Blau Neutralleiter (N) 3 x 1,5 mm Gelb-Grün Schutzleiter ( ) Copyright © 2010 Somfy SAS. All rights reserved. -
Page 15: Inbetriebnahme
Oximo 50 S Auto io INBETRIEBNAHME Diese Anleitung beschreibt nur die Inbetriebnahme mit Hilfe eines lokalen Somfy io-Funksenders vom Typ Situo io. Für die Inbetriebnahme mit Hilfe einer anderen io-Bedieneinheit ziehen Sie die entsprechende Anleitung zurate. 6.1. Feststellung der bereits durchgeführten Einstellschritte Versorgen Sie für die Inbetriebnahme nur den Oximo 50 S Auto... -
Page 16: Testen Der Drehrichtung Des Antriebes
Oximo 50 S Auto io 6.3. Testen der Drehrichtung des Antriebes Drücken Sie die AUF-Taste am lokalen Somfy io-Funksender: Bestätigen der Fährt der Rollladen nach oben, ist die Drehrichtung automatischen korrekt : weiter mit Kapitel „Bestätigen der automatischen Einstellungen Einstellungen“. -
Page 17: Betrieb Mit Einem Somfy Io-Sonnensensor
Rollladen automatisch an. 7.1.6. Festfrierschutz Der Festfrierschutz funktioniert wie die Hinderniserkennung: Erkennt der Oximo 50 S Auto io einen Widerstand, setzt er sich nicht in Bewegung, um eine Beschädigung des Rollladenpanzers zu vermeiden: Der Rollladen verbleibt in seiner ursprünglichen Position. 7.2. -
Page 18: Austausch Eines Defekten Oder Verlorenen Somfy Io-Funksenders
Bei jeder Änderung an der Installation (Ausbau der Wellenverbinder bzw. Hochschiebesicherungen, Herausnehmen des Rohrmoduls S aus der Welle usw.) muss der Antrieb Oximo 50 S Auto io auf die Werkseinstellungen zurückgesetzt werden und die Installation des Antriebs wieder vollständig, ab dem Kapitel „Installation“, durchgeführt werden. -
Page 19: Introduzione
Modulo tubolare S elemento che contiene la parte di azionamento del motore. Il motore Oximo 50 S auto io è progettato per motorizzare le tapparelle dotate di cintini rigidi e stopper selezionati secondo le condizioni di utilizzo descritte di seguito. -
Page 20: Avvertenze
Non utilizzare per scopi diversi dal campo di applicazione dichiarato da Somfy. Ciò comporta, così come il mancato rispetto delle istruzioni riportate nel presente manuale, l'annullamento della responsabilità... -
Page 21: Contenuto Del Kit
Utilizzare almeno 2 blocchi antieffrazione o 2 cintini rigidi per fissare la tapparella al tubo di avvolgimento. CONTENUTO DEL KIT Il motore Oximo 50 S auto io è composto da due elementi inseparabili: il modulo tubolare S (D), il modulo Oximo io (E). -
Page 22: Preparazione Del Tubo
230 V ~ 50 Hz Cavo motore 3 x 0,75 mm 230 V 1 Marrone Fase (F) 50 Hz 2 Blu Neutro (N) 3 x 1,5 mm 3 Verde/Giallo Terra ( ) Copyright © 2010 Somfy SAS. All rights reserved. -
Page 23: Messa In Servizio
Oximo 50 S Auto io MESSA IN SERVIZIO La guida descrive soltanto la messa in servizio mediante un trasmettitore locale io Somfy di tipo Situo io. Per una messa in servizio mediante qualsiasi altro trasmettitore io, consultare la guida corrispondente. -
Page 24: Verifica Del Senso Di Rotazione Del Motore
Il rilevamento automatico degli ostacoli permette di proteggere il telo della tapparella e di rimuovere gli eventuali ostacoli presenti: Se la tapparella incontra un ostacolo durante la discesa: Si ferma automaticamente. Si ferma e risale automaticamente. Copyright © 2010 Somfy SAS. All rights reserved. -
Page 25: Funzionamento Con Un Sensore Io Sun Somfy
Protezione contro il gelo La protezione contro il gelo funziona come il rilevamento degli ostacoli: Se il motore Oximo 50 S auto io rileva una resistenza, non entra in funzione, al fine di proteggere il telo della tapparella: la tapparella resta nella posizione iniziale. -
Page 26: Sostituzione Di Un Trasmettitore Io Somfy Perso O Guasto
In caso di modifica dell'installazione (smontaggio dei cintini o dei blocchi antieffrazione, uscita del motore dal tubo di avvolgimento, ecc.), è necessario ripristinare la configurazione originale del motore Oximo 50 S auto io e riprendere l'installazione completa del motore Oximo 50 S auto io a partire dal capitolo «Installazione». - Page 27 • Motormodule S: component die het aandrijfgedeelte van de motor bevat. De Oximo 50 S Auto io-motor is ontworpen voor de aandrijving van rolluiken met starre verbindingen en geselecteerde stoppers volgens de hieronder beschreven gebruiksvoorwaarden. De Oximo 50 S Auto io-motor is geschikt voor montage aan de linker- of aan de rechterkant.
-
Page 28: Veiligheid
Elke vorm van gebruik dat buiten het door Somfy gedefinieerde toepassingsgebied valt, is verboden. Hierdoor en door het negeren van de instructies in deze handleiding, vervallen iedere aansprakelijkheid en garantie van Somfy. -
Page 29: Inhoud Van De Set
Gebruik ten minste 2 starre verbindingen voor het bevestigen van het rolluik aan de oprolbuis. INHOUD VAN DE SET De Oximo 50 S Auto io-motor bestaat uit twee bij elkaar behorende onderdelen: de motormodule S (D), de Oximo io-module (E). -
Page 30: Voorbereiden Van De Oprolbuis
Sluit de motor volgens de tabel hier onder aan: 230 V ~ 50 Hz Motorkabel 3 x 0,75 mm 230 V 1 Bruin Fase (F) 50 Hz 2 Blauw Nul (N) 3 x 1,5 mm 3 Geel-Groen Aarding ( ) Copyright © 2010 Somfy SAS. All rights reserved. -
Page 31: In Werking Stellen
Oximo 50 S Auto io IN WERKING STELLEN De handleiding beschrijft alleen de installatie met behulp van een lokaal Somfy io bedieningspunt van het type Situo io. Raadpleeg voor het installeren met behulp van ieder ander io bedieningspunt de bijbehorende handleiding. -
Page 32: Controle Van De Draairichting Van De Motor
Oximo 50 S Auto io 6.3. Controle van de draairichting van de motor Druk op de OP toets van het lokale Somfy io bedieningspunt: Bevestigen van Als het rolluik omhoog gaat, is de draairichting correct: de automatische ga naar het hoofdstuk «Bevestigen van de automatische afstellingen afstellingen». -
Page 33: Werking Met Een Somfy Io-Zonnesensor
7.1.6. Bescherming tegen vastvriezen De bescherming tegen vastvriezen werkt als de detectie van obstakels: Als de Oximo 50 S Auto io een weerstand vaststelt, start de motor niet om het rolluik te beschermen: Het rolluik blijft in de beginstand. 7.2. -
Page 34: Vervangen Van Een Verloren Of Defect Somfy Io-Bedieningspunt
Elke wijziging van de installatie (demontage van de verbindingen of van de starre verbindingen, uitbouwen van de buismodule S van de oprolbuis, enz.) betekent dat de Oximo 50 S Auto io-motor gereset moet worden in de oorspronkelijke configuratie en dat de Oximo 50 S Auto io-motor compleet moet worden geïnstalleerd zoals in het hoofdstuk "Installatie"... - Page 35 Tubular S Module: component which contains the drive part of the motor. The Oximo 50 S auto io motor is designed to drive roller shutters fitted with rigid links and end stops selected in accordance with the operating conditions described below.
-
Page 36: Safety
Any use outside the sphere of application specified by Somfy is forbidden. This invalidates the warranty and discharges Somfy of all liability, as does any failure to comply with the instructions given herein. Never begin installing without first checking the compatibility of this product with the associated equipment and accessories. -
Page 37: Kit Contents
Use at least 2 bolts or 2 rigid links to attach the roller shutter to the roller tube. KIT CONTENTS The Oximo 50 S auto io motor comprises two inseparable components: the Tubular S Module (D), the Oximo io Module (E). -
Page 38: Tube Preparation
- Connect the motor as per the table below: 230 V ~ 50 Hz Motor cable 3 x 0.75 mm 230 V 1 Brown Live 50 Hz 2 Blue Neutral 3 x 1.5 mm 3 Yellow/Green Earth ( ) Copyright © 2010 Somfy SAS. All rights reserved. -
Page 39: Commissioning
Oximo 50 S Auto io COMMISSIONING The guide only describes commissioning using a Situo io type Somfy io local control point. For commissioning using any other io control point, refer to the corresponding guide. 6.1. Identifying setting steps already completed During the setting stage, only supply power to the Oximo 50 S Auto io whose settings are to be adjusted. -
Page 40: Checking The Motor's Direction Of Rotation
Oximo 50 S Auto io 6.3. Checking the motor’s direction of rotation 1) Press the Up button on the Somfy io local control point: Confirming the a) If the roller shutter is raised, the direction of rotation automatic settings is correct: go to chapter «Confirming the automatic settings». -
Page 41: Operating With A Somfy Io Sun Sensor
Anti-freeze protection The anti-freeze protection function operates in the same way as the obstacle detection function: If the Oximo 50 S Auto io detects any resistance, it does not move in order to protect the roller shutter: The roller shutter remains in the initial position. -
Page 42: Replacing A Lost Or Broken Somfy Io Control Point
Module from the roller tube, etc.) requires the original Oximo 50 S Auto io motor settings to be restored and complete installation of the Oximo 50 S Auto io motor to be carried out again as set out in chapter “Installation”. - Page 43 10. Datos técnicos local io de Somfy INTRODUCCIÓN El Oximo 50 S Auto io es un motor corto, que programa los finales de carrera de forma automática. El motor Oximo 50 S auto io consta de dos elementos indisociables: •...
-
Page 44: Seguridad
Seguridad y responsabilidad Antes de instalar y usar este producto, debe leerse este manual con suma atención. Este producto Somfy debe ser instalado por un profesional de la motorización y la automatización de la vivienda. El instalador deberá, además, cumplir las normativas y la legislación vigente en el país de instalación e informar a sus clientes sobre las condiciones de uso y mantenimiento del producto. -
Page 45: Contenido Del Kit
Utilice un mínimo de dos uniones rígidas para fijar la persiana enrollable al tubo de enrollamiento. CONTENIDO DEL KIT El motor Oximo 50 S auto io consta de dos elementos indisociables: el módulo Tubular S (D) el módulo Oximo io (E) INSTALACIÓN... -
Page 46: Preparación Del Tubo
Conecte el motor tal y como se indica en la tabla siguiente: Cable del 230 V ~ 50 Hz motor 3 x 0,75 mm 230 V 1 Marrón Fase 50 Hz 2 Azul Neutro 3 x 1,5 mm 3 Verde-amarillo Tierra ( ) Copyright © 2010 Somfy SAS. All rights reserved. -
Page 47: Puesta En Marcha
PUESTA EN MARCHA En esta guía se describe únicamente la puesta en marcha con un punto de mando local io de Somfy de tipo Situo io. Para la puesta en marcha con cualquier otro tipo de punto de mando io, consulte la guía correspondiente. -
Page 48: Comprobación Del Sentido De Rotación Del Motor
Cuando el tablero de la persiana enrollable encuentra un obstáculo durante la bajada, esta puede reaccionar de dos formas: la persiana enrollable se detiene automáticamente la persiana enrollable se detiene y sube automáticamente Copyright © 2010 Somfy SAS. All rights reserved. -
Page 49: Funcionamiento Con Un Sensor Solar Io De Somfy
Protección contra el hielo La protección contra el hielo funciona del mismo modo que la detección de obstáculos: Si el Oximo 50 S auto io detecta una resistencia, aquel no inicia el movimiento con el fin de proteger la persiana enrollable: la persiana enrollable se queda en su posición inicial. -
Page 50: Sustitución De Un Punto De Mando Io De Somfy Perdido O Dañado
Cualquier modificación de la instalación (desmontaje de las uniones rígidas, sacar el motor Tubular S del tubo de enrollamiento, etc.) requiere volver a poner el motor Oximo 50 S auto io en su configuración original y volver a hacer la instalación completa del motor Oximo 50 S auto io desde el capítulo "Instalación". - Page 51 6.2. Pré-memorização do ponto de comando local io Somfy INTRODUÇÃO O Oximo 50 S Auto io é um motor curto que programa automaticamente as definições de fim de curso. O motor Oximo 50 S auto io é composto por dois elementos inseparáveis: •...
-
Page 52: Segurança
Segurança e responsabilidade Antes de instalar e utilizar este produto, ler atentamente este guia. Este produto Somfy deve ser instalado por um profissional da motorização e da automatização do lar, a quem se destina este guia. O técnico de instalação deve, além disso, respeitar as normas e a legislação em vigor no país de instalação e informar os seus clientes das condições de funcionamento e de manutenção do produto. -
Page 53: Conteúdo Do Kit
Utilizar, no mínimo, 2 fechos ou 2 uniões rígidas para fixar o estore ao tubo de enrolamento. CONTEÚDO DO KIT O motor Oximo 50 S auto io é composto por dois elementos inseparáveis: o Módulo Tubular S (D), o Módulo Oximo io (E). -
Page 54: Preparação Do Tubo De Enrolamento
230 V ~ 50 Hz Cabo do motor 3 x 0,75 mm 230 V 1 Castanho Fase (P) 50 Hz 2 Azul Neutro (N) 3 x 1,5 mm 3 Verde/Amarelo Terra ( ) Copyright © 2010 Somfy SAS. All rights reserved. -
Page 55: Colocação Em Serviço
COLOCAÇÃO EM SERVIÇO O guia apenas descreve a colocação em serviço com um ponto de comando local io Somfy do tipo Situo io. Para uma colocação em serviço com qualquer outro tipo de ponto de comando io, consultar o guia correspondente. -
Page 56: Verificação Do Sentido De Rotação Do Motor
7.1.5. Detecção de obstáculos A detecção automática de obstáculos permite proteger o estore e evitar os obstáculos: Se o estore encontrar um obstáculo na descida: O estore pára automaticamente. Ou pára e sobe automaticamente. Copyright © 2010 Somfy SAS. All rights reserved. -
Page 57: Regulações Suplementares
7.1.6. Protecção anticongelamento A protecção anticongelamento funciona da mesma forma que a detecção de obstáculos: Se o Oximo 50 S Auto io detectar uma resistência, pára para proteger o estore: O estore mantém-se na posição inicial. 7.2. Funcionamento com um sensor io sun Somfy Consultar o guia correspondente. -
Page 58: Substituição De Um Ponto De Comando Io Somfy Perdido Ou Danificado
Tubular S do tubo de enrolamento, etc.) requerem a reconfiguração de origem e reinstalação completa do motor Oximo 50 S Auto io, a partir do capítulo "Instalação". Esta reposição elimina todos os pontos de comando, todos os sensores e todas as regulações de fins de curso e reinicializa o sentido de rotação do motor e a posição preferida («my»). - Page 59 ® μ μ μ μ μ μ ® io-homecontrol μ μ io-homecontrol μ ® μ μ μ μ μ μ io-homecontrol ® μ , μ μ μ μ io-homecontrol ® μ www.io-homecontrol.com Copyright © 2010 Somfy SAS. All rights reserved.
- Page 60 μ Oximo io Module. μ μ 2.3. 2.3.1. μ μ μ : • μ μ (B) – μ μ • (C). μ μ μ μ μ Somfy. μ μ μ μ Somfy. Copyright © 2010 Somfy SAS. All rights reserved.
- Page 61 Oximo io Module (E). μ Oximo io Module (E) μ μ μ μ Tubular S 4.2. Module μ L1 = … Tubular S Module (D). μ (L1) μ μ μ Tubular S Module Copyright © 2010 Somfy SAS. All rights reserved.
- Page 62 Tubular S Module (D) μ μ (L). μ μ (M). μ μ μ μ μ 3 x 0,75 mm 230 V ~ 50 Hz 230 V 50 Hz 3 x 1,5 mm Copyright © 2010 Somfy SAS. All rights reserved.
- Page 63 μ PROG «PROG» io Somfy (G): μ μ μ μ «b1» «b2» μ μ μ μ io Somfy « Somfy». μ « ». io Somfy 6.2. μ μ μ io Somfy μ Copyright © 2010 Somfy SAS. All rights reserved.
- Page 64 « μ ». μ μ (my): μ «my», μ μ μ μ (my). STOP 7.1.3. μ «my»: μ 7.1.4. μ μ μ 7.1.5. μ μ μ μ μ μ μ μ μ Copyright © 2010 Somfy SAS. All rights reserved.
- Page 65 «my» μ μ (my) io Somfy 8.2. 8.3. μ μ μ μ io Somfy: μ μ «my», μ μ μ Oximo 50 S Auto io; 9.1. μ μ μ μ μ μ Copyright © 2010 Somfy SAS. All rights reserved.
- Page 66 Somfy: μ μ μ μ μ « ». 868-870 MHz io-homecontrol® μ μ Tri-band IP 44 μ - 20°C + 70°C 230 V ~ 50 Hz μ μ μ μ μ Copyright © 2010 Somfy SAS. All rights reserved.
- Page 67 • Tubular S-modul: Komponent, som indeholder motorens drivdele. Oximo 50 S auto io-motoren er designet til at drive de rullegardiner, der er monteret med faste link, og de endestop, der er valgt ud fra de driftsforhold, der er beskrevet nedenfor.
-
Page 68: Sikkerhed
Al anden anvendelse end den, der er defineret af Somfy, er ikke tilladt. Ved anden anvendelse bortfalder Somfys ansvar og garanti, hvilket også er tilfældet, hvis forskrifterne i nærværende monteringsvejledning ikke følges. -
Page 69: Sættets Indhold
Brug mindst 2 bolte eller 2 faste link til at fastgøre rullegardinet til rullerøret. SÆTTETS INDHOLD Oximo 50 S auto io-motoren består af to uadskillelige komponenter: Tubular S-modulet (D), Oximo io-modulet (E). -
Page 70: Forberedelse Af Røret
- Tilslut motoren som vist i tabellen nedenfor: 230 V ~ 50 Hz Motorkabel 3 x 0,75 mm 230 V 1 Brun Fase 50 Hz 2 Blå Neutral 3 x 1,5 mm 3 Grøn-Gul Jord ( ) Copyright © 2010 Somfy SAS. All rights reserved. -
Page 71: Idriftsættelse
Oximo 50 S Auto io IDRIFTSÆTTELSE I installationsvejledningen beskrives idrifttagning med en lokal Somfy io-betjeningsboks af typen Situo io. Ved brug med alle andre betjeningsenheder henvises til den tilhørende installationsvejledning. 6.1. Identifikation af de indstillingstrin, der er udført Under indstillingen skal der kun føres strøm til den Oximo 50 S Auto io, hvis indstillinger skal ændres. -
Page 72: Verifikation Af Motorens Rotationsretning
Funktionen til automatisk forhindringsregistrering beskytter rullegardinet og sikrer, at forhindringer kan fjernes: Hvis rullegardinet støder på en forhindring, når det rulles ned: Rullegardinet standser automatisk. Rullegardinet standser, og køres automatisk op igen. Copyright © 2010 Somfy SAS. All rights reserved. -
Page 73: Funktion Med En Somfy Io-Solsensor
Funktionen anti-stopbeskyttelse fungerer på samme måde funktionen forhindringsregistrering: Hvis Oximo 50 S Auto io registrerer modstand, standser det, så rullegardinet beskyttes: Rullegardinet forbliver i udgangspositionen. 7.2. Funktion med en Somfy io-solsensor Se den tilhørende installationsvejledning. TILLÆGSINDSTILLINGER 8.1. Favoritposition (my) 8.1.1. -
Page 74: Udskiftning Af Mistet Eller Ødelagt Somfy Io-Betjeningsboks
9.3. Tilbage til den oprindelige indstilling Enhver ændring af installationen (fjernelse af forbindelser eller bolte, fjernelse af Tubular S-modulet fra rullerøret etc.) kræver, at den oprindelige Oximo 50 S Auto io-motorindstilling gendannes, og at Oximo 50 S Auto io-motoren geninstalleres som beskrevet i kapitlet “Installation”. - Page 75 • Tubular S -moduuli: osa sisältää käyttömoottorin. Oximo 50 S Auto io -moottori on suunniteltu pyörittämään rullaimia, joihin on asennettu alla kuvailtujen toimintaehtojen mukaan valitut kiinteät lenkit ja ääriarvot. Oximo 50 S Auto io -moottorin voi asentaa joko oikealle tai vasemmalle.
-
Page 76: Turvallisuus
2.1. Turvallisuus ja vastuu Ennen tuotteen asentamista lue tämä opas huolellisesti. Tämän Somfy-laitteen asennuksen saa suorittaa asuintilojen motorisoinnin ja automatisoinnin ammattilainen, jolle tämä asennusopas on suunnattu. Asentajan täytyy noudattaa asennusmaassa voimassa olevia normeja ja lainsäädäntöä ja kertoa asiakkailleen tuotteen käytöstä ja huollosta. -
Page 77: Pakkauksen Sisältö
Käytä vähintään kahta salpaa tai kahta kiinteää lenkkiä kiinnittäessäsi rullainta rullausputkeen. PAKKAUKSEN SISÄLTÖ Oximo 50 S Auto io -moottori sisältää kaksi toisistaan erottamatonta osaa: Tubular S -moduuli (D), Oximo io -moduuli (E). ASENNUS Noudata tarkasti oppaassa mainittua asennusten suoritusjärjestystä! -
Page 78: Putken Valmistelu
230 V ~ 50 Hz Moottorin johto 3 x 0,75 mm 230 V 1 Ruskea Jännitteinen 50 Hz POIS 2 Sininen Neutraali PÄÄLTÄ 3 x 1,5 mm 3 Vihreä/keltainen Maa ( ) Copyright © 2010 Somfy SAS. All rights reserved. -
Page 79: Käyttöönotto
Oximo 50 S Auto io KÄYTTÖÖNOTTO Käyttöohjeessa kuvataan käyttöönotto vain paikallisella Somfy ion Situo io -tyyppisellä kaukosäätimellä. Jos haluat tehdä käyttöönoton millä tahansa muulla io-kaukosäätimellä, katso vastaava käyttöohje. 6.1. Jo tehtyjen säätövaiheiden tunnistaminen Kytke virta asennusvaiheessa ainoastaan Oximo 50 S PÄÄLLÄ... -
Page 80: Moottorin Pyörimissuunnan Tarkistus
7.1.5. Esteen tunnistus Automaattinen esteen tunnistustoiminto suojaa rullainta ja estää törmäämisen esteisiin. Jos rullain havaitsee laskeutumisen aikana esteen: Rullain joko pysähtyy automaattisesti, Tai se pysähtyy ja nousee automaattisesti ylös. Copyright © 2010 Somfy SAS. All rights reserved. -
Page 81: Toiminta Somfy Io -Aurinkosensorin Avulla
Jos rullain havaitsee esteen noustessaan ylöspäin: Rullain pysähtyy automaattisesti. 7.1.6. Juuttumisen esto Juuttumisen estotoiminto toimii samalla tavalla kuin esteen tunnistustoiminto. Jos Oximo 50 S Auto io havaitsee liikeradan estymistä, se suojaa rullainta pysäyttämällä liikkumisen: Rullain jää alkuasentoon. 7.2. Toiminta Somfy io -aurinkosensorin avulla Katso vastaava käyttöopas. -
Page 82: Kadonneen Tai Rikkoutuneen Somfy Io -Kaukosäätimen Vaihto
9.3. Alkuperäisasetusten palautus Kaikki asennusten muutokset (kuten esimerkiksi kytkentöjen tai salpojen poisto, Tubular S -moduulin poisto rullausputkesta) edellyttävät, että Oximo 50 S Auto io -moottorin alkuperäisasetukset palautetaan ja Oximo 50 S Auto io -moottorille tehdään täydellinen uudelleenasennus luvun "Asennus" sisältämien ohjeiden mukaan. - Page 83 • Tubular S-modulen: som innehåller motorns drivenhet. Motorn Oximo 50 S auto io är avsedd för motorisering av rulljalusier som har stela länkar och ändstopp som har valts enligt de användningsvillkor som beskrivs nedan. Motorn Oximo 50 S auto io kan monteras både till höger och till vänster.
-
Page 84: Säkerhet
Säkerhet och ansvar Innan du installerar och använder produkten måste du noga läsa igenom den här handboken. Den här produkten från Somfy bör installeras av en fackman inom motorisering och automatisering av utrustning för bostadsfastigheter, och denna handbok är avsedd för fackmannen. -
Page 85: Satsen Innehåller
Använd åtminstone två stela länkar eller två reglar för att sätta fast rulljalusin vid upprullningsröret. SATSEN INNEHÅLLER Motorn Oximo 50 S auto io består av två fast sammansatta delar: Tubular S-modulen (D) Oximo io-modulen (E) INSTALLATION Det är mycket viktigt att följa den monteringsordning som beskrivs i handboken! -
Page 86: Förberedelse Av Röret
- Anslut motorn enligt tabellen nedan: 230 V ~ 50 Hz Motorkabel 3 x 0,75 mm 230 V 1 Brun 50 Hz 2 Blå Neutral 3 x 1,5 mm 3 Gul/grön Jord ( ) Copyright © 2010 Somfy SAS. All rights reserved. -
Page 87: Idrifttagning
Oximo 50 S Auto io IDRIFTTAGNING Anvisningarna beskriver bara drift med hjälp av en lokal io Somfy-fjärrkontroll av typen Situo io. För användning med andra typer av fjärrkontroller, se motsvarande anvisningar. 6.1. Identifiering av inställningssteg som redan har utförts I inställningsskedet där inställningarna för Oximo 50 S Auto io ska ändras ska endast denna förses med... -
Page 88: Kontroll Av Motorns Rotationsriktning
Oximo 50 S Auto io 6.3. Kontroll av motorns rotationsriktning 1) Tryck på upp-knappen på den lokala io Somfy- Bekräfta de fjärrkontrollen: automatiska a) Om rulljalusin rör sig uppåt är rotationsriktningen rätt: inställningarna gå till kapitlet ”Bekräfta de automatiska inställningarna”. -
Page 89: Funktion Med En Io Somfy-Solgivare
7.1.6. Stoppskydd Stoppskyddet fungerar på samma sätt som funktionen för avkänning av hinder: Om Oximo 50 S Auto io upptäcker någon form av motstånd stannar den för att skydda rulljalusin: Rulljalusin stannar i ursprungsläget. 7.2. Funktion med en io Somfy-solgivare Se motsvarande anvisningar. -
Page 90: Byte Av En Defekt Eller Borttappad Io Somfy-Fjärrkontroll
Varje förändring av installationen (kontakterna eller reglarna tas bort,Tubular S-modulen avlägsnas från upprullningsröret etc.) kräver att inställningarna för motorn Oximo 50 S Auto io återställs och att en fullständig ominstallation av motorn Oximo 50 S Auto io enligt anvisningarna i kapitlet ”Installation” utförs. - Page 91 • Tubular S-modulen: Inneholder motorens drivelement Oximo 50 S Auto io-motoren er beregnet for styring av rullegitter med faste lenker og endestopp valgt i samsvar med driftsbetingelsene som er beskrevet nedenfor. Oximo 50 S Auto io-motoren kan monteres enten på høyre eller på venstre side.
-
Page 92: Sikkerhet
Installatøren skal dessuten følge gjeldende normer og lovgiving i installasjonslandet og informere kundene om hvordan produktet skal brukes og vedlikeholdes. Enhver anvendelse utenom bruksområdet som er fastsatt av Somfy, er ikke godkjent. I likhet med enhver annen manglende overholdelse av instruksjonene i denne anvisningen, vil en slik bruk medføre at Somfys ansvar og garanti opphører. -
Page 93: Pakkens Innhold
Bruk minst to bolter eller to faste lenker ved montering av rullegitteret til rullegitterrøret. PAKKENS INNHOLD Oximo 50 S Auto io-motoren består av to deler som hører sammen: Tubular S-modulen (D) Oximo io-modulen (E) INSTALLASJON Monteringsrekkefølgen i installasjonsguiden må... -
Page 94: Klargjøring Av Røret
- Koble motoren som vist i tabellen nedenfor: 230 V ~ 50 Hz Motorkabel 3 x 0,75 mm 230 V 1 Brun Strømførende 50 Hz 2 Blå Nøytral 3 x 1,5 mm 3 Grønn-Gul Jord ( ) Copyright © 2010 Somfy SAS. All rights reserved. -
Page 95: Idriftsetting
Oximo 50 S Auto io IDRIFTSETTING Installasjonsguiden beskriver bare idriftsetting med en lokal Somfy io-fjernkontroll av typen Situo io. For idriftssetting med alle andre fjernkontroller henviser vi til den tilhørende installasjonsguiden. 6.1. Finne ut hvilke innstillingstrinn som alt er utført I innstillingsfasen forsyner du bare de Oximo 50 S Auto PÅ... -
Page 96: Kontroll Av Motorens Rotasjonsretning
7.1.5. Registrering av hindring Den automatiske hindringsdetektoren beskytter rullegitteret og gjør det mulig å fjerne hindringer: Hvis rullegitteret oppdager en hindring på vei nedover: Rullegitteret stopper automatisk Rullegitteret stopper og rulles automatisk opp Copyright © 2010 Somfy SAS. All rights reserved. -
Page 97: Bruk Med En Somfy Io-Solsensor
Rullegitteret stopper automatisk 7.1.6. Frostsikring Frostsikringen fungerer på samme måte som hindringsdetektoren: Hvis Oximo 50 S Auto io registrerer motstand, blir den stående i ro for å beskytte rullegitteret: Rullegitteret forblir i den opprinnelige posisjonen. 7.2. Bruk med en Somfy io-solsensor Se tilhørende installasjonsguide. -
Page 98: Utskifting Av Mistet Eller Ødelagt Somfy Io-Fjernkontroll
Alle endringer i installasjonen (fjerning av forbindelser eller bolter, fjerning av Tubular S-modulen fra rullegitterrøret osv.) krever tilbakestilling til originalinnstillingene for Oximo 50 S Auto io-motoren. Deretter må Oximo 50 S Auto io-motoren installeres på nytt helt fra begynnelsen, som beskrevet i kapitlet “Installasjon”. - Page 100 Tel: +39-024847181 Tel. +351 229 396 840 United Arab Emirates: Czech Republic: Japan: Romania: Somfy Gulf Jebel Ali Free Zone Somfy, spol. s.r.o. SOMFY KK Somfy SRL Tel: +971 (0) 4 88 32 808 Tel.: +40 - (0)368 - 444 081...
Need help?
Do you have a question about the Oximo 50 S Auto io and is the answer not in the manual?
Questions and answers