
Related Manuals for Retsch GM 200


Summary of Contents for Retsch GM 200
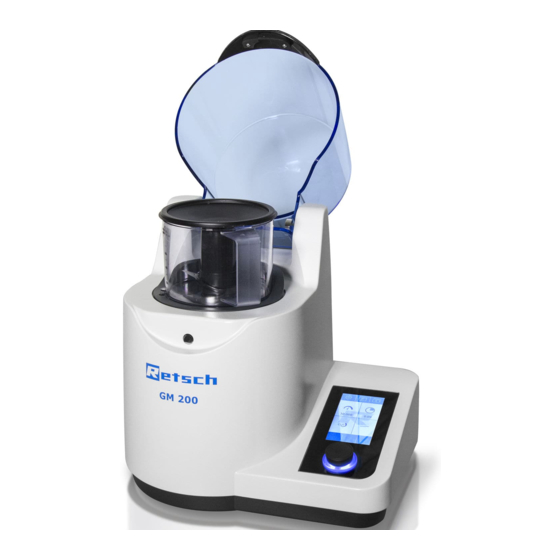
- Page 1 Manual Knife Mill GM 200 Translation © Retsch GmbH, 42781 Haan, Retsch-Allee 1-5, Germany | 13.06.2019 Version 0002...
- Page 2 Copyright © Copyright by Retsch GmbH Retsch-Allee 1-5 42781 Haan Germany...
-
Page 3: Table Of Contents
Table of Contents Notes on the manual ..........................6 Explanation of signs and symbols ..................... 6 Disclaimer ............................6 Copyright............................6 Safety ..............................7 Explanations of the Safety Instructions ..................... 8 General Safety Instructions ....................... 9 Repairs ............................. 10 Intended use of the device....................... 11 Improper use ............................ - Page 4 Manual Mode ........................... 36 7.4.1 Start Process ..........................36 7.4.2 Stop Process..........................37 Programme Mode ..........................37 7.5.1 Select a Programme ........................37 7.5.2 Edit a Programme ........................39 7.5.3 Save a Programme ........................39 7.5.4 Delete a Programme ........................39 Sequence Mode ..........................
- Page 5 Notes on the manual...
-
Page 6: Notes On The Manual
This manual does not contain any repair instructions. Please contact your supplier or contact Retsch GmbH directly if anything is unclear or you have questions about these guidelines or the device, or in the case of any faults or necessary repairs. -
Page 7: Safety
All those operating, cleaning or working with or on the device. This device is a modern, powerful product from Retsch GmbH and has been developed in line with the state-of-the art. The device is safe to use when operated correctly and when following the instructions in this manual. -
Page 8: Explanations Of The Safety Instructions
Safety 2.1 Explanations of the Safety Instructions The following warnings in this manual warn of possible risks and damage: DANGER D1.0000 Risk of fatal injuries Source of danger Possible consequences if the danger is ignored. Instructions and information on how to avoid the risk. Fatal or serious injuries may result if the “Danger”... -
Page 9: General Safety Instructions
The conformity declared by Retsch GmbH with the European Directives will lose its validity. Any warranty claims will be terminated. Do not make any modification to the device. Use spare parts and accessories that have been approved by Retsch GmbH exclusively. -
Page 10: Repairs
2.3 Repairs This manual does not contain any repair instructions. For safety reasons, repairs may only be carried out by Retsch GmbH or an authorised representative or by qualified service technicians. In case of repair, please inform… …the Retsch GmbH representative in your country, …your supplier, or... -
Page 11: Intended Use Of The Device
Safety 2.4 Intended use of the device The Knife Mill GM 200 is a laboratory device that has been designed for the grinding and homogenisation of soft to medium-hard materials. Dry materials and those containing water can similarly be processed, as can greasy, oily or fibrous materials. -
Page 12: Confirmation Form For The Managing Operator
Safety 2.6 Confirmation Form for the Managing Operator This manual contains essential instructions for operating and maintaining the device which must be strictly observed. It is essential that they be read by the user and by the qualified staff responsible for the device before the device is commissioned. This manual must be available and accessible at the place of use at all times. -
Page 13: Technical Data
Technical Data Technical Data 3.1 Protective Equipment This device is equipped with an automatic hood lock. The locking mechanism prevents the device from being started when in an unsafe state. The device can only be started when the hood is closed. ... -
Page 14: Electromagnetic Compatibility (Emc)
Technical Data Example 2: Container: Glass container with gravity lid Grinding body: Knife of stainless steel Feed material: Cheese (~ 20 x 20 mm) Feed quantity: 100 g Speed: 10 000 rpm At these operating conditions, the workplace related equivalent continuous sound level = 73.9 dB(A). -
Page 15: Receptacle Volume
Technical Data 3.9 Receptacle Volume The receptacle volume (feed volume) depends on the sample material and on the device configuration and setting. Feed volume: max. 700 ml 3.10 Feed Grain Size The feed grain size depends on the sample material and on the device configuration and setting. -
Page 16: Packaging, Transport And Installation
N5.0014 Complaints Incomplete delivery or transport damage The forwarding agent and Retsch GmbH must be notified immediately in the event of transport damage. It is otherwise possible that subsequent complaints will not be recognised. Please check the delivery on receipt of the device for its completeness and intactness. -
Page 17: Temperature Fluctuations And Condensation
Packaging, Transport and Installation 4.3 Temperature Fluctuations and Condensation NOTICE N6.0016 Damaged components due to condensation Temperature fluctuations The device may be exposed to substantial fluctuations in temperature during transport. The ensuing condensation can damage electronic components. Wait until the device has acclimatised before putting it into service. Temporary storage: Also in case of an interim storage the device must be stored dry and within the specified ambient temperature range. -
Page 18: Electrical Connection
Packaging, Transport and Installation 4.5 Electrical Connection WARNING W3.0015 Risk to life caused by an electric shock Connection to socket without a protective earth conductor Connecting the device to sockets without a protective earth conductor can lead to life-threatening injuries caused by an electric shock. ... -
Page 19: Type Plate Description
Packaging, Transport and Installation 4.6 Type Plate Description Fig. 1: Type plate 1 Device designation 2 Year of production 3 Part number 4 Serial number 5 Manufacturer’s address 6 CE marking 7 Disposal label 8 Bar code 9 Power version 10 Mains frequency 11 Capacity 12 Amperage... -
Page 20: First Commissioning
First Commissioning First Commissioning WARNING W4.0002 Danger to life through electric shock Damaged power cable Operating the device with a damaged power cable or plug can lead to life- threatening injuries caused by an electric shock. Before operating the device, check the power cable and plug for damage. -
Page 21: Operating The Device
Operating the Device Operating the Device CAUTION C6.0005 Risk of injury Potentially explosive atmosphere The device is not suitable for use in potentially explosive atmospheres. Operating the device in a potentially explosive atmosphere can lead to injuries caused by an explosion or fire. ... -
Page 22: Principle Of Operation
Operating the Device NOTICE N12.0007 Handling foodstuffs, pharmaceuticals and cosmetic products Products processed Foodstuffs, pharmaceuticals and cosmetic products that have been processed on the device may no longer be eaten, used or put into circulation,. Dispose of these substances according to applicable directives. NOTICE N13.0007 Range of application of the device... -
Page 23: Views Of The Device
Operating the Device 6.2 Views of the device 6.2.1 Front Fig. 2: Front view of the device Element Description Function Locking mechanism Keeps the device closed Operating controls with rotary Operation of the device knob Grinding container Container for the sample material Lid of the grinding container Closes the grinding container Knife insert... -
Page 24: Back
Operating the Device 6.2.2 Back Fig. 3: Rear view of the machine... -
Page 25: Switching On / Off
Retschbox 6.3 Switching On / Off Turn on the GM 200 with the mains switch (I) on the back side of the device. When the device is switched off, it is completely disconnected from the mains. 6.4 Opening and Closing of the Device 6.4.1 Opening... -
Page 26: Inserting The Grinding Container
An O-ring (OR) serves as a seal and fixation for the grinding container receptacle (MBA). When inserting the grinding container, ensure the correct seating of the O-ring in the groove of the motor shaft (MW). Grinding containers made of different materials are available for the GM 200 from Retsch GmbH. NOTICE... -
Page 27: Inserting The Knive Insert
Operating the Device 6.6 Inserting the Knive Insert CAUTION C11.0028 Risk of cuts Improper handling of the blade insert The blades on the blade insert are extremely sharp and may cause cuts if not handled properly. Always wear suitable protective gloves when touching the blades in the blade insert. -
Page 28: Filling The Grinding Container
Operating the Device 6.7 Filling the Grinding Container CAUTION C12.0039 Risk of cuts Sharp blade insert The blades in the blade insert are extremely sharp and may cause cuts if not handled properly. Wear protective gloves when handling the blades in the blade insert. ... -
Page 29: Closing The Grinding Container
(MB). Check the tight clamping of the standard lid on the grinding container. For the GM 200 various lids are available from the Retsch GmbH. The different lid-grinding container combinations allow for an optimum adjustment to the individual tasks. - Page 30 Gravity lid Standard lid with overflow channels Fig. 8: Lids for the GM 200 NOTICE The feed volume depends on the properties of the sample material or the lid used. Do not exceed the recommended feed volume listed in the following table!
-
Page 31: Controlling The Device
Controlling the Device Controlling the Device 7.1 Operating Controls, Displays and Functions Fig. 9: Control panel areas Element Description Function Navigation Selection of the operating modes "Manual", "Programme" and "Sequence". Access to the menu "Settings" Settings and display of Settings of grinding parameters and display of parameters parameters during the grinding process Device control... - Page 32 Controlling the Device B1.3 B1.2 B1.1 B2.2 B2.1 B2.3 B2.4 B3.1 B3.3 B3.2 Fig. 10: Control elements and functions Element Description Function B1.1 Programme settings Access to the programme settings B1.2 Sequence settings Access to the sequence settings B1.3 Settings Access to the settings B2.1 Speed...
-
Page 33: Operating Modes And Navigation
Controlling the Device 7.2 Operating Modes and Navigation The device can be operated entirely using the touchscreen. The operating software can be divided into three operating modes: Manual Programme Sequence 7.2.1 Navigation between Operating Modes Enter the desired grinding parameters in the control panel area of the settings (B2) to perform a manual grinding. - Page 34 Controlling the Device Fig. 11: Rotary knob Process time (B2.2): The process time indicates the total duration of the grinding process. Via the rotary knob, a process time between 0:01 and 3:00 (m:ss) can be set. The process time between 0:01 and 0:30 can be set in steps of 1 second, the process time between 0:30 and 3:00 in steps of 5 seconds.
-
Page 35: Activatable Or Deactivatable Parameters
Controlling the Device 7.3.2 Activatable or Deactivatable Parameters The following parameters can be activated or deactivated: Interval Direction of rotation In manual mode the parameters can be edited directly. In programme mode the parameters can only be changed, when the edit mode has been activated via the button (B3.4). -
Page 36: Manual Mode
Controlling the Device 7.4 Manual Mode In manual mode, the following grinding parameters can be edited directly: Speed Process time Direction of rotation Interval A detailed description of the parameter settings can be found in Chapter "Grinding Parameters". -
Page 37: Stop Process
Controlling the Device 7.4.2 Stop Process The grinding process is terminated automatically after the set process time has elapsed. However, the grinding process can be stopped manually at any time. Press the button to stop the grinding process. The hood opens automatically after the set process time has elapsed, or the grinding process has been stopped manually. - Page 38 Controlling the Device Press the button (B1.1) to change to the programme mode. The display changes to the current programme. The programme number is displayed next to the icon in the upper, left quadrant. To navigate ascending or descending through the programmes, wipe from right to left or from left to right, respectively over the display in the control panel area of the settings (B2).
-
Page 39: Edit A Programme
Controlling the Device 7.5.2 Edit a Programme B1.6 B1.5 B3.5 B3.7 Fig. 14: Editing a programme Press the button (B3.4) to edit the programme. Enter the desired grinding parameters. The process can be cancelled by pressing the button (B1.6). All settings are discarded. 7.5.3 Save a Programme ... -
Page 40: Sequence Mode
Controlling the Device 7.6 Sequence Mode For special grinding tasks, grinding sequences can be set in this mode. There are four sequence memory positions available. Each sequence consists of two consecutive, freely selectable parameter sets. Please refer to Chapter "Grinding Parameters"... -
Page 41: Edit A Sequence
Controlling the Device 7.6.2 Edit a Sequence B1.5 B3.5 B3.7 Fig. 16: Editing a sequence Press the button (B3.4) to edit the sequence. Enter the desired grinding parameters for the parameter sets A and B. The process can be cancelled by pressing the button (B1.6). -
Page 42: Settings
Controlling the Device 7.7 Settings The settings of the GM 200 can only be accessed from the manual mode. Press the button (B1.3). B1.5 Fig. 17: Settings B1.5 Fig. 18: Settings... -
Page 43: Myretsch
(B1.5). 7.7.1 myRetsch Section (E1) permits access to the myRetsch portal of Retsch GmbH by means of a QR code. This can be scanned in using a mobile phone with the corresponding software and an internet connection. It is then possible to obtain direct access to the website for the machine, which contains information such as tips and tricks for the GM 200. -
Page 44: Remote
Controlling the Device 7.7.2 Remote Selecting Section (E2) enables the machine to be controlled using a mobile phone, tablet or PC. Press Section (E2) to establish a remote connection. Once the remote connection has been established, control is exclusively using the mobile phone, tablet or PC. -
Page 45: Software Update
7.7.7 Service Environment Section (E8) provides access to the service environment. The service environment is only accessible to service technicians from Retsch GmbH. NOTICE If the service environment has been activated by pressing Section (E8), the USB interface (K) is activated and “On”... -
Page 46: Error Messages And Information Notes
Error Messages and Information Notes Error Messages and Information Notes 8.1 Error Messages Error messages inform the user about detected device or programme errors. In the event of an error message, a fault has occurred, in which the operation of the device or the programme is automatically interrupted. -
Page 47: Information Notes
Error Messages and Information Notes 8.2 Information Notes Notices inform the user on specific device or programme processes. The operation of the device or programme may be interrupted briefly, but there is no fault. The information notice must be acknowledged by the user to continue the process. Information notices provide additional information for the user as an aid, but do not represent any device or programme errors. -
Page 48: Return For Service And Maintenance
When returning a device, attach the return form to the outside of the packaging. In order to eliminate any health risk to the service technicians, Retsch GmbH reserves the right to refuse the acceptance and to return the respective delivery at the expense of the sender. -
Page 49: Cleaning, Wear And Maintenance
Improper repairs Unauthorised and improper repairs can cause injuries. Repairs to the device may only be carried out by the Retsch GmbH , an authorised representative or by qualified service technicians. Do not carry out any unauthorised or improper repairs to the device! 9.1 Cleaning... -
Page 50: Cleaning The Grinding Set
Cleaning, Wear and Maintenance Fig. 22: Cleaning the grinding container receptacle In case of frequent and heavy contamination of the grinding container receptacle (MBA) with liquid or greasy samples, sample material can get under the grinding container receptacle. Remove the O-ring (OR), which seals the grinding container receptacle. ... - Page 51 Cleaning, Wear and Maintenance Likewise, all existing sealing gaskets (of grinding sets and in the device) should be checked for wear regularly and replaced if necessary. V-ring sealing gasket on the motor shaft: Fig. 23: Checking the V-ring sealing gasket ...
-
Page 52: Maintenance
Cleaning, Wear and Maintenance 9.3 Maintenance The GM 200 is largely maintenance-free. In order to ensure the operational safety of the device, the locking mechanism (A) and the retaining bracket of the locking mechanism (FV) on the hood (F) should be checked and cleaned if necessary at each cleaning. -
Page 53: Accessories
Retsch GmbH homepage (http://www.retsch.com) under the heading "Downloads" of the device. Information on wear parts and small accessories can be found in the Retsch GmbH general catalogue also available on the homepage. In case of any questions concerning spare parts please contact the Retsch GmbH... -
Page 54: Disposal
Disposal 11 Disposal In the case of a disposal, the respective statutory requirements must be observed. In the following, information on the disposal of electrical and electronic devices in the European Community are given. Within the European Community the disposal of electrically operated devices is regulated by national provisions that are based on the EU Directive 2012/19/EU on Waste Electrical and Electronic Equipment (WEEE). -
Page 55: Index
Index 12 Index Emissions ............13 Equivalent continuous sound level ....13, 14 Accessories ............53 Error Activatable parameters ........35 E10 ..............46 Adjustable parameters ........33 E11 ..............46 Air vents .............. 25 E12 ..............46 Ambient temperature .......... 17 E20 .............. - Page 56 Index Opening ............. 25 Operating controls ........23, 31 Hearing loss ............13 Operating hours ..........44 Height..............14 Operating instructions ........12 with open hood ..........14 Operating mode Hood ............. 23, 25 change ............33 Housing fan ............25 manual ............
- Page 57 Index Safety Officer ............7 Technical data ............ 13 Sequence Temperature fluctuations ........17 deleting ............41 Temperature range ..........17 editing .............. 41 Temporary storage ..........17 saving .............. 41 Touchscreen ............33 selecting ............40 Transport ............16 Transport damage ..........
- Page 60 Copyright © Copyright by Retsch GmbH Retsch-Allee 1-5 42781 Haan Germany...
Need help?
Do you have a question about the GM 200 and is the answer not in the manual?
Questions and answers