
Related Manuals for Retsch PM200


Summary of Contents for Retsch PM200
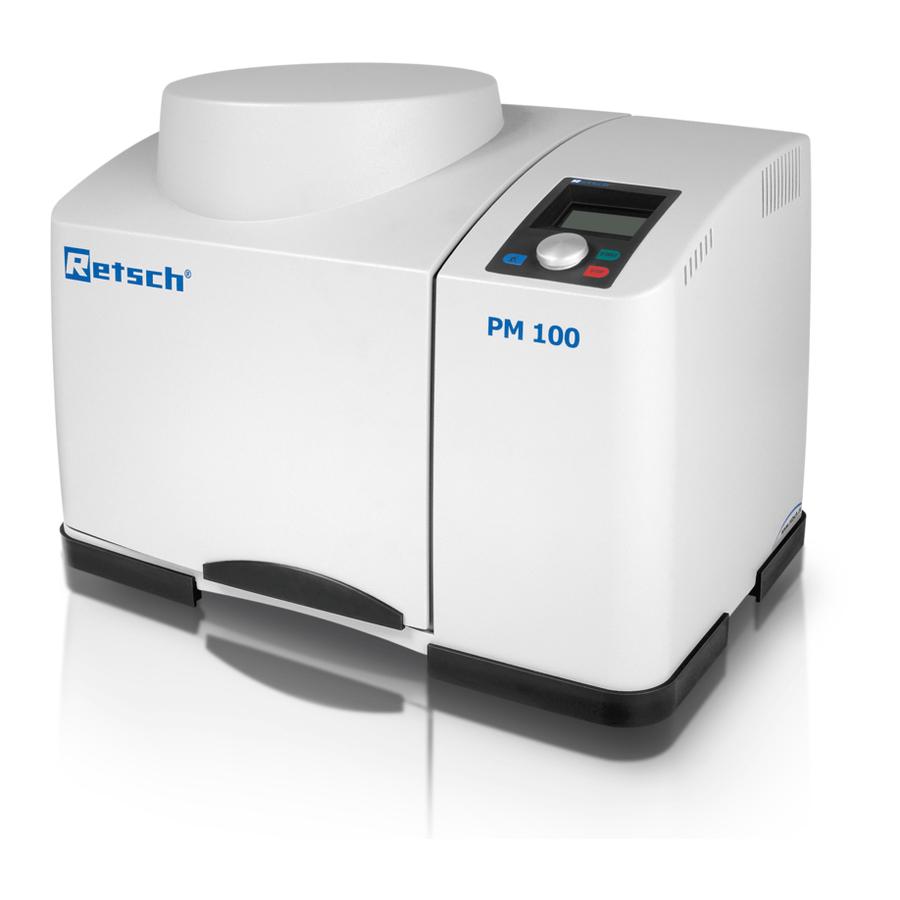
- Page 1 Operating Instructions Ball Mills Type PM100 / PM200 / PM100cm Retsch GmbH, 42781 Haan, Retsch-Alle 1-5, Germany, 10/31/2014 0006...
-
Page 2: Table Of Contents
Balancing – only required for the PM100 ........20 Balancing – only for PM 100 with additional balance weight ..20 Inserting and clamping grinding bowls in the PM200 ....21 Tightening and loosening the grinding bowl clamping fixture using the counter spanner ..........21 Safety instructions for starting the PM 200 ........ - Page 3 F01 to F12 ................... 34 F13 to F26 ................... 35 General points ..................36 Cleaning ..................36 Maintenance ................36 Parts subject to wear and tear............. 37 Copyright ..................38 Changes ..................38 Appendix ..............following pages Retsch GmbH...
-
Page 4: Information On These Operating Instructions
Each chapter is a self-contained unit. The operating instructions do not contain any repair instructions. Should repairs ever become necessary, please contact your supplier or talk directly to Retsch GmbH. http://www.retsch.de Warnings The following signs are used to warn of hazards:... -
Page 5: Safety
Safety The PM100/200 is a modern, high-performance product manufactured by Retsch GmbH. It incorporates the latest technology. The machine is entirely safe in its operation when used for the intended purpose and in accordance with the present technical documentation. Safety instructions... - Page 6 Scope of supply If the shipment is incomplete and / or has suffered transport damage, you must notify the forwarder and Retsch GmbH immediately (within 24 hours). Under certain circumstances, claims lodged at a later date may not be considered valid.
-
Page 7: Safety Directives Summarised, Part 2
(increased wear and tear). Stacking 50ml grinding bowls of type "C" It is not possible to stack 50ml grinding bowls in the PM200. Heating the grinding bowls Please take the action necessary - depending on how dangerous the material you are grinding is - to ensure that people are not exposed to danger. -
Page 8: Confirmation
Confirmation I have read and understood the chapters Foreword and Safety. __________________________________ Signature of operator/owner __________________________________ Signature of service technician Retsch GmbH... -
Page 9: Technical Specifications
In the PM100 1x of 50-500ml, 2x50ml, 2x25ml and 2x12ml can be stacked. In the PM200 the 12ml and 25ml grinding bowls can be stacked but the 50ml and 125ml are not stackable. They are not designed as production machines, but rather as laboratory devices intended for single-shift, 8-hour operation. -
Page 10: Protective Equipment
Device dimensions Height: Up to approx. 835 mm / Width: 630 mm / Depth : Up to approx. 505 mm Weight : PM100 net approx. 86 kg / PM200 net approx. 80 kg Base area required 630 mm x 505 mm;... -
Page 11: Transport And Assembly
4 people are required to carry the device. Only place the PM100 or PM200 on a stable laboratory bench, as they might otherwise be subjected to disagreeable vibrations. The table base must be clean and skid-resistant. -
Page 12: Requirements For The Assembly Site
1. Electrical connections must use PE conductors ! 2. A frequency converter is fitted to the drive unit of your PM100 / PM200. In order to fulfil the EMV directive, this is equipped with a mains filter and screened cables to the motor. If your mains power... -
Page 13: Serial Interfaces
Interface to update the software Inactive interface for optional data communication with an external device. Software update required. The interface cables may not be longer than 2.5 m. Longer cables can cause faults in the transmission of data. Retsch GmbH... -
Page 14: Operation
Operation Connect the power Ensure that the voltage and frequency of your mains power supply agree with the data plate of the PM100 or PM200. Plug the power cable into the socket at the rear of the device ... - Page 15 Emergency unlocking A key is fixed underneath the unit. This can be used to open the PM100 or PM200 manually in case of a power failure. Lift the unit Remove key S (I) Insert the (S) key into the (O) opening on the right-hand side.
-
Page 16: Inserting And Clamping Grinding Bowls In The Pm100
Milling cup can be ejected, danger of injury and damage to equipment. Wear of safety slider In case of wear at the screws and/or slits as well as an substantially increased play of the safety slider, it should be replaced. (See chapter on wearing parts) Retsch GmbH... -
Page 17: Removing The Grinding Bowl Fastening Device In The Pm100
Tightening and unscrewing the grinding bowl fastening device using a counter spanner Using a counter spanner prevents the drive from turning, which can otherwise easily occur when tightening or loosening the grinding bowl. Retsch GmbH... -
Page 18: Safety Instructions For Starting The Pm 100
4 is in contact with the counter spanner 6. Easy tightening or loosening is then possible. For the PM200 the counter spanner 6 must be turned 180° and inserted when the grinding bowl fastening device is in the highest lock-in position. - Page 19 Make sure the grinding bowl is clamped before you start the machine. The grinding bowl can be hurled out, risk of injury and damage to property! Our recommendation is that you do not hide the safety instruction. Retsch GmbH...
-
Page 20: Balancing - Only Required For The Pm100
Example: If the grinding bowl weighs 8.2 kg the counterweight must be set to a scale reading of 7.2 kg. Note: When using light (small) grinding bowls the additional weight must be removed again. Retsch GmbH... -
Page 21: Inserting And Clamping Grinding Bowls In The Pm200
Inserting and clamping grinding bowls in the PM200 Only operate the PM200 with grinding bowls up to a maximum nominal volume of 125ml. In order to avoid unpleasant vibrations, 2 grinding bowls with the same gross weight must always be inserted. -
Page 22: Safety Instructions For Starting The Pm 200
Danger of being hurled out! Only use grinding bowls of type "C" and only up to a nominal volume of 125ml The PM200 will otherwise be overloaded and mechanical components could be damaged! Retsch GmbH... -
Page 23: Suitable Grinding Bowls For The Pm100
It is also possible to stack milling cups with a capacity of less than 50 ml one on top of the other. Stacking procedure Place milling cup M2 on milling cup M1 Clamp milling cups as described in the section “Clamping the milling cups”. Retsch GmbH... -
Page 24: Suitable Grinding Bowls For The Pm200
(increased wear and tear). Stacking 50ml grinding bowls of type "C" It is not possible to stack 50ml grinding bowls in the PM200. Handling grinding bowls of type "C" Carrying and holding The gripping edges X on the grinding bowl itself and its cover provide secure handling. -
Page 25: Grinding Bowl Identification
In dry milling processes an improved fineness of milling can be achieved by the addition of a few drops of stearic or acetic acid, and use of milling balls with a diameter < 10 mm and a filling level of 70-80% of the milling cup volume. Retsch GmbH... -
Page 26: Use Of The Closing Device For Milling Cups
For wet milling in milling cups with material inserts do not use old closing devices which clamp only the gripping edges of the milling cups. The material inserts can be pressed out by possible internal pressure. Retsch GmbH... -
Page 27: Operation Via The Pm100/200 Display Unit
Reverse rotation switched on Program mode – Store parameters Program mode – Edit program Program mode – Delete program Opening mechanism off Alarm off °C Motor or frequency converter too hot °C Retsch GmbH... -
Page 28: Menu Structure Of The Display Unit
Adjust parameters in opened menu items (see Press 1) Press 1 Selected menu items are opened Press 2 A short press confirms the adjustment of the parameters Press 3 Return to the 1 level menu by continuously pressing the button. Retsch GmbH... -
Page 29: Adjustment Options Via The Display Menu
The PM100/200 is started at the pre-selected grinding time and a speed of 100 rpm. Reverse rotation with interval break is not switched on Speed 100 to 650 rpm The PM100/200 is started at the pre-selected grinding time and speed. Reverse rotation with interval break is not switched on Retsch GmbH... -
Page 30: Interval
Select the grinding program to be deleted by turning the setting button and confirm by pressing. You can now choose between "Delete program" or "Cancel" You are then returned to the program mode level. Retsch GmbH... -
Page 31: Start Time
Set the balancing weight accordingly. Then change to the sub-menu: DETERMINE IDLING ENERGY Clamp the grinding bowl securely into the machine, but still without the material to be ground and the grinding media. Retsch GmbH... -
Page 32: Alarm
The version of the operating software can be called up and updated as required. If necessary, get in touch with your Retsch distributor. Should you have reached this menu by mistake and cannot return to the previous menu, switch the device off at the main switch and re-start it. -
Page 33: Contrast / Brightness
The stand-by monitor disappears after a key is pressed or the setting button activated without executing the command issued. Should you be in a sub-menu when the stand-by monitor is activated, you will be returned automatically to this selection window. The stand-by monitor cannot be adjusted, it therefore cannot be switched off. Retsch GmbH... -
Page 34: Error Messages On The Display
Faulty motor Please select control grinding time Service required! The display shows The display shows Cooling fan is off Sun wheel does not rotate Service required! Service required! The display shows Sun wheel rotate to slow Service required! Retsch GmbH... -
Page 35: F13 To F26
Please rebalance Service required! The display shows The display shows Parameters OK? Frequency converter START = Machine START has overheated STOP = Check No START possible Allow to cool down Retsch GmbH... -
Page 36: General Points
It may not be less than 7.5 mm for the PM100. It may not be less than 5.5 mm for the PM200. The heights H1 of the latching brackets should be checked for wear from time to time, although at the latest every month. -
Page 37: Parts Subject To Wear And Tear
Parts subject to wear and tear The operating instructions do not contain any repair instructions. In the interests of your own safety, repairs should only be performed by Retsch GmbH, an authorised representative or by Retsch service technicians. Spider with pressure piece PM100 Art. -
Page 38: Copyright
PM 100: 22.623.0010 PM 200: 22.623.0011 Copyright Reproducing or distributing this documentation, or utilizing and distributing the contents is not permitted unless Retsch GmbH has given express permission to do so. Violations against this are subject to claims for damages Changes Technical changes are reserved. - Page 41 The CE-conformity of the Retsch Planetary Ball Mills Type PM 100 and PM 200 is assured herewith. In case of a modification to the machine not previously agreed with us as well as the use of not licensed spare parts and accessories this certificate will lose its validity.
- Page 44 Copyright ® Copyright by Retsch GmbH Haan, Retsch-Allee 1-5 D-42781 Haan Federal Republic of Germany...
Need help?
Do you have a question about the PM200 and is the answer not in the manual?
Questions and answers