Table of Contents
Advertisement
Advertisement
Table of Contents

Related Manuals for Nilfisk-Advance SC3500


Summary of Contents for Nilfisk-Advance SC3500
- Page 1 04/2019 REV B Form No. VR38003...
-
Page 2: Table Of Contents
USER MANUAL ENGLISH TABLE OF CONTENTS ITRODUCTION ............................. 2 MANUAL CONTENT AND PURPOSE ........................2 HOW TO KEEP THIS MANUAL ..........................2 DECLARATION OF CONFORMITY..........................2 ACCESSORIES AND MAINTENANCE ........................2 CHANGES AND IMPROVEMENTS ..........................2 SCOPE OF APPLICATION ............................2 MACHINE IDENTIFICATION DATA........................... -
Page 3: Itroduction
USER MANUAL ENGLISH ITRODUCTION NOTE The numbers in brackets refer to the components shown in Machine Description chapter. MANUAL CONTENT AND PURPOSE The purpose of this Instruction for Use Manual is to provide the operator with necessary information to use the machine properly and safely. -
Page 4: Transport And Unpacking
USER MANUAL ENGLISH TRANSPORT AND UNPACKING When the carrier delivers the machine, make sure the packaging and machine are both whole and undamaged. If any damaged, make the carrier know the damage and before accepting the goods, reserve the right in compensation of the damage. -
Page 5: General Safety Instruction
USER MANUAL ENGLISH GENERAL SAFETY INSTRUCTION Specific warnings and cautions to inform about potential damages to people and machine are shown below. DANGER! This machine must be operated by trained and authorized personnel according to guidance of the manual. Before performing any cleaning, maintenance, repair or replacement procedure, read all the instructions carefully, ensure to turn the machine OFF and disconnect the battery connector. - Page 6 USER MANUAL ENGLISH Do not bump into shelves or scaffoldings, especially where there is a risk of falling objects. Do not lean liquid containers on the machine, use the relevant can holder. To avoid damaging the floor, do not allow the brush/pad to operate while the machine is stationary. In case of fire, use a dry powder fire extinguisher.
-
Page 7: Machine Description
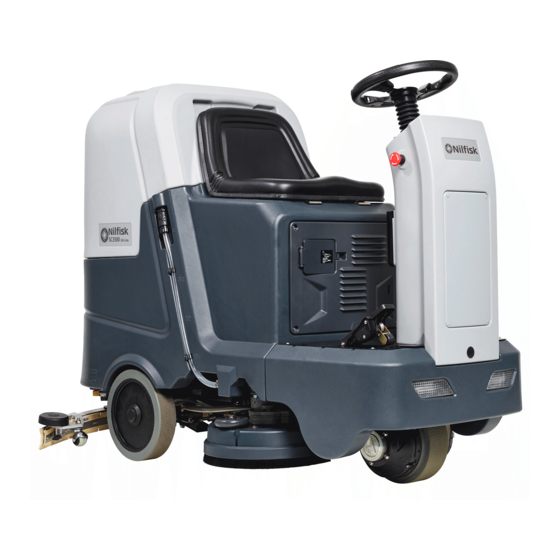
USER MANUAL ENGLISH MACHINE DESCRIPTION MACHINE STRUCTURE (as shown in Figure 1) Figure 1 1. Steering wheel 16. Warning light (*) 2. Seat cushion 17. Recovery tank drain hose 3. Recovery tank cover 18. Tank 4. Utility caddy (*) 19. Squeegee adjustment knob 5. -
Page 8: Control Panel
USER MANUAL ENGLISH MACHINE DESCRIPTION CONTROL PANEL (as shown in Figure 2) Figure 2 30. LCD screen 43. Charger plug cover 31. Speed controller light 44. Vacuum motor overload protector 32. Detergent flow control knob (*) 45. Drive motor overload protector 33. -
Page 9: Technical Parameters
USER MANUAL ENGLISH NOTE In the process of charging, if the yellow light (52) is on, it may be caused by: Battery and charger doesn’t match, battery is not connected well, or output is short-circuited. The red light of charger flashing may be caused by the charger internal short circuit. MACHINE DESCRIPTION TECHNICAL PARAMETERS Technical Specification... -
Page 10: Circuit Diagram
USER MANUAL ENGLISH CIRCUIT DIAGRAM... -
Page 11: Operating Guide
USER MANUAL ENGLISH OPERATING GUIDE WARNING! On some points of the machine there are some adhesive plates indicating: — DANGER! — WARNING! — CAUTION! — CONSULTATION While reading this Manual, the operator must pay particular attention to the symbols shown on the plates. Do not cover these plates for any reason and immediately replace them if damaged. -
Page 12: Battery Installation And Battery Type Setting (Wet Or Gel Or Agm Or Dis-Ev)
USER MANUAL ENGLISH BATTERY INSTALLATION AND BATTERY TYPE SETTING (WET OR GEL OR AGM OR DIS-EV) Set the electronic circuit board of the machine and battery charger according to battery types (WET or GEL or AGM or DIS-EV) following steps below: Turn off the machine. -
Page 13: Battery Mode Set Up Method Of The Charger
USER MANUAL ENGLISH BATTERY MODE SET UP METHOD OF THE CHARGER Do not to set charger unless you have professional training Turn off the machine and disassemble the control cover SW 1 (A as Figure 6) from the machine. Then pry open the label on the charger cover (B as Figure 6). -
Page 14: Squeegee Installation And Adjustment
USER MANUAL ENGLISH CAUTION! Rotate the speed adjusting knob (41 as Figure 2) to the minimum speed before depressing accelerate pedal (26 as Figure 1) to avoid the machine running too quickly when it is started. Make sure the brush/pad is installed correctly before machine operating. SQUEEGEE INSTALLATION AND ADJUSTMENT 1. -
Page 15: Drive Motor Inspection
USER MANUAL ENGLISH Carefully overturn the recovery tank (F, Figure 10). Open the cap (I Figure 10). Replace or fill the jug (H Figure 10) with any standard gallon container of detergent suitable for the work to be per formed (highly concentrated detergents). Do not fill the detergent tank completely, leave a few centimeters from the edge. -
Page 16: Machine Operation (Scrubbing And Drying)
USER MANUAL ENGLISH Depress the accelerate pedal (N Figure 12), operate the machine forward or backward by steering wheel (L Figure 12) together with forward-backward switch (I Figure 12), you can adjust speed by 100% speed adjusting knob (F Figure 12). Adjust solution flow by solution adjusting button (G Figure 12) base on cleaning requirement. -
Page 17: Detergent Amount Adjustment
USER MANUAL ENGLISH DETERGENT AMOUNT ADJUSTMENT 0.4% 0.75% 2.5% 1.5% (Only for machine with Chemical System) With the same detergent amouont, solution concentration can be changed by adjusting water flow through water flow adjusting buttons (C, D, Figure 14). Twist the rotary knob (B, Figure14) by clockwise or anti- closewise to increase or reduce the detergent amount. -
Page 18: Recovery Tank Emptying
USER MANUAL ENGLISH RECOVERY TANK EMPTYING When the red LCD (C, Figure 15) turns on indicates the recovery tank (A, Figure 16) is full, the vacuum motor stops work to dry the floor, please empty the recovery tank as flowing steps: Turn off the brush system and vacuum system, lift up squeegee and brushes. -
Page 19: Maintenance
USER MANUAL ENGLISH MAINTENANCE WARNING! Maintenance procedures must be performed after the machine is turned off and the battery charger cable is disconnected. In addition, carefully read the safety chapters in the guide. All scheduled or extraordinary maintenance procedures must be performed by qualified personnel or an authorized Service Center. -
Page 20: Battery Charging
USER MANUAL ENGLISH BATTERY CHARGING NOTE Re-charge the batteries when there is only two or less two rectangular show at the right bottom LCD screen (A, Figure18), or after every time cleaning work. CAUTION Always keep the battery in a state of charged can extend its lifetime. -
Page 21: Brush/Pad Cleaning
USER MANUAL ENGLISH Use on-board charger for battery charging Open the protection cover (E, Figure19), connect the charger connector (A, Figure 19) to the main power supply, all machine functions are shut off. The red LED (D, Figure 19) turns on means the charging is ongoing. The batteries are fully charged when the green LED (C) becomes on. -
Page 22: Squeegee Cleaning
USER MANUAL ENGLISH SQUEEGEE CLEANING NOTE The squeegee must be clean and its blades must be in good conditions in order to get good drying. CAUTION It is advisable to wear protective gloves when cleaning the squeegee because there may be sharp debris. -
Page 23: Squeegee Blade Check And Replacement
USER MANUAL ENGLISH SQUEEGEE BLADE CHECK AND REPLACEMENT Clean the steel or the aluminum squeegee, as shown in the previous paragraph. Check that the edges (E, Figure 23) of the front blade (C) and the edges (F) of the rear blade (D) lay down on the same level, along with their length;... -
Page 24: Tank And Debris Collection Box Cleaning, And Cover Gasket Check
USER MANUAL ENGLISH TANK AND DEBRIS COLLECTION BOX CLEANING, AND COVER GASKET CHECK Drive the machine on a level floor. Ensure the machine is off and the ignition key (40) has been removed. Turn the recovery tank lid (A, Figure 25) 90 degree position where it can be took off from the tank, and then take down the Debris collection box (D, E Figure 25) from the tank. -
Page 25: Machine Working Hour Check
USER MANUAL ENGLISH MACHINE WORKING HOUR CHECK Turn the ignition key (A, Figure 27) to "I". 100% Press the switch (B Figure 27), the hour meter (C Figure 27) be- gins to work and it at the same time shows the total number of working hours (scrubbing/drying) performed by the machine. -
Page 26: Accessories/Options
USER MANUAL ENGLISH ACCESSORIES/OPTIONS In addition to the standard components, the machine can be equipped with the following accessories/options, according to the machine specific use. For further information concerning the above mentioned optional accessories, contact an authorized retailer. Accessories/Options See “Parts List” section WET or GEL/AGM batteries Mop and trash kit Pads of different materials... -
Page 27: Scrapping
USER MANUAL ENGLISH DRIVE MOTOR ERROR INDICATOR INFORMATION LED CODES FAULT POSSIBLE CAUSE 1. Temperature >80°C or < -10°C. 2. Excessive load on vehicle. ¤ ¤ THERMAL FAULT 3. Operation in extreme environments. 4. Electromagnetic brake not releasing. 1. Throttle input wire open or shorted. ¤... - Page 28 USER MANUAL ENGLISH Machine material composition and recyclability Type Recyclable percentage Weight% Aluminium 100 % Electric motors - various Ferrous materials 100 % Wiring harness Liquids 100 % Plastic - non-recyclable material Plastic - recyclable material 100 % Polyethylene Rubber...
- Page 29 Nilfisk A/S Kornmarksvej 1 DK-2605 Broendby Denmark Tel: +45 43 23 81 00 Fax: +45 43 43 77 00 www.nilfisk.com...
Need help?
Do you have a question about the SC3500 and is the answer not in the manual?
Questions and answers