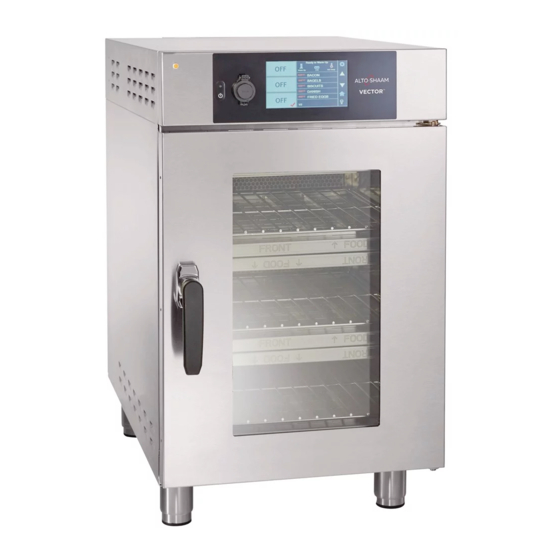
Alto-Shaam Vector VMC-H2 Operator's Manual
Multi-cook oven
Hide thumbs
Also See for Vector VMC-H2:
- Service manual (138 pages) ,
- Operator's manual (116 pages) ,
- Operator's manual (104 pages)
Table of Contents
Advertisement
Quick Links
See also:
Service Manual
Advertisement
Table of Contents

Related Manuals for Alto-Shaam Vector VMC-H2


Summary of Contents for Alto-Shaam Vector VMC-H2
- Page 1 Operator’s Manual Vector™ Multi-Cook Oven Deluxe Control VMC-H2 VMC-H2H VMC-H3 VMC-H3H VMC-H4 VMC-H4H Structured Air Technology™ MN-46295-EN REV.01 11/19 alto-shaam.com...
-
Page 2: Manufacturer's Information
© Copyright 11/19 by Alto-Shaam, Inc. All rights reserved. This manual or any portion thereof may not be reproduced or used in any manner whatsoever without the express written permission of Alto-Shaam, Inc. Trademarks All trademarks referenced in this documentation are the property of their respective owners. -
Page 3: Foreword
OREWORD Enjoy your Alto-Shaam Vector Oven! Structured Air The Alto-Shaam Vector Oven features Structured Air Technology, giving you two, Technology™ three or four ovens in one. It gives you the flexibility to simultaneously cook a variety of menu items with no flavor transfer. It provides the ability to control temperature, fan speed, and time in each individual oven chamber. - Page 4 OREWORD This page intentionally left blank. Ve ct o r H™ Se r i es Op e ra to r ’ s Ma n u al MN- 4 62 9 5 Re v 1 1 1/ 1 9 ▪ ▪ ▪...
-
Page 5: Table Of Contents
Foreword Enjoy your Alto-Shaam Vector Oven! ....3 Extend Your Manufacturer’s Warranty ....3 Alto-Shaam 24/7 Emergency Repair Service . - Page 6 Cheflinc.alto-shaam.com is not Available on your Device ..80 Cannot Connect to cheflinc.alto-shaam.com ....81 The Oven is not Displayed on the Dashboard ....82...
-
Page 7: Safety
AFETY The Meaning of Signal Words This manual contains signal words where needed. These signal words must be obeyed to reduce the risk of death, personal injury, or equipment damage. The meaning of these signal words is explained below. DANGER Danger indicates a hazardous situation which, if not avoided, will result in serious injury or death. -
Page 8: Appliance Description And Intended Use
AFETY Appliance Description and Intended Use Structured Air Alto-Shaam Vector’s Structured Air Technology system allows for multiple, Technology™ unique cooking chambers within the same oven. Air is delivered by a blower located in the rear of each cooking chamber. Air travels vertically through the jet plates into each chamber. -
Page 9: Safety Precautions
AFETY Safety Precautions Before you begin Read and understand all instructions in this manual. Electrical precautions Obey these electrical precautions when using the appliance: ▪ Connect the appliance to a properly grounded outlet. Do not use the appliance if it is not properly grounded. Consult an electrician if there is any doubt that the outlet used is properly grounded. - Page 10 Only trained personnel are permitted to service or repair the appliance. Repairs that are not performed by an authorized service partner or trained technician, or appliance the use of non-factory parts, will void the warranty and relieve Alto-Shaam of all liability. ▪...
- Page 11 AFETY Personal Protective Wear the following Personal Protective Equipment (PPE) while cleaning the Equipment (PPE) appliance: ▪ Protective gloves ▪ Protective clothing ▪ Eye protection ▪ Face protection Ve ct or H™ Se r i es Op e ra to r ’ s Ma n u al M N- 46 2 9 5 Re v 1 1 1/ 1 9...
- Page 12 AFETY This page intentionally left blank. Ve ct o r H™ Se r i es Op e ra to r ’ s Ma n u al MN- 4 62 9 5 Re v 1 1 1/ 1 9 ▪ ▪ ▪...
-
Page 13: Labels
ABELS Label Locations j klmn VMC-PHD-006220 Ve ct or H™ Se r i es Op e ra to r ’ s Ma n u al M N- 46 2 9 5 Re v 1 1 1/ 1 9 ▪ ▪ ▪... - Page 14 51mm 51mm 51mm LA-38994 Every Alto-Shaam product is precision calibrated prior to release from the factory to ensure accurate temperature control. Ve ct o r H™ Se r i es Op e ra to r ’ s Ma n u al...
- Page 15 ABELS WARNING Hot surface Made in U.S.A. WARNING WARNING / ADVERTENCIA / AVERTISSEMENT Burn hazard Burn hazard. Always load liquids, or foods that can become liquid when heated, at an eye level where they can be seen. Peligro de quemaduras. Siempre coloque líquidos, o alimentos que Always load liquids, or foods that can become liquid se puedan volver líquidos cuando se calientan, a nivel de los ojos donde se puedan ver.
- Page 16 ABELS Line 3 supply terminal LA-36443-L3 Neutral LA-36443-N Ground terminal LA-36443-G Equipotential terminal LA-36443-E Press and release the high limit temperature reset button(s). VMC-H2, VMC-H3, VMC-H4 VMC-F3, VMC-F4 VMC-H2H, VMC-H3H, VMC-H4H LA-39715 Ve ct o r H™ Se r i es Op e ra to r ’...
-
Page 17: Installation
NSTALLATION Dimension Drawings VMC-H2: 37-1/2" (953mm) H2, H3, H4: 54-3/8" (1382mm) VMC-H2H: 39-1/2" (1003mm) H2H, H3H, H4H: 56-3/8" (1432mm) 21-1/2" VMC-H2: 34-11/16" (882mm) 19-9/16" (546mm) (498mm) VMC-H2H: 36-11/16" (932mm) 14-11/16" (373mm) 3-3/4" electrical connection (94 mm) electrical connection 4-5/16" (109mm) 16-3/8"... -
Page 18: How To Receive The Appliance
Alto-Shaam policy It is the policy of Alto-Shaam to assist customers in collecting claims that have been properly filed and actively pursued. Alto-Shaam cannot, however, file damage claims, assume the responsibilities for damage claims, or accept deductions in payment for damage claims. -
Page 19: How To Unpack The Oven
Examine the appliance for damage. If the appliance has been damaged, do not use the appliance until it has been inspected by an authorized service provider. Contact your carrier or Alto-Shaam customer service. Remove the shrink wrap. the restraining straps. -
Page 20: Vector Pre-Installation Checklist
NSTALLATION Vector Pre-Installation Checklist Installation of the oven is to be completed only by an authorized Alto-Shaam service partner. Place this form with the oven’s records. WARNING: Electric shock and arc flash hazard. Use caution when measuring line voltage and line current. - Page 21 NSTALLATION Continued from previous page Electrical Alto-Shaam oven ratings Breaker: Voltage: Phase: The following fields must be completed by the service technician on site. What is the measured voltage at the site? L1-N: L2-N: L3-N: L1-L2: L2-3: L1-L3: Pass Fail...
- Page 22 NSTALLATION Continued from previous page Other site information Is there a proper ventilation hood installed above where the oven(s) will be installed? Pass Fail (If required) Does the designated location for the oven have a level surface, i.e., no more than 1.5” Pass Fail (38mm) change in elevation from its highest to lowest surface point?
- Page 23 On-site manager should make the necessary contacts to move forward with these changes as soon as possible. If there are any questions, please contact Alto-Shaam Technical Service Department at 800-558- 8744 ext. 6702. Or, review documentation regarding the equipment www.alto-shaam.com/en/resource-library.
-
Page 24: Installation Checklist
NSTALLATION Installation Checklist Installation of the oven is to be completed only by an authorized Alto-Shaam service partner. Place this form with the oven’s records. WARNING: Electric shock and arc flash hazard. Use caution when measuring line voltage and line current. - Page 25 NSTALLATION Continued from previous page Electrical: Record Measure the voltage at the wall outlet. L1 to L2: L1 to L3: L2 to L3: Measure the voltage at the oven’s main disconnect switch. L1 to L2: L1 to L3: L2 to L3: Measure the voltage at the oven’s main terminal block.
-
Page 26: How To Install The Oven (60 Hz Cord And Plug Models)
NSTALLATION How to Install the Oven (60 Hz Cord and Plug Models) Before you begin Make sure you have: ▪ An appropriate lifting device, and enough personnel, to safely move and position the weight of the oven. VMC-H2/H2H: 213 lb (97 kg) □... - Page 27 NSTALLATION Continued from previous page Position the oven To position the oven, do the following. Step Action Make sure that: The location where the oven is being installed is rated to support the ▪ weight of the oven; The oven is within five feet (1.5m) of the appropriate electrical outlet; ▪...
- Page 28 NSTALLATION Continued from previous page Connect power To connect electric power to the oven, do the following. the main disconnect switch to the OFF position. VMC-TS-006236 Connect the plug to the electrical outlet. NEMA 6-50P NEMA 15-50P NEMA 6-30P VMC-TS-000318 Press reset button(s) Press and release the high limit temperature reset button(s)
-
Page 29: How To Install The Oven (60 Hz Models Without Cords Or Plugs)
NSTALLATION How to Install the Oven (60 Hz Models Without Cords or Plugs) Before you begin Make sure you have: ▪ Appropriate cord and plug. See local codes and regulations. ▪ Screwdriver (Phillips #2) ▪ Nut driver (1/4-inch) ▪ An appropriate lifting device, and enough personnel, to safely move and position the weight of the oven. - Page 30 NSTALLATION Continued from previous page Position the oven To position the oven, do the following. Step Action Make sure that: The location where the oven is being installed is rated to support the ▪ weight of the oven, The oven is within five feet of the appropriate electrical outlet, ▪...
- Page 31 NSTALLATION Continued from previous page Connect the wiring To connect the wiring, do the following. Remove the pivot screws. Remove the top cover WARNING: Electric shock hazard. Make sure the supply cord is not connected to a power supply. VMC-TS-007943 Remove the bottom 3 screws from the mounting bracket.
- Page 32 NSTALLATION Continued from previous page Connect the supply cord to the appropriate terminals (L1, L2, L3, etc.) in accordance with local codes and regulations. VMC-H2 VMC-H2H VMC-H3 VMC-H3H VMC-TS-001821 VMC-H3 VMC-H3H VMC-H4 VMC-H4H VMC-TS-001825 Continued on next page Ve ct o r H™ Se r i es Op e ra to r ’...
- Page 33 NSTALLATION Continued from previous page Install the ground wire Adjust the cord length. Tighten the cord grip sealing nut onto the supply cord. VMC-TS-001829 Re-install the main disconnect switch. Re-install the mounting bracket. Re-install the top cover. Press reset button(s) Press and release the high limit temperature reset button(s) Remove...
-
Page 34: How To Install The Oven (50 Hz Models Without Cords Or Plugs)
NSTALLATION How to Install the Oven (50 Hz Models Without Cords or Plugs) Before you begin Make sure you have: ▪ Appropriate cord and plug, minimum oil resistant HO7RN-F. See local codes and regulations. ▪ Screwdriver (Phillips #2) ▪ Nut driver (1/4-inch) ▪... - Page 35 NSTALLATION Wire sizes 60335-1 IEC:2010 Rated current of appliance Nominal cross-sectional area >0.2 – ≤3 >3 – ≤0 0.75 >6 – ≤10 >10 – ≤16 >16 – ≤25 >25 – ≤32 >32 – ≤40 >40 – ≤63 Position the oven To position the oven, do the following.
- Page 36 NSTALLATION Continued from previous page Level the oven To level the oven, do the following. Check the level of the oven using a spirit (bubble) level. Check front to back and side to side. VMC-TS-007501 Adjust the legs, if necessary, to achieve levelness. The oven is now level.
- Page 37 NSTALLATION Continued from previous page Remove the bottom 3 screws from the mounting bracket. Remove the main disconnect switch from the mounting bracket. VMC-TS-001815 Install the cord through the cord grip Install the cord and cord grip into the oven. Install the lock nut onto the cord grip.
- Page 38 NSTALLATION Continued from previous page Install the ground wire Leave an extra loop so that current-carrying conductors become taut before the ground wire if the cord is accidentally pulled. Follow applicable regulations. Tighten the cord grip sealing nut onto the supply cord. VMC-TS-002875 VMC-TS-007997 ...
- Page 39 Continued from previous page Press reset button(s) Press and release the high limit temperature reset button(s) Remove the tag VMC-H2, VMC-H3, VMC-H4 VMC-H2H, VMC-H3H, VMC-H4H LA-39715 VMC-TS-007954 Result The oven is now installed.
-
Page 40: How To Install The Oven On A Stand
NSTALLATION How to Install the Oven on a Stand Before you begin Make sure you have: ▪ The appropriate stand for your oven ▪ Regulation UL 197, 91.8 ▪ An appropriate lifting device, and enough personnel, to safely move and position the weight of the oven. - Page 41 NSTALLATION Continued from previous page Install wheels on To install the casters on the lower oven, do the following. lower oven Attach each caster with fasteners as shown. VMC-TS-008006 Level the unit as necessary. To do so, screw the wheel up or down until the unit is level.
-
Page 42: How To View And Set Up Network Connections
NSTALLATION How to View and Set up Network Connections ▪ Before you begin The facility must have WIFI. ▪ Do not connect to a guest network. Procedure To set up WIFI, do the following. Step Action Touch the menu icon . - Page 43 NSTALLATION Continued from previous page Scroll to the SSID and IP address. Touch the SSID > icon AS-TS-008283 The available networks will show on the screen. The color of the network icon indicates the strength of the signal for each network. Green = strong Red = weak If the network to be used is not displayed, continue with step 5.
- Page 44 NSTALLATION Continued from previous page Touch the box for the network to be used. The box will turn green with a Touch small check mark. the check mark AS-TS-008292 Enter your network password, then touch the check mark . The connection type WIFI screen is displayed.
-
Page 45: Operation
PERATION How to Turn On and Turn Off the Oven Before you begin The oven must be connected to electric power. Turning on the oven To turn on the oven, do the following. Step Action the main disconnect switch to the ON position. Touch the ON/OFF button ... -
Page 46: How To Preheat The Oven
PERATION How to Preheat the Oven Before you begin Make sure: ▪ The oven is turned on. ▪ The oven door is closed. Procedure To preheat the oven, do the following. Step Action Touch the menu icon . The menu screen displays. VMC-TS-006259 Touch the Settings icon... - Page 47 PERATION Continued from previous page Touch the check mark to save the preheat temperature settings. Touch the manual cook icon to return to the manual cook screen. VMC-TS-006271 Touch the preheat icon . The preheat all chambers confirmation screen displays. Touch Preheat .
-
Page 48: How To Cook With Programmed Recipes
PERATION How to Cook with Programmed Recipes Before you begin Make sure: ▪ The oven is preheated. ▪ Your food is prepared and ready to cook. Procedure To cook using a programmed recipe, do the following. Step Action Touch the recipes icon . - Page 49 PERATION During the cooking The cooking status screen displays the details on the current cook setting. process VMC-TS-006650 During the cooking process: Action Result Touch the hand icon when to continue the cooking process. action is required, Touch the chamber, to show the recipe details.
-
Page 50: How To Cook In Manual Mode
PERATION How to Cook in Manual Mode Before you begin Be sure your food is prepared and ready to cook. Procedure To cook in manual mode, do the following. Step Action Touch the manual cook icon VMC-TS-008092 Touch the available chamber Touch Add Stage to add a cooking stage to the recipe. - Page 51 PERATION Continued from previous page Touch the cooking temperature, cook time, and fan speed to enter the recipe information for that stage. If needed, touch the plus icon to add an additional stage or action. If needed, touch the delete icon to delete a current cooking stage.
-
Page 52: How To Cool Down The Oven
PERATION How to Cool Down the Oven Procedure To cool down the oven, do the following. Step Action Touch the manual cook icon VMC-TS-008263 Touch the cool down icon . The cool down all chambers screen displays. Touch “Cool down” Open the door. -
Page 53: How To Create A Recipe
PERATION How to Create a Recipe Procedure To create a recipe, do the following. Step Action Touch the recipes icon . The browse recipes screen displays. VMC-TS-006641 Touch the plus icon Touch Add Stage to add a cooking stage to the recipe. A stage adds another cooking temperature, cooking time, and fan speed to the recipe. - Page 54 PERATION Continued from previous page Enter the recipe name. Touch the forward icon . The recipe description screen displays. VMC-TS-006677 Enter the recipe description. Touch the forward icon . The recipe category screen displays. VMC-TS-006680 Select the recipe category. A check mark displays on the selected recipe category.
- Page 55 Continued from previous page Select the cover photo for the recipe. A check mark displays on the selected photo. Touch the check mark . The add photos screen displays. VMC-TS-006686 Select additional photos for the recipe, if needed. A check mark displays on any selected photos.
-
Page 56: How To Edit, Duplicate, Or Delete A Recipe
PERATION How to Edit, Duplicate, or Delete a Recipe Procedure To edit, duplicate, or delete a recipe, do the following. Step Action Touch the recipes icon . The browse recipes screen displays. VMC-TS-006641 Touch the recipe settings icon of the desired recipe. Touch Modify recipe to edit a recipe. -
Page 57: How To Load Recipes From A Usb Drive
PERATION How to Load Recipes from a USB Drive Before you begin You will need a USB drive loaded with recipes. Procedure To load recipes from the USB drive to the oven, do the following. Step Action Touch the menu icon . - Page 58 PERATION Continued from previous page Scroll to System Backup & Update. Touch the Upload recipes from USB setting. VMC-TS-008113 Loading the recipes The oven loads the recipe file. When the process is complete, the Recipes Touch uploaded screen displays. the check mark to return to the settings screen. Remove the USB drive.
-
Page 59: How To Save Recipes To A Usb Drive
PERATION How to Save Recipes to a USB Drive Before you begin You will need a USB drive. Procedure To download recipes from the oven to a USB drive, do the following. Step Action Touch the menu icon . The menu screen displays. VMC-TS-006259 Touch the Settings icon... - Page 60 PERATION Continued from previous page Scroll to System Backup & Update. Touch the Download recipes to USB setting. VMC-TS-008122 Loading the recipes The oven downloads the recipes onto the USB drive. When the process is Touch complete, the Recipes uploaded screen displays. the check mark to return to the settings screen.
-
Page 61: How To Update Software With A Usb Drive
PERATION How to Update Software with a USB Drive ▪ Before you begin The chambers should be off (not preheated). ▪ You will need a USB drive with the updated software. ▪ Do not remove the USB drive during the update process. Procedure To update the software, do the following. - Page 62 PERATION Continued from previous page Scroll to System Backup & Update. Touch the Update system software setting. VMC-TS-008150 Touch Control Board (CB) to update the control board. The oven loads the selected software. The oven verifies the file and then updates the CB. NOTICE Do not remove the USB drive during the update process.
-
Page 63: How To Change The Home Screen
PERATION How to Change the Home Screen Procedure To change the home screen, do the following. Step Action Touch the menu icon . The menu screen displays. VMC-TS-006259 Touch the Settings icon . The general settings screen displays. VMC-TS-006262 Touch the Home Screen setting . - Page 64 PERATION Continued from previous page Select your desired home screen from the list. Touch the check mark Touch the check mark to save the home screen setting. VMC-TS-008219 Result The home screen has now been changed. Ve ct o r H™ Se r i es Op e ra to r ’...
-
Page 65: How To Change The Temperature Scale
PERATION How to Change the Temperature Scale Procedure To change the temperature scale from °F to °C and vice versa, do the following. Step Action Touch the menu icon . The menu screen displays. VMC-TS-006259 Touch the Settings icon . The general settings screen displays. VMC-TS-006262 Scroll to the Temperature Settings. - Page 66 PERATION Continued from previous page Select your desired temperature scale. Touch the check mark Touch the check mark to save the temperature scale setting. VMC-TS-008234 Result The temperature scale has now been changed. Ve ct o r H™ Se r i es Op e ra to r ’...
-
Page 67: How To Enable The Handle Light
PERATION How to Enable the Handle Light Procedure To enable the handle light, do the following. Step Action Touch the menu icon . The menu screen displays. VMC-TS-006259 Touch the Settings icon . The general settings screen displays. VMC-TS-006262 Scroll to the Handle light setting. -
Page 68: How To View Oven Information
PERATION How to View Oven Information Background The oven information screen shows the system info, serial number, network status, connection settings, and cleaning timer. Procedure To view oven information, do the following. Step Action Touch the menu icon . The menu screen displays. VMC-TS-006259 Touch the Info page icon... -
Page 69: How To Download Haccp Data
PERATION How to Download HACCP Data Before you begin You will need a USB drive. Background HACCP data provides automated record keeping, set-point validation, recipes used, dates and times. The data is stored until the information is downloaded. Once downloaded, the information is removed from the oven’s memory. Best practice would be to download the information every 30 days to a USB drive. - Page 70 PERATION Continued from previous page Touch the download icon VMC-TS-008647 Loading the data The oven downloads the data onto the USB drive. When the process is complete, Touch the download successful screen displays. the check mark to return to the Remove menu screen.
-
Page 71: Maintenance
AINTENANCE Maintenance Schedule ▪ Requirements See topic How to Clean the Oven. ▪ Make sure the oven is cooled down and off—inside of chamber 140°F (60°C) or less. Daily For daily maintenance, do the following. ▪ Remove any spills with disposable paper wipes or a damp cloth. ▪... -
Page 72: How To Clean The Oven
AINTENANCE How to Clean the Oven Before you begin WARNING: Electric shock hazard. Set the main disconnect switch to the OFF position to remove electric power from the appliance. CAUTION: Burn hazard. Allow the oven, utensils, and racks to cool before cleaning. CAUTION: Corrosive materials hazard. - Page 73 AINTENANCE Continued from previous page Weekly cleaning To clean the oven weekly, do the following. procedure Step Action the main disconnect switch to the OFF position. Make sure the oven is cool—chambers are less than 140°F (60°C). VMC-TS-006236 Spray the exterior areas of the oven with stainless steel polish. NOTICE Use only non-caustic cleaners.
- Page 74 AINTENANCE Continued from previous page Monthly cleaning To clean the oven monthly, do the following. procedure Step Action the main disconnect switch to the OFF position. Make sure the oven is cool—chambers are less than 140°F (60°C). Remove the cooking racks and jet plates CAUTION: Personal injury hazard.
- Page 75 AINTENANCE Continued from previous page Re-install the jet plates and cooking racks. NOTE: Make sure the jet plates are installed correctly. The nozzles on the jet plates should be pointing towards the food. Cleaning the filters Remove the filters (if equipped) VMC-TS-006247 Spray...
- Page 76 AINTENANCE This page intentionally left blank. Ve ct o r H™ Se r i es Op e ra to r ’ s Ma n u al MN- 4 62 9 5 Re v 1 1 1/ 1 9 ▪ ▪ ▪...
-
Page 77: Troubleshooting
2. Cavity fan not operating Note: Contact an 3. Optional grease filters blocked with debris authorized 4. Heat relay(s) stuck closed Alto-Shaam service 5. Connection between high limit switch and partner. control board 6. High limit switch Ve ct or H™ Se r i es Op e ra to r ’... -
Page 78: What To Do If The Fan Indicator Light Illuminates
ROUBLESHOOTING What to do if the Fan Indicator Light Illuminates Procedure If the fan indicator light illuminates, do the following. Step Action Turn off the oven and allow it to cool. Remove the filters VMC-TS-007746 Clean the filters in a dishwasher. Re-install the filters. -
Page 79: What To Do If The High Limit Screen Displays
ROUBLESHOOTING What to do if the High Limit Screen Displays Procedure If the high limit screen displays, do the following. Step Action Press and release the high limit temperature reset button(s) VMC-TS-007607 Resume operation of the oven. NOTE: If the high limit screen continues to display, the appliance is malfunctioning. -
Page 80: Cheflinc.alto-Shaam.com Is Not Available On Your Device
ROUBLESHOOTING Cheflinc.alto-shaam.com is not Available on your Device If other website are not available, Are other websites available on your device from the contact your network provider or IT same network being used to access Cheflinc. department. If the website is blocked, contact... -
Page 81: Cannot Connect To Cheflinc.alto-Shaam.com
A recovery link will be sent to the email associated with the Cheflinc account. If you are still unable to log in, contact Alto-Shaam techical support. Ve ct or H™ Se r i es Op e ra to r ’ s Ma n u al... -
Page 82: The Oven Is Not Displayed On The Dashboard
ROUBLESHOOTING The Oven is not Displayed on the Dashboard Prerequisite: The operator is on a device connected to the Internet and is able to login to cheflin.alto-shaam.com. See topic, The Oven will not Power Up Does the oven power up? troubleshooting tree in the Service Manual. -
Page 83: Unable To Assign Recipes From The Dashboard To Ovens In The Field
See The Oven is not Displayed on the connected (yes) or offline (no)? Dashboard troubleshooting tree. Contact Alto-Shaam technical support for assistance. Ve ct or H™ Se r i es Op e ra to r ’ s Ma n u al... - Page 84 ROUBLESHOOTING This page intentionally left blank. Ve ct o r H™ Se r i es Op e ra to r ’ s Ma n u al MN- 4 62 9 5 Re v 1 1 1/ 1 9 ▪ ▪ ▪...
-
Page 85: Notifications
OTIFICATIONS Notifications FCC ID: N6C-SDPAC IC ID: 4908A-SDPAC NOTICE Federal Communication Interference Statement (United States only) This equipment has been tested and found to comply with the limits for a class B digital device, pursuant to Part 15 of the FCC rules. These limits are designed to provide reasonable protection against harmful interference in a residential installation. - Page 86 OTIFICATIONS Canadian Department of Communications Industry Canada Notice (Canada only) This Class B digital apparatus complies with Canadian ICES-003. FCC Rules, Part 15 / Industry Canada This device complies with Part 15 of FCC Rules and Industry Canada licence- exempt RSS standard(s). Operation is subject to the following two conditions: (1) This device may not cause harmful interference, and (2) This device must accept any interference, including interference that may cause undesired operation of this device.
- Page 87 OTIFICATIONS General Specifications Chipset: QCA9377-3, (Qualcomm Atheros) Host Interface: Wifi: SDIO v3.0; BT: High Speed UART Operating Voltage: 3.30 VDC +/- 5% Operating -20 to +70 degrees C Temperature: Dimensions: 18.0 x 13.0 x 2.2 mm (L x W x D) Connector Type: 52-pin proprietary Radio Specifications:...
- Page 88 OTIFICATIONS This page intentionally left blank. Ve ct o r H™ Se r i es Op e ra to r ’ s Ma n u al MN- 4 62 9 5 Re v 1 1 1/ 1 9 ▪ ▪ ▪...
-
Page 89: Warranty
ARRANTY Warranty Introduction Alto-Shaam, Inc. warrants to the original purchaser only, that any original part found to be defective in material or workmanship will be replaced with a new or rebuilt part at Alto-Shaam's option, subject to provisions hereinafter stated. - Page 90 No person except an officer of Alto-Shaam, Inc. is authorized to modify this warranty or to incur on behalf of Alto-Shaam any other obligation or liability in connection with Alto-Shaam equipment.
Need help?
Do you have a question about the Vector VMC-H2 and is the answer not in the manual?
Questions and answers