
Subscribe to Our Youtube Channel
Related Manuals for Alto-Shaam Vector H Series


Summary of Contents for Alto-Shaam Vector H Series
-
Page 1: Operator's Manual
https://appliancetechmanuals.com Vector H-Series ULTI Operator’s Manual VMC-H2 VMC-H3 VMC-H4 VMC-H2H VMC-H3H VMC-H4H MN-38979 REV.3 3/17... -
Page 2: Manufacturer's Information
© Copyright 3/17 by Alto-Shaam, Inc. All rights reserved. This manual or any portion thereof may not be reproduced or used in any manner whatsoever without the express written permission of Alto-Shaam, Inc. Trademarks All trademarks referenced in this documentation are the property of their respective owners. -
Page 3: Forward
Extend Your Manufacturer’s Warranty Register Register your Alto-Shaam appliance online, and you will automatically be entered into a monthly drawing to win an additional year extended warranty! Registering your equipment ensures prompt service in the event of a warranty claim. You will also receive direct notifications of software updates and additional product information. - Page 4 https://appliancetechmanuals.com ORWARD C omb i th erm ® CT PROf orm an c e™ S er i es O p e r a tor’ s Man u a l MN-359 48 R ev 0 3 /17...
-
Page 5: Table Of Contents
Forward Enjoy your Alto-Shaam Multi-Cook Oven! ....3 Extend Your Manufacturer’s Warranty ....3 Alto-Shaam 24/7 Emergency Repair Service . -
Page 6: Safety
AFETY The Meaning of Signal Words Technical content produced by Alto-Shaam contains signal words where needed. These signal words must be obeyed to reduce the risk of death, personal injury, or equipment damage. The meaning of these signal words is explained below. -
Page 7: Appliance Description And Intended Use
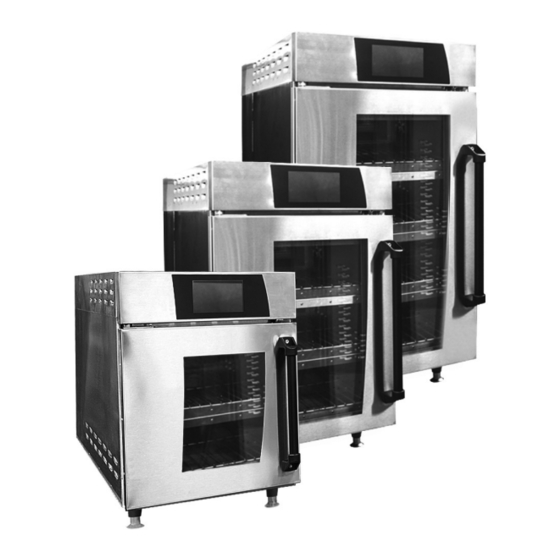
Appliance Description and Intended Use Description The Alto-Shaam Vector series oven uses structured air technology and 3-stage cooking. Air is delivered by a blower located in the rear of each cook cavity. Air travels through the shelves (jet plates) and is delivered vertically through Structured Air plates in the top and bottom of the cook chamber. -
Page 8: Safety Precautions
https://appliancetechmanuals.com AFETY Safety Precautions Before you begin Read and understand all instructions in this manual. Electrical precautions Follow these precautions while using the appliance: ▪ Connect the appliance to a properly grounded outlet. Do not use the appliance if it is not properly grounded. Consult an electrician if there is any doubt if the outlet used is properly grounded. -
Page 9: Installation
https://appliancetechmanuals.com NSTALLATION Dimensions VMC-H2 VCM-H2: 37.7" (958mm) VMC-H2H VCM-H2H: 39.4" (1001mm) VCM-H2: 34.3" (871mm) 21" (533mm) VCM-H2H: 36" (914mm) 28.5" (724mm) 16.8" (427mm) 23" (584mm) 27.1" (688mm) VMC-H3 VCM-H3: 37.7" (958mm) VMC-H3H VCM-H3H: 39.4" (1001mm) 21" (533mm) VCM-H4: 34.3" (871mm) VCM-H3H: 36"... - Page 10 https://appliancetechmanuals.com NSTALLATION Clearances 2.0" 50mm 2.0" 2.0" 50mm 50mm xx" xxmm AS-DIM-000196 C omb i th erm ® CT PROf orm an c e™ S er i es O p e r a tor’ s Man u a l MN-359 48 R ev 0 3 /17...
-
Page 11: Installing The Oven (Cord And Plug Models)
https://appliancetechmanuals.com NSTALLATION Installing the Oven (Cord and Plug Models) Before you begin Have the following ready to use: ▪ Cutting tools to remove the packaging ▪ A cart or lifting device, and enough personnel, to safely move and position the weight of the oven. - Page 12 https://appliancetechmanuals.com NSTALLATION Continued from previous page Connect power To connect electric power to the oven do the following. Step Action the main disconnect switch to the OFF position. VMC-TS-000137 the standby switch to the OFF position. VMC-TS-000076 Connect the plug to the outlet. NEMA 6-50P NEMA 15-50P NEMA 6-30P...
-
Page 13: Operation
https://appliancetechmanuals.com PERATION Turning On the Oven Procedure Perform the procedure below to turn on the oven. Step Action Turn the main disconnect switch to the ON position. The oven’s software loads. This takes approximately 30 seconds. A color band screen may appear on the display momentarily. -
Page 14: Preheating The Oven
https://appliancetechmanuals.com PERATION Preheating the Oven Before you begin The oven must be connected and turned on Step Action All cavities From the home screen, press the “WARM UP” icon All cavities start to warm to their preset temperatures. Ready to Warm Up O F F W W arm Up Link... - Page 15 https://appliancetechmanuals.com PERATION Continued from previous page Screen loading bars On the left side of the screen, red loading bars indicate each cavity’s progress towards reaching its selected temperature WAIT... WAIT... W W ARMING UP ARMING UP WARMING UP WAIT... WAIT... Selected Temp elected Temp WARMING UP...
-
Page 16: Cooking With Preset Recipes
https://appliancetechmanuals.com PERATION Cooking with Preset Recipes ▪ Before you begin Be sure the oven is preheated ▪ Be sure your food is prepared and ready to cook Procedure Perform the procedure below to cook using a preset recipe. Step Action Select the desired cavity on the left side of the screen. - Page 17 https://appliancetechmanuals.com PERATION Continued from previous page During the cook During the cook: ▪ The cavity button indicates the time remaining. VT-UI-000099 ▪ The menu area displays details on the current cook setting. ▪ Pressing “Cancel Cook” stops the cook. ▪ Opening the door (to load another cavity or check on a cook) pauses the cook.
-
Page 18: Cooking With The Manual Setting
https://appliancetechmanuals.com PERATION Cooking with the Manual Setting ▪ Before you begin Be sure the oven is preheated ▪ Be sure your food is prepared and ready to cook Procedure Perform the procedure below to cook with the manual setting. Step Action Select the desired cavity... -
Page 19: Editing Recipes
https://appliancetechmanuals.com PERATION Editing Recipes Before you begin You’ll need to know the pass code. Procedure Perform the procedure below to edit a recipe. Step Action Press the gear icon . The “Enter Pass Code” screen appears. R E A D Y reset Cook LINK r e s e t C o o k... - Page 20 https://appliancetechmanuals.com PERATION Continued from previous page Press the chef hat (“Recipes”) icon The “Recipe Development” screen appears. A d m i n M o d e M a i n t R R e c i p e s Te m p s Recipe Development ecipe Development Select A Recipe To Edite...
-
Page 21: How To Update The Relay Or Ui Firmware
https://appliancetechmanuals.com PERATION How to Update the Relay or UI firmware Before you begin You’ll need a USB stick with the updated firmware. Procedure Perform the procedure below to update the relay firmware or the UI firmware. Step Action Press the gear icon . - Page 22 https://appliancetechmanuals.com PERATION Continued from previous page The “USB Functions” screen appears. Press the “USB” icon A d m i n M o d e U S B F u n c t i o n s M a i n t R e c i p e s Te m p s U p d a t e U I...
-
Page 23: How To Download Recipes From The Oven
https://appliancetechmanuals.com PERATION How to Download Recipes from the Oven Before you begin You’ll need a USB stick. Procedure Perform the procedure below to download recipes from the oven. Step Action Press the gear icon . The “Enter Pass Code” screen appears. R E A D Y reset Cook LINK... - Page 24 https://appliancetechmanuals.com PERATION Continued from previous page The “USB Functions” screen appears. Press the “USB” icon A d m i n M o d e U S B F u n c t i o n s M a i n t R e c i p e s Te m p s U p d a t e U I...
-
Page 25: How To Load Config Files
https://appliancetechmanuals.com PERATION How to Load Config Files Before you begin You’ll need a USB stick with the config files. Procedure Config files are used to load the oven’s menu. Perform the procedure below to load a menu to the oven. Step Action Press... - Page 26 https://appliancetechmanuals.com PERATION Continued from previous page The “USB Functions” screen appears. Press the “USB” icon A d m i n M o d e U S B F u n c t i o n s M a i n t R e c i p e s Te m p s U p d a t e U I...
-
Page 27: Daily Cleaning Of The Oven
https://appliancetechmanuals.com PERATION Daily Cleaning of the Oven Caution CAUTION Burn hazard. The oven, utensils, and racks become hot during use. Allow the oven, utensils, and racks to cool before cleaning. Wear eye protection and hand protection when cleaning. Using improper cleaning procedures could damage the NOTICE catalyst and void the warranty. - Page 28 https://appliancetechmanuals.com PERATION C omb i th erm ® CT PROf orm an c e™ S er i es O p e r a tor’ s Man u a l MN-359 48 R ev 0 3 /17...
- Page 29 https://appliancetechmanuals.com PERATION Com bither m® CT PR Ofor mance™ Series O pe ra t o r ’ s M a n ua l MN - 35948 Rev 0 3/17...
- Page 30 https://appliancetechmanuals.com Warranty Com bither m® CT PR Ofor mance™ Series O pe ra t o r ’ s M a n ua l MN - 35948 Rev 0 3/17...
- Page 31 https://appliancetechmanuals.com Vector...
Need help?
Do you have a question about the Vector H Series and is the answer not in the manual?
Questions and answers