
Subscribe to Our Youtube Channel
Related Manuals for Alto-Shaam Vector Series


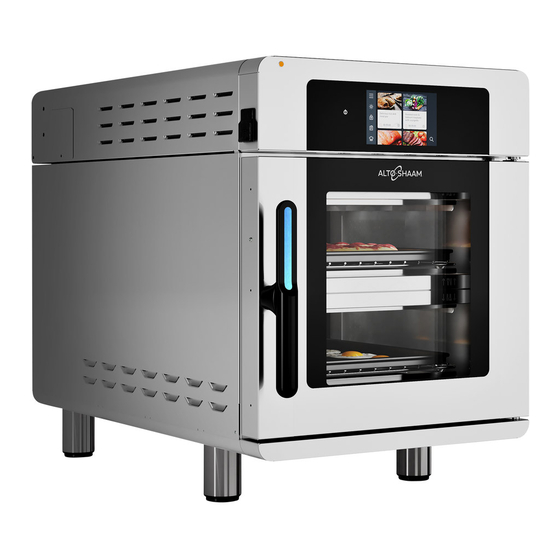
Summary of Contents for Alto-Shaam Vector Series
- Page 1 Service Manual Vector™ Multi-Cook Oven Simple Control VMC-H2H VMC-H2 VMC-H3H VMC-H3 VMC-H4 VMC-H4H Structured Air Technology™ MN-46543-EN REV.01 11/19 alto-shaam.com...
-
Page 2: Manufacturer's Information
© Copyright 11/19 by Alto-Shaam, Inc. All rights reserved. This manual or any portion thereof may not be reproduced or used in any manner whatsoever without the express written permission of Alto-Shaam, Inc. Trademarks All trademarks referenced in this documentation are the property of their respective owners. -
Page 3: Foreword
Call 800-558-8744 to reach our 24-hour emergency service call center for immediate access to local authorized service agencies outside standard business hours. The emergency service access is provided exclusively for Alto-Shaam equipment and is available throughout the United States through Alto-Shaam’s toll free number. - Page 4 OREWORD This page intentionally left blank. V ec to r ™ H Se ri e s Ser vi c e M an u a l MN- 4 6 54 3 Re v 0 1 1 1/ 1 9 ▪ ▪ ▪...
-
Page 5: Table Of Contents
Manufacturer’s Information ......2 Foreword Alto-Shaam 24/7 Emergency Repair Service ....3 Table of Contents Safety The Meaning of Signal Words . - Page 6 ABLE OF ONTENTS Maintenance Maintenance Schedule ......57 How to Clean the Oven......58 Testing How to Test the Cooling Fans .
-
Page 7: Safety
AFETY The Meaning of Signal Words This manual contains signal words where needed. These signal words must be obeyed to reduce the risk of death, personal injury, or equipment damage. The meaning of these signal words is explained below. DANGER Danger indicates a hazardous situation which, if not avoided, will result in serious injury or death. -
Page 8: Safety Precautions
AFETY Safety Precautions Before you begin Read and understand all instructions in this manual. Electrical precautions Obey these electrical precautions when using the appliance: ▪ Connect the appliance to a properly grounded outlet. Do not use the appliance if it is not properly grounded. Consult an electrician if there is any doubt that the outlet used is properly grounded. - Page 9 Only trained personnel are permitted to service or repair the appliance. Repairs that are not performed by an authorized service partner or trained technician, or appliance the use of non-factory parts, will void the warranty and relieve Alto-Shaam of all liability. ▪...
- Page 10 AFETY Personal Protective Wear the following Personal Protective Equipment (PPE) while cleaning the Equipment (PPE) appliance: ▪ Protective gloves ▪ Protective clothing ▪ Eye protection ▪ Face protection Service Technician Only trained personnel are permitted to service or repair the appliance. Service technicians must be knowledgeable in current codes and standards as stated by the Training appropriate agencies, such as:...
-
Page 11: Operation
PERATION How to Turn On and Turn Off the Oven Before you begin The oven must be connected to electric power. Turning on the oven To turn on the oven, do the following. Step Action the main disconnect switch to the ON position. Press the ON/OFF button . -
Page 12: How To Update The Interface Board (Ib)
PERATION How to Update the Interface Board (IB) ▪ Before you begin The chambers should be off (not preheated). ▪ Do not remove the USB drive during the update process. ▪ You will need a USB drive with the updated firmware. ▪... - Page 13 PERATION Continued from previous page Touch the Update IB icon The Enter Pass Code screen displays. Enter the pass code 6702 Touch the green check mark USB Functions Enter Pass Code 6 7 0 2 # 1 2 3 4 5 6 Load Update IB Config...
-
Page 14: How To Update The Control Board (Cb)
PERATION How to Update the Control Board (CB) ▪ Before you begin The chambers should be off (not preheated). ▪ Do not remove the USB drive during the update process. ▪ You will need a USB drive with the updated firmware. ▪... - Page 15 PERATION Continued from previous page Touch the Update CB icon The Enter Pass Code screen displays. Enter the pass code 6702 Touch the green check mark USB Functions Enter Pass Code 6 7 0 2 # 1 2 3 4 5 6 Load Update IB Update CB...
-
Page 16: How To Load Configuration Files
PERATION How to Load Configuration Files ▪ Before you begin The chambers should be off (not preheated). ▪ Do not remove the USB drive during the update process. ▪ You will need a USB drive with the configuration files. ▪ You will need to know the service pass code. - Page 17 PERATION Continued from previous page Touch the Load Config icon The Enter Pass Code screen displays. Enter the pass code 6702 Touch the green check mark USB Functions Enter Pass Code 6 7 0 2 # 1 2 3 4 5 6 Load Update IB Update CB...
- Page 18 PERATION This page intentionally left blank. V ec to r ™ H Se ri e s Ser vi c e M an u a l MN- 4 6 54 3 Re v 0 1 1 1/ 1 9 ▪ ▪ ▪...
-
Page 19: Components
OMPONENTS Component Identification Ve ct or ™ H Se r i es Se r vi ce Ma n ua l MN -4 6 5 4 3 Rev 0 1 1 1 / 19 ▪ ▪ ▪ ▪... -
Page 20: Chamber Identification
OMPONENTS Chamber Identification Components will be identified in accordance with the chamber numbering illustrated here. VMC-PHD-007530 V ec to r ™ H Se ri e s Ser vi c e M an u a l MN- 4 6 54 3 Re v 0 1 1 1/ 1 9 ▪... -
Page 21: Front Panel Identification
OMPONENTS Front Panel Identification VMC-PHD-008452 Ref. Description Check fans indicator light ON/OFF button USB port Control panel display Ve ct or ™ H Se r i es Se r vi ce Ma n ua l MN -4 6 5 4 3 Rev 0 1 1 1 / 19 ▪... -
Page 22: Back Panel Identification
OMPONENTS Back Panel Identification VMC-PHD-007536 Ref. Description Cooling Fans/Filters Main disconnect switch Electrical supply cord Tether ring mount Equipotential-bonding terminal V ec to r ™ H Se ri e s Ser vi c e M an u a l MN- 4 6 54 3 Re v 0 1 1 1/ 1 9 ▪... -
Page 23: Component Access Panels Identification
OMPONENTS Component Access Panels Identification VMC-PHD-008455 Ref. Description Provides access to Left service panel Heating elements, catalyst, and thermocouples Circuit breaker access panel Circuit breakers Top service panel Electrical components Right service panel Blower motors and cooling fans Ve ct or ™ H Se r i es Se r vi ce Ma n ua l MN -4 6 5 4 3 Rev 0 1... -
Page 24: H4-Electrical Component Identification
OMPONENTS H4—Electrical Component Identification VMC-PHD-008460 Ref. Description Ref. Description Check fans indicator light switch Terminal blocks Terminal blocks Interface board Main disconnect switch Control board Circuit breakers (heating ele- Relays ments) Variable Frequency Drive (VFD) Fuses (lights) Solid State Relay (SSR) Wye filter (CE models only) Line filter (CE models only) Circuit breakers (control) -
Page 25: H3-Electrical Component Identification
OMPONENTS H3—Electrical Component Identification VMC-PHD-008463 Ref. Description Ref. Description Check fans indicator light switch Terminal blocks Terminal blocks Interface board Main disconnect switch Control board Circuit breakers (heating ele- Relays ments) Variable Frequency Drive (VFD) Fuses (lights) Solid State Relay (SSR) Wye filter (CE models only) Line filter (CE models only) Circuit breakers (control) -
Page 26: H2-Electrical Component Identification
OMPONENTS H2—Electrical Component Identification VMC-PHD-008466 Ref. Description Ref. Description Check fans indicator light switch Terminal blocks Terminal blocks Interface board Main disconnect switch Control board Circuit breakers (heating ele- Relays ments) Variable Frequency Drive (VFD) Fuses (lights) Solid State Relay (SSR) Wye filter (CE models only) Line filter (CE models only) Circuit breakers (control) -
Page 27: Electrical Components
OMPONENTS Electrical Components Check Fans Indicator Light Switch ▪ The contacts close at or above 130°F (54°C) VMC-PHD-001903 Terminal Blocks for Electrical Supply Non-CE TB 1 TB 1 TB 2 TB 2 TB 3 VMC-PHD-001907 TB 1 TB 2 TB 3 TB N Ve ct or ™... -
Page 28: Main Disconnect Switch
OMPONENTS Main Disconnect Switch VMC-PHD-001911 Circuit Breakers (Heating Elements) CB 1 - Chamber 1 CB 1 - Chamber 1 CB 2 - Chamber 2 CB 2 - Chamber 2 CB 3 - Chamber 3 CB 3 - Chamber 3 CB 4 - Chamber 4 CB 1 - Chamber 1 CB 2 - Chamber 2 VMC-PHD-001915... -
Page 29: Variable Frequency Drive (Vfd)
OMPONENTS Variable Frequency Drive (VFD) WARNING: Electric shock hazard. Do not disassemble the VFD. VMC-PHD-008469 Ve ct or ™ H Se r i es Se r vi ce Ma n ua l MN -4 6 5 4 3 Rev 0 1 1 1 / 19 ▪... -
Page 30: Solid State Relay (Ssr)
OMPONENTS Solid State Relay (SSR) Heater element control. One SSR for each chamber. VMC-PHD-001923 Ref. Description L1 terminal, AC line voltage into the SSR T1 terminal, AC load voltage to the heating element Call for heat indicator light A2 (-) terminal, DC control voltage from the control board to the SSR A2 (+) terminal, DC control voltage from the control board to the SSR Line Filter (CE only) L’... -
Page 31: 12Vac Transformer
OMPONENTS 12VAC Transformer The transformer provides a voltage signal to the control board. The signal allows the control board to determine the incoming line voltage. ▪ Primary: 1700 Ohms ▪ Secondary: 6 Ohms 240 VAC VMC-PHD-001927 12VDC Power Supply Supplies DC voltage to the control board and the ON/OFF switch. Vo Adj VMC-PHD-001935 Ref. -
Page 32: Terminal Blocks
OMPONENTS Terminal Blocks (VFDs and Cooling Fans) VMC-PHD-001939 Ref. Description TB 4 - L2 TB 5 - L1 TB 6 - L2 (switched) Ground V ec to r ™ H Se ri e s Ser vi c e M an u a l MN- 4 6 54 3 Re v 0 1 1 1/ 1 9... -
Page 33: Interface Board
OMPONENTS Interface Board VMC-PHD-001943 Ref. Description BATT Clock battery LCD display ribbon cable Control board communication Touch overlay ribbon cable 4 GB micro SD card USB connection ON/OFF board LED 1 RS485 communication LED 2 RS485 communication Ve ct or ™ H Se r i es Se r vi ce Ma n ua l MN -4 6 5 4 3 Rev 0 1... - Page 34 OMPONENTS Control Board (CB) Í TELCO VFD SIEMENS VFD ON VMC-PHD-001947 Ref. Description Ref. Description Ref. Description Drive 1 communication Jumper LED 9 Chamber 2 call for heat LED 10 Chamber 3 call for heat Input signals Not used Door handle lights Input from chamber combine LED 11 Chamber 4 call for heat (if equipped)
-
Page 35: Relays
OMPONENTS Relays AZ 22 AZ 22 VMC-PHD-001951 Ref. Description Ref. Description RL-3 (H3 only) Common terminal RL-1, T9C, 240VAC coil Coil terminal Input to the control board for the check fan indicator light Coil—10.90 K Ohm RL-2, AZ 22, 12VDC coil Normally open terminal Blowers/fan Coil—155 Ohm... -
Page 36: Wye Filter (Ce Models Only)
OMPONENTS Fuses (Chamber Lights) Fuse, 1A, 250V, Slow-Blo, 5 x 20 mm VMC-PHD-007561 Wye Filter (CE Models) Capacitance range 0.1–10.0uF Tolerance ±10% VMC-PHD-008475 V ec to r ™ H Se ri e s Ser vi c e M an u a l MN- 4 6 54 3 Re v 0 1 1 1/ 1 9... -
Page 37: Circuit Breakers (Control)
OMPONENTS Circuit Breakers (Control) CB 5 - L1 CB 6 - L2/N VMC-PHD-001955 High Limit Switches Resettable Contacts open at 572°F (300°C) VMC-PHD-001987 Ref. Description Reset button Temperature bulb Ve ct or ™ H Se r i es Se r vi ce Ma n ua l MN -4 6 5 4 3 Rev 0 1 1 1 / 19... -
Page 38: Left Service Panel Identification
OMPONENTS Left Service Panel Identification VMC-PHD-008478 Ref. Description High limit switch temperature bulbs Chamber heating element Catalyst Chamber air temperature probes Speaker Door switch V ec to r ™ H Se ri e s Ser vi c e M an u a l MN- 4 6 54 3 Re v 0 1 1 1/ 1 9... -
Page 39: Left Service Panel Components
OMPONENTS Left Service Panel Components Chamber Heating Element 18 Ohms VMC-PHD-001979 Catalyst VMC-PHD-001983 Ve ct or ™ H Se r i es Se r vi ce Ma n ua l MN -4 6 5 4 3 Rev 0 1 1 1 / 19 ▪... - Page 40 OMPONENTS Chamber Air Temperature Probe K Type Thermocouple 100°C 4.096 MV 100°F 1.521 MV 200°C 8.138 MV 200°F 3.820 MV 300°C 12.209 MV 300°F 6.094 MV VMC-PHD-001991 V ec to r ™ H Se ri e s Ser vi c e M an u a l MN- 4 6 54 3 Re v 0 1 1 1/ 1 9...
- Page 41 OMPONENTS Speaker 8 Ohms VMC-PHD-001995 Door Switch ▪ Door closed 0 Ohms; 0 VDC across terminals 1 and 2 of connector P3 on the control board. ▪ Door open Infinite Ohms; 8 VDC across terminals 1 and 2 of connector P3 on the control board.
-
Page 42: Right Service Panel Identification
OMPONENTS Right Service Panel Identification VMC-PHD-008481 Ref. Description Chamber blower motor Cooling fans Filter—cooling air V ec to r ™ H Se ri e s Ser vi c e M an u a l MN- 4 6 54 3 Re v 0 1 1 1/ 1 9 ▪... -
Page 43: Right Service Panel Components
OMPONENTS Right Service Panel Components Blower Assembly 4.3 Ohms VMC-PHD-002007 Fans ▪ Impedance protected ▪ 240 Volt ▪ 581 Ohm VMC-PHD-002011 Ve ct or ™ H Se r i es Se r vi ce Ma n ua l MN -4 6 5 4 3 Rev 0 1 1 1 / 19 ▪... - Page 44 OMPONENTS Filter—Cooling Air VMC-PHD-002015 V ec to r ™ H Se ri e s Ser vi c e M an u a l MN- 4 6 54 3 Re v 0 1 1 1/ 1 9 ▪ ▪ ▪ ▪...
-
Page 45: Internal Components Identification
OMPONENTS Internal Components Identification VMC-PHD-007583 VMC-PHD-007580 Ref. Description Chamber light Filters (optional) Ve ct or ™ H Se r i es Se r vi ce Ma n ua l MN -4 6 5 4 3 Rev 0 1 1 1 / 19 ▪... -
Page 46: Internal Components
OMPONENTS Internal Components Chamber Light 12 VDC VMC-PHD-007587 Filters (optional) VMC-PHD-002027 V ec to r ™ H Se ri e s Ser vi c e M an u a l MN- 4 6 54 3 Re v 0 1 1 1/ 1 9 ▪... -
Page 47: Theory
HEORY Standby State Background The main disconnect switch is in the ON position, the display is not illuminated. WARNING: Electric shock hazard. Voltage is present at the following components: • Terminal blocks • Circuit breakers • Heater elements, one wire on each element •... -
Page 48: On State
HEORY On State Background The main disconnect switch is in the ON position, the display is illuminated. The logo will appear along with the firmware versions on the display. After five seconds, the LCD will display the home screen. WARNING: Electric shock hazard. -
Page 49: Preheat State
HEORY Preheat State Background Pressing Preheat will automatically begin preheating all chambers up to their pre-programmed default temperature setpoints. It should take approximately 10-15 minutes for the oven to reach temperature. The Temps icon in the User Configuration screen allows the user to change the individual chamber preheat temperatures. -
Page 50: Idle State
HEORY Idle State Background As each chamber reaches its temperature setpoint, it will start a 5-minute countdown to allow the chamber temperature to stabilize. The chamber blower fans are driven at 30% rotation speed by the VFDs. Component State Control panel LCD backlight Heaters ON, maintaining the temperature setpoint requirements... -
Page 51: Cooking State
HEORY Cooking State Background Each chamber is independently controlled. The current chamber is indicated by the check mark on the display. Opening the door will pause the cooking cycle. The oven will keep track of how long the door is open and automatically add time to any current cooking cycle to compensate for the temperature loss. -
Page 52: Cooking State Complete
HEORY Cooking State Complete Background At the end of the cooking cycle, the oven buzzer/speaker sounds an alert and the chamber light flashes. The chamber blower fans are driven at 30% rotation speed by the VFDs. Component State Control panel LCD backlight Heaters ON, maintaining the temperature setpoint... -
Page 53: Rapid On/Off State
HEORY Rapid ON/OFF State Background Each chamber transitions to the rapid ON/OFF state if the chamber temperature is greater than 20°F (11°C) from the temperature setpoint. The chamber blower fans are driven at 70% rotation speed by the VFDs. Component State Control panel LCD backlight... -
Page 54: Cool Down State
HEORY Cool Down State Background The oven automatically turns on the blowers for the cool down process. With the oven door open, the oven takes approximately 2 hours to cool down to a chamber temperature of 140°F (60°C). The screen displays a cool down prompt and requests for the door to be opened. The oven shuts down once the cool down is complete. -
Page 55: Cool Down State Complete
HEORY Cool Down State Complete Background The oven transitions to the OFF state after 20 minutes. Component State Control panel LCD backlight Heaters Cooling fans Blower Buzzer / speaker Ve ct or ™ H Se r i es Se r vi ce Ma n ua l MN -4 6 5 4 3 Rev 0 1 1 1 / 19... - Page 56 HEORY This page intentionally left blank. V ec to r ™ H Se ri e s Ser vi c e M an u a l MN- 4 6 54 3 Re v 0 1 1 1/ 1 9 ▪ ▪ ▪...
-
Page 57: Maintenance
AINTENANCE Maintenance Schedule ▪ Requirements See topic How to Clean the Oven. ▪ Make sure the oven is cooled down and off—inside of chamber 140°F (60°C) or less. Daily For daily maintenance, do the following. ▪ Remove any spills with disposable paper wipes or a damp cloth. ▪... -
Page 58: How To Clean The Oven
AINTENANCE How to Clean the Oven Before you begin WARNING: Electric shock hazard. Set the main disconnect switch to the OFF position to remove electric power from the appliance. CAUTION: Burn hazard. Allow the oven, utensils, and racks to cool before cleaning. CAUTION: Corrosive materials hazard. - Page 59 AINTENANCE Continued from previous page Weekly cleaning To clean the oven weekly, do the following. procedure Step Action the main disconnect switch to the OFF position. Make sure the oven is cool—chambers are less than 140°F (60°C). VMC-TS-006236 Spray the exterior areas of the oven with stainless steel polish. NOTICE Use only non-caustic cleaners.
- Page 60 AINTENANCE Continued from previous page Monthly cleaning To clean the oven monthly, do the following. procedure Step Action the main disconnect switch to the OFF position. Make sure the oven is cool—chambers are less than 140°F (60°C). Remove the cooking racks and jet plates CAUTION: Personal injury hazard.
- Page 61 AINTENANCE Continued from previous page Re-install the jet plates and cooking racks. NOTE: Make sure the jet plates are installed correctly. The nozzles on the jet plates should be pointing towards the food. Cleaning the filters Remove the filters (if equipped) VMC-TS-006247 Spray...
- Page 62 AINTENANCE This page intentionally left blank. V ec to r ™ H Se ri e s Ser vi c e M an u a l MN- 4 6 54 3 Re v 0 1 1 1/ 1 9 ▪ ▪ ▪...
-
Page 63: Testing
ESTING How to Test the Cooling Fans ▪ Before you begin The oven must be connected to electric power. ▪ Make sure the chamber’s are in an OFF state. ▪ Make sure the top cover and side panels are installed when testing the cooling fans. - Page 64 ESTING Continued from previous page Touch the down arrow . The second Service screen displays. Service S e r v i c e Service e r v i c e Diagnostics Pass Code B l o w e r s l o w e r s F a n s a n s...
-
Page 65: How To Test The Blower Motors
ESTING How to Test the Blower Motors ▪ Before you begin The oven must be connected to electric power. ▪ Make sure the chamber’s are in an OFF state. Procedure To test the blower motors, do the following. Step Action Touch the gear icon . - Page 66 ESTING Continued from previous page Touch the down arrow . The second Service screen displays. Service S e r v i c e Service e r v i c e Diagnostics Pass Code B l o w e r s l o w e r s F a n s a n s...
- Page 67 ESTING Continued from previous page Touch the return icon to stop the blower motors and return to the home screen. NOTE: Touching the cancel icon will also stop the blower motors and return to the Service screen. Air Speed Select a chamber to test its blower Enter air speed (10 - 100%) Chamber 1...
-
Page 68: How To Test The Heaters
ESTING How to Test the Heaters ▪ Before you begin The oven must be connected to electric power. ▪ Make sure the chambers are in an OFF state. Procedure To test the heaters, do the following. Step Action Remove the left side service panel. VMC-TS-008535 Touch the gear icon... - Page 69 ESTING Continued from previous page Enter the pass code 6702 Touch the green check mark . The first Service screen displays. Enter Pass Code Service 6 7 0 2 # 1 2 3 4 5 6 Diagnostics Pass Code 7 8 9 <...
- Page 70 ESTING Continued from previous page Measure the amp draw while the heater is on. The amperage draw of a functioning heater element is 10–15 amps. WARNING: Electric shock hazard. Use caution when testing line voltage. The heater will automatically stop after one minute of operation. See topic The Chambers will not Heat if the heaters do not turn on.
-
Page 71: How To Calibrate A Chamber Thermocouple
ESTING How to Calibrate a Chamber Thermocouple ▪ Before you begin The oven must be connected to electric power. ▪ Make sure the chamber’s are in an OFF state. ▪ Make sure you have a multimeter with thermocouple attachment. ▪ Make sure the jet plates are installed. - Page 72 ESTING Continued from previous page Touch the Service icon . The Enter Pass Code screen displays. User Configuration Enter Pass Code Enter Pass Co 1 2 3 4 5 6 Time 7 8 9 < 0 Logs Recipes VMC-TS-008566 Enter the pass code Touch the green check mark...
- Page 73 ESTING Continued from previous page Touch the chamber that needs to be calibrated . The Enter Offsets screen displays. Enter the offset number from the calculation. To determine the offset number, subtract the smaller number from the larger number. If the multimeter number is larger, add a “+” in front of the resulting number.
- Page 74 ESTING This page intentionally left blank. V ec to r ™ H Se ri e s Ser vi c e M an u a l MN- 4 6 54 3 Re v 0 1 1 1/ 1 9 ▪ ▪ ▪...
-
Page 75: Troubleshooting
ROUBLESHOOTING Error Messages Background This section is provided for the assistance of qualified and trained service technicians only and is not intended for use by untrained or unauthorized service personnel. Failure to observe this precaution may void the warranty. Message Meaning Action required ERR: HIGH LIMIT 1... -
Page 76: The Oven Will Not Power Up
ROUBLESHOOTING The Oven will not Power Up ▪ Before you begin Move the main disconnect switch on the back of the oven to the OFF position. ▪ Remove the circuit breaker service panel on the left side of the oven. ▪... - Page 77 ROUBLESHOOTING Continued from previous page Measure the DC voltage across the + and - terminals at the power supply. Is the voltage approximately Replace the power supply. 12VDC? Measure the DC voltage across the + and - terminals Repair or replace the wiring from connector P6 at the control board.
-
Page 78: The Screen Will Not Turn On
ROUBLESHOOTING The Screen will not Turn On ▪ Before you begin Move the main disconnect switch on the back of the oven to the OFF position. ▪ Move the main disconnect switch on the back of the oven to the ON position. ▪... -
Page 79: The Screen Will Not Power Down Or The Oven Will Not Enter Cool Down Mode
ROUBLESHOOTING The Screen will not power down or the oven will not enter cool down mode Before you begin ▪ Read and record the oven temperature for each chamber. ▪ Press and hold the ON/OFF button. ▪ If the oven chamber temperatures are below 140ºF / 60ºC the oven control will power down. -
Page 80: The Screen Is Solid White
▪ The stripe screen should flash on the control panel and go blank. ▪ If the screen is solid white contact Alto-Shaam Technical Service for the "Force Load file". ▪ The file will be emailed to you and you will we need the ability to load the file to a USB drive with the following requirements. -
Page 81: The Screen Is Not Responsive/Incorrect Response To The Selected Icon
ROUBLESHOOTING The Screen is not Responsive/Incorrect Response to the Selected Icon Before you begin ▪ Move the main disconnect switch on the back of the oven to the OFF position. ▪ Move the main disconnect switch on the back of the oven to the ON position. ▪... -
Page 82: The Screen Has Icons, But No Text
▪ Press the ON/OFF button. Allow the oven to power up. ▪ If the icons are still missing contact Alto-Shaam Technical Service for the "Force Load file". ▪ The file will be emailed to you and you will we need the ability to load the file to a USB drive with the following requirements. -
Page 83: The Striped Screen Is Locked-Continuous
▪ Press the ON/OFF button. Allow the oven to power up. ▪ If the icons are still missing contact Alto-Shaam Technical Service for the "Force Load file". ▪ The file will be emailed to you and you will we need the ability to load the file to a USB drive with the following requirements. -
Page 84: Chamber(S) Do Not Heat-Solid State Relay (Ssr) Control Voltage Not Present
ROUBLESHOOTING Chamber(s) do not Heat—Solid State Relay (SSR) Control Voltage not Present Before you begin Locate the temperature high limit switches and reset any tripped high limit switch as required. Locate the circuit breakers and reset any tripped circuit breaker as required. Put the oven into a heating mode. Remove the service panel. - Page 85 Continued from previous page Is the chamber set Set the chamber set point above the chamber point above the temperature. Test and replace the thermocouple chamber as required. temperature? Navigate to the Refer to topic service screen, read Are LEDs 8, 9, 10, 11 "Chamber on the control board the blower RPM.
-
Page 86: The Chamber(S) Do Not Heat-Heater Element Line Voltage (Ssr Is Energized)
The Chamber(s) do not Heat—Heater Element Line Voltage (SSR is Energized) How the heating The heating elements require two phases of line voltage to operate. One phase element line voltage originates at the main disconnect switch and is connected through a terminal works board and then directly to the heating element. - Page 87 ROUBLESHOOTING At the main disconnect switch, place one meter lead on the phase that connects directly to the heating element. Place the second meter lead on the line side terminal of the circuit breaker for the phase that connects to the SSR. Measure the AC voltage across the two phases.
- Page 88 ROUBLESHOOTING Measure the current draw of the heater elements. Is the Replace the heater element. current draw correct? The heater is working properly. V ec to r ™ H Se ri e s Ser vi c e M an u a l MN- 4 6 54 3 Re v 0 1 1 1/ 1 9...
-
Page 89: The Chamber Is Slow To Heat
ROUBLESHOOTING The Chamber is Slow to Heat Before you begin Remove the left service panel. Locate the power wires to the blower motor to be tested. Place an ammeter on one of the power wires to the blower motor. WARNING: Electric shock and arc flash hazard. -
Page 90: A Single Chamber Blower Fan Does Not Operate
ROUBLESHOOTING A Single Chamber Blower Fan does not Operate Before you begin ▪ Locate the circuit breakers and reset any tripped circuit breaker as required. ▪ Remove the service panel. ▪ Navigate to the service screen, touch the blower test icon, set the blower speed to 100%, touch the check mark. -
Page 91: All Chamber Blower Fans Do Not Operate
ROUBLESHOOTING All Chamber Blower Fans do not Operate ▪ Before you begin Locate the circuit breakers and reset any tripped circuit breaker as required. ▪ Remove the service panel. ▪ Navigate to the service screen, touch the blower test icon, set the blower speed to 100%, touch the check mark. -
Page 92: Chamber Light Do Not Illuminate
ROUBLESHOOTING Chamber Light do not Illuminate Before you begin Navigate to the service screen, locate the "Door Lights" icon. Touch the icon to change between door lights mode "Green" and chamber lights mode "Red". Set the door lights to the proper mode for your oven. If the lights turn off when the door is opened check the "Door Lights"... -
Page 93: The Check Fan Indicator Light Is Illuminated
ROUBLESHOOTING The Check Fan Indicator Light is Illuminated ▪ Before you begin Inspect the cooling fan filters. Clean and replace as required. ▪ Put the oven into a cooking mode. ▪ Remove the service panel. WARNING: Electric shock and arc flash hazard. Use caution when measuring line voltage. -
Page 94: The Cooling Fan(S) Do Not Operate
ROUBLESHOOTING The Cooling Fan(s) do not Operate Before you begin Put the oven into a heating mode. WARNING: Electric shock and arc flash hazard. Use caution when measuring line voltage. Wear Personal Protective Equipment (PPE). NOTICE Do not operate the oven in a cooking mode for an extended period of time with the top panel removed. - Page 95 ROUBLESHOOTING Measure the AC voltage across the normally open terminal at the blower/fan Replace the blower/fan relay and L1. Does the relay. voltage correspond to the voltage printed on the serial number tag? Measure the AC voltage across TB3-L2 and L1. Does Repair or replace the the voltage correspond to wires from blowers/fan...
- Page 96 ROUBLESHOOTING This page intentionally left blank. V ec to r ™ H Se ri e s Ser vi c e M an u a l MN- 4 6 54 3 Re v 0 1 1 1/ 1 9 ▪ ▪ ▪...
-
Page 97: Assembly/Disassembly
SSEMBLY ISASSEMBLY Removing and Installing the Blower Motor ▪ Before you begin The oven must be disconnected from electric power. ▪ Have a replacement blower motor. Procedure To remove and install the blower motor, do the following. WARNING: Electric shock hazard. Disconnect the appliance from electric power before servicing the appliance. - Page 98 SSEMBLY ISASSEMBLY Continued from previous page Remove the mounting screws and remove the motor support plate. VMC-TS-008229 the insulation around the motor. Remove the three mounting screws and remove the motor and blower wheel from the housing. Install the new motor with the three mounting screws. Tape all the seams in the insulation.
-
Page 99: Removing And Installing A Heater Element
SSEMBLY ISASSEMBLY Removing and Installing a Heater Element ▪ Before you begin The oven must be disconnected from electric power. ▪ Have a replacement heater element. Procedure To remove and install a heater element, do the following. WARNING: Electric shock hazard. Disconnect the appliance from electric power before servicing the appliance. - Page 100 SSEMBLY ISASSEMBLY Continued from previous page the insulation around the heater element panel. Move the insulation away from the heater element panel. Remove the heater element panel VMC-TS-007631 Remove the heater element from the oven. Install the new heater element into the oven. VMC-TS-007634 Re-install the heater element panel.
Need help?
Do you have a question about the Vector Series and is the answer not in the manual?
Questions and answers