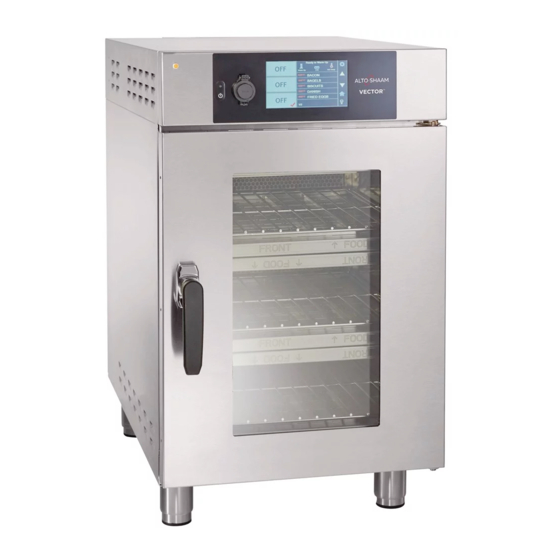
Alto-Shaam Vector VMC-H2 Service Manual
Multi-cook oven deluxe control
Hide thumbs
Also See for Vector VMC-H2:
- Service manual (124 pages) ,
- Operator's manual (116 pages) ,
- Operator's manual (80 pages)

Related Manuals for Alto-Shaam Vector VMC-H2


Summary of Contents for Alto-Shaam Vector VMC-H2
- Page 1 Service Manual Vector™ Multi-Cook Oven Deluxe Control VMC-H2 VMC-H2H VMC-H3 VMC-H3H VMC-H4 VMC-H4H Structured Air Technology™ MN-46544-EN REV.01 11/19 alto-shaam.com...
-
Page 2: Manufacturer's Information
© Copyright 11/19 by Alto-Shaam, Inc. All rights reserved. This manual or any portion thereof may not be reproduced or used in any manner whatsoever without the express written permission of Alto-Shaam, Inc. Trademarks All trademarks referenced in this documentation are the property of their respective owners. -
Page 3: Foreword
Call 800-558-8744 to reach our 24-hour emergency service call center for immediate access to local authorized service agencies outside standard business hours. The emergency service access is provided exclusively for Alto-Shaam equipment and is available throughout the United States through Alto-Shaam’s toll free number. - Page 4 OREWORD This page intentionally left blank. V ec to r ™ H Se ri e s Ser vi c e M an u a l MN- 4 6 54 4 Re v 0 1 1 1/ 1 9 ▪ ▪ ▪...
-
Page 5: Table Of Contents
Manufacturer’s Information ......2 Foreword Alto-Shaam 24/7 Emergency Repair Service ....3 Table of Contents Safety The Meaning of Signal Words . - Page 6 Cheflinc.alto-shaam.com is not Available on your Device ..73 Cannot Connect to cheflinc.alto-shaam.com ....74 The Oven is not Displayed on the Dashboard ....75...
-
Page 7: Safety
AFETY The Meaning of Signal Words This manual contains signal words where needed. These signal words must be obeyed to reduce the risk of death, personal injury, or equipment damage. The meaning of these signal words is explained below. DANGER Danger indicates a hazardous situation which, if not avoided, will result in serious injury or death. -
Page 8: Safety Precautions
AFETY Safety Precautions Before you begin Read and understand all instructions in this manual. Electrical precautions Obey these electrical precautions when using the appliance: ▪ Connect the appliance to a properly grounded outlet. Do not use the appliance if it is not properly grounded. Consult an electrician if there is any doubt that the outlet used is properly grounded. - Page 9 Only trained personnel are permitted to service or repair the appliance. Repairs that are not performed by an authorized service partner or trained technician, or appliance the use of non-factory parts, will void the warranty and relieve Alto-Shaam of all liability. ▪...
- Page 10 AFETY Personal Protective Wear the following Personal Protective Equipment (PPE) while cleaning the Equipment (PPE) appliance: ▪ Protective gloves ▪ Protective clothing ▪ Eye protection ▪ Face protection Service Technician Only trained personnel are permitted to service or repair the appliance. Service technicians must be knowledgeable in current codes and standards as stated by the Training appropriate agencies, such as:...
-
Page 11: Operation
PERATION How to Turn On and Turn Off the Oven Before you begin The oven must be connected to electric power. Turning on the oven To turn on the oven, do the following. Step Action the main disconnect switch to the ON position. Touch the ON/OFF button ... -
Page 12: How To View And Set Up Network Connections
PERATION How to View and Set up Network Connections ▪ Before you begin The facility must have WIFI. ▪ Do not connect to a guest network. Procedure To set up WIFI, do the following. Step Action Touch the menu icon . - Page 13 PERATION Continued from previous page Scroll to the SSID and IP address. Touch the SSID > icon AS-TS-008283 The available networks will show on the screen. The color of the network icon indicates the strength of the signal for each network. Green = strong Red = weak If the network to be used is not displayed, continue with step 5.
- Page 14 PERATION Continued from previous page Touch the box for the network to be used. The box will turn green with a Touch small check mark. the check mark AS-TS-008292 Enter your network password, then touch the check mark . The connection type WIFI screen is displayed.
-
Page 15: Components
OMPONENTS Component Identification Ve ct or ™ H Se r i es Se r vi ce Ma n ua l MN -4 6 5 4 4 Rev 0 1 1 1 / 19 ▪ ▪ ▪ ▪... -
Page 16: Chamber Identification
OMPONENTS Chamber Identification Components will be identified in accordance with the chamber numbering illustrated here. VMC-PHD-007530 V ec to r ™ H Se ri e s Ser vi c e M an u a l MN- 4 6 54 4 Re v 0 1 1 1/ 1 9 ▪... -
Page 17: Front Panel Identification
OMPONENTS Front Panel Identification VMC-PHD-007533 Ref. Description Check fans indicator light ON/OFF button USB port Control panel display Ve ct or ™ H Se r i es Se r vi ce Ma n ua l MN -4 6 5 4 4 Rev 0 1 1 1 / 19 ▪... -
Page 18: Back Panel Identification
OMPONENTS Back Panel Identification VMC-PHD-007536 Ref. Description Cooling Fans/Filters Main disconnect switch Electrical supply cord Tether ring mount Equipotential-bonding terminal V ec to r ™ H Se ri e s Ser vi c e M an u a l MN- 4 6 54 4 Re v 0 1 1 1/ 1 9 ▪... -
Page 19: Component Access Panels Identification
OMPONENTS Component Access Panels Identification VMC-PHD-007539 Ref. Description Provides access to Top service panel Electrical components Left service panel Heating elements, catalyst, and thermocouples Circuit breaker access panel Circuit breakers Control panel Interface board Right service panel Blower motors and cooling fans Ve ct or ™... -
Page 20: H4-Electrical Component Identification
OMPONENTS H4—Electrical Component Identification VMC-PHD-007545 Ref. Description Ref. Description Check fans indicator light switch Terminal blocks Terminal blocks USB port Main disconnect switch Control board Circuit breakers (heating ele- Relays ments) Variable Frequency Drive (VFD) Fuses (lights) Solid State Relay (SSR) Wye filter (CE models only) Line filter (CE models only) Circuit breakers (control) -
Page 21: H3-Electrical Component Identification
OMPONENTS H3—Electrical Component Identification VMC-PHD-007542 Ref. Description Ref. Description Check fans indicator light switch Terminal blocks Terminal blocks USB port Main disconnect switch Control board Circuit breakers (heating ele- Relays ments) Variable Frequency Drive (VFD) Fuses (lights) Solid State Relay (SSR) Wye filter (CE models only) Line filter (CE models only) Circuit breakers (control) -
Page 22: H2-Electrical Component Identification
OMPONENTS H2—Electrical Component Identification VMC-PHD-007548 Ref. Description Ref. Description Check fans indicator light switch Terminal blocks Terminal blocks USB port Main disconnect switch Control board Circuit breakers (heating ele- Relays ments) Variable Frequency Drive (VFD) Fuses (lights) Solid State Relay (SSR) Wye filter (CE models only) Line filter (CE models only) Circuit breakers (control) -
Page 23: Electrical Components
OMPONENTS Electrical Components Check Fans Indicator Light Switch ▪ The contacts close at or above 130°F (54°C) VMC-PHD-001903 Terminal Blocks for Electrical Supply Non-CE TB 1 TB 1 TB 2 TB 2 TB 3 VMC-PHD-001907 TB 1 TB 2 TB 3 TB N Ve ct or ™... -
Page 24: Main Disconnect Switch
OMPONENTS Main Disconnect Switch VMC-PHD-001911 Circuit Breakers (Heating Elements) CB 1 - Chamber 1 CB 1 - Chamber 1 CB 2 - Chamber 2 CB 2 - Chamber 2 CB 3 - Chamber 3 CB 3 - Chamber 3 CB 4 - Chamber 4 CB 1 - Chamber 1 CB 2 - Chamber 2 VMC-PHD-001915... -
Page 25: Variable Frequency Drive (Vfd)
OMPONENTS Variable Frequency Drive (VFD) WARNING: Electric shock hazard. Do not disassemble the VFD. VMC-PHD-007590 Ve ct or ™ H Se r i es Se r vi ce Ma n ua l MN -4 6 5 4 4 Rev 0 1 1 1 / 19 ▪... -
Page 26: Solid State Relay (Ssr)
OMPONENTS Solid State Relay (SSR) Heater element control. One SSR for each chamber. VMC-PHD-001923 Ref. Description L1 terminal, AC line voltage into the SSR T1 terminal, AC load voltage to the heating element Call for heat indicator light A2 (-) terminal, DC control voltage from the control board to the SSR A2 (+) terminal, DC control voltage from the control board to the SSR V ec to r ™... -
Page 27: 12Vac Transformer
OMPONENTS 12VAC Transformer The transformer provides a voltage signal to the control board. The signal allows the control board to determine the incoming line voltage. ▪ Primary: 1700 Ohms ▪ Secondary: 6 Ohms 240 VAC VMC-PHD-001927 12VDC Power Supply Supplies DC voltage to the control board and the ON/OFF switch. Vo Adj VMC-PHD-001935 Ref. - Page 28 OMPONENTS Terminal Blocks (VFDs and Cooling Fans) VMC-PHD-001939 Ref. Description TB 4 - L2 TB 5 - L1 TB 6 - L2 (switched) Ground V ec to r ™ H Se ri e s Ser vi c e M an u a l MN- 4 6 54 4 Re v 0 1 1 1/ 1 9...
- Page 29 OMPONENTS Control Board (CB) Í TELCO VFD SIEMENS VFD ON VMC-PHD-001947 Ref. Description Ref. Description Ref. Description Drive 1 communication Jumper LED 9 Chamber 2 call for heat LED 10 Chamber 3 call for heat Input signals Not used Door handle lights Input from chamber com- LED 11 Chamber 4 call for heat bine switches (F Series only)
- Page 30 OMPONENTS Relays AZ 22 AZ 22 VMC-PHD-001951 Ref. Description Ref. Description RL-3 (H3 only) Common terminal RL-1, T9C, 240VAC coil Coil terminal Input to the control board for the check fan indicator light Coil—10.90 K Ohm RL-2, AZ 22, 12VDC coil Normally open terminal Blowers/fan Coil—155 Ohm...
- Page 31 OMPONENTS Fuses (Chamber Lights) Fuse, 1A, 250V, Slow-Blo, 5 x 20 mm VMC-PHD-007561 Circuit Breakers (Control) CB 5 - L1 CB 6 - L2/N VMC-PHD-001955 Ve ct or ™ H Se r i es Se r vi ce Ma n ua l MN -4 6 5 4 4 Rev 0 1 1 1 / 19...
-
Page 32: Left Service Panel Identification
OMPONENTS Left Service Panel Identification VMC-PHD-007565 Ref. Description Chamber heating element Catalyst High limit switch Chamber air temperature probe Speaker Door switch V ec to r ™ H Se ri e s Ser vi c e M an u a l MN- 4 6 54 4 Re v 0 1 1 1/ 1 9... -
Page 33: Left Service Panel Components
OMPONENTS Left Service Panel Components Chamber Heating Element 18 Ohms VMC-PHD-001979 Catalyst VMC-PHD-001983 Ve ct or ™ H Se r i es Se r vi ce Ma n ua l MN -4 6 5 4 4 Rev 0 1 1 1 / 19 ▪... - Page 34 OMPONENTS High Limit Switches Resettable Contacts open at 572°F (300°C) VMC-PHD-001987 Ref. Description Reset button Temperature bulb Chamber Air Temperature Probe K Type Thermocouple 100°C 4.096 MV 100°F 1.521 MV 200°C 8.138 MV 200°F 3.820 MV 300°C 12.209 MV 300°F 6.094 MV VMC-PHD-001991 V ec to r ™...
-
Page 35: Door Switch
OMPONENTS Speaker 8 Ohms VMC-PHD-001995 Door Switch ▪ Door closed 0 Ohms; 0 VDC across terminals 1 and 2 of connector P3 on the control board. ▪ Door open Infinite Ohms; 8 VDC across terminals 1 and 2 of connector P3 on the control board. -
Page 36: Control Panel
OMPONENTS Control Panel VMC-PHD-007596 Ref. Description WIFI antenna (Not serviceable) Capacitive touch controller board (Not serviceable) Interface board Liquid Crystal Display (LCD) (Not serviceable) ON/OFF board (Not serviceable) USB port V ec to r ™ H Se ri e s Ser vi c e M an u a l MN- 4 6 54 4 Re v 0 1... - Page 37 OMPONENTS Interface Board INTERFACE BOARD INTERFACE BOARD SIDE A SIDE B TOP of TOP of OVEN OVEN BATT DO NOT USE WIFI VMC-TS-008222 Ref. Description BATT Clock battery Capacitive touch cable USB connections Display back light LCD interface Speaker 12 VDC power 8 GB micro SD card ON/OFF board Speaker...
-
Page 38: Right Service Panel Identification
OMPONENTS Right Service Panel Identification VMC-PHD-007574 Ref. Description Chamber blower motor Cooling fans Filter—cooling air V ec to r ™ H Se ri e s Ser vi c e M an u a l MN- 4 6 54 4 Re v 0 1 1 1/ 1 9 ▪... -
Page 39: Right Service Panel Components
OMPONENTS Right Service Panel Components Blower Assembly 4.3 Ohms VMC-PHD-002007 Fans ▪ Impedance protected ▪ 240 Volt ▪ 581 Ohm VMC-PHD-002011 Ve ct or ™ H Se r i es Se r vi ce Ma n ua l MN -4 6 5 4 4 Rev 0 1 1 1 / 19 ▪... - Page 40 OMPONENTS Filter—Cooling Air VMC-PHD-002015 V ec to r ™ H Se ri e s Ser vi c e M an u a l MN- 4 6 54 4 Re v 0 1 1 1/ 1 9 ▪ ▪ ▪ ▪...
-
Page 41: Internal Components Identification
OMPONENTS Internal Components Identification VMC-PHD-007583 VMC-PHD-007580 Ref. Description Chamber light Filters (optional) Ve ct or ™ H Se r i es Se r vi ce Ma n ua l MN -4 6 5 4 4 Rev 0 1 1 1 / 19 ▪... -
Page 42: Internal Components
OMPONENTS Internal Components Chamber Light 12 VDC VMC-PHD-007587 Filters (optional) VMC-PHD-002027 V ec to r ™ H Se ri e s Ser vi c e M an u a l MN- 4 6 54 4 Re v 0 1 1 1/ 1 9 ▪... -
Page 43: Maintenance
AINTENANCE Maintenance Schedule ▪ Requirements See topic How to Clean the Oven. ▪ Make sure the oven is cooled down and off—inside of chamber 140°F (60°C) or less. Daily For daily maintenance, do the following. ▪ Remove any spills with disposable paper wipes or a damp cloth. ▪... -
Page 44: How To Clean The Oven
AINTENANCE How to Clean the Oven Before you begin WARNING: Electric shock hazard. Set the main disconnect switch to the OFF position to remove electric power from the appliance. CAUTION: Burn hazard. Allow the oven, utensils, and racks to cool before cleaning. CAUTION: Corrosive materials hazard. - Page 45 AINTENANCE Continued from previous page Weekly cleaning To clean the oven weekly, do the following. procedure Step Action the main disconnect switch to the OFF position. Make sure the oven is cool—chambers are less than 140°F (60°C). VMC-TS-006236 Spray the exterior areas of the oven with stainless steel polish. NOTICE Use only non-caustic cleaners.
- Page 46 AINTENANCE Continued from previous page Monthly cleaning To clean the oven monthly, do the following. procedure Step Action the main disconnect switch to the OFF position. Make sure the oven is cool—chambers are less than 140°F (60°C). VMC-TS-006236 Remove the cooking racks and jet plates CAUTION: Personal injury hazard.
- Page 47 AINTENANCE Continued from previous page Re-install the jet plates and cooking racks. NOTE: Make sure the jet plates are installed correctly. The nozzles on the jet plates should be pointing toward the food. Cleaning the filters Remove the filters (optional) VMC-TS-007616 Clean...
- Page 48 AINTENANCE This page intentionally left blank. V ec to r ™ H Se ri e s Ser vi c e M an u a l MN- 4 6 54 4 Re v 0 1 1 1/ 1 9 ▪ ▪ ▪...
-
Page 49: Troubleshooting
ROUBLESHOOTING The Oven will not Power Up ▪ Before you start Remove the circuit breaker service panel on the left side of the oven. ▪ Move the circuit breakers to the OFF position, then move the circuit breakers to the ON position and retry operation. If the oven still does not power up, follow the troubleshooting procedure below. - Page 50 ROUBLESHOOTING Continued from previous page Is there 12VDC out of the power supply between the Replace the faulty power supply. positive and negative side terminals? Inspect the wiring between power Is there 12VDC at the interface board? Is the green supply and the interface board for LED light on the board near the J12 illuminated? broken, open, or lose connections.
-
Page 51: The Oven Does Not Heat
ROUBLESHOOTING The Oven does not Heat ▪ Before you start Read and follow the steps described in the topic The Chambers do not Heat— Element Control Voltage. ▪ At the main disconnect switch, determine which phase connects directly to the heating element, and which phase connects to the L1 terminal of the SSR. - Page 52 ROUBLESHOOTING Continued from previous page Enter a value higher than the temperature sensor value. Touch the check mark. Select the button to the right of the heater. NOTE: The button will move to the right and turn gray. The convection fan button will also move to the right and turn gray.
- Page 53 ROUBLESHOOTING Continued from previous page Is there 12VAC out of the voltage selection Replace the voltage selection transformer. transformer? Check the length of wiring between the Is there 12VAC at the control board between J33 voltage selection transformer and the control and J30? board for open or broken connections.
-
Page 54: Chamber Blower Fans Do Not Operate
ROUBLESHOOTING Chamber Blower Fans do not Operate ▪ Before you start Put the oven into a heating mode. ▪ Remove the service panel. ▪ Locate the circuit breakers and reset any tripped circuit breaker as required. WARNING: Electric shock and arc flash hazard. Use caution when measuring line voltage. - Page 55 ROUBLESHOOTING Continued from previous page Verify the oven has the correct supplied voltage Inform the customer to call an electrician. and phase. Is the chamber on and calling for heat? Turn the chamber ON. Inspect the wiring to the voltage selection Does the voltage selection transformer have line transformer between circuit breakers 5 and 6 voltage supplied to it?
-
Page 56: Chamber Lights Do Not Illuminate
ROUBLESHOOTING Chamber Lights do not Illuminate Before you start Remove the service panel. WARNING: Electric shock and arc flash hazard. Use caution when measuring line voltage. Wear Personal Protective Equipment (PPE). NOTICE Do not operate the oven in a cooking mode for an extended period of time with the top panel removed. -
Page 57: The Check Fan Indicator Light Is Illuminated
ROUBLESHOOTING The Check Fan Indicator Light is Illuminated ▪ Before you start Put the oven into a heating mode. ▪ Remove the service panel. WARNING: Electric shock and arc flash hazard. Use caution when measuring line voltage. Wear Personal Protective Equipment (PPE). NOTICE Do not operate the oven in a cooking mode for an extended period of time with the top panel removed. -
Page 58: Door Handle Light Does Not Illuminate
ROUBLESHOOTING Door Handle Light does not Illuminate Before you start Remove the service panel. WARNING: Electric shock and arc flash hazard. Use caution when measuring line voltage. Wear Personal Protective Equipment (PPE). NOTICE Do not operate the oven in a cooking mode for an extended period of time with the top panel removed. -
Page 59: Axial Cooling Fan(S) Are Not Running
ROUBLESHOOTING Axial Cooling Fan(s) are not Running ▪ Before you start Put the oven into a heating mode. ▪ Remove the top service panel. WARNING: Electric shock and arc flash hazard. Use caution when measuring line voltage. Wear Personal Protective Equipment (PPE). NOTICE Do not operate the oven in a cooking mode for an extended period of time with the top panel removed. -
Page 60: How To Test The Convection Fan Motors
ROUBLESHOOTING How to Test the Convection Fan Motors Before you begin The oven must be connected to electric power. Procedure To test the convection fan motors, do the following. NOTICE Do not turn on the heaters during this test. Damage to the oven may occur. - Page 61 ROUBLESHOOTING Continued from previous page Scroll to the chamber selection buttons. VMC-TS-008133 Touch the button of the chamber to be tested. The chamber options are displayed. VMC-TS-008135 Scroll until the convection fan button is displayed. VMC-TS-008137 Touch the convection fan button .
- Page 62 ROUBLESHOOTING Continued from previous page Move the Set target speed button to change the motor RPM. If the blower speed changes, the system is working. VMC-TS-008155 Remove the right side panel from the oven. Touch the convection fan motor and feel for vibration. See topic Chamber Blower Fans Inoperable if the blower motor does not turn on.
-
Page 63: How To Test The Cooling Fans
ROUBLESHOOTING How to Test the Cooling Fans ▪ Before you begin The oven must be connected to electric power. ▪ Make sure the top cover and side panels are installed when conducting this test. Procedure To test the cooling fans, do the following. Step Action Touch... - Page 64 ROUBLESHOOTING Continued from previous page Scroll to the cooing fan button displays. VMC-TS-008166 Touch the cooling fan button . The cooling fans turn on. See topic The Cooling Fans do not Operate. if the fans do not operate. Touch the cooling fan button to turn the cooling fans off. VMC-TS-008171 Result The cooling fans have now been tested.
-
Page 65: How To Test The Heaters
ROUBLESHOOTING How to Test the Heaters ▪ Before you begin The oven must be connected to electric power. ▪ Remove the right side panel. Procedure To test the heaters, do the following. NOTICE Do not operate the oven in a cooking mode for an extended period of time with the top panel removed. - Page 66 ROUBLESHOOTING Continued from previous page Enter the pass code 6702 Touch the check mark . The general device information screen displays. VMC-TS-008131 Scroll to the chamber selection buttons. VMC-TS-008133 Touch the button of the chamber to be tested. The chamber options are displayed.
- Page 67 ROUBLESHOOTING Continued from previous page Touch the target temperature setting . The select temperature screen displays. VMC-TS-008180 Select a temperature higher than the current chamber temperature Touch the check mark. the target temperature is displayed. VMC-TS-008182 Touch the heater button .
- Page 68 ROUBLESHOOTING Continued from previous page Measure the amp draw while the heater is on. The amperage draw of a functioning heater element is 10-15 amps. WARNING: Electric shock hazard. Wear PPE and use best practices when measuring live voltage. VMC-TS-008224 Touch the heater button to stop the heater.
-
Page 69: How To Calibrate A Chamber Thermocouple
ROUBLESHOOTING How to Calibrate a Chamber Thermocouple ▪ Before you begin The oven must be connected to electric power. ▪ Make sure you have a multimeter with a thermocouple attachment. ▪ Make sure the jet plates are installed. ▪ You will need to know the service pass code. Procedure To calibrate a chamber thermocouple, do the following. - Page 70 ROUBLESHOOTING Continued from previous page Enter the pass code 6702 Touch the check mark . The general device information screen displays. VMC-TS-008131 Scroll to the chamber selection buttons. VMC-TS-008133 Touch the button of the chamber to be tested. The chamber options are displayed.
- Page 71 ROUBLESHOOTING Continued from previous page Touch the target temperature setting . The select temperature screen displays. VMC-TS-008180 Enter chamber Enter a temperature higher than the current chamber temperature temperature Touch the check mark. The target temperature is displayed. Repeat for all chambers. all chambers to the same temperature.
- Page 72 ROUBLESHOOTING Continued from previous page Calibrate the offset Calibrate the offset number. Subtract the smaller value from the larger value. This is the offset. If the value measured by the multimeter was the larger value, the offset will positive “+”. If the value measured by the multimeter was the smaller value, the offset will be negative “–”.
-
Page 73: Cheflinc.alto-Shaam.com Is Not Available On Your Device
ROUBLESHOOTING Cheflinc.alto-shaam.com is not Available on your Device If other website are not available, Are other websites available on your device from the contact your network provider or IT same network being used to access Cheflinc. department. If the website is blocked, contact... -
Page 74: Cannot Connect To Cheflinc.alto-Shaam.com
A recovery link will be sent to the email associated with the Cheflinc account. If you are still unable to log in, contact Alto-Shaam techical support. V ec to r ™ H Se ri e s Ser vi c e M an u a l... -
Page 75: The Oven Is Not Displayed On The Dashboard
ROUBLESHOOTING The Oven is not Displayed on the Dashboard Prerequisite: The operator is on a device connected to the Internet and is able to login to cheflin.alto-shaam.com. See topic, The Oven will not Power Up Does the oven power up? troubleshooting tree in the Service Manual. -
Page 76: Unable To Assign Recipes From The Dashboard To Ovens In The Field
See The Oven is not Displayed on the connected (yes) or offline (no)? Dashboard troubleshooting tree. Contact Alto-Shaam technical support for assistance. V ec to r ™ H Se ri e s Ser vi c e M an u a l... -
Page 77: Assembly/Disassembly
SSEMBLY ISASSEMBLY Removing and Installing the Blower Motor ▪ Before you begin The oven must be disconnected from electric power. ▪ Have a replacement blower motor. Procedure To remove and install the blower motor, do the following. WARNING: Electric shock hazard. Disconnect the appliance from electric power before servicing the appliance. - Page 78 SSEMBLY ISASSEMBLY Continued from previous page Remove the mounting screws and remove the motor support plate. VMC-TS-008229 the insulation around the motor. Remove the three mounting screws and remove the motor and blower wheel from the housing. Install the new motor with the three mounting screws. Tape all the seams in the insulation.
-
Page 79: Removing And Installing A Heater Element
SSEMBLY ISASSEMBLY Removing and Installing a Heater Element ▪ Before you begin The oven must be disconnected from electric power. ▪ Have a replacement heater element. Procedure To remove and install a heater element, do the following. WARNING: Electric shock hazard. Disconnect the appliance from electric power before servicing the appliance. - Page 80 SSEMBLY ISASSEMBLY Continued from previous page the insulation around the heater element panel. Move the insulation away from the heater element panel. Remove the heater element panel VMC-TS-007631 Remove the heater element from the oven. Install the new heater element into the oven. VMC-TS-007634 Re-install the heater element panel.
-
Page 81: Schematics
CHEMATICS OF OVEN Ve ct or ™ H Se r i es Se r vi ce Ma n ua l MN -4 6 5 4 4 Rev 0 1 1 1 / 19 ▪ ▪ ▪ ▪... - Page 138 CHEMATICS V ec to r ™ H Se ri e s Ser vi c e M an u a l MN- 4 6 54 4 Re v 0 1 1 1/ 1 9 ▪ ▪ ▪ ▪...
Need help?
Do you have a question about the Vector VMC-H2 and is the answer not in the manual?
Questions and answers