Table of Contents
Advertisement
Quick Links
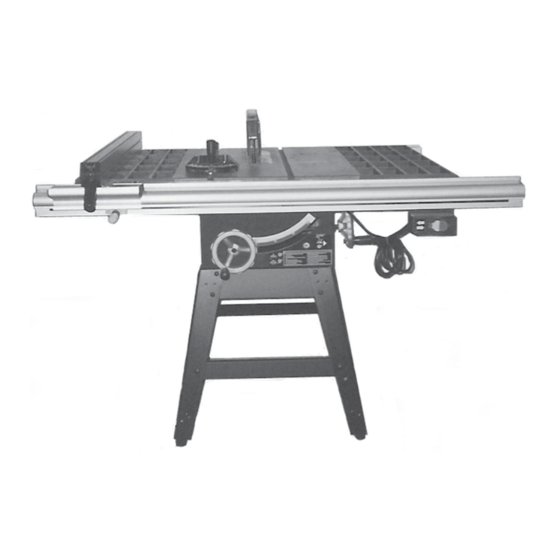
12" TABLE SAW
WITH RIP FENCE
Model 93491
ASSEMBLY AND OPERATING INSTRUCTIONS
Due to continuing improvements, actual product may differ slightly from the product described herein.
®
3491 Mission Oaks Blvd., Camarillo, CA 93011
Visit our Web site at: http://www.harborfreight.com
TO PREVENT SERIOUS INJURY,
READ AND UNDERSTAND ALL WARNINGS
AND INSTRUCTIONS BEFORE USE.
©
®
Copyright
2006 by Harbor Freight Tools
. All rights reserved. No portion of this manual
or any artwork contained herein may be reproduced in any shape or form without the
express written consent of Harbor Freight Tools.
For technical questions, please call 1-800-444-3353.
Advertisement
Table of Contents

Related Manuals for Central Machinery 93491


Summary of Contents for Central Machinery 93491
- Page 1 12” TABLE SAW WITH RIP FENCE Model 93491 ASSEMBLY AND OPERATING INSTRUCTIONS Due to continuing improvements, actual product may differ slightly from the product described herein. ® 3491 Mission Oaks Blvd., Camarillo, CA 93011 Visit our Web site at: http://www.harborfreight.com...
-
Page 2: Table Of Contents
Parts List G & Assembly Diagram G ....................58 Parts List H & Assembly Diagram H ....................59 Parts List I ............................60 Assembly Diagram I ..........................61 WARRANTY ......................... 62 SKU 93491 For technical questions, please call 1-800-444-3353. Page 2... -
Page 3: Product Specifications
Keep bystanders, children, and visitors away while operating a power tool. Distractions can cause you to lose control. Protect others in the work area from debris such as chips and sparks. Provide barriers or shields as needed. SKU 93491 For technical questions, please call 1-800-444-3353. Page 3... - Page 4 Avoid accidental starting. Be sure the Power Switch is off before plugging in. Carrying power tools with your finger on the Power Switch, or plugging in power tools with the Power Switch on, invites accidents. SKU 93491 For technical questions, please call 1-800-444-3353. Page 4...
- Page 5 Check for misalignment or binding of moving parts, breakage of parts, and any other condition that may affect the tool’s operation. If damaged, have the tool serviced before using. Many accidents are caused by poorly maintained tools. SKU 93491 For technical questions, please call 1-800-444-3353. Page 5...
-
Page 6: Specific Safety Rules
“push stick” (not included) if necessary. Never leave the Table Saw unattended when it is plugged into an electrical outlet. Turn off the tool, and unplug it from its electrical outlet before leaving. SKU 93491 For technical questions, please call 1-800-444-3353. Page 6... - Page 7 The Saw Blade will become hot while cutting. Allow the Saw Blade to completely cool before handling. Do not force the workpiece into the Saw Blade when cutting. Apply moderate pressure, allowing the Saw Blade to cut without being forced. SKU 93491 For technical questions, please call 1-800-444-3353. Page 7...
- Page 8 Saw Teeth are not engaged into the woodstock. If the Saw Blade is binding, the woodstock may walk up or kick back as the Table Saw is restarted. SKU 93491 For technical questions, please call 1-800-444-3353. Page 8...
- Page 9 Use the right tool for the job. Do not attempt to force small equipment to do the work of larger industrial equipment. There are certain applications for which this Table Saw was designed. It will do the job better and more safely at the rate SKU 93491 For technical questions, please call 1-800-444-3353. Page 9...
-
Page 10: Grounding
Tools marked with “Grounding Required” have a three wire cord and three prong grounding plug. The plug must be connected to a properly grounded outlet. If the tool should electrically malfunction or break down, grounding provides a low SKU 93491 For technical questions, please call 1-800-444-3353. Page 10... -
Page 11: Extension Cords
(See Figure B.) When using more than one extension cord to make up the total length, make sure each cord contains at least the minimum wire size required. (See Figure B.) SKU 93491 For technical questions, please call 1-800-444-3353. Page 11... -
Page 12: Symbology
150% of the rated amperes. SYMBOLOGY Double Insulated Canadian Standards Association Underwriters Laboratories, Inc. Volts Alternating Current Amperes No Load Revolutions xxxx/min. per Minute (RPM) FIGURE C SKU 93491 For technical questions, please call 1-800-444-3353. Page 12... -
Page 13: Unpacking
CAUTION! Always make sure the Power Switch (8E) of the Table Saw is in its “OFF” position and the tool is unplugged from its electrical outlet prior to assembling the tool, adding any accessories, or making adjustments to the tool. SKU 93491 For technical questions, please call 1-800-444-3353. Page 13... -
Page 14: To Assemble The Stand
HEX NUT (2B) CARRIAGE BOLT WASHER (3B) (5B) WASHER (3B) HEX NUT (2B) (4B) WASHER (3B) HEX NUT (2B) LEVELING FOOT (1B) LONG LEG BRACE (10B) SHORT LEG BRACE (9B) FIGURE E SKU 93491 For technical questions, please call 1-800-444-3353. Page 14... -
Page 15: To Attach The Saw Table To The Stand
(See Figure E.) ASSEMBLED STAND FIGURE F To Attach The Saw Table To The Stand: WARNING! Avoid injury. Do not lift the Saw Table without additional help and a proper lifting device. SKU 93491 For technical questions, please call 1-800-444-3353. Page 15... - Page 16 Wrench (17-I). NOTE: Leave the Table Saw sitting upside down. (See Figure G.) HEX NUT (2B) STAND LEG (4B) WASHER (3B) WASHER (3B) BASE (1G) HEX BOLT (8B) FIGURE G SKU 93491 For technical questions, please call 1-800-444-3353. Page 16...
-
Page 17: To Attach The Saw Table Extensions
TABLE EXTENSION (5H) TABLE (5H) SAW TABLE EDGE EXTENSION TABLE EDGE HERE SIDE VIEW TAP HERE EXTENSION TABLE EDGE SAW TABLE EDGE (2B) HEX BOLT (8B) WASHER FRONT VIEW (3B) SKU 93491 For technical questions, please call 1-800-444-3353. Page 17... -
Page 18: To Attach The Rear Rail
TABLE (3H) (5H) SLOT BOLT REAR RAIL (3H) SQUARE HEX NUT HEAD WASHER (13H) BOLT (12H) (10H) 2-1/2” SQUARE HEAD BOLT (10H) REAR RAIL INSTALLED WASHER HEX NUT (12H) (13H) SKU 93491 For technical questions, please call 1-800-444-3353. Page 18... -
Page 19: To Attach The Front Rail
Snug the Front Rail (7H) against the Saw Table (17H) and Extension Tables (5H). Then, finger-tighten each Hex Nut (13H) on the Saw Table and Extension Tables. (See Figure J.) SKU 93491 For technical questions, please call 1-800-444-3353. Page 19... -
Page 20: To Align The Rip Fence And Front Rail
Hook the back of the Rip Fence (10C) over the Rear Rail (3H). Lower the front of the Rip Fence into the groove on the Front Rail (7H). (See Figure K, next page.) SKU 93491 For technical questions, please call 1-800-444-3353. Page 20... -
Page 21: To Attach The Blade Guard
To Attach The Blade Guard: This procedure will require use of the following hardware: A. 2 Hex Bolts (2-I). B. 3 Socket Head Screws (5D). C. 2 Lock Washers (1-I). D. 3 Washers (4D). SKU 93491 For technical questions, please call 1-800-444-3353. Page 21... - Page 22 (7D). Align the hole in the front of the Riving Knife Base (6D) with the screw hole BLADE GUARD SOCKET HEAD SCREW (5D) (10D) WASHER (4D) RIVING KNIFE (6D) BLADE GUARD BRACKET (7D) FIGURE M SKU 93491 For technical questions, please call 1-800-444-3353. Page 22...
-
Page 23: To Check The Throat Plate For Proper Alignment
Set Screws (14H) on the Throat Plate with a 2mm Hex Key. Do not allow the Throat Plate to bow up above the Saw Table surface. (See Figure O.) SKU 93491 For technical questions, please call 1-800-444-3353. Page 23... -
Page 24: To Check Rip Fence And Saw Blade Alignment
Fence (10C) with the Saw Blade (14-I). (See Figure S.) Retighten the four Adjustment Screws (11C) in alternating order and check the alignment. (See Figure S.) Repeat until the Rip Fence (10C) is aligned. SKU 93491 For technical questions, please call 1-800-444-3353. Page 24... -
Page 25: To Align The Riving Knife With The Saw Blade
The Riving Knife (6D) must be aligned and centered over the Saw Blade (14-I). (See Figure P.) Raise the Saw Blade (14-I) and the Blade Guard (10D). (See Figure P.) SKU 93491 For technical questions, please call 1-800-444-3353. Page 25... - Page 26 HEAD SCREW (5D) FRAMING SQUARE SAW BLADE (NOT INCLUDED) (14-I) SAW BLADE VIEWED FROM TOP (14-I) OF SAW WITH RIVING KNIFE SHOWN CENTERED OVER SAW BLADE FIGURE Q FIGURE R SKU 93491 For technical questions, please call 1-800-444-3353. Page 26...
-
Page 27: To Replace The Saw Blade
Place the Outer Blade Washer (15-I) and Blade Nut (16-I) on the Arbor Shaft (13-I). Make sure the dome side of the Outer Blade Washer faces out from the Saw Blade (14-I) and that all parts are snug against the Arbor Housing. Then, SKU 93491 For technical questions, please call 1-800-444-3353. Page 27... -
Page 28: To Parallel The Saw Blade To The Miter Gauge Groove
TEETH DOWN AT FRONT WASHER (15-I) BLADE NUT (16-I) BLADE GUARD (10D) ARBOR SHAFT (13-I) SAW BLADE AT HIGHEST POSITION LOOSEN SCRAP WOOD SCRAP SAW BLADE WOOD TIGHTEN SAW BLADE FIGURE T SKU 93491 For technical questions, please call 1-800-444-3353. Page 28... - Page 29 Tighten the three Hex Head Bolts (9-I). Raise the Saw Blade (14-I) and re-check. (See Figure U.) Repeat the above Steps until the Saw Blade (14-I) is parallel to the Miter Gauge SKU 93491 For technical questions, please call 1-800-444-3353. Page 29...
- Page 30 REAR HEX HEAD BOLT (9-I) REAR TABLE BRACKET (7-I) REAR HEAD BOLT (9-I) MITER GAUGE FRONT GROOVE TABLE BRACKET (7-I) FRONT HEX HEAD BOLT (9-I) FIGURE U (VIEWED FROM BELOW) SKU 93491 For technical questions, please call 1-800-444-3353. Page 30...
-
Page 31: To Set The Bevel Stops And Indicator
LOCK SET SCREW HANDLE (18H) 45 DEGREE (19-I) SET SCREW (NOT SHOWN) (18H) HEIGHT HAND WHEEL (4G) BEVEL SCALE INDICATOR BEVEL HAND WHEEL (4G) FIGURE V HEIGHT HAND WHEEL (4G) SKU 93491 For technical questions, please call 1-800-444-3353. Page 31... -
Page 32: To Adjust The Miter Gauge
MITER GAUGE KNOB (2A) MITER GAUGE ROD (10A) MITER GAUGE BASE (4A) 45 DEGREE STOP SCREW (11A) 0 DEGREE STOP SCREW (11A) STOP PIN (8A) FIGURE W HEX NUT (12A) SKU 93491 For technical questions, please call 1-800-444-3353. Page 32... -
Page 33: Removing And Replacing The Throat Plate
Spring Clip. NOTE: The key slot in the Throat Plate will drop over the Flat Head Screw (16H). (See Figure X.) THROAT PLATE (15H) SPRING CLIP KEY SLOT SET SCREWS (18H) SAW TABLE (17H) FIGURE X FLAT HEAD SCREW (16H) SKU 93491 For technical questions, please call 1-800-444-3353. Page 33... -
Page 34: Operating Instructions
(See Figure Y.) A pushblock (not included) has a handle fastened by recessed screws from the underside. Use a pushblock on non-through cuts. (See Figure Y.) PUSHSTICKS PUSHBLOCKS FIGURE Y SKU 93491 For technical questions, please call 1-800-444-3353. Page 34... -
Page 35: Resetting The Thermal Overload Protector
(See Figure AA.) NOTE: THE MOTOR SHOULD BE BLOWN OUT OR VACUUMED FREQUENTLY TO PREVENT SAWDUST BUILD-UP WHICH CAN INTERFERE WITH MOTOR COOLING. MOTOR (7F) FIGURE AA MOTOR RESET BUTTON SKU 93491 For technical questions, please call 1-800-444-3353. Page 35... -
Page 36: The Power Switch
Place a support (not included) the same height as the Saw Table (17H) behind the Table Saw for large workpieces. (See Figure II, page 45.) The Miter Gauge may be used in either of the two Miter Gauge Grooves in the SKU 93491 For technical questions, please call 1-800-444-3353. Page 36... - Page 37 WHEN MITER GAUGE IS ON LEFT SIDE OF SAW BLADE PLACE RIGHT HAND ON MITER GAUGE KNOB (2A) HERE. PLACE LEFT HAND ON FIGURE CC WORKPIECE AND MITER GAUGE BASE (4A) HERE. SKU 93491 For technical questions, please call 1-800-444-3353. Page 37...
-
Page 38: Making A Rip Cut
Plug the Power Cord Plug into the nearest 220 volt, grounded, electrical outlet. Then, insert the Switch Key and pull the Power Switch (8E) to its “ON” position. (See Figure BB.) RIP CUT SCALE (6H) (14-I) SAW BLADE RIP FENCE FIGURE DD SKU 93491 For technical questions, please call 1-800-444-3353. Page 38... -
Page 39: Making A Miter Cut
Saw Blade height, turn the Height Hand Wheel (4G). (See Figure EE.) MITER CUT SAW BLADE (14-I) STRAIGHT MITER GAUGE ANGLED HEIGHT HAND WHEEL (4G) FIGURE EE BEVEL HAND WHEEL (4G) SKU 93491 For technical questions, please call 1-800-444-3353. Page 39... -
Page 40: Making A Bevel Cross Cut
(See Figure FF, next page.) Raise the Rip Fence Handle (37C) and remove the Rip Fence. Set the Saw Blade (14-I) angle by loosening the Bevel Lock Handle (19-I) and SKU 93491 For technical questions, please call 1-800-444-3353. Page 40... - Page 41 SAW BLADE (14-I) MITER GAUGE STRAIGHT ANGLED BEVEL LOCK HANDLE BEVEL HAND WHEEL (4G) (19-I) BEVEL LOCK HANDLE (VIEWED FROM THE FRONT, BELOW THE SAW TABLE) FIGURE FF (NOT SHOWN) SKU 93491 For technical questions, please call 1-800-444-3353. Page 41...
-
Page 42: Making A Bevel Rip Cut
Place a support (not included) the same height as the Saw Table (17H) behind BEVEL RIP CUT SAW BLADE (14-I) ANGLED RIP FENCE ON RIGHT SIDE OF SAW BLADE SCALE (6H) FINE ADJUSTMENT KNOB (30C) FIGURE GG SKU 93491 For technical questions, please call 1-800-444-3353. Page 42... -
Page 43: Making A Compound (Bevel) Miter Cut
Place a support (not included) the same height as the Saw Table (17H) behind the Table Saw for cut workpieces. Make sure the workpiece is not touching the Saw Blade (14-I). SKU 93491 For technical questions, please call 1-800-444-3353. Page 43... -
Page 44: Making A Large Panel Cut
WARNING! Make sure the Blade Guard (10D) is lowered over the Saw Blade (14-I) and is working properly to prevent possible injury. Make sure the Table Saw is properly secured to a work surface to avoid tipping SKU 93491 For technical questions, please call 1-800-444-3353. Page 44... - Page 45 Switch Key. Then, unplug the Power Cord Plug from its electrical outlet. (See Figure BB.) LARGE PANEL CUT RIP FENCE SUPPORT HEIGHT HAND WHEEL (4G) BEVEL HAND WHEEL (4G) FIGURE II SKU 93491 For technical questions, please call 1-800-444-3353. Page 45...
-
Page 46: Making A Dado Cut
After extended use, you should inspect, clean, and lubricate the areas shown in the illustration below. Clean before lubricating with a solvent recommended for gum and pitch removal. Lubricate with machine oil. (See Figure LL, next page.) SKU 93491 For technical questions, please call 1-800-444-3353. Page 46... - Page 47 Screws (42-I), and close the Outer Belt Guard (1F). (See Figure MM, next page.) CAUTION! All maintenance, service, or repairs not mentioned in this manual must only be performed by a qualified service technician. SKU 93491 For technical questions, please call 1-800-444-3353. Page 47...
- Page 48 TECHNICIANS, AND NOT BY THE BUYER. THE BUYER ASSUMES ALL RISKS AND LIABILITY ARISING OUT OF HIS OR HER REPAIRS TO THE ORIGINAL PRODUCT OR REPLACEMENT PARTS THERETO, OR ARISING OUT OF HIS OR HER INSTALLATION OF REPLACEMENT PARTS THERETO. SKU 93491 For technical questions, please call 1-800-444-3353. Page 48...
-
Page 49: Troubleshooting
3. Have the power cord or power switch replaced by a qualified technician. Table saw is noisy when running. 1. Motor needs attention. 1. Have the motor checked by a qualified technician. SKU 93491 For technical questions, please call 1-800-444-3353. Page 49... - Page 50 2. Clean and lubricate rails. Wood edges away from rip fence 1. Rip fence is misaligned. 1. See “Aligning Rip Fence and Front when ripping. Rail” section on page 19. SKU 93491 For technical questions, please call 1-800-444-3353. Page 50...
-
Page 51: Parts Lists And Diagrams
Miter Gauge Rod Stop Screw (M4x18) Hex Nut (M4) Scale Rule NOTE: Some parts are listed and shown for illustration purposes only, and are not available individually as replacement parts. SKU 93491 For technical questions, please call 1-800-444-3353. Page 51... -
Page 52: Parts List B & Assembly Diagram B
Hex Head Bolt (M8x20) Short Leg Brace Carriage Bolt (M8x14) Long Leg Brace NOTE: Some parts are listed and shown for illustration purposes only, and are not available individually as replacement parts. SKU 93491 For technical questions, please call 1-800-444-3353. Page 52... -
Page 53: Parts List C
Rip Fence Cover Right End Cap Rip Fence Label Scale Indicator NOTE: Some parts are listed and shown for illustration purposes only, and are not available individually as replacement parts. SKU 93491 For technical questions, please call 1-800-444-3353. Page 53... -
Page 54: Assembly Diagram C
ASSEMBLY DIAGRAM C NOTE: Some parts are listed and shown for illustration purposes only, and are not available individually as replacement parts. SKU 93491 For technical questions, please call 1-800-444-3353. Page 54... -
Page 55: Parts List D & Assembly Diagram D
PARTS LIST D & ASSEMBLY DIAGRAM D SKU 93491 For technical questions, please call 1-800-444-3353. Page 55... -
Page 56: Parts List E & Assembly Diagram E
PARTS LIST E & ASSEMBLY DIAGRAM E SKU 93491 For technical questions, please call 1-800-444-3353. Page 56... -
Page 57: Parts List F & Assembly Diagram F
PARTS LIST F & ASSEMBLY DIAGRAM F SKU 93491 For technical questions, please call 1-800-444-3353. Page 57... -
Page 58: Parts List G & Assembly Diagram G
PARTS LIST G & ASSEMBLY DIAGRAM G SKU 93491 For technical questions, please call 1-800-444-3353. Page 58... -
Page 59: Parts List H & Assembly Diagram H
PARTS LIST H & ASSEMBLY DIAGRAM H SKU 93491 For technical questions, please call 1-800-444-3353. Page 59... -
Page 60: Parts List I
Hex Nut (M8) Retaining Ring Washer (8) Washer Semi-circle Head Screw (M5x10) NOTE: Some parts are listed and shown for illustration purposes only, and are not available individually as replacement parts. SKU 93491 For technical questions, please call 1-800-444-3353. Page 60... -
Page 61: Assembly Diagram I
ASSEMBLY DIAGRAM I SKU 93491 For technical questions, please call 1-800-444-3353. Page 61... -
Page 62: Warranty
3491 Mission Oaks Blvd. • PO Box 6009 • Camarillo, CA 93011 • (800) 444-3353 3491 Mission Oaks Blvd. • PO Box 6009 • Camarillo, CA 93011 • (800) 444-3353 SKU 93491 For technical questions, please call 1-800-444-3353. Page 62...
Need help?
Do you have a question about the 93491 and is the answer not in the manual?
Questions and answers