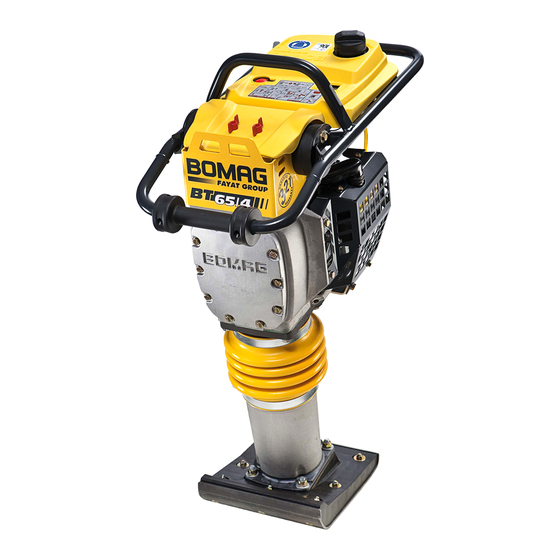
Bomag BT 60/4 Operating And Maintenance Instructions Manual
Vibratory tamper
Hide thumbs
Also See for BT 60/4:
- Operating instructions manual (59 pages) ,
- Operating instructions, maintenance instructions (61 pages)

Related Manuals for Bomag BT 60/4


Summary of Contents for Bomag BT 60/4
- Page 1 Operating instructions Maintenance instructions BT 60/4 - BT 65/4 S/N 101 540 39 ... (EPA II) S/N 101 540 49 ... (EPA II) Vibratory Tamper www.discount-equipment.com Catalogue number 06/2005 008 113 61...
- Page 2 Lull, Skytrak, Tsurumi, Husquvarna Target, Stow, Wacker, Sakai, Mi-T-M, Sullair, Basic, Dynapac, MBW, Weber, Bartell, Bennar Newman, Haulotte, Ditch Runner, Menegotti, Morrison, Contec, Buddy, Crown, Edco, Wyco, Bomag, Laymor, EZ Trench, Bil-Jax, F.S. Curtis, Gehl Pavers, Heli, Honda, ICS/PowerGrit, IHI, Partner, Imer, Clipper, MMD, Koshin, Rice, CH&E, General Equipment ,Amida, Coleman, NAC, Gradall, Square Shooter, Kent,...
- Page 4 These operating and maintenance instructions are chine. also available in other languages. Your BOMAG dealer will also supply you with in- Using these instructions will formation about the correct use of our machines in help you to become familiar with the machine.
- Page 5 During commissioning our organisation will in- struct you in the operation and maintenance of the machine. Please observe strictly the safety regulations and all notes on risks and dangers! Fig. 2 Fig. 3 BOMAG BT 60/4, BT 65/4...
-
Page 6: Table Of Contents
5.14 Check, adjust the valve clearance 5.15 Cleaning the fuel filter inside the tank 5.16 Oil change in tamper foot 5.17 Clean, change the double dry air filter cartridge Trouble shooting 6.1 General notes 6.2 Engine problems BT 60/4, BT 65/4 BOMAG... -
Page 7: Technical Data
1 Technical Data BT 60/4, BT 65/4 BOMAG... - Page 8 GX 100 (EPA II) GX 100 (EPA II) Cooling Number of cylinders Rated power ISO 9249 kW (PS) 2,5 (3,4) 2,5 (3,4) Rated speed 4200 4200 Capacities Fuel tank Oil in tamper foot 0,75 Engine oil 0,33 0,33 BOMAG BT 60/4, BT 65/4...
- Page 9 20 up to 20 pendent) Max. areal output (de- pending on soil) Max. depth effect (de- up to 55 up to 65 pending on soil) The right for technical modifications remains reserved BT 60/4, BT 65/4 BOMAG...
- Page 10 During operation these values may vary because of the existing operating conditions. Noise value sound pressure level on the operator’s stand: = 95.3 dB(A) BT 60/4, determined acc. to ISO 11204 and EN 500 = 94,9 dB(A) BT 65/4, determined acc. to ISO 11204 and EN 500 Guaranteed sound capacity level: = 108 dB(A), determined acc.
-
Page 11: Safety Regulations
2 Safety regulations BT 60/4, BT 65/4 BOMAG... - Page 12 General notes Who is allowed to operate the ma- chine? This BOMAG machine is built in accordance The machine must only be operated by trained with the state-of-the-art and the present techni- and authorized persons which are at least 18 cal rules and regulations.
- Page 13 Find the cause and have the Do not touch the piston with the cleaning tools. fault corrected. Do not hold the throttle lever in the area below I, as this may damage the centrifugal clutch. BT 60/4, BT 65/4 BOMAG...
- Page 14 Do not damage the blower wheel when work- ing on the magnetic ignition. Always replace self locking nuts. Do not open the foot cover on the tamper foot, spring tension. Danger of accident! Observe the prescribed tightening torques. BOMAG BT 60/4, BT 65/4...
-
Page 15: Indicators And Controls
3 Indicators and Controls BT 60/4, BT 65/4 BOMAG... -
Page 16: General Notes
Paragraph 4 Operation contains only concise de- scriptions of the individual operating steps. Fig. 5 Throttle lever (Fig. 5). Fig. 6 Engine stop switch (Fig. 6). Fig. 7 Recoil starter (Fig. 7). BOMAG BT 60/4, BT 65/4... - Page 17 Indicators and Controls Fig. 8 Fuel cock (Fig. 8). Fig. 9 Choke lever (Fig. 9). BT 60/4, BT 65/4 BOMAG...
-
Page 18: Operation
4 Operation BT 60/4, BT 65/4 BOMAG... -
Page 19: General Notes
Check condition of engine and machine engine oil level fuel tank and fuel lines for leaks fuel level concertina wall for damage and leaks oil filling of tamper cylinder Visual inspection of machine BOMAG BT 60/4, BT 65/4... -
Page 20: Filling In Fuel
Turn the fuel shut-off valve (Fig. 10) to position STOP (closed). Fig. 13 Set the throttle lever (Fig. 13) to MAX position. Fig. 11 Tank contents max. 3,0 Litres. After filling close the filler cover tightly (Fig. 11). BT 60/4, BT 65/4 BOMAG... - Page 21 Pull the rope by the starter handle (Fig. 15) un- til resistance can be felt. Let the starter handle run back to initial posi- Fig. 17 tion. Open the choke (Fig. 17) 3 to 6 seconds after the engine has started running. BOMAG BT 60/4, BT 65/4...
-
Page 22: Starting Under Cold Weather Conditions
Fig. 18 Set the throttle lever (Fig. 18) to "MIN" and let the engine run warm for 1 to 2 minutes. Note Once the engine has warmed up you can start to work with the tamper. BT 60/4, BT 65/4 BOMAG... -
Page 23: Incorrect Starting
Repeat the starting procedure. Fig. 20 In order to achieve a smooth running of the machine adjust the throttle lever in the range I (Fig. 20), depending on the condition and the density of the soil. BOMAG BT 60/4, BT 65/4... - Page 24 If the tamper should get out of rhythm on highly compacted ground, smooth running can be achieved by slightly changing the engine speed and/or the inclination of the tamper. BT 60/4, BT 65/4 BOMAG...
-
Page 25: Shutting The Engine Down
Press the stop switch (push button) (Fig. 25). Danger Danger of burning! Immediately after shutting down the engine is still hot, do not touch the exhaust. Park the machine so that it cannot turn over. BOMAG BT 60/4, BT 65/4... -
Page 26: Changing The Tamper Foot Plate
60 ...70 Nm (44...52 ft.lbs). bearing capacity Note When changing the tamper foot to a different width use only genuine BOMAG parts. After changing the tamper foot check the engine speed, adjust if necessary. Fig. 29 Always shut the engine down for transport. - Page 27 Operation Fig. 30 To load the tamper attach the lifting tackle only to the cross bar of the steering bow (Fig. 30). Weights see technical data BOMAG BT 60/4, BT 65/4...
-
Page 28: Maintenance
5 Maintenance BT 60/4, BT 65/4 BOMAG... -
Page 29: General
(see diagram). Occasional falling short of the temperature limit (e.g. use of SAE 15W/40 down to -15 °C) may ef- fect the cold starting ability of the engine, but will not cause any engine damage. BOMAG BT 60/4, BT 65/4... -
Page 30: Filling Capacities
1 year. BT 65/4 Oil quality Tamper foot: 1.0 l Preferably use oils API- quality class SF and SG. Tamper foot oil Use gear oil SAE 90 API, GL-5 BT 60/4, BT 65/4 BOMAG... -
Page 31: Running-In Instructions
Check maximum engine speed, adjust if nec- essary. Check engine and machine for leaks. Retighten the fastening screws on air filter ex- haust, fuel tank and other attachments. Retighten the bolted connections on the ma- chine. BOMAG BT 60/4, BT 65/4... -
Page 32: Maintenance Chart
Clean the fuel screen in the tank 5.13 Oil change in tamper foot Oil level inspection glass 5.14 Clean, change the double dry air filter cartridge in case of a drop in the max. engine speed BT 60/4, BT 65/4 BOMAG... -
Page 33: Cleaning The Machine
Do not guide the water jet directly into the air Fig. 33 filter 1 (Fig. 32) and into the starter/air intake Check the condition of the bellows, inspect for (2). damage and tight fit. Check the hose clamps for tight fit (Fig. 33). BOMAG BT 60/4, BT 65/4... -
Page 34: Check The Engine Oil Level
After a running time of approx. 1 minute check the oil level again with the engine shut down. Fig. 34 Pull out the dipstick (Fig. 34) and wipe it clean with a lint-free, clean cloth. BT 60/4, BT 65/4 BOMAG... -
Page 35: Checking The Fuel Level, Topping Up Fuel
No open fire, do not smoke! Fuel: Unleaded standard grade petrol Fig. 36 Set the fuel valve (Fig. 36) to STOP position (closed). Fig. 37 Tank content max. 3.0 litres. Close the filler cap again tightly after refuelling (Fig. 37). BOMAG BT 60/4, BT 65/4... -
Page 36: Change The Engine Oil
Catch running out oil (Fig. 40). Clean the drain plug and screw it back in with a new seal ring. Fig. 38 Unscrew the oil dipstick (Fig. 38). Fig. 41 Fill in new engine oil (Fig. 41). BT 60/4, BT 65/4 BOMAG... -
Page 37: Cleaning, Checking The Spark Plug, Replacing If Necessary
Check the electrode gap with a feeler gauge, if necessary adjust the gap to 0.6...0.7 mm. Spark plugs: NGK: CR5HSB Denso: U16FSR-UB Caution Do not use spark plugs with incorrect heat val- BOMAG BT 60/4, BT 65/4... -
Page 38: Tamper Foot Plate
Clean the sight glass (Fig. 45). Check the oil level. The oil must be visible in the inspection glass, if necessary fill in oil accordingly. For quality of oil refer to the table of fuels and lubricants. BT 60/4, BT 65/4 BOMAG... -
Page 39: Check, Adjust The Valve Clearance
Align the alignment mark ∆ on the flywheel rib Do not apply force to remove the cylinder head with the top bore in the fan cover (Fig. 50). cover. Replace the cylinder head cover if it is dented. BOMAG BT 60/4, BT 65/4... - Page 40 1 (Fig. 52) and slacken locking screw (2). Turn the valve adjustment screw in or out in or- der to achieve the specified valve clearance. Retighten the locking screw with a tightening torque of 7.5 Nm (5.4 lbsft). BT 60/4, BT 65/4 BOMAG...
-
Page 41: Cleaning The Fuel Filter Inside The Tank
Disconnect the fuel hose 1 (Fig. 54) from the fuel shut-off valve (2). Open the fuel shut-off valve, drain the fuel off. Unscrew the fuel shut-off valve (2). Fig. 55 Screw the strainer (Fig. 55) out and clean it with gasoline. BOMAG BT 60/4, BT 65/4... -
Page 42: Oil Change In Tamper Foot
Turn the drain plug in and tighten it. Fig. 59 Clean the inspection glass (Fig. 59) and check the oil level. The oil must be visible in the inspection glass, if necessary fill in oil accordingly. BT 60/4, BT 65/4 BOMAG... -
Page 43: Clean, Change The Double Dry Air Filter Cartridge
Make sure that no dirt falls into the air intake channel. Visual inspection/cleaning Fig. 62 Danger Remove the protection grid on the left hand side of the engine (Fig. 62). Eye injury! Wear protective clothing (goggles, gloves). BT 60/4, BT 65/4 BOMAG... - Page 44 (Fig. 64). Clean the air filter housing. Caution Make sure that no dirt falls into the air intake channel. Note Before installation check seals and dry air filter for damage, replace if necessary. BOMAG BT 60/4, BT 65/4...
-
Page 45: Trouble Shooting
6 Trouble shooting BT 60/4, BT 65/4 BOMAG... -
Page 46: General Notes
On the following pages you will find a selection of fault remedies. It is quite obvious that we were not able to list all possible causes for faults. BOMAG BT 60/4, BT 65/4... -
Page 47: Engine Problems
Replace the engine/have the fault correct- Carburettor defective Replace the carburettor Exhaust blocked clean Engine runs with Centrifugal clutch defective Change the centrifugal clutch high speed, but Mechanical defect Have repaired by the customer service of no vibration BOMAG. BT 60/4, BT 65/4 BOMAG... - Page 48 Lull, Skytrak, Tsurumi, Husquvarna Target, Stow, Wacker, Sakai, Mi-T-M, Sullair, Basic, Dynapac, MBW, Weber, Bartell, Bennar Newman, Haulotte, Ditch Runner, Menegotti, Morrison, Contec, Buddy, Crown, Edco, Wyco, Bomag, Laymor, EZ Trench, Bil-Jax, F.S. Curtis, Gehl Pavers, Heli, Honda, ICS/PowerGrit, IHI, Partner, Imer, Clipper, MMD, Koshin, Rice, CH&E, General Equipment ,Amida, Coleman, NAC, Gradall, Square Shooter, Kent,...
- Page 49 BOMAG FAYAf GROUP www.discount-equipment.com...
Need help?
Do you have a question about the BT 60/4 and is the answer not in the manual?
Questions and answers