Table of Contents
Advertisement
Quick Links
Download this manual
See also:
User Manual
Advertisement
Table of Contents

Subscribe to Our Youtube Channel
Related Manuals for Vuzix M300


Summary of Contents for Vuzix M300
- Page 1 Getting Started Version 1.0, Dec 12, 2017...
-
Page 2: Table Of Contents
Assembly ..........................6 Ear Hooks ..........................7 M300 Power Button ........................ 8 Display Adjustment ......................... 8 Charging the M300 and First Boot ....................9 Connecting to WiFi ........................12 Setting App Permissions ......................12 Vuzix Basics Video – M300 User ....................15 Starting the App......................... -
Page 3: Overview
VERVIEW This guide is intended to guide you through initial steps to begin using your M300 and the Vuzix Basics Video application. Please be sure to follow all of the instructions below to properly set up and configure your M300 prior to attempting your first call with Vuzix Basics Video. - Page 4 Inspect the package’s contents. In the unlikely event that any items are damaged or missing contact your purchase source immediately. • If you purchased your M300 Smart Glasses directly from Vuzix, contact Vuzix Customer Service in the region in which they were purchased. (see Customer Service) •...
-
Page 5: Device Layout & Components
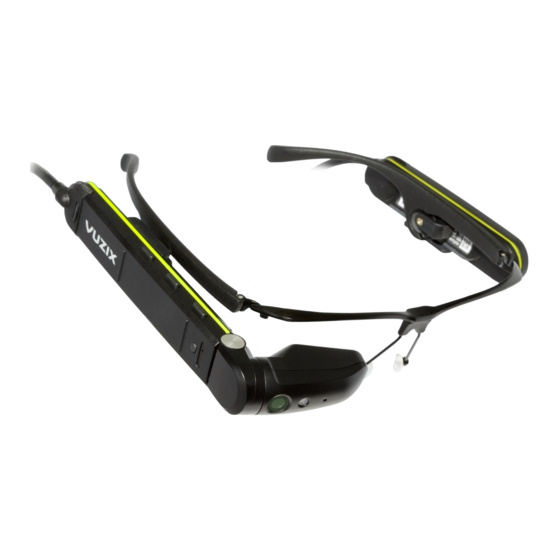
Device Layout & Components Main Unit Hot-Swap Battery Smart Glasses Frame... -
Page 6: Nose Pad Options
Nose Pad Options There are three different nose pad options that come with your M300. The default set of pads that sit on either side of the nose, and the included alternate full bridge pads come in two sizes and span the bridge of the nose for added comfort and stability. -
Page 7: Ear Hooks
Ear Hooks In some operating environments, a more secure fit may be required to ensure the M300 will remain stable. Optional Ear Hooks are included with your M300 to help secure the frame. The Ear Hooks slide over the ends of the M300 Smart Glasses Frame temple arms and can be adjusted to fit your needs. -
Page 8: M300 Power Button
M300 Power Button Using the Power Button: • If the M300 is powered off, press and hold the Power Button for 2 – 3 seconds until the Power Indicator flashes to power on the M300. • If the M300 is powered on, a quick press of the Power Button will wake the device from sleep mode or put it to sleep. -
Page 9: Charging The M300 And First Boot
To adjust the display position: • Press the Power Button on the Main Unit to power up your M300 Smart Glasses. • Put on the M300 Smart Glasses the same as you would put on traditional eyeglasses, looping the power cord behind your head like a tether strap. - Page 10 Standard USB ports on computers provide only 500mA. A USB power source providing a minimum of 1.5A is required to charge the M300 while connected to the Hot-Swap Battery. The connectors on each end of the Power Cable are interchangeable and can be connected to either the Hot-Swap Battery or Main Unit.
- Page 11 Charging may take up to two hours. Due to the architecture needed to support the Hot-Swap Batteries, the M300 will continue to consume a small amount of power, even when powered off if the Hot- Swap Battery and Main Units are connected.
-
Page 12: Connecting To Wifi
From the WiFi section of the M300 Settings application, enable WiFi by toggling from Off to On. The M300 will then scan for available networks. Scroll down to the network you want to connect to and select it. A standard Android keyboard will come up if the network is password protected. - Page 13 Figure 2 - App Settings ]Select the “Apps” menu and then navigate to the “Basics Video”. Figure 3 - Vuzix Basics Video Once you select the Basics Video app, navigate to the permissions menu.
- Page 14 Figure 4 – Permissions Ensure the permissions are set for the Camera and Microphone (storage isn’t required). Figure 5 - Permissions Enabled When you return to the App Info menu, you will now see the permissions listed.
-
Page 15: Vuzix Basics Video - M300 User
You are now ready to run the Vuzix Basics Video application. – M300 U UZIX ASICS IDEO Once you have your M300 powered on, you will see the Basics Video application installed as shown in Figure 7. Figure 7 - Vuzix Basics Video App... -
Page 16: Starting The App
Once the app settings and WiFi has been configured, you are now ready to start the app. Return to the App Carousel and navigate to the Vuzix Basics Video app. When you start the app you will see the following screen. -
Page 17: Connecting A Call
To start the call, press the M300 select button. Once started, you will see “Connected” at the bottom of the display. Disconnecting a Call To disconnect a call, simply press the M300 select button and you will see the call status change to disconnected. -
Page 18: Vuzix Basics Video - Desktop User
Figure 10 - Call Disconnected When a call is disconnected, the remote expert will no longer be able to see the M300 camera view or hear audio from the microphone. – D UZIX ASICS IDEO ESKTOP For the remote desktop user, you will use a web portal to join the video call. Visit https://www.vuzix.com/basicsvideo/connector.html... - Page 19 Display Name: Name of the desktop user. It will show where “Preview” is in Figure 11. Resource ID: This is the 7 digit ID (VBXXXXX) provided by the M300 user. Once you enter this information and ensure your microphone and speaker settings are correct, you can start the call.
-
Page 20: Additional Documentation And Faqs
DDITIONAL OCUMENTATION AND For more information on Vuzix Basics Video and other Vuzix Basics apps, visit our Support site at the link below. US Customers https://www.vuzix.com/support/Vuzix-Basics EU Customers https://www.vuzix.eu/support/Vuzix-Basics...
Need help?
Do you have a question about the M300 and is the answer not in the manual?
Questions and answers