Table of Contents
Advertisement
Quick Links
Download this manual
See also:
Installation Manual
Advertisement
Table of Contents

Subscribe to Our Youtube Channel
Related Manuals for ACTi Q960


Summary of Contents for ACTi Q960
- Page 1 Multi-Imager Dome People Counting Camera Quick Start Guide V20170904...
-
Page 2: Quick Start Guide
Quick Start Guide About this Manual This manual is applicable to the Multi-Imager Dome People Counting Camera. The Manual includes instructions for using and managing the product. Pictures, charts, images and all other information hereinafter are for description and explanation only. The information contained in the manual is subject to change, without notice, due to firmware updates or other reasons. -
Page 3: Regulatory Information
Quick Start Guide Regulatory Information FCC Information Please take attention that changes or modification not expressly approved by the party responsible for compliance could void the user’s authority to operate the equipment. FCC compliance: This equipment has been tested and found to comply with the limits for a Class B digital device, pursuant to part 15 of the FCC Rules. - Page 4 Quick Start Guide FCC Conditions This device complies with part 15 of the FCC Rules. Operation is subject to the following two conditions: 1. This device may not cause harmful interference. 2. This device must accept any interference received, including interference that may cause undesired operation.
-
Page 5: Safety Instruction
Quick Start Guide supplier or to a designated collection point. For more information see: www.recyclethis.info Industry Canada ICES-003 Compliance This device meets the CAN ICES-3 (B)/NMB-3(B) standards requirements. Safety Instruction These instructions are intended to ensure that user can use the product correctly to avoid danger or property loss. - Page 6 Quick Start Guide Warnings ● Proper configuration of all passwords and other security settings is the responsibility of the installer and/or end-user. ● In the use of the product, you must be in strict compliance with the electrical safety regulations of the nation and region. Please refer to technical specifications for detailed information.
- Page 7 Quick Start Guide ● Do not touch sensor modules with fingers. If cleaning is necessary, use clean cloth with a bit of ethanol and wipe it gently. If the camera will not be used for an extended period, please replace the lens cap to protect the sensor from dirt. ●...
- Page 8 Quick Start Guide ● Improper use or replacement of the battery may result in hazard of explosion. Replace with the same or equivalent type only. Dispose of used batteries according to the instructions provided by the battery manufacturer. ● If the product does not work properly, please contact your dealer or the nearest service center.
-
Page 9: Table Of Contents
Quick Start Guide Table of Contents Description ..................9 Installation ..................11 Camera Installation ............. 11 Setting the Network Camera over the LAN ........15 Wiring ................. 15 Activating the Camera ............16 Activation via Web Browser ........16 Accessing via Web Browser ............. 18 Configuring People Counting ............ -
Page 10: Description
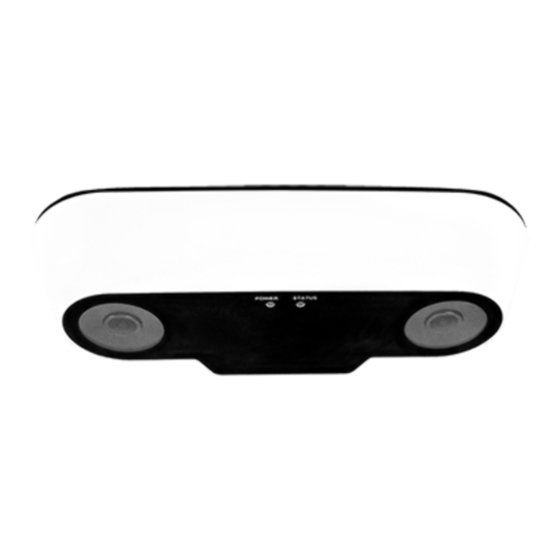
Quick Start Guide Description Attention! Disassembling the camera without professional technical instruction may affect the accuracy of people counting function. Contact the technical support for repair if any malfunction happens. Overview of Camera... - Page 11 Quick Start Guide Description Lens Power Solid red: running properly indicator Off: power supply abnormal Status Solid blue: running properly indicator Flashing red: network connection abnormal Flashing blue: other exceptions Power supply interface (12 VDC) RS-485 and alarm I/O interface Network interface (support power over Ethernet) Reset button Note:...
-
Page 12: Installation
Quick Start Guide Installation Before you start: ● Make sure the device in the package is in good condition and all the assembly parts are included. ● The standard power supply is 12V DC, please make sure your power supply matches your camera. ●... - Page 13 Quick Start Guide Installation Recommendation Mounting Height Ground Max. Detection Span Focal Length (mm) Mounting Height (m) Max. Detection Span (m)
- Page 14 Quick Start Guide Notes: Mounting height of 2.0 mm lens camera should be no higher than 4 meters, and 2.8 mm lens camera no higher than 4.8 meters. The camera must be installed on a flat surface parallel to the ground (or, the optical axes of both lenses should be perpendicular to the ground).
- Page 15 Quick Start Guide Align the "Front" mark on drill template with that on mounting base. Fix the mounting base with supplied screws. Mounting Base Fix the Mounting Base Align the "Front" mark on the mounting base with that on camera bottom. Fit the hooks on mounting base in the big end of the slots on camera bottom.
-
Page 16: Setting The Network Camera Over The Lan
Quick Start Guide Setting the Network Camera over the Note: You shall acknowledge that the use of the product with Internet access might be under network security risks. For avoidance of any network attacks and information leakage, please strengthen your own protection. -
Page 17: Activating The Camera
Quick Start Guide Activating the Camera You are required to activate the camera first by setting a strong password for it before you can use the camera. Activation is done via Web Browser. Activation via Web Browser Steps: 1. Power on the camera, and connect the camera to the network. 2. - Page 18 Quick Start Guide 3. Create a password and input the password into the password field. STRONG PASSWORD RECOMMENDED– We highly recommend you create a strong password of your own choosing (using a minimum of 8 characters, including upper case letters, lower case letters, numbers, and special characters) in order to increase the security of your product.
-
Page 19: Accessing Via Web Browser
Quick Start Guide Accessing via Web Browser System Requirement: Operating System: Microsoft Windows XP SP1 and above version CPU: 2.0 GHz or higher RAM: 1G or higher Display: 1024×768 resolution or higher Web Browser: Internet Explorer 8.0 and above version, Apple Safari 5.0.2 and above version, Mozilla Firefox 5.0 and above version and Google Chrome 18 and above version Steps:... - Page 20 Quick Start Guide 4. Click Login. 5. Install the plug-in before viewing the live video and managing the camera. Please follow the installation prompts to install the plug-in. Note: Close the web browser to finish the installation of the plug-in. 6.
-
Page 21: Configuring People Counting
Quick Start Guide Configuring People Counting The People Counting function is used to calculate the number of people entering, exiting, and passing by an area. It is widely applied to the entrances and exits. Before you start: The camera is recommended to be installed right above the entrance/exit, and make sure it is installed properly. -
Page 22: Auto Calibration
Quick Start Guide Auto Calibration: camera automatically calculates the lens height. Manual Calibration: lens height should be measured by the users. Note: If the level ground area occupies less than 25% of the whole image, use manual calibration. Auto Calibration Select calibration mode as Auto. - Page 23 Quick Start Guide A convenient way is that you check the Display Height checkbox (People Counting > Advanced), ask a 180 cm person to go pass the camera, and check the calculated height of the person displayed in live image. If the error is less than 5%, then the auto calibration is considered as a valid one.
-
Page 24: Manual Calibration
Quick Start Guide Manual Calibration Manual calibration is recommended if it is easy to measure the lens height. 1. Select calibration mode as Manual. 2. Measure the lens height from the ground. Input the value into the Lens Height field. 3. - Page 25 Quick Start Guide Adjust detection line and the direction. You can drag the straight line and its endpoints to adjust its position and length to better cover the entrance/exit. Click to change the direction of the detection line arrow. The arrow stands for the direction of entering.
Need help?
Do you have a question about the Q960 and is the answer not in the manual?
Questions and answers