Table of Contents
Advertisement
Quick Links
Kaminofen Virgo
Kaminofen Virgo
Página 34 - 41
Anleitung
Anleitung
Instruction
Instruction
Instructions
Instructions
Aanwijzing
Aanwijzing
Manual de instrucciones
Manual de instrucciones
- DIN EN 13240
- DIN EN 13240
- 15a BV-G
- 15a BV-G
Manual de instrucciones
Instruction
D
Seite
D
Seite
Instructions
GB
Page
GB
Page
Aanwijzing
F
Page
F
Page
Manual de instrucciones
NL
Pagina 26 - 33
NL
Pagina 26 - 33
E
Página 34 - 41
E
Página 34 - 41
INSTRUCTION MANUAL
INSTRUCTION MANUAL
OLSBERG PULAR COMPACT
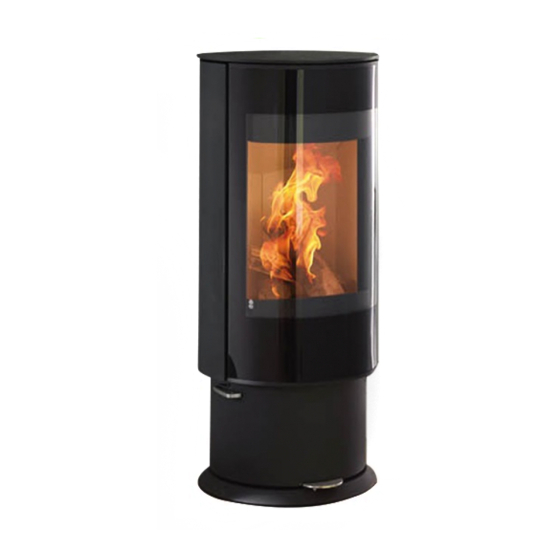
OLSBERG VIRGO
- DIN EN 13240
- DIN EN 13240
- DIN 18897 raumluftunabhängig
INSTALLATION INSTRUCTIONS
- DIBt - Bauaufsichtliche Zulassung
- 15a BV-G
- 15a BV-G
OLSBERG VIRGO
CYLINDRICAL STOVE
- DIN EN 13240
GB
Page
10 - 17
2 - 9
2 - 9
F
Page
18 - 25
10 - 17
10 - 17
NL
Pagina 26 - 33
18 - 25
18 - 25
E
Página 34 - 41
28/865
E
28/865
Página 34 - 41
Advertisement
Table of Contents

Subscribe to Our Youtube Channel
Related Manuals for Olsberg Virgo


Summary of Contents for Olsberg Virgo
- Page 1 Kaminofen Virgo 28/865 Manual de instrucciones Kaminofen Virgo 28/865 Página 34 - 41 Página 34 - 41 Instruction Page 10 - 17 Anleitung Seite 2 - 9 Anleitung Seite 2 - 9 Instructions Page 18 - 25 Instruction Page 10 - 17...
-
Page 3: Table Of Contents
CONTENTS 1.0 USER INSTRUCTIONS Page 04 1.1 - Welcome 1.2 - General 1.3 - Heating Capacity 1.4 - Health & Safety 1.5 - Chimney Requirements 1.6 - Combustion Air Supply Requirements 2.0 INSTALLATION Page 08 2.1 - Heating Capacity - Installation Guide 2.2 - Installation Notes &... -
Page 4: User Instructions
1.0 USER INSTRUCTIONS 1.1 - Welcome Thank you for your decision to buy an Olsberg Stove. The crackling, visible flames give you the sense of comfort and security. The combination of hot-air heating and heat radiation provides a pleasant and healthy climate in any room. -
Page 5: Heating Capacity
λąż®Ľ·˛ą ¬¸· łż¬¬»®ô żµ ż ®»°±˛·ľ´» ˝¸·ł˛»§ ©»»° ±® ±¬¸»® ˝±ł°»¬»˛¬ »¨°»®¬ ľ»ş±®» ·˛¬ż´´·˛ą ż˛Ľ ±°»®ż¬·˛ą ¬¸» ż°°´·ż˛˝»ň řDZ« ˝ż˛ ż´± ą»¬ ¸»´° Olsberg stoves comply with DIN 18891 (building category 1) and DIN EN 13240 standards. ş®±ł Ü×Ň ďččçęć îđđëóđę ¬ż˛Ľż®Ľ ¬¸ż¬ ˝±˛¬ż·˛ ¬¸» ¬»˝¸˛·˝ż´ ®«´» ±ş ·˛¬ż´´żó... -
Page 6: Chimney Requirements
1.4 - Health & Safety Cont. Olsberg stoves are freestanding stoves that cannot be equipped with an individual cover or be built in as a fire chamber insert/cassette. You must not make any modifications influencing the operation of the stove. -
Page 7: Combustion Air Supply Requirements
At extremely low outdoor temperatures, condensation can occur on the combustion air duct. For this reason it must be insulated with a suitable insulating material. Observe the rules of the oven and air heating construction craft. Use the Olsberg combustion air pipes with sealing lip. NOTE: Appliances with external combustion air connection are not suitable for concurrent operation with ventilation systems, without a supplemental safety system. -
Page 8: Installation
2.0 INSTALLATION 2.1 - Heating Capacity - Installation Guide This appliance must be installed by a competent person and the installation must comply with bs8303 – code of practice for installation of domestic heating and cooking appliances burning solid mineral fuel, national building regulations, local by-laws and standards and the requirements of the health and safety at work act - in particular: Handling:... -
Page 9: Positioning The Appliance
It is also necessary in the case of rooms with forced aeration systems (e/g extractor fan). If it is possible a solution must be found for turning off these appliances. Some Olsberg stoves have an optional connection for an external air inlet. Use of Olsberg stoves in building with hermetic insulation and mechanical airing systems is only allowed under certain conditions. -
Page 10: Flue Installtion
2.0 INSTALLATION 2.4 - Flue Installation The flue outlet diameter on the Olsberg Virgo is 125mm. Appliances are sold equipped with a top or rear outlet. We would recommend the top outlet connection mode because of combustion technological reasons. In case you would prefer to connect the stove at the back please refer to the technical data sheet, which contains the connection height), remove the flue outlet from the top and the closing lid from the back. - Page 11 2.0 INSTALLATION Installing the stove Minimum distance from combustible or load-bearing walls 2.5 - Stove Rotation The floor on which the stove is installed must be even There must be no objects made of combustible materi- and horizontal. The stove may only be installed on an The stove is delivered with the arrest engaged (non-rotating).
-
Page 12: Stove Rotation
ified not e 100 cm 100 cm rear “Tec perm pipe 2.0 INSTALLATION 45° 45° ● Conn with ly se Assembly sequence Stove rotating ● Push 2.6 - Stove Rotation Cont. so th ● The Ø 150 stovepipe connection can be installed at The wall distances for rotating installation are present- The wall distances for rotating installation are presented below. -
Page 13: Operating Instructions
3.0 OPERATING INSTRUCTIONS 3.1 - General Information All national, regional, local laws, orders and regulations must be kept. Therefore, depending on the location of installation, special operating conditions and restrictions can be enforced regarding the period of use and fuels used. It is important to consult a chimney sweep or other competent expert before installing and using the appliance. -
Page 14: Lighting The Stove For The First Time
3.0 OPERATING INSTRUCTIONS 3.4 - Lighting The Stove For The First Time Follow the directions below when you light the fire for the first time. High Burning temperature is necessary for the fuel to catch fire quickly, so put enough fire-starter on the grate at the lower part of the combustion chamber. -
Page 15: Regulation Of Combustion Air
OPEN .. 1/5 OPE OPEN .. CLOSE ● As th 3.0 OPERATING INSTRUCTIONS ness must positi ● When Air controller Regulation of combustion air to red Primary air controller: CLOSED OPEN Primary air controller As the p OPEN ..Ignition adjustment and max. heating output ent on t OPEN ..Nominal heat output with lignite briquettes has to b... -
Page 16: Troubleshooting
4.0 TROUBLESHOOTING 3.6 - After Use & Maintaining Perfect Burn Cont. Combustible remains are deposited in the appliance, the flue and chimney during use. This happens increasingly if you use wet or treated wood or fuel that is not allowed. The possible overload of the stove or restrain of the fire can contribute to this also. -
Page 17: Special Notes
5.0 SPECIAL NOTES 5.1 - Notes Your guarantee expires immediately in case of extreme or long lasting overload above nominal capacity or the use of fuel not specified. 5.2 - Cleaning Schedule (To be performed only when stove is cold) WHAT FREQUENCY UTENSIL... -
Page 18: Appendix 1 - Dimensional Drawings
APPENDIX 1 - DIMENSIONAL DRAWINGS PAGE 18... - Page 20 Brought to you by Imperial Point Express Trading Estate Stone Hill Road Farnworth Bolton BL4 9TN Tel: 01204 868 550 Fax: 01204 868 551 Email: sales@percydoughty.com www.visionfires.co.uk...
Need help?
Do you have a question about the Virgo and is the answer not in the manual?
Questions and answers