Advertisement
Table of Contents
- 1 Installation Instructions
- 2 Room Ventilation
- 3 Electrical Connection
- 4 Installation
- 5 Before Using the Appliance
- 6 Precautions and General Advice
- 7 Energy Saving Tips
- 8 Oven Accessories
- 9 Wire Shelf
- 10 Care and Maintenance
- 11 Oven Cleaning
- 12 Removing the Door
- 13 Troubleshooting Guide
- 14 After Sales Service
- Download this manual
INSTRUCTIONS FOR USE
INSTALLATION INSTRUCTIONS
BEFORE USING THE APPLIANCE
PRECAUTIONS AND GENERAL ADVICE
ENERGY SAVING TIPS
OVEN ACCESSORIES
CARE AND MAINTENANCE
TROUBLESHOOTING GUIDE
AFTER-SALES SERVICE
For best use of the oven, carefully read the operating instructions and keep them for future
consultation.
17
Advertisement
Table of Contents

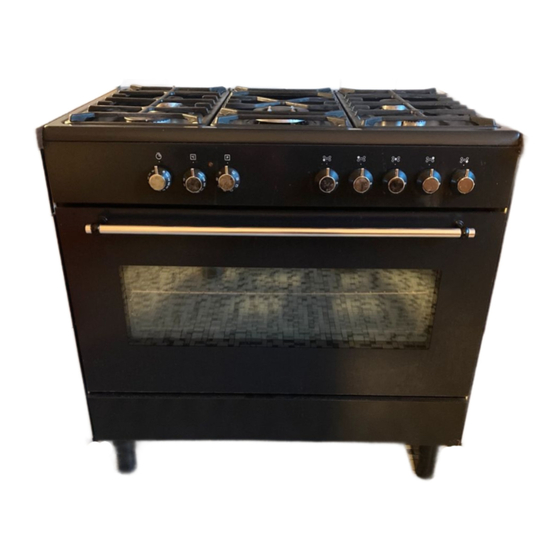
Summary of Contents for IKEA Framtid CG7
- Page 1 INSTRUCTIONS FOR USE INSTALLATION INSTRUCTIONS BEFORE USING THE APPLIANCE PRECAUTIONS AND GENERAL ADVICE ENERGY SAVING TIPS OVEN ACCESSORIES CARE AND MAINTENANCE TROUBLESHOOTING GUIDE AFTER-SALES SERVICE For best use of the oven, carefully read the operating instructions and keep them for future consultation.
-
Page 2: Installation Instructions
INSTALLATION INSTRUCTIONS This appliance is in Class 1. The appliance must be used with the gas specified on the rating plate located on the inside of the drawer door (see details given on the product) Installation and maintenance of the appliance must be carried out by a qualified technician in compliance with the conditions established in the applicable regulation documents and the ethical codes. - Page 3 Gas connection For information regarding gas connection instructions, see the section on “standards” relevant to your country (see attached leaflet “References to National Regulations”). The gas supply system must comply with current local regulations. The appliance must be connected to the gas supply or gas bottle by means of a rigid copper or steel pipe with fittings conforming to local regulations or by means of a s/steel hose without breaks, conforming to local regulations.
-
Page 4: Room Ventilation
Gas adjustments Use pressure regulators that are suitable for the gas pressure values indicated in the Product Description Sheet supplied separately. If the appliance is arranged for a type of gas different from that available, it is necessary to change the injectors, adjust the minimum flame, change the outlet connector. -
Page 5: Electrical Connection
For the indispensable introduction of fresh air in the room, a similar opening of at least 100 cm directly to the outside must be provided at a height near floor level so as not to be obstructed on the inside or outside of the wall and not to hinder the correct combustion of the burners and the regular extraction of vitiated air, and with a height difference of at least 180 cm with respect to the outlet opening. -
Page 6: Installation
Installation IMPORTANT: The covering of the cabinets must be in heat resistant (min. 90°C) material. If the appliance has to be installed near furniture, ensure the minimum spaces given in the following figure. The appliance is equipped with 4 feet that are used for possible height alignment with the cabinets. -
Page 7: Before Using The Appliance
BEFORE USING THE APPLIANCE • Remove the accessories from the oven and heat By ensuring that this appliance is scrapped suitably, the user can help prevent potentially damaging it at 200°C for about two hours to eliminate the consequences for the environment and health, smell of protective grease and insulating which could otherwise be caused by inappropriate materials. -
Page 8: Energy Saving Tips
• Keep children away from: • For cooking, do not use containers made of synthetic material (except those suitable; see - the controls and the appliance in general, the Manufacturer's instructions). They could especially during and immediately after use: melt at high temperatures. risk of injury;... -
Page 9: Oven Accessories
OVEN ACCESSORIES The accessories supplied depend on the model. The accessories supplied with the oven are listed in the separate Product Sheet (at the point Accessories). Drip tray (1) Used for collecting fat and bits of food when placed under the grill, pour a little water in the drip tray to prevent splashes of fat and smoke. - Page 10 OVEN ACCESSORIES Children safety device (according to the models) The children safety device can be removed by following the sequence of images.
-
Page 11: Care And Maintenance
CARE AND MAINTENANCE Disconnect the appliance from the electrical power supply before carrying out any cleaning operation. • Clean using a cloth moistened with warm soapy water or diluted liquid detergent. • Do not use abrasive or corrosive products, chlorine products or steel wool. -
Page 12: Removing The Door
Removing the door Important: it is advisable to use protective gloves for the following operations. To prevent possible injury and to avoid damaging the oven door and hinges, carefully follow these instructions. The oven door can be removed as follows: 1. -
Page 13: Troubleshooting Guide
TROUBLESHOOTING GUIDE 1. The appliance does not work 3. The burner does not stay lit • Check the mains power supply and that the • Repeat the lighting operation, turning the knob appliance is electrically connected. to the symbol representing the small flame •...


Need help?
Do you have a question about the Framtid CG7 and is the answer not in the manual?
Questions and answers