
Related Manuals for Nordmende DOI414IX


Summary of Contents for Nordmende DOI414IX
- Page 1 BUILT IN ELECTRIC DOUBLE OVEN WARNING: Read the instructions before using this appliance.
- Page 2 1 x Handle 1 x Grill Tray & Rack Insert 2 x Oven Rack 1 x Roasting Tray 1 : 1 [06] x 4 [07] x 4 Ø4mm x 25mm Screws Plastic Washers...
-
Page 3: Dear Customer
Dear Customer, Thank you for selecting one of our products. We are certain that it will respond fully to your needs and expectations, giving perfect results every time. Please read this manual carefully. The instructions that it contains will enable you to use the appliance correctly and to its best advantage. -
Page 4: Your Product
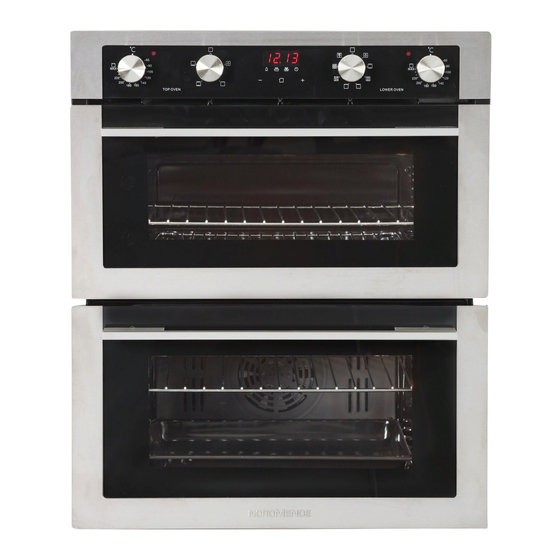
Your product This diagram may be slightly different from the layout of the appliance. A. Control Panel B. Cooking mode selection knob C. Cooking temperature selection knob D. Electronic programmer - Allows you to programme the desired length of cooking by selecting the start cooking time and the end cooking time. -
Page 5: You Will Need
Before you start Things to check before you start To avoid the risks that are always present when you use an electrical appliance, it is important that this appliance is installed correctly and that you read the safety instructions carefully to avoid misuse and hazards. Please keep this instruction manual for future reference and to pass it on to any future owners. - Page 6 These instructions are for your safety. Please read through them thoroughly prior to installation and retain them for future reference. CAUTION: THIS APPLIANCE MUST BE INSTALLED BY A PROFESSIONAL ELECTRICIAN, AND IN ACCORDANCE WITH THE MANUFACTURER’S INSTRUCTIONS BEFORE CARRYING OUT ANY ADJUSTMENT OR REPAIR ON THE APPLIANCE, MAKE CERTAIN IT IS DISCONNECTED FROM THE ELECTRICAL POWER SUPPLY This appliance complies with all current European safety legislation,...
- Page 7 Cleaning and user maintenance shall not be made by children without supervision. Regularly check the power plug and power cord for damage. If the supply cord is damaged, it must be replaced by the a service agent or similarly qualified person, in order to avoid a danger or injury. Do not use a steam cleaner on the appliance.
- Page 8 Before connecting the appliance to the power supply, check that the power supply voltage and current rating corresponds with the power supply details, shown on the appliance rating label. Never use a damaged appliance! Disconnect the appliance from the electrical outlet and contact your retailer if it is damaged. Danger of electric shock! Do not attempt to repair the appliance yourself.
- Page 9 The fixed wiring must be protected against hot surfaces. Do not hang an objects to the handle of the oven door. Do not cover the bottom of the oven with aluminium foil or other objects. Caution: Risk of fire! Do not allow aluminium foil, plastic, paper or fabric come in contact with heating elements.
- Page 10 Note: This multifunction oven combines the advantages of traditional conventional oven with those of the more modern fan oven, in a single appliance. It is an extremely versatile appliance that allows you to choose easily and safely between different cooking modes. The various features offered by the oven are selected by means of selector knob "B"...
-
Page 11: Product Functions
Product functions > The oven is controlled by a thermostat between 60ºC and 250ºC, depending on the temperature required. The thermostat pilot light turns on and off to indicate the temperature control during use. > The required cooking mode is selected using the multifunctional control button. - Page 12 The information given in the following charts is intended only as a guide. Select the lowest temperature quoted and check the food at the end of the shortest duration quoted. CONVENTIONAL Cakes / Biscuits Recommended Temperature °C Cooking Time shelf level from in min.
- Page 13 CONVENTIONAL Meat / Fish Recommended Temperature °C Cooking Time shelf level in min. from the bottom Roast beef, approx. 1 kg 190 – 210 100 – 120 Beef fillet, approx. 1 kg 200 – 220 45 – 55 Venison, approx. 1 kg 190 –...
- Page 14 Recommended GRILL Recommended Grilled Food FAN GRILL shelf level from 2nd shelf level the bottom for from the bottom the grill function for the grill fan function Temperature Total Temperature Total setting setting grilling grilling time in time in min. min.
-
Page 15: Function Button
Setting the clock & 3-key timer cooking modes Adjust the clock after switch on Once it is connected with electrical power, the display will show “12:00” with the square symbol above “ ”. Press the + or - button will increase or decrease the number until it reaches the right time. - Page 16 Semi-automatic setting Setting the required time frame for baking (10 hours maximum) • Press the function button repeatedly until the square symbol above “ ” flashes and set the required time using the + and - buttons. Adjust the cooking method (thermostat, oven operation). •...
-
Page 17: Cooling Ventilation
Cooling ventilation • In order to cool down the exterior of the appliance, this model is equipped with a cooling fan, which comes on automatically when the oven is hot. • When the fan is on, a normal flow of air can be felt exiting between the oven door and the control panel Practical cooking advice •... -
Page 18: Using The Defrost Mode
Using the fan assisted grill Use the grill in the same way as the standard grill, but ensure the door is closed. This mode is recommend for quick browning on the outside, while keeping the juices in. Ideal for chops and burgers. Using the true fan mode The rear circular element and the fan come on and the heat is dispersed by forced convection. -
Page 19: Care And Maintenance
Care and maintenance Warning Always switch off the electricity supply before performing maintenance work. In the event of a fault, FUSE contact customer services +353 (01) 4136444 Caution Do not use hot water, diluents, petrol, alcohol, kerosene, washing powder, cleanser, alkaline detergent, acid, chemical cloth, etc. for cleaning so as not to damage the enamel coating and plastic. - Page 20 Care and maintenance Warning! NEVER USE A STEAM CLEANER TO CLEAN THE INSIDE OF THE OVEN. • This oven is fitted with catalytic liners, it is recommended that the the oven is heated to 200ºC or higher once a month. This burns off and soften excess grease deposits.
-
Page 21: How To Remove The Oven Doors
How to remove the oven doors For a more thorough clean, you can remove the oven door. To remove the oven door use the following instructions: 1. Open the door to the full 2. Open the lever A completely extent. on the left &... - Page 22 Removing the inner pane of glass 1. Remove the top plate by unscrewing the 2 screws (A). 2. Gently pull out the inner panel of glass. Clean the glass with an appropriate cleaner. Dry thoroughly, and place on a soft surface.
-
Page 23: Replacing The Oven Lamp
Replacing the oven lamp WARNING: Disconnect the appliance from the electricity supply before replacing the lamp. 90’ • During use the appliance becomes hot. Care should be taken to avoid touching heating elements inside the oven. • Remove the oven racks to allow access to the upper right rear corner of the oven cavity. -
Page 24: Troubleshooting
Troubleshooting What should I do if the oven doesn’t heat up? Check to see if one of the following actions resolves the issue: Check that the oven is switched on. • • The clock may not be set. Set the clock (see section “Setting the clock”). •... -
Page 25: Recycling And Disposal
Recycling and disposal Environmental protection Waste electrical products should not be disposed of with household waste. Please recycle where facilities exist. Check with your local authority, or retailer for recycling advice. The symbol on the product or its packaging indicates that this product cannot be treated as normal household waste. -
Page 26: Warranty And Service Information
Warranty & Service Information Thank You For Purchasing a Quality Nordmende Appliance All NordMende Household Appliances Come With a 2 Year Warranty. Register online within 30 days of purchase to receive your additional 1 year free - so 3 years in total. Please retain your original proof of purchase to secure your warranty guarantee.*... -
Page 27: Warranty Conditions
Warranty Conditions Your NordMende warranty is valid on condition that: The appliance has been correctly installed and used only on the electricity or gas supply stated on the appliance rating plate. The appliance has been used for normal domestic use only... -
Page 28: Installation
Installation Only a quali ied person in compliance with the instructions provided must install the appliance. The manufacturer declines all responsibility for improper installation, which may harm persons and animals and damage property. Caution • The power supply to the appliance must be switched Fig 5 off before any adjustments or maintenance work is undertaken. - Page 29 Installation Unit modifications • Remove the both upper shelf (A) and cross member support (B) on the oven housing unit. • Cut the bottom panel (C) of the oven housing as shown. DOU414IX...
- Page 30 DOI414IX Note • The panels of the adjacent cabinets must be made of heat-resistant material. In particular the adhesive that bonds the plastic laminate to the furniture must be able to withstand temperatures of not less than 150°C to avoid delamination. The appliance must be housed in heat-...
- Page 31 Installation Connect to mains power supply, ensuring the cable is not bent. Lift oven into the housing unit, do not lift the oven by the handle as the glass door may shatter. Note: If the supply cord is damaged, it must be replaced by the manufacturer, its service agent or similarly qualified persons in order to avoid a hazard.
-
Page 32: Electrical Connection
Electrical connection All installation work must be carried out by a qualified electrician. Before connecting the mains supply ensure that the mains voltage corresponds to the voltage on the rating plate inside the appliance. Warning: THIS APPLIANCE MUST BE EARTHED. Mains Supply should be connected to the Mains Voltage by Direct Connection Warning •... -
Page 33: Electrical Requirements
Electrical requirements Any permanent electrical installation must comply with the latest national regulations. For your own safety a registered, qualified electrician should undertake the electrical installation of this appliance. The appliance is supplied with a 3-core mains cable and must be connected to the electricity supply via a double pole switch having a 3mm minimum contact gap on each connector. - Page 34 Symbol Value Unit Model identification DOI414IX Type of oven Built-in electric oven Mass of the appliance 58.5 Number of cavities Heat source per cavity Electricity (electricity or gas) Volume per cavity Top oven: 31 bottom oven: 57 Energy consumption Top oven: 0.58...
- Page 35 Symbol Value Unit Model identification DOU414IX Type of oven Built-in electric oven Mass of the appliance Number of cavities Heat source per cavity Electricity (electricity or gas) Volume per cavity Top oven: 31 bottom oven: 43 Energy consumption Top oven: 0.58 kWh/cycle electric cavity (electricity) required to heat a...
- Page 36 NORD MENDE SMART LIVING...
Need help?
Do you have a question about the DOI414IX and is the answer not in the manual?
Questions and answers