Advertisement
Table of Contents
- 1 Part 1: Introduction of Product
- 2 Part 3: Installation and Preparation for Use
- 3 Electric Connection and Safety
- 4 Part 4: Using the Product
- 5 Ceramic Hob
- 6 Control Panel
- 7 Using the Cooktop Burners
- 8 Using the Oven
- 9 Energy Saving
- 10 Cooking Recommendations
- 11 Cleaning the Oven
- 12 Cleaning the Ceramic Hob
- 13 Maintenance
- 14 Part 6: Service and Transport
- Download this manual
Advertisement
Table of Contents

Related Manuals for Nordmende CTEC50WH


Summary of Contents for Nordmende CTEC50WH
- Page 1 CTEC50WH CTEC60WH CTEC60BK OPERATING AND INSTALLATION INSTRUCTIONS OF ELECTRIC DOUBLE OVEN...
- Page 2 Dear Customer, Thank you for purchasing this Cooking Appliance. The safety precautions and recommendations in these instructions are for your own safety and that of others. They will also provide a means by which to make full use of the features offered by your appliance. Please keep this booklet in a safe place.
- Page 3 CONTENS: INTRODUCTION OF PRODUCT WARNINGS INSTALLATION AND PREPARATIONS FOR USE USING THE PRODUCT CLEANING AND MAINTENANCE SERVICE AND TRANSPORTATION...
-
Page 4: Part 1: Introduction Of Product
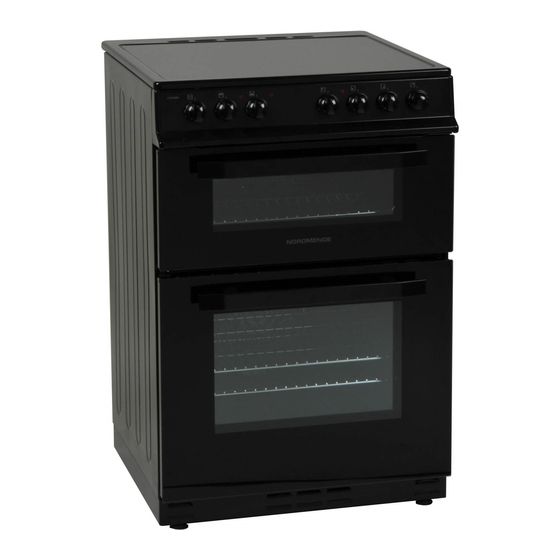
Rack 1 List of Components 1. Cooktop MODEL SIZE (mm) 2. Control panel 3. Top oven door CTEC50WH 50 * 60 * 90 4. Oven door handle 5. Main oven door 6. Grid CTEC60WH 60 * 60 * 90 CTEC60BK 7. - Page 5 PART 2: WARNINGS TAKE ALL IMPORTANT SECURITY MEASURES AND READ THE MANUAL COMPLETELY BEFORE USING THE PRODUCT This product has been designed for non-professional, domestic use only. Surely control whether there is any damage after you unpacked the product. If there is any damage;...
- Page 6 Do not use steam cleaners for cleaning the hob burners and oven cavity. Before opening the lid covering the hotplates, take care that no liquids are on the top of the lid. The lid is to closed not earlier than hotplates have been cooled down. Take care that the lid is in correct position under operation.
-
Page 7: Part 3: Installation And Preparation For Use
PART 3: INSTALLATION AND PREPARATION FOR USE This modern, functional and practical cooker that is manufactured with the most quality parts and materials will meet your needs in every respect. You must surely read this manual in order not to have any problem in future and to be able to have successful results. -
Page 8: Electric Connection And Safety
3.2 ADJUSTMENT OF LEVELING LEGS The cooker stands on 4 leveling legs. As the leveling legs are adjusted at lower position, it is required to control whether the product is leveled before operating it. This adjustment can be made as turning the leveling leg clockwise, if required. It is possible to raise the product maximum 15mm via the leveling leg. - Page 9 Connection diagram is given below. 3.4 GENERAL WARNING AND MEASURES Your product is manufactured in accordance with the related safety norms. The maintenance and repair works must be made just by the authorized service. The installation and repair works without follwing rules may endanger you. When the cooker is operated, the external and internal surfaces of product become hot.
-
Page 10: Part 4: Using The Product
PART 4: USING THE PRODUCT 4.1 TECHNICAL SPECIFICATIONS FOR TOP AND MAIN OVENS TOP OVEN OF 60x60 COOKER RATING Top Heating Element 700W Bottom Heating Element 700W Grill Heating Element 1600W MAIN OVEN OF 60x60 COOKER RATING Top Heating Element 1200W Bottom Heating Element 1100W... -
Page 11: Control Panel
4.2. CONTROL PANEL The control panel of the cooker is shown below. 4.3. USING THE COOKTOP BURNERS The hob part of the appliance is controlled via knob with 7 positions on the control panel. Position ''0'' means off position. The remaining 6 positions indicate the following types of use: :Heat maintenance position : Heating in low temperature position... - Page 12 WRONG WRONG WRONG CORRECT pot bottom is round pot buttom does not sit well pot buttom is small Figure 9 After using any hob,please make sure that it is switched off. Never touch any heating element, after it si turned off. Because, it keeps the heat for a certain period.
-
Page 13: Using The Oven
4.4 USING THE OVEN 4. 4. 1. Using the Mechanical Timer Mechanical timer only controls the main oven. Some products may have mechanical minute minder. It is only for alarm function. It does not control the oven. Manual operation When you set the timer knob to ''M'' position as seen in the illustration on left side, the oven can be operated continuously. - Page 14 4.4.3. Using the Main Oven The switch for main oven allows you to select the oven functions. The symbols and their functions are briefly explained in the following lines. The detailed information for their usage will also be explained in the following pages. Defrost function Fan and ring heating element function Defrost function...
-
Page 15: Energy Saving
ENERGY SAVING During use of electrical cookers , it is required to use saucepans having flat bases. Choose a cookware of proper size. Using a lid will reduce cooking times. Minimize the amount of liquid or fat to reduce cooking times. When liquid starts boling ,reduce the temperature setting. -
Page 16: Cooking Recommendations
4.6. COOKING RECOMMENDATIONS 4.6.1. Top oven cooking chart Food Cooking Temperature Time(min.) Rack position Small Cakes 160-185 20-25 1(From Bottom) Burgers Max position 20-25 2(From Bottom) Beef Max position 25-30 2(From Bottom) Toast Max position 5-10 2(From Bottom) Fruit Cake Fatless Sponge Cake Victoria Sandwich 4.6.2. -
Page 17: Cleaning The Oven
PART 5: CLEANING AND MAINTENANCE OF YOUR OVEN 5.1. GENERAL Before starting to clean your oven, be sure that all control knobs are off and your appliance is cooled off. Before using the cleaning materials control whether they are appropriate and recommended by the manufacturer of your oven. -
Page 18: Cleaning The Ceramic Hob
5.3. CLEANING THE CERAMIC HOB Make sure to unplug the oven before starting to clean it. Before starting cleaning wait for ceramic cooker completely coll down. Be sure that cleaning material does not contain any particles which may cause to scratch glass. Use cream or liquid detergent. -
Page 19: Maintenance
· Close the door till it almost reaches to the full closed position and remove it by pulling towards yourself. Note : To re- assemble the door follow the opposite rules of removal. Please pay attention. That the reccessed forms on each hinge mechanisms should be positioned properly on the hinge counterparts as shown above. - Page 20 Pan anti-tilting wire To locate grid correctly in the cavity, put it to any rack and push the grid up to the end. The pan anti-tilting wire must be placed inside of the cavitiy. Removal of wire shelf Pull the wire shelf as shown in the picture.
-
Page 21: Part 6: Service And Transport
PART 6: SERVICE AND TRANSPORT 6.1. CHECK BEFORE CONTACTING TO SERVICE If the oven does not operate : The oven may be plugged off; there has been a blow-out. On models fitted with a timer, time may not be regulated. If the oven does not heat : The heat may be not adjusted with oven’s heater control switch. - Page 22 The symbol on the product or on its packaging indicates that this product may not be treated as household waste. Instead it shall be handed over to the applicable collection point for the recycling of electrical and electronic equipment. By ensuring this product is disposed of correctly, you will help prevent potential negative consequences for the environment and human health, which could otherwise be caused by inappropriate waste handling of this product.
Need help?
Do you have a question about the CTEC50WH and is the answer not in the manual?
Questions and answers