
Related Manuals for Nordmende CTG50WH


Summary of Contents for Nordmende CTG50WH
- Page 1 CTG50WH CTG50LPGWH CTG60WH CTG60LPGWH CTG60LPGBK CTG60BK OPERATING AND INSTALLATION INSTRUCTIONS OF FREESTANDING GAS DOUBLE OVEN...
- Page 2 Dear Customer, Our goal is to offer you products with high quality that exceed your expectations. Your appliance is produced in modern facilities carefully and particularly tested for quality. This manual is prepared in order to help you use your appliance that is manufactured by the most recent technology, with confidence and maximum effciency.
-
Page 3: Table Of Contents
CONTENTS: 1. Part : PRESENTATION AND SIZES OF PRODUCT 2. Part : WARNINGS 3. Part : INSTALLATION AND PREPARATIONS FOR USE 3.1 Environment where the appliance will be installed 3.2 Installation of oven 3.3 Adjustment of feet 3.4 Gas connection 3.5 Electric connection and security 3.6 General warnings and measures 3.7 Gas conversions... -
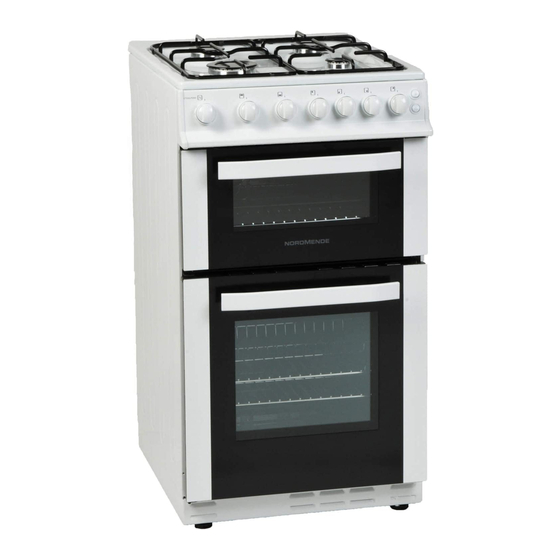
Page 4: Part : Presentation And Sizes Of Product
3- Oven Door Handle 4- Supply Leg 5- Oven Door 6- Oven Tray MODEL SIZE (mm) 7- Wire Grid 8- Grill CTG50WH 50 * 60 * 90 9- Oven Lamp CTG50LPGWH 10- Semi-Rapid Burner CTG60WH 11- Rapid Burner CTG60LPGWH 60 * 60 * 90... -
Page 5: Part : Warnings
2. Part : WARNINGS TAKE ALL IMPORTANT SECURITY MEASURES AND READ THE MANUAL COMPLETELY BEFORE USING THE APPLIANCE This appliance has been designed for non-professional, domestic use only • When you unpack the appliance, make sure that it is not damaged during •... - Page 6 2. Part : WARNINGS ventilation device (mechanical extractor hood) Prolonged intensive use of the appliance may call for additional ventilation, for example opening of a window or more effective ventilation, for example increasing thelevel of mechanical ventilation where present. Turn off all burners before shutting the lid •...
-
Page 7: Part : Installation And Preparations For Use
3. Part : INSTALLATION AND PREPARATIONS FOR USE This modern, functional and practical oven, that was manufactured with the parts and materials of highest quality, will meet your cooking needs in every aspect. You must surely read this manual so that you don't have any problem in future and to be able to have satisfactory results. -
Page 8: Installation Of Oven
3. Part : INSTALLATION AND PREPARATIONS FOR USE access to fresh air. This electric fan must have the capacity to change the air of the kitchen environment 4-5 times of its own volume of air per hour. Cooker hood flue Electrical ventilator Air inlet section Air inlet section... -
Page 9: Adjustment Of Feet
3. Part : INSTALLATION AND PREPARATIONS FOR USE • Pay attention not to place it near the refrigerator, there must be no flammable or inflammable materials such as curtain, waterproof cloth, etc. that will begin to burn quickly It is required that there must be least a 2cm blank space around the oven for •... - Page 10 3. Part : INSTALLATION AND PREPARATIONS FOR USE As gas is turned on, all connection parts and hose must be checked with soapy water or leakage fluids. Do not use naked flame to check gas leakage. All metal components used during gas connection must be clear of rust. Also check the expiry dates of components used.
-
Page 11: Electric Connection And Security
3. Part : INSTALLATION AND PREPARATIONS FOR USE 3.5 Electric connection and security During the electric connection, follow the instructions stated in the user manual The earthing cable must be connected to the earth terminal • You have to ensure the power cord with suitable insulation to be connected •... -
Page 12: General Warnings And Measures
3. Part : INSTALLATION AND PREPARATIONS FOR USE 3.6 General warnings and measures Your appliance is produced in accordance with the local and international • standards and regulations applicable. The maintenance and repair works must be made only by authorized service •... - Page 13 3. Part : INSTALLATION AND PREPARATIONS FOR USE Changing injectors: Hob Burners Cut off the feeding gas flow and electric current • Remove the hob cap and the adapter. • Unscrew the injectors. For this, use a 7mm spanner. • •...
- Page 14 3. Part : INSTALLATION AND PREPARATIONS FOR USE Figure 11 Adjusting The Reduced Flame Position The flame length in the minimum position is adjusted with a flat screw located on the valve. For valves with FFD, the screw is located on the side of the valve spindle.
-
Page 15: Part : Use Of Your Oven
4. Part : USE OF YOUR OVEN 4.1 Use of gas burners Ignition of the burners To determine which knob controls which burner, check the position symbol above the knob. Manual Ignition of the Gas Burners • If your appliance is not equipped with any ignition aid or in case there is a failure in the electricity network, follow the procedures listed below For Hob Burners: To ignite one of the burners, press and turn its knob counter-clockwise so that the knob is in max. -
Page 16: Control Of Hob Burners
4. Part : USE OF YOUR OVEN pressing the knob until you see a stable flame on the burner. Flame safety device: Hob Burners (If your hob is equipped with gas safety device) Hobs equipped with flame failure device provide security in case of accidentally extinguished flame. -
Page 17: Control Of Oven Burner
4. Part : USE OF YOUR OVEN Rapid Burner: 22-26cm Medium Burner: 14-22cm Auxiliary Burner: 12-18cm Make sure that the tips of the flames do not spread out of the outer circumference of the pan, as this may also harm the plastic accessories around the pan (handles etc.) Figure 12 When the burners are not in use for prolonged periods, always turn the main... - Page 18 4. Part : USE OF YOUR OVEN Preheating When you need to preheat the oven, we recommend you do so for 10 minutes. For recipes needing high temperatures, e.g. bread, pastries, scones, soufflés etc., best results are achieved if the oven is preheated first. For best results when cooking frozen or cooked chilled ready meals always preheat the oven first.
-
Page 19: Control Of Grill Burner
4. Part : USE OF YOUR OVEN MAIN OVEN MARK TEMPERATURE( C) These temperature settings may change slightly when both top and main ovens are operated together. 4.1.3 Control of the grill burner The grill burner can be operated with the oven door in two positions regarding your choice: completely open or partially open (30°... -
Page 20: Accessories Used In Oven
4. Part : USE OF YOUR OVEN 4.2 Accessories used in oven The oven already supplied with accessories. You can also use accessories you • purchase from the market, but they must be heat and flame resistant. You can also use glass dishes, cake molds, special oven trays that are appropriate for use in oven. - Page 21 4. Part : USE OF YOUR OVEN Pan anti-tilting wire • To locate grid correctly in the cavity, put it to any rack and push the grid up to the end. • The pan anti-tilting wire must be placed inside of the cavitiy. Figure 13 Removal of catalitic panel Removal of wire shelf...
-
Page 22: Part : Cleaning And Maintenance
5. Part : CLEANING AND MAINTENANCE 5.1 Cleaning Be sure that all control switches are off and your appliance cooled before cleaning your oven. Plug off the appliance. Check whether they are appropriate and recommended by the manufacturer before using the cleaning materials on your oven. -
Page 23: Maintenance
5. Part : CLEANING AND MAINTENANCE Burner Caps: Periodically, enameled pan support, enameled covers, burner heads must be washed with soapy warm water rinsed and dried. After drying them thoroughly, replace them correctly. Enamelled Parts: In order to keep them a new, it is necessary to clean them frequently with mild warm soapy water and then dry with cloth. -
Page 24: Part : Service And Transport
6. Part : SERVICE AND TRANSPORT 6.1 Basic troubleshooting before contacting service If the oven does not operate : The oven may be plugged off, there has been a black out. • If the oven does not heat : The heat may be not adjusted with oven's heater control switch. •... -
Page 25: Injector Table
INJECTOR TABLE Gas Category: II 2H3+ Class: 1 28-30 mbar 20 mbar RAPID BURNER Injector Diameter ( 1/100mm Nominal Rating (kW) 285.7 lt/h 218.1 gr/h Consumption in 1h AUXILLARY BURNER Injector Diameter ( 1/100mm Nominal Rating (kW) 95.2 lt/h 72.7 gr/h Consumption in 1h MEDIUM BURNER Injector Diameter (... - Page 26 The symbol on the product or on its packaging indicates that this product may not be treated as household waste. Instead it shall be handed over to the applicable collection point for the recycling of electrical and electronic equipment. By ensuring this product is disposed of correctly, you will help prevent potential negative consequences for the environment and human health, which could otherwise be...
Need help?
Do you have a question about the CTG50WH and is the answer not in the manual?
Questions and answers