
Related Manuals for Nordmende SOPT523IX


Summary of Contents for Nordmende SOPT523IX
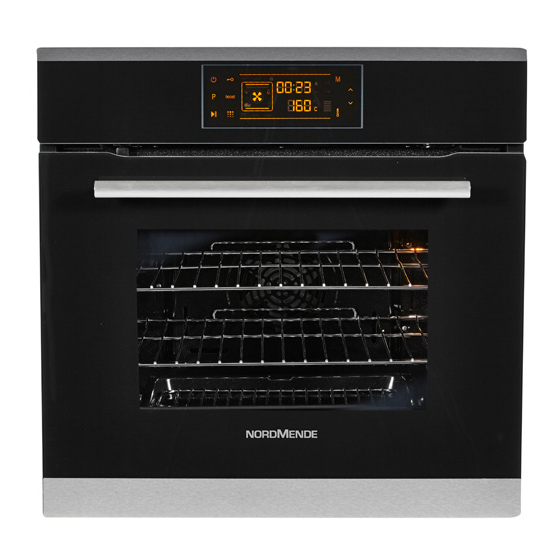
- Page 1 SOPT523IX OPERATING AND INSTALLATION INSTRUCTIONS OF TOUCH CONTROL BUILT-IN OVEN...
- Page 2 Dear Customer, We take offering quality products that more than meet your expectations as our goal, offering you products produced in modern factories that have been carefully and extensively tested for quality. Your manual is prepared in order to help you to use your appliance that is manufactured by the most recent technology, with confidence and maximum efficiency.
- Page 3 Contents 1- Presentation and size of product 2- Safety Warnings 3- Preparation for installation and use 4- Using the oven 5- Cleaning and maintenance of your product 6- Service and Transport...
-
Page 4: Part 1: Presentation And Size Of Product
PART 1: PRESENTATION AND SIZE OF PRODUCT LIST OF COMPONENTS : 1- Control panel 8- Wire Grill 2- Handle 9- Racks 3- Oven Door 10- Oven Light 4- Child Lock 11- Turbo Heating Element(behind the plate) 5- Tray 12- Fan (behind the plate) 6- Lower Heating Element (behind the plate) 13- Air Outlet Shutters 7- Upper Heating Element (behind the plate) -
Page 5: Part 2: Safety Warnings
PART 2: SAFETY WARNINGS READ THESE INSTRUCTIONS CAREFULLY AND COMPLETELY BEFORE USING YOUR APPLIANCE, AND KEEP IT IN A CONVENIENT PLACE FOR REFERENCE WHEN NECESSARY. THIS MANUAL IS PREPARED FOR MORE THAN ONE MODEL IN COMMON. YOUR APPLIANCE MAY NOT HAVE SOME OF THE FEATURES THAT ARE EXPLAINED IN THIS MANUAL. PAY ATTENTION TO THE EXPRESSIONS THAT HAVE FIGURES, WHILE YOU ARE READING THE OPERATING MANUAL. - Page 6 - During use, handles held for short periods in normal use can get hot. - Do not use harsh abrasive cleaners or sharp metal scrapers to clean the oven door glass and other surface since they can scratch the surface, which may result in shattering of the glass or damage to the surface.
- Page 7 Installation Warnings - Do not operate the appliance before it is fully installed. - The appliance must be installed by an authorized technician and put into use. The producer is not responsible for any damage that might be caused by defective placement and installation by unauthorized people.
-
Page 8: Part 3: Preparation For Installation And Use
PART 3: PREPARATION FOR INSTALLATION AND USE Manufactured with best quality parts and materials, this modern, functional and practical oven will meet your needs in all respects. Make sure to read the manual to obtain successful results and not to experience any problems in the future. The information given below contain rules that are necessary for correct positioning and service operations. - Page 9 3.2. INSTALLATION OF BUILT_IN OVEN Cabinet cut-out sizes Min 25mm You can use either cabinet 1 or cabinet 2 cut-out sizes A DETAIL Minimum 40mm(The wooden part can be extended up to cut-out depth) Wooden part Front frame B DETAIL Countertop Built-in hob Distance between...
- Page 10 The dimensions and material of the cabinet in which the oven will be installed must be correct and resistant to increases in temperature. In a correct installation, contact with electrical or insulated parts must be prevented. Insulating parts need to be fitted in a way to ensure that they cannot be removed by using any kind of tool.
- Page 11 The appliance is designed to connect to 220-240V~ electricity is different than the value given above, call the Authorized Service immediately. The Manufacturer Firm declares that its bears no responsibility whatsoever for any kind of damage and loss arising from not complying with safety norms! Wiring of the appliance must be performed by the Authorized Service.
-
Page 12: Part 4: Using The Oven
PART 4: USING THE OVEN 4.1. USING THE OVEN FUNCTION Defrost Function The oven 's warning lights will be turned on, the fan starts operating. To use the defrost function, take your frozen food and place it in the oven on a shelf placed in the third slot from the bottom. - Page 13 Grilling Function The oven 's thermostat and warning lights will be turned on, the grill heating element will start operating. The function is used for grilling and toasting foods, use the upper shelves of oven. Lightly brush the wire grid with oil to stop foods sticking and place foods in the centre of the grid. Always place a tray beneath to catch any drips of oil or fat.
- Page 14 Pyrolytic Cleaning Function This function allows you to clean throughly the oven cavity. WARNING: • Before activating pyrolytic cleaning function, remove any excessive spillage and make sure that the oven is empty. Do not leave anything inside the oven cavity (e.g. wire grids, shallow tray, deep tray etc.
-
Page 15: Energy Saving
ENERGY SAVING During use of electrical cookers , it is required to use saucepans having flat bases. Choose a cookware of proper size. Using a lid will reduce cooking times. Minimize the amount of liquid or fat to reduce cooking times. When liquid starts boling ,reduce the temperature setting. - Page 16 4.2. HOW TO USE THE TOUCH CONTROL UNIT FUNCTION DISPLAY demo TIME DISPLAY auto boost TEMPERATURE DISPLAY boost yogurt KEY LOCK ON-OFF MODE boost PLUS FUNCTION SELECTION BOOST PLAY/PAUSE THERMOSTAT MINUS The control unit switches off after 5 minutes, if no function is selected and is changed. The appliances is operated using Touch control sensor fields.
- Page 17 4.2. HOW TO USE THE TOUCH CONTROL UNIT During the WAIT mode, the desired cooking function can be selected by touching P sensor. Every touching of P sensor change the oven functions as below. Some of these cooking functions may not be exist according to your model. Lamp →...
- Page 18 Adjusting the Day Time: When the built in oven installed firstly the time of day must be adjusted according to below instructions. Touch the ON/OFF to pass the Wait mode. During this mode, touch the MODE for 5 seconds. The Day Time symbol will be flashed continuously and you can adjust it with ^ and ?. To complete the Day time adjustment, touch the MODE one more time or wait at least for 5 seconds.
- Page 19 First; keep touching on the MODE for twice (until you see Cooking Duration Time symbol on the timer screen). Adjust the cooking period for the food you wish to cook, by using the ^ and ? while timer is in this position. Some time after the adjustment operation is completed;...
- Page 21 4.3. ACCESSORIES USED IN THE OVEN It is recommended that you use the containers indicated on the table depending on the food you will cook in your oven, you can also use glass containers, cake cutters, special oven trays suitable for use in your oven, available in the market. Pay attention to the information given by the manufacturer firm concerning this issue.
- Page 22 Pan anti-tilting wire To locate grid correctly in the cavity, put it to any rack and push the grid up to the end. The pan anti-tilting wire must be placed inside of the cavity. WARNING- Fit the grid correctly into any correspondingrack in the oven cavity and push it to the end.
-
Page 23: Maintenance
PART 5: CLEANING AND MAINTENANCE OF YOUR OVEN 5.1. CLEANING Before starting to clean your oven, be sure that all control buttons are off and your appliance is cooled off. Unplug the appliance. Do not use cleaning materials containing particles that might scratch the enamelled and painted parts of your oven. -
Page 24: Part 6: Service And Transport
PART 6: SERVICE AND TRANSPORT 6.1. REQUIREMENTS BEFORE CONTAINING TO SERVICE If the oven does not operate : The oven may be plugged off, there has been a black out. On models fitted with a timer, time may not be regulated. If the oven does not heat : The heat may be not adjusted with oven’s heater control switch. -
Page 25: Energy Efficiency Class
Trademark SOPT523IX Model Standard Energy Consumption at Energy Efficiency Class Load E (kWh) E < 1.00 A(High Efficiency) 1.00 E < 1.20 < 1.20 E < 1.40 < 1.40 < E < 1.60 1.60 E < 1.80 < 1.80 E < 2.00 <... - Page 26 The symbol on the product or on its packaging indicates that this product may not be treated as household waste. Instead it shall be handed over to the applicable collection point for the recycling of electrical and electronic equipment. By ensuring this product is disposed of correctly, you will help prevent potential negative consequences for the environment and human health, which could otherwise be caused by inappropriate waste handling of this...
Need help?
Do you have a question about the SOPT523IX and is the answer not in the manual?
Questions and answers