Advertisement
Advertisement
Table of Contents

Related Manuals for Belling BI602MFPY


Summary of Contents for Belling BI602MFPY
- Page 1 Belling Built In Pyrolytic 60cm Date: 21/05/19...
- Page 2 NZ - New Zealand DE - Germany ES - Spain NL - Netherlands AU - Australia To contact Belling about your appliance, please call: Warranty Registration Customer Care Helpline 0800 952 1068 0344 815 3746 in case of diffculty within the UK...
-
Page 3: Declaration Of Compliance
INTRODUCTION ACKNOWLEDGEMENT Thank you for purchasing our product. We hope you enjoy using the many features and benefits it pro- vides. This user guide book is designed to help you through each step of owning your new product. Please read it carefully before you start using your appliance, as we have endeavored to answer as many questions as possible, and provide you with as much support as we can. - Page 4 SAFETY WARNING • During use the appliance becomes hot. Care should be taken to avoid touching heating elements. • Children less than 8 years of age shall be kept away unless continuously supervised. This appliance can be used by children aged from 8 years and above and persons with reduced physical sensory or mental capabilities or lack of experience and knowledge if they have been given supervision or instruction...
- Page 5 order to avoid overheating. • The cooking process has to be supervised. A short term cooking process has to be supervised continuously. • Fire Safety Advice If you do have a fire in the kitchen, don’t take any risks - get everyone out of your home and call the Fire Brigade.
-
Page 6: Using Your Appliance
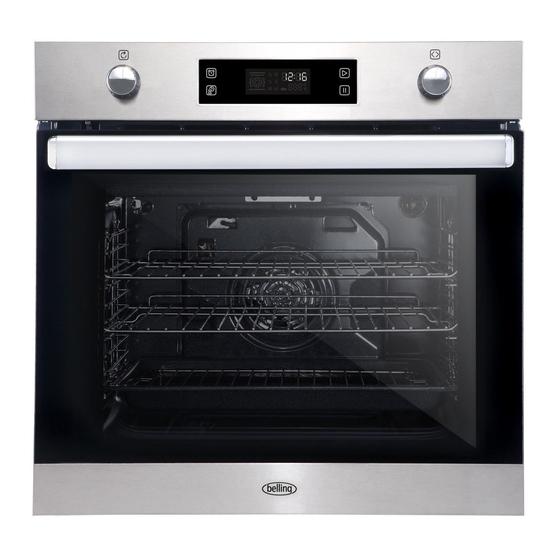
USING YOUR APPLIANCE Getting to know your product Note: Your appliance layout may differ depending on the model. Control Panel Time/Temperature Function Selector Control Control (K2) Minute Minder Start/Confirmation Key (K1) Clock Key Pause/Off Key... -
Page 7: Oven / Grill Functions
Oven / Grill functions Note: Your oven may not have all of the functions shown here. We recommend for best cooking results, please preheat for 15 minutes. Symbol Function Description Fanned Oven:- The even temperature in the oven makes this function suitable for batch baking, or batch cooking foods. -
Page 8: Cooling Fan
Oven Selector control Time/Temperature control Cooling Fan When cooking is finished, paused, or if the central oven temperature is over 75 C, the cooling fan will continue working for 15 minutes. When the central oven temperature drops below 75 C, the cooling fan will stop. - Page 9 1. Press the Clock key once, and the hour figures will begin to flash. 2. Rotate K2 to adjust the hour figure. The numbers go from 0-23. 3. Press the Clock key to set the hours and move onto the minutes. 4.
- Page 10 5. Now adjust K1 to select the desired function. The Fully Automatic symbol will appear on the display 6. Press the Start/Confirmation key to set the function. 7. Adjust K1 and K2 in order to set the cooking time and cooking temperature (if not adjusted, the default cooking time is set to 9 hours) The temperature cannot be adjusted in the Pyrolytic function.
- Page 11 Removing the door from oven (If fitted) Disassembly of oven door components 1. To remove the door, open the door to the maximum angle. Then pull the catches on each hinge forward towards you. 2. Close the door to an angle approximately 30°. Hold the door with one hand on each side.
- Page 12 Accessories Wire shelf: For grill, dishes, cake pan with items for roasting and grilling. Slider bracket: For cooking larger size food, these shelf support rails on the right and left sides of the oven can be removed. (only for specific models) Grill pan: For cooking large quantities of food such as moist cakes, pastries, frozen food etc, or for collecting fat/ spillage and meat juices.
-
Page 13: Shelf Placement Warning
Shelf placement warning: To ensure the oven shelves operate safely, correct placement of the shelves between the side rails is imperative. Shelves and the grill pan can only be used between the first and fifth layers. Ensure that shelves are inserted correctly, with the upstand at the back and pointing upwards. This will help to prevent the shelves tipping forwards when they are pulled out. -
Page 14: Bulb Replacement
The oven shelves can also be hooked onto the shelf runners Before removing the shelves completely, please make sure that the shelf is unclipped from the retaining tabs. BULB REPLACEMENT Risk of electric shock! Glass cover You must replace a damaged glass cover. Suitable glass covers may be obtained from the after-sales service. -
Page 15: Cleaning Your Appliance
CLEANING YOUR APPLIANCE Do’s Note: Always switch off your appliance and allow it to cool down before you clean any part of it. Note: Please take extra care when cleaning over the symbols on the control panel, as this can lead to them fading. - Page 16 CLEANING YOUR APPLIANCE Before Using the Pyrolytic Cleaning Function Please read the warning section prior to using the Pyrolytic cleaning function. The shelf guides which support the wire shelves and grill pan are not suitable for pyrolytic cleaning. Take the shelf guides, shelves, grill pan, trivet and all bakeware out of the cavity prior to using the pyrolytic self-cleaning function.
- Page 18 Please keep this handbook for future reference, or for anyone else who may use the appliance.
- Page 19 Please keep this handbook for future reference, or for anyone else who may use the appliance.
-
Page 20: Technical Data
TECHNICAL DATA Electric Built In Electrical supply / Load Appliance Size (cm) Electrical supply Load (kW) 60 Pyrolytic Oven 220 - 240V ~ 50Hz For the specific power rating of your model, refer to the data badge on the front frame of your appliance. WARNING: This appliance must be earthed.
Need help?
Do you have a question about the BI602MFPY and is the answer not in the manual?
Questions and answers