Table of Contents
Advertisement
Advertisement
Table of Contents

Subscribe to Our Youtube Channel
Related Manuals for Blanco BOSE 69PX


Summary of Contents for Blanco BOSE 69PX
- Page 1 GUIDE TO INSTALLATION Oven BOSE 69PX...
- Page 2 You will find that the clean lines and modern look of your Blanco oven blends in perfectly with your kitchen décor. It is easy to use and performs to a high standard. Blanco also makes a range of products that will enhance your kitchen such as cooktops, rangehoods, dishwashers and microwaves, sinks and taps.
-
Page 3: Table Of Contents
CONTENTS 1 / SAFETY INSTRUCTIONS • Packaging • Child safety 2 / INSTALLING YOUR APPLIANCE • Choice of location • Build-in • Electrical connection 3 / DESCRIPTION OF YOUR APPLIANCE • Presentation of the oven • Presentation of the programmer •... - Page 4 1 / SAFET Y INSTRUCTIONS IMPORTANT SAFETY INSTRUCTIONS - READ CAREFULLY AND RETAIN FOR FUTURE USE. Important When you receive the appliance, unpack it or have it unpacked immediately. Give it an overall inspection. Make note of any concerns or reservations on the delivery slip and make sure to keep a copy of this form.
-
Page 5: Safety Instructions
1 / SAFET Y INSTRUCTIONS — This oven was designed for use by private individuals in their homes. It is intended solely for cooking foodstuffs. This oven does not contain any asbestos-based components. — Do not modify or attempt to modify any of the characteristics of this appliance. - Page 6 1 / SAFET Y INSTRUCTIONS — Do not use abrasive cleaning products or hard metal scrapers for cleaning the oven's glass door, as they could scratch the sur- face and cause the glass to shatter. — To clean both the electronic programmer window and the oven door, use a soft cloth.
-
Page 7: Packaging
1 / SAFET Y INSTRUCTIONS • PACKAGING — This appliance’s packing materials are recy- clable. Recycle them by depositing them in local authority containers provided for this purpose. — Your appliance also contains many recyclable materials. It is therefore marked with this logo to indicate that used appliances must not be mixed with other waste. -
Page 8: Installing Your Appliance
2 / INSTALLING YOUR APPLIANCE • CHOICE OF LOCATION The above diagrams show the dimensions of a cabinet that will be able to hold your oven. This appliance may be installed either under a worktop or in a cab- inet column, as indicated on the installation diagram. If the cabinet is open, its opening must be 70 mm maximum. -
Page 9: Build-In
2 / INSTALLING YOUR APPLIANCE • BUILD-IN 1) Drill a hole Ø 2 mm in the cabinet panel to avoid splitting the wood. 2) Attach the oven with the 2 screws. To be certain that you have properly installed your appli- ance, do not hesitate to call on a household appliance spe- cialist. -
Page 11: Electrical Connection
2 / INSTALLING YOUR APPLIANCE PYROLYSIS OVENS: Single phase 20A Meter 220-240V ~ 50Hz 220-240 V ~ Single phase line 16A fuse or differential circuit breaker Minimum cord size: 3G 1.5mm 2 Power supply cable length 1.50 m approx. • ELECTRICAL CONNECTION The appliance must be fitted correctly to guarantee electrical safe- The electrical connections are made before the appliance is... - Page 12 2 / INSTALLING YOUR APPLIANCE Warning : If the electrical installation in your residence requires any changes in order to hook up your appliance, contact a profession- al electrician. If the oven malfunctions in any way, unplug the appliance or remove the fuse corresponding to the sector where the oven is hooked up.
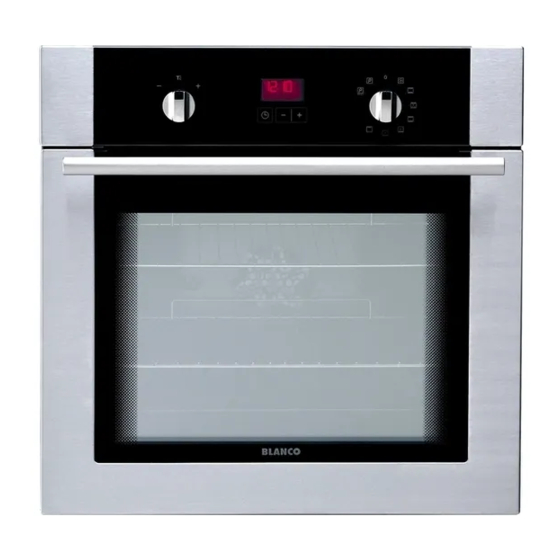
- Page 13 3 / DESCRIPTION OF YOUR APPLIANCE • PRESENTATION OF THE OVEN Programmer Lamp Temperature selector Shelf support indicator Function selector This installation and user manual applies to several different models. There may be slight differences between your model and the one described as regards details and acces- sories.
-
Page 14: Description Of Your Appliance
3 / DESCRIPTION OF YOUR APPLIANCE • PRESENTATION OF THE PROGRAMMER Time and duration display Cooking time indicator Locked door indicator Touch controls for setting time ECO cooking indicator Selection touch control (duration and time) Timer indicator Digital temperature display End of cooking indicator... -
Page 15: Accessories
3 / DESCRIPTION OF YOUR APPLIANCE • ACCESSORIES • Anti-tipping safety grid (fig.1) REAR The grid can be used to hold all dishes and moulds containing foodstuffs to be cooked or browned. It can be used for barbecues (to be placed di- FRONT rectly on the grid). -
Page 16: 4/Using Of Your Appliance
USING OF YOUR • USING THE PROGRAMMER • Setting the time. When the appliance is started up: 12:00 will flash on the display (fig.1) fig.1 Adjuste the time by pressing the + or - adjustement buttons (if you hold them down, the time will count up quickly) (fig.2). -
Page 17: º Instant Cooking
USING OF YOUR •Instant cooking — The programmer should display only the time. It should not be flashing (fig.1). fig.1 Turn the function selector to the position of your choice. Example: position (fig.2). Your oven suggests the optimal temperature fig.2 for this type of cooking. - Page 18 4 USING OF YOUR Cooking with immediate start and pro- grammed duration - Select the desired cooking mode and adjust the temperature (fig.1). fig.1 - Press the “ ” touch control until the cook- ing time indicator begins flashing The display flashes 0:00 to indicate that you fig.2 can now adjust the setting (fig.2).
- Page 19 USING OF YOUR Cooking with delayed start and select- ed end of cooking time. - After setting the cooking time, press the “ ” touch control until the “ ” end of cooking indicator flashes The display flashes 0:00 to indicate that you fig.1 can now adjust the setting (fig.1).
-
Page 20: º Using The Time Switch Function
4 USING OF YOUR • USING THE TIME SWITCH FUNCTION Your oven’s programmer can be used as an independent timer that allows you to count down a time without operating the oven. In this case, the timer display has priority over the clock display. - Page 21 OVEN COOKING FAN FORCED Pre-set temperature 180°C ( Min. 35°C - Max. 235°C) • Cooking is controlled by the heating element located at the back of the oven and by the fan. • Preheating unnecessary except for cooking programmes requiring very short times (biscuits on several levels).
-
Page 22: Oven Cooking Modes
OVEN COOKING WARM KEEPING Pre-set temperature 80°C ( Min 35°C Max - 100°C) • Heat regulated by the upper and lower elements with use of fan. • Recommended for rising dough for bread, brioche, kouglof, etc. while not exceeding 40° (plate heating, defrosting). FULL GRILL Pre-set temperature 275°C ( Min 180°C Max - 275°C) Use only for foods that need cooking for no longer than 5 minutes. -
Page 23: Cleaning The Outer Surfaces
6 CARING FOR AND CLEANING YOUR • CLEANING THE OUTER SURFACES To clean both the electronic programmer window and the oven door, use a soft cloth. Do not use abrasive creams or scouring sponges. • CLEANING THE DOOR • Removing the door Warning Do not use abrasive cleaning pro- ducts or hard metal scrapers for cleaning... - Page 24 6 CARING FOR AND CLEANING YOUR - If necessary, remove all the door's inner glass panels. This unit is made up of one or two glass panels depending on the model, with a black rubber buffer in each corner (fig. 4). fig.
-
Page 25: What Is Pyrolytic
6 CARING FOR AND CLEANING YOUR • WHAT IS PYROLYSIS? Your oven is equipped with enamelled wire shelf supports: these need to be removed before running the pyrolysis cycle. Warning Remove any cookware, grids and trays from the oven and clean any major spill residue before carrying out the pyrolysis. -
Page 26: Instant Pyrolytic Cleaning
6 CARING FOR AND CLEANING YOUR • INSTANT PYROLYTIC CLEANING To take advantage of the volume of heat already built up in the oven and thus save energy: Star t a pyrolysis cycle af ter a cooking pro- gramme. Remove the accessories from the oven and clean any major spill residue. - Page 27 If you have a doubt about the functioning of your oven, this does not necessarily mean that there is a malfunction. In any event, check the following items: YOU OBSERVE POSSIBLE CAUSES WHAT SHOULD YOU DO? THAT… ➡ Plug in your oven. - The oven is not connected.
-
Page 28: Changing The Bulb
Warning - Disconnect your oven before performing any task on the bulb to avoid the risk of elec- tric shock and, if necessary, let the appliance cool down. To unscrew the view port and the light, use a rubber glove, which will make disas- sembly easier. -
Page 29: Tips
TIPS VEGETABLES For a smoother potato gratin, pre-cook the potatoes sliced into rounds in milk or milk + cream for about twenty minutes. To prepare stuffed tomatoes: after cutting off the tops, remove the seeds, sprinkle some salt inside them and put them upside down on a mesh so they drain before stuffing them. FISH When buying it, it should smell pleasant and not too “fishy”. -
Page 30: Recipes
SOME RECIPES VEGETABLES Tomatoes stuffed with goat’s cheese. 8 tomatoes 300g of fresh goat’s cheese 4 soup spoons of olive oil 1 small bunch of fine herbs (chives or basil) salt, pepper. Wash the tomatoes, take off the top and carefully take out the pulp. Turn them over to let them drain well. - Page 31 SOME RECIPES CHICKEN Stuff it with a good bouquet of fresh tarragon or rub it with a mixture of 6 crushed cloves of garlic with a pinch of coarse salt, and some peppercorns. PIZZA Base: 1 pizza crust *with vegetables: 6 tablespoons tomato sauce + 100 g diced zucchini + 50 g diced bell peppers + 50 g sliced eggplant +2 small sliced tomatoes + 50 g shredded gruyere + oregano + salt + pepper.
- Page 32 SOME RECIPES POUND CAKE WITH CITRUS FRUIT Caramel: 20 lumps of sugar (200 g). Cake: 4 eggs - 200g granulated sugar - 200g flour - 200g good butter. 2 teaspoons baking powder. Fruits: 1 small tin of citrus fruits in syrup. Drain the fruit.
Need help?
Do you have a question about the BOSE 69PX and is the answer not in the manual?
Questions and answers