Blanco BFS60CX Instructions For The Use And Care And Installation

Blanco BFS60CX Instructions For The Use And Care And Installation

Freestanding multifunction ovens

Advertisement

Instructions for the Use and Care and Installation of
BFS60CX
BFS60NX
BFS60NXFF
BFS60WX
BFS60WXFF
Freestanding Multifunction Ovens.
Fro
F

Advertisement

Table of Contents
loading
Need help?

Need help?

Do you have a question about the BFS60CX and is the answer not in the manual?

Questions and answers

Inyx
February 21, 2025

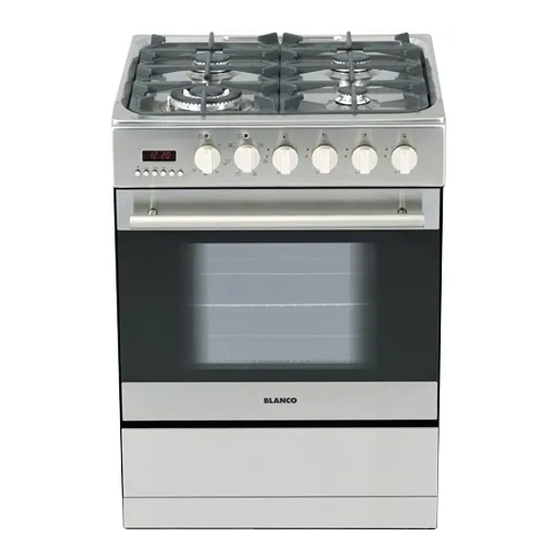
My oven that I have at the house I live in (BLANCO BFS60NXFF) has it's dials worn off so i don't know if the temperature I'm using is the correct one. It also applies to all other dials that are marked with something. I'd appreciate a image with all the dials markings there. Thank you!

User image 67b8557ada1de

Summary of Contents for Blanco BFS60CX

  • Page 1 Instructions for the Use and Care and Installation of BFS60CX BFS60NX BFS60NXFF BFS60WX BFS60WXFF Freestanding Multifunction Ovens.
  • Page 2 Dear customer, You will find that the clean lines and modern look of your Blanco oven blends in perfectly with your kitchen décor. It is easy to use and performs to a high standard. Blanco also makes a range of products that will enhance your kitchen – such as cook tops, rangehoods, dishwashers, microwaves, sinks and taps.
  • Page 3: General Warnings

    GENERAL WARNINGS Read the following carefully to avoid an electric shock or fire. It is most important that this instruction book should be retained with the appliance for future reference. Should the appliance be sold or transferred, always ensure that the book is left with the appliance in order that the new owner can get to know the functions of the appliance and the relevant warnings.
  • Page 4: Installer's Guide

    2 INSTALLER’S GUIDE 2.1 COOKER INSTALLATION The Manufacturer declines any and all responsibilities for damages to things or injuries to persons or animals deriving from incorrect installation or use of equipment. The appliance has been certified by the Australian Gas Association and meets the requirements of AS4551/AG101 Domestic Gas Cooking Appliances.
  • Page 5 Important: After fixing the chain, ensure the chain is taut and appliance cannot tilt forward or sideways. Important: For a situation where the appliance is between two cupboards and the anti tilt chain cannot be fitted please contact Blanco Technical Department for advice.
  • Page 6: Gas Connection

    2.2 GAS CONNECTION The cooker is provided with a label placed on the rear panel near the gas inlet, showing the type of gas and pressure for which the appliance has been originally adjusted. Before connecting this appliance, check the data label to ensure that it matches the available gas type.
  • Page 7: Electric Connection

    2.3 ELECTRIC CONNECTION WARNING: ELECTRICAL WORK ON THIS APPLIANCE MUST ONLY BE DONE BY A QUALIFIED PERSON AUTHORISED BY THE LOCAL AUTHORITIES TO PERFORM THIS WORK. ELECTRICAL WORK DONE BY UNQUALIFIED PERSONS COULD RESULT IN A SAFETY HAZARD OR PROPERTY DAMAGE. IMPORTANT: The appliance must be always connected to the ground, according to actual regulations by qualified personnel.
  • Page 8 2.4 CONVERSION TO OTHER TYPE OF GAS This operation must be executed always by qualified and authorised tradesperson. This appliance has been designed to function with Propane or Natural gas. This appliance is provided with a label on the rear panel, near the gas inlet, indicating the type of gas for which the cooker has been adjusted.
  • Page 9 BEFORE LEAVING. Check all connections for gas leaks with soap and water. DO NOT use a naked flame for detecting leaks. Ignite all burners to ensure correct operation of gas valves, burners and ignition. Turn gas taps to low flame position and observe stability of the flame. When satisfied with the cooker, please instruct the user on the correct method of operation.
  • Page 10 To ignite this type of burner it’s necessary to depress and maintain pressure on the knob for 10 seconds. After this time release the knob and the burner will then remain alight. 3.2 USING THE CERAN COOKTOP ( BFS60CX ) Avoid any shocks with saucepans etc: The glass surface is highly resistant but not unbreakable.
  • Page 11: How To Use The Multifunction Oven

    To switch off the area, just turn the knob for the 0 position. A light signal placed in the control panel indicates the working of a heating area. A light signal placed in the front area of the glass indicates the “ residual heat “. After being switched off, the cooking zones need some time to cool down.
  • Page 12 Fan Assisted The outside ring of the top element and the bottom element and fan come into operation and the heat is spread evenly to all shelf positions. Suitable for cooking pies and single layer baking. The oven must be preheated before food is placed inside. To operate, select Fan Assisted function along with the temperature.
  • Page 13: General Remarks

    3.7 ELECTRONIC PROGRAMMER (MODELS BFS60CX; BFS60WX AND BFS60WXFF) SETTING UP THE ACTUAL HOUR: Once the electrical connection is made to the oven, the display blinks and shows 0.00. Press keys (1) and (2) at the same time, then press keys (-) and (+) to set up the actual hour within 4 seconds;...
  • Page 14 3.8 RECOMMENDATION TO USE THE OVEN AND THE GRILL The accessible parts of the cooker could be hot, if the oven or the grill is in operation. Do not let children close to the appliance. Don’t let children sit down or play with the oven door. Do not use the drop down door as a stool to reach cabinets above.
  • Page 15: Instructions For Maintenance And Cleaning

    4 INSTRUCTIONS FOR MAINTENANCE AND CLEANING Warning: Servicing should be carried out only by authorised personnel. Before maintenance or cleaning your cooker, switch off the circuit breaker, turn off the isolating gas valve or the gas mains and allow the cooker to cool down. GENERAL CLEANING Adequate maintenance and cleaning will prolong the life of the appliance, as well as ensure trouble-free service.
  • Page 16: Removing The Oven Door For Cleaning

    CLEANING CERAN COOKTOP (BFS60CX) After use, once the cooker has cooled down, clean thoroughly as even small amounts of dirt can become impossible to remove when re-heated. Do not use abrasive pads, sponges or powders to clean, as these products can scratch the surface of the glass.
  • Page 17: Replacing The Oven Bulb

    CLEANING OF THE FAN Periodically the fan should be cleaned with warm water and suitable detergents: Wait until the oven has cooled down. Unscrew the four screws A Unscrew the central nut C Extract the fan D and clean it Reassemble in the reverse order, paying attention that the central E seat coincides with the peg F placed on the motor shaft Protection Filter of the Oven Fan ( Optional )
  • Page 18 TABLES Overall Dimensions (mm) 600W x 600D x 850/900H TABLE 1 – GAS BURNERS PROPANE GAS NATURAL GAS Supply pressure 2.75kPa 1.13kPa Test Point 2.75kPa 1.00kPa Pressure SABAF II Main By Pass Nominal Gas Main Nominal Gas Injector Screw Consumption Injector Consumption Burners...

This manual is also suitable for:

Bfs60nxBfs60nxffBfs60wxffBfs60wx

Table of Contents

Save PDF