Table of Contents
Advertisement
Advertisement
Table of Contents

Related Manuals for Blanco BODE 62X


Summary of Contents for Blanco BODE 62X
- Page 1 INSTRUCTION MANUAL Oven BODE 62X...
- Page 2 Dear Customer You will find that the clean lines and modern look of your Blanco oven blends in perfectly with your kitchen décor. It is easy to use and performs to a high stan- dard. Blanco also makes a range of products that will enhance your kitchen – such as cook tops, rangehoods, dishwashers, microwaves, sinks and taps.
-
Page 3: Table Of Contents
• How to use the timer P.22 • Lower oven cooking modes P.23 CLEANING AND MAINTENANCE • How to change the bulbs P.25 • How to clean the inside area of the oven P.26 TROUBLESHOOTING P.26 AFTER-SALES SERVICE P.27 BLANCO CUSTOMER SERVICE P.28... - Page 4 SAFETY INSTRUCTIONS IMPORTANT SAFETY INSTRUCTIONS - READ CAREFULLY AND RETAIN FOR FUTURE USE. Important When you receive the appliance, unpack it or have it unpacked immediately. Give it an overall inspection. Make note of any concerns or reservations on the delivery slip and make sure to keep a copy of this form.
- Page 5 SAFETY INSTRUCTIONS se than that for which it was designed. — This oven was designed for use by private individuals in their homes. It is intended solely for cooking foodstuffs. This oven does not contain any asbestos-based components. — Do not modify or attempt to modify any of the characteristics of this appliance.
- Page 7 PACKAGING • — This appliance’s packing materials are recy- clable. Recycle them by depositing them in local authority containers provided for this purpose. — Your appliance also contains many recyclable materials. It is therefore marked with this logo to indi- cate that used appliances must not be mixed with other waste.
-
Page 11: How To Install Your Oven
HOW TO INSTALL YOUR OVEN DIMENSIONS FOR INSTALLATION USE • fig.1 CHOICE OF LOCATION • The above diagrams show the dimensions of a cabinet that will be able to hold your oven. The oven can be installed in a cabinet column (open* or closed) that has the appropriate dimensions for built-in installation (see diagram opposite). - Page 12 • BUILD-IN To do this: 1) Remove the rubber screw covers to access the mounting holes. 2) Drill a hole in the cabinet panel to avoid splitting the wood. 3) Attach the oven with the 2 screws. 4) Replace the rubber screw covers (they also absorb the shock caused by closing the oven door).
-
Page 13: Your Oven
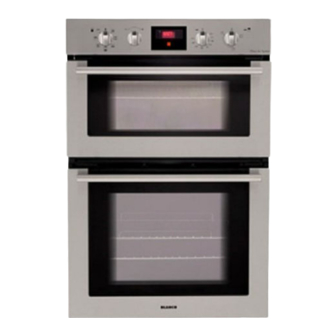
YOUR OVEN Upper oven Lower oven Feature selector Lights Temperature control Rail positions Programmable clock (Lower) -
Page 14: The Programmer
HOW TO USE YOUR LOWER OVEN THE PROGRAMMER • Display for temperatures, times, cooking duration and timer. Temperature display indicator. Cooking time display indicator. Cooking end time display indicator. Independent timer display indicator. Touch controls for accessing various programmer settings. -
Page 15: Accessories
ACCESSORIES • ACCESSORIES Anti-tipping safety grid • (fig.1) Rear The grid can be used to hold all dishes and moulds contai- ning foodstuffs to be cooked Front or browned. fig.1 • Sloped 45 mm dish equipped with a special grid for grilling It serves to collect juices and fat from cooking meat or fish placed directly on the grid... -
Page 16: How To Use Your Upper Oven
HOW TO USE YOUR UPPER OVEN HOW TO COOK STRAIGHTAWAY • — The timer display only shows the time of day. It should not be blinking. • Choose the cooking method: Turn the dial until it is indicating your choice. Example: position •... -
Page 17: Upper Oven Cooking Modes
HOW TO USE YOUR UPPER OVEN UPPER OVEN COOKING MODES • CONVENTIONAL OVEN • The food is cooked by top and bottom elements. • Pre-heating is sometimes necessary to reach the required temperature. • Recommended to keep white meat, fish and vegetables juicy and succulent. ADJUSTABLE GRILL •... -
Page 18: How To Use Your Lower Oven
HOW TO USE YOUR LOWER OVEN HOW TO SET THE CLOCK • • How to set the time When plugged in, the displays flashes 12:00. Set the time using the + and - setting seletor (holding down the + or - allows you obtain a rapid advancement of the numbers). -
Page 19: How To Program For Immediate Cooking
HOW TO USE YOUR LOWER OVEN HOW TO PROGRAM FOR IMMEDIATE COOKING • •Immediate cooking The analogue programmer should display only the time; it should not be flashing. Choose the cooking mode: Turn the function selector to the position of your choice. Example: position ->... -
Page 20: How To Set A Cooking Programme
HOW TO USE YOUR LOWER OVEN HOW TO SET A COOKING PROGRAMME • Cooking with immediate start and pro- grammed duration - Select the desired cooking mode and adjust the temperature (see paragraph: immediate cooking). Example: position Temperature 200°C. - Press the touch control until the icon cooking time indicator starts to flash. - Page 21 HOW TO USE YOUR LOWER OVEN HOW TO SET A COOKING PROGRAMME • Cooking with delayed start and chosen cooking end time Proceed as with programmed cooking. - Press the touch control until the icon cooking time indicator starts to flash. The display flashes 0:00 to indicate that you can now adjust the setting.
-
Page 22: How To Use The Timer
HOW TO USE YOUR LOWER OVEN HOW TO USE THE TIMER • Your oven’s programmer can be used as an independent timer that allows you to count down a time without operating the oven. In this case, the timer display has priority over the clock display. -
Page 23: Lower Oven Cooking Modes
HOW TO USE YOUR LOWER OVEN LOWER OVEN COOKING MODES • CIRCULATING HEAT •Cooking controlled by the heating element located at the back of the oven by the fan. •Rapid temperature increase: Some dishes can be placed in the oven while it is still cold. - Page 24 HOW TO USE YOUR LOWER OVEN LOWER OVEN COOKING MODES • WARM KEEPING • Heat regulated by the upper and lower elements with use of fan. • Recommended for letting dough rise for bread, brioche, kugelhopf, etc, without exceeding 40°C (plate warming, defrosting). FAN GRILL •...
-
Page 25: Cleaning And Maintenance
CLEANING AND MAINTENANCE HOW TO CHANGE THE BULBS • Warning Make sure the appliance is disconnected from the power before replacing the lamp in order to avoid the risk of electric shock. Change the lamp only when the appliance has cooled down. -
Page 26: How To Clean The Inside Area Of The Oven
CLEANING AND MAINTENANCE HOW TO CLEAN THE INSIDE AREA OF THE OVEN • The oven features continuous cleaning (depending on the model) and comprises an oven chamber fitted with removable liners covered with a special enamel (catalytic enamel) to give it its self-cleaning properties. As they appear, the stains and soiling spread and get trapped in the microporosities of the enamel. -
Page 27: After-Sales Service
AFTER-SALES SERVICE • SERVICE CALLS Any repairs that are made to your appliance must be handled by a qualified professional authorised to work on the brand. When you call, mention your appliance’s complete refer- ence (model, type, serial number).This infor- mation appears on the fig.1. - Page 28 CZ5701495-02 11/12...
Need help?
Do you have a question about the BODE 62X and is the answer not in the manual?
Questions and answers