Raymarine CP370 Installation Instructions Manual
Hide thumbs
Also See for CP370:
- Installation instructions manual (52 pages) ,
- Installation instructions manual (58 pages)

Related Manuals for Raymarine CP370


Summary of Contents for Raymarine CP370
- Page 1 CP370 / 470 / 570 Installation instructions English (en-US) Date: 05-2018 Document number: 87349-2 © 2018 Raymarine UK Limited...
- Page 3 Software updates Check the Raymarine website for the latest software releases for your product. www.raymarine.com/software Product documentation The latest versions of all English and translated documents are available to download in PDF format from the website: www.raymarine.com/manuals.
-
Page 5: Table Of Contents
Product documentation ......................15 LightHouse MFD Operation instructions................15 Transducer installation instructions ..................15 2.2 Parts supplied ........................16 CP370 — Parts supplied ....................... 16 CP470 — Parts supplied ......................17 CP570 — Parts supplied ....................... 18 2.3 Product overview ....................... 19 CP370 product overview ...................... - Page 6 Grounding — Dedicated drain wire..................52 Grounding — additional dedicated drain wire required (CP470 only) ......... 52 4.4 Transducer connections....................54 CP370 Transducer connections ...................54 CP470 / CP570 Transducer connections ................55 Transducer cable extension ....................61 4.5 Network connection......................62 Chapter 5 Mounting ......................
- Page 7 Chapter 6 System checks and troubleshooting............69 6.1 Initial power on test......................70 Operation instructions ......................70 CP370 — Legacy multifunction display transducer set up ...........70 6.2 Troubleshooting ......................... 71 Sonar troubleshooting ......................71 LED Diagnostics........................74 Resetting the sonar (LightHouse 3) ..................77 Resetting the sonar (LightHouse 2) ..................
- Page 8 Compatible transducers....................... 92 10.2 Network hardware ......................93 10.3 Network cable connector types..................94 10.4 RayNet to RayNet cables and connectors..............95 10.5 RayNet to RJ45 adapter cables ..................96 10.6 RJ45 SeaTalk network and patch cables ..............97...
-
Page 9: Chapter 1 Important Information
Certified Installation Raymarine recommends certified installation by a Raymarine approved installer. A certified installation qualifies for enhanced product warranty benefits. Contact your Raymarine dealer for further details, and refer to the separate warranty document packed with your product. Warning: Product installation and operation •... -
Page 10: Water Ingress
Raymarine. Raymarine is not responsible for damages or injuries caused by your use or inability to use the product, by the interaction of the product with products manufactured by others, or by errors in information utilized by the product supplied by third parties. -
Page 11: Compass Safe Distance
Connections to other equipment Requirement for ferrites on non-Raymarine cables If your Raymarine equipment is to be connected to other equipment using a cable not supplied by Raymarine, a suppression ferrite MUST always be attached to the cable near the Raymarine unit. -
Page 12: Imo And Solas
In addition, our policy of continuous product improvement may change specifications without notice. As a result, Raymarine cannot accept liability for any differences between the product and this document. Please check the Raymarine website (www.raymarine.com) to ensure you have the most up-to-date version(s) of the documentation for your product. -
Page 13: Chapter 2 Document And Product Information
• 2.1 Document information on page 14 • 2.2 Parts supplied on page 16 • 2.3 Product overview on page 19 • 2.4 Sonar technology on page 22 • 2.5 Raymarine sonar modules on page 25 Document and product information... -
Page 14: Document Information
• install and connect your product as part of a wider system of connected marine electronics; • troubleshoot problems and obtain technical support if required. This and other Raymarine product documents are available to download in PDF format from www.raymarine.com/manuals. -
Page 15: Product Documentation
Description Part number CP370 / CP470 / CP570 Installation instructions 87213 / 88027 Installation of a CP370 /CP470 / CP570 unit and connection to a wider system of marine electronics. CP370 and CP470 Mounting template 87240 Mounting diagram for surface mounting a CP370 / CP470... -
Page 16: Parts Supplied
2.2 Parts supplied CP370 — Parts supplied Item Description Quantity Sonar module 1.5 m (5 ft) power cable No.8 fixing screws Documentation pack 2 m (6.56 ft) RayNet (Female) to RayNet (Female) network cable... -
Page 17: Cp470 - Parts Supplied
CP470 — Parts supplied Item Description Quantity Sonar module 1.5 m (5 ft) power cable No.8 fixing screws Cable ferrite Additional ground-wire kit Documentation pack 2 m (6.56 ft) RayNet (Female) to RayNet (Female) network cable Document and product information... -
Page 18: Cp570 - Parts Supplied
CP570 — Parts supplied Item Description Quantity Sonar module 1.5 m (5 ft) power cable Fixing screw kit Cable ferrite Documentation pack 2 m (6.56 ft) RayNet (Female) to RayNet (Female) network cable... -
Page 19: Product Overview
The CP370 is a ClearPulse traditional sonar module. In conjunction with a compatible multifunction display, the CP370 provides a detailed view of the water beneath your vessel including the bottom, enabling you to identify fish and other objects. The CP370 has the following features: •... -
Page 20: Cp470 Product Overview
CP470 product overview The CP470 is a ClearPulse CHIRP broadband sonar module. In conjunction with a compatible multifunction display, the CP470 provides a detailed view of the water beneath your vessel including the bottom, enabling you to identify fish and other objects. The CP470 has the following features: •... -
Page 21: Cp570 Product Overview
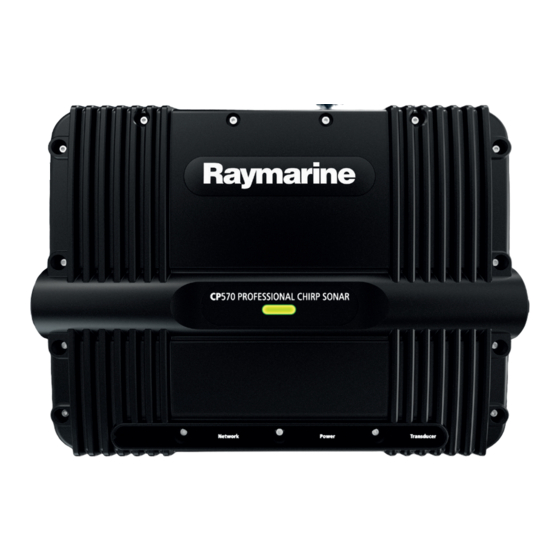
CP570 product overview The CP570 is a ClearPulse CHIRP dual-channel broadband sonar module. In conjunction with a compatible multifunction display, the CP570 provides a detailed view of the water beneath your vessel including the bottom, enabling you to identify fish and other objects. The CP570 has the following features: •... -
Page 22: Sonar Technology
2.4 Sonar technology Traditional sonar technology Traditional sonar uses a single carrier frequency or carrier wave for the sonar ping. The sonar works by measuring the time it takes the ping echo to return to the transducer to determine target depth. -
Page 23: Chirp Technology
CHIRP technology CHIRP sonars use a swept frequency 'CHIRP' signal which can distinguish between multiple close targets, this enables the sonar to display multiple targets instead of large combined targets that you would see when using traditional non-CHIRP sonar. Benefits of CHIRP include improvements to target resolution, bottom detection even through bait balls and thermoclines and detection sensitivity. -
Page 24: Chirp Sonar Overview
CHIRP Sonar overview CHIRP sonar produces a conical shaped beam, the coverage of the conical beam is the water column directly beneath the vessel Conical beam Sonar is effective at a range of speeds. In deeper waters the CHIRP bandwidth is automatically optimized to improve bottom lock and the detection of moving objects (e.g. -
Page 25: Raymarine Sonar Modules
2.5 Raymarine sonar modules The table below lists Raymarine’s current range of sonar modules. Sonar module Type Technology CP100 External CHIRP DownVision ™ / Sonar CP200 External SideVision ™ CP300 / CP370 External Traditional (1 kW) External CHIRP CP450C / CP470... -
Page 27: Chapter 3 Planning The Installation
Chapter 3: Planning the installation Chapter contents • 3.1 Installation checklist on page 28 • 3.2 Required additional components on page 29 • 3.3 Multifunction display compatibility on page 30 • 3.4 Software updates on page 31 • 3.5 Compatible transducers on page 32 •... -
Page 28: Installation Checklist
3.1 Installation checklist Installation includes the following activities: Installation Task Plan your system. Obtain all required equipment and tools. Site all equipment. Route all cables. Drill cable and mounting holes. Make all connections into equipment. Secure all equipment in place. Power on and test the system. -
Page 29: Required Additional Components
• any country that requires EMC Directive Compliance. If in doubt, please contact your local dealer or Raymarine technical support. Transducers NOT certified to be used with the CP370 in the regions listed above: • E66054 (P66, Plastic, Transom mount) •... -
Page 30: Multifunction Display Compatibility
3.3 Multifunction display compatibility Compatible multifunction displays The following Raymarine multifunction displays are compatible with your sonar module. Multifunction display CP370 CP470 CP570 ● ● ● Axiom XL ● ● ● Axiom Pro / Pro-S ● ● ● Axiom ●... -
Page 31: Software Updates
3.4 Software updates The software running on the product can be updated. • Raymarine periodically releases software updates to improve product performance and add new features. • The software on many products can be updated using a connected and compatible multifunction display (MFD). -
Page 32: Compatible Transducers
3.5 Compatible transducers Refer to the Raymarine website for a list of transducers that are compatible with your sonar module: www.raymarine.com/transducers. -
Page 33: Tools Required
3.6 Tools required Product installation requires the following tools: Item Description Quantity Power drill Pozidrive screwdriver Drill bit of appropriate size* Adhesive tape Note: * The appropriate drill bit size is dependent on the thickness and material of the mounting surface. -
Page 34: System Examples
3.7 System examples The system examples below apply to your sonar module. Example: Basic system Item Description Compatible Raymarine multifunction display Sonar module (CP470 illustrated) Transducer... - Page 35 Example: Extended system Item Description Sonar module (CP470 illustrated) Raymarine network switch Digital radome Compatible Raymarine multifunction display Transducer Planning the installation...
- Page 36 Item Description Actuator Control Unit (ACU) EV unit SeaTalk Pilot controller Note: For detailed information on sonar module connections refer to Chapter 4 Cables and connections.
-
Page 37: Warnings And Cautions
3.8 Warnings and cautions Important: Before proceeding, ensure that you have read and understood the warnings and cautions provided in the Chapter 1 Important information section of this document. Planning the installation... -
Page 38: General Location Requirements
3.9 General location requirements Important considerations when choosing a suitable location for your product. This product is suitable for mounting above or below decks. The product should be mounted where it will be: • protected from physical damage and excessive vibration. •... -
Page 39: Compass Safe Distance
Compass safe distance To prevent potential interference with the vessel's magnetic compasses, ensure an adequate distance is maintained from the product. When choosing a suitable location for the product you should aim to maintain the maximum possible distance from any compasses. Typically this distance should be at least 1 m (3.3 ft) in all directions. However for some smaller vessels it may not be possible to locate the product this far away from a compass. -
Page 40: Product Dimensions
3.10 Product dimensions CP370 dimensions Item Dimension 299.4 mm (11.79 in) 188.0 mm (7.4 in) 201.5 mm (7.9 in) 84.4 mm (3.3 in) 80.0 mm (3.1 in) -
Page 41: Cp470 Dimensions
CP470 dimensions Item Dimension 299.4 mm (11.79 in) 188.0 mm (7.4 in) 205.6 mm (8.1 in) 84.4 mm (3.3 in) 80.0 mm (3.1 in) Planning the installation... -
Page 42: Cp570 Dimensions
CP570 dimensions Item Dimension 352.5 mm (13.9 in) 235 mm (9.3 in) 248.1 mm (9.8 in) 109.9 mm (4.3 in) 80.0 mm (3.1 in) -
Page 43: Chapter 4 Cables And Connections
Chapter 4: Cables and connections Chapter contents • 4.1 General cabling guidance on page 44 • 4.2 Connections overview on page 46 • 4.3 Power connection on page 48 • 4.4 Transducer connections on page 54 • 4.5 Network connection on page 62 Cables and connections... -
Page 44: General Cabling Guidance
• Unless otherwise stated use only standard cables of the correct type, supplied by Raymarine. • Ensure that any non-Raymarine cables are of the correct quality and gauge. For example, longer power cable runs may require larger wire gauges to minimize voltage drop along the run. -
Page 45: Cable Shielding
Ensure that all cables are properly shielded and that the cable shielding is undamaged. Suppression ferrites • Raymarine cables may be pre-fitted or supplied with suppression ferrites. These are important for correct EMC performance. If ferrites are supplied separately to the cables (i.e. not pre-fitted), you must fit the supplied ferrites, using the supplied instructions. -
Page 46: Connections Overview
4.2 Connections overview Cable connectors for your sonar module are shown below: CP370 sonar module CP470 sonar module CP570 sonar module Item Description Network connection Power connection Transducer connection Additional grounding point (CP470 only) -
Page 47: Making Connections
Making connections Follow the steps below to connect the cable(s) to your product. 1. Ensure that the vessel's power supply is switched off. 2. Ensure that the device being connected to the unit has been installed in accordance with the installation instructions supplied with that device. -
Page 48: Power Connection
4.3 Power connection Power must be supplied to the sonar module from an appropriate power source. Power connection requirements • 12 or 24 Vdc nominal supply voltage • Isolated power supply • Connected via an appropriately rated thermal breaker or fused switch. Refer to: In-line fuse and thermal breaker ratings. -
Page 49: Power Distribution
The information provided below is for guidance only, to help protect your product. It covers common vessel power arrangements, but does NOT cover every scenario. If you are unsure how to provide the correct level of protection, please consult an authorized Raymarine dealer or a suitably qualified professional marine electrician. - Page 50 Battery connection scenario A: suitable for a vessel with a common RF ground point. In this scenario, if your product’s power cable is supplied with a separate drain wire then it should be connected to the vessel’s common ground point. Battery connection scenario B: suitable for a vessel without a common grounding point.
- Page 51 Positive (+) bar Negative (-) bar Circuit breaker Fuse • In all cases, observe the recommended breaker / fuse ratings provided in the product’s documentation. Important: Be aware that the suitable fuse rating for the thermal breaker or fuse is dependent on the number of devices you are connecting.
-
Page 52: Grounding - Dedicated Drain Wire
More information It is recommended that best practice is observed in all vessel electrical installations, as detailed in the following standards: • BMEA Code of Practice for Electrical and Electronic Installations in Boats • NMEA 0400 Installation Standard • ABYC E-11 AC & DC Electrical Systems on Boats •... - Page 53 Item Description Spring washer Washer Additional drain wire Product additional ground point Connect one end of the additional drain wire to your product. To locate the additional grounding point on your product, refer to the Connections illustration in this document. Connect the other end of the additional drain wire to the same point as the power cable drain wire (shield).
-
Page 54: Transducer Connections
• Cutting the transducer cable will void the warranty and invalidate the European CE mark. CP370 Transducer connections The CP370 is a ClearPulse sonar module designed for use with traditional transducers. Transducers must be installed in accordance with the instructions provided with the transducer. -
Page 55: Cp470 / Cp570 Transducer Connections
Cable to transducer connection Traditional transducer (e.g. Depth) Traditional transducer (e.g. Speed and Temperature) Refer to the Raymarine website for a list of transducers that are compatible with your sonar module: www.raymarine.com/transducers. For a list of transducer cables refer to 10.1 Spares and... - Page 56 Broadband transducer connections Item Description CP470 Optional extension cable (part numbers A102148 – 3 m / A102510 – 5 m / A80327 – 10 m) Broadband transducer...
- Page 57 Dual broadband (single element) transducer connections Item Description CP470 Paired CHIRP transducer Y-cable (part number A102146) Channel B of combined cable Channel A of combined cable Broadband transducer Broadband transducer Transducer pair connections Transducer Pair Frequencies Cable Channel A Cable Channel B Low &...
- Page 58 Single broadband (single element) transducer connections Item Description CP470 Single B75/B175 operation cable (part number A80328) Broadband transducer Dual transducer connections...
- Page 59 Item Description CP470 Dual Speed and Temperature CHIRP transducer cable (part number A80345) Cable to transducer connection Cable to transducer connection Broadband transducer Speed and Temperature transducer Dual broadband (single element) transducer connections (with Speed and Temperature transducer) Item Description CP470 Dual Speed and Temperature CHIRP transducer cable (part number A80345) Cable to Y-cable (A102146) connection...
- Page 60 Item Description Channel B of combined cable Channel A of combined cable Broadband transducer Broadband transducer Speed and Temperature transducer Transducer pair connections Transducer Pair Frequencies Cable Channel A Cable Channel B Low & High Low frequency transducer High frequency transducer Low &...
-
Page 61: Transducer Cable Extension
Item Description Speed and Temperature transducer Broadband transducer Refer to the Raymarine website for a list of transducers that are compatible with your sonar module: www.raymarine.com/transducers. For a list of transducer cables refer to 10.1 Spares and accessories. Transducer cable extension For some installations it may be necessary to extend the transducer cable. -
Page 62: Network Connection
4.5 Network connection The unit must be connected to a compatible Raymarine multifunction display to enable echo sounder data to be viewed. Multifunction display connection Unit connected to a multifunction display using a RayNet cable. Note: The connection panel on your product may look slightly different to that shown, depending on variant. - Page 63 RayNet (Male) to (Male) adaptor cable. Multiple multifunction display configuration A Raymarine network switch can be used to connect the unit to more than 1 multifunction display. Note: Ensure network cables and connections are tight and secure using any cable ties provided with your network hardware.
-
Page 65: Chapter 5 Mounting
Chapter 5: Mounting Chapter contents • 5.1 Mounting on page 66 Mounting... -
Page 66: Mounting
Mounting the unit Having chosen a suitable location, install the unit as follows: Note: Raymarine recommends mounting the unit vertically. 1. Secure the mounting template in the required location using adhesive tape. 2. Drill 4 holes at the marked location on the template. - Page 67 5. Place the unit onto the fixing screws. 6. Push the unit down to engage the key slots in the unit. 7. Tighten the screws (CP370 illustrated). Note: Drill bit, tap size and tightening torque is dependent on the thickness and type of material the unit is to be mounted on.
-
Page 69: Chapter 6 System Checks And Troubleshooting
Chapter 6: System checks and troubleshooting Chapter contents • 6.1 Initial power on test on page 70 • 6.2 Troubleshooting on page 71 System checks and troubleshooting... -
Page 70: Initial Power On Test
Operation instructions For detailed operation instructions for your product, refer to the documentation that accompanies your display. All product documentation is available to download from the Raymarine website: www.raymarine.com/manuals. CP370 — Legacy multifunction display transducer set up To set up the sonar module / transducer on an E Classic, C-Series Widescreen, E-Series Widescreen or G-Series the following steps must be followed: Select the relevant transducer from the set-up menu. -
Page 71: Troubleshooting
If after referring to this section you are still having problems with your product, please refer to the Technical support section of this manual for useful links and Raymarine Product Support contact details. - Page 72 Possible causes Possible solutions Power source insufficient With the product under load, using a multi-meter, check the power supply voltage as close to the unit as possible to establish actual voltage when the current is flowing. (Check your product’s Technical specification for power supply requirements.) Damaged or fouled Check the condition of the transducer ensuring it is not damaged transducer...
- Page 73 Possible causes Possible solutions can cause the Fishfinder applications to stop scrolling or the unit to reset/turn off), replace if necessary. Transducer location • Check that the transducer has been installed in accordance with the instructions provided with the transducer. •...
-
Page 74: Led Diagnostics
LED Diagnostics CP370 / CP470 CP570 The LED on the front panel of the unit provides information on the status of the sonar module and notifies users of any problems within the unit. The LED blinks the following colors: • Green — shows the unit is operating normally. - Page 75 • Power cycle unit to recover transducer information. • If problem persists contact Raymarine technical support. Amber No network • Ensure network is powered. 2 blinks detected • Ensure network cable and connections are secure and free from damage.
- Page 76 • Power cycle unit to recover. • If problem persists contact Raymarine technical support. Red 2 Not Defined • If problem persists contact Raymarine blinks technical support. Ambient • Ensure installation environment is Red 3...
-
Page 77: Resetting The Sonar (Lighthouse 3)
The reset function restores the unit to its factory default values. Note: Performing a factory reset will clear speed and temperature calibration settings and the depth offset. 1. Using a compatible Raymarine multifunction display go to the Sonar application page. 2. Select Menu from the side menu. 3. Select Set-up. -
Page 79: Chapter 7 Maintenance
Chapter 7: Maintenance Chapter contents • 7.1 Routine checks on page 80 • 7.2 Unit cleaning instructions on page 81 Maintenance... -
Page 80: Routine Checks
7.1 Routine checks The following periodic checks should be made: • Examine cables for signs of damage, such as chafing, cuts or nicks. • Check that the cable connectors are firmly attached and that their locking mechanisms are properly engaged. Note: Cable checks should be carried out with the power supply switched off. -
Page 81: Unit Cleaning Instructions
7.2 Unit cleaning instructions The unit does not require regular cleaning. However, if you find it necessary to clean the unit, please follow the steps below: 1. Ensure power is switched off. 2. Wipe unit clean with a damp cloth. 3. -
Page 83: Chapter 8 Technical Support
Chapter 8: Technical support Chapter contents • 8.1 Raymarine product support and servicing on page 84 Technical support... -
Page 84: Raymarine Product Support And Servicing
You can obtain this product information using the menus within your product. Servicing and warranty Raymarine offers dedicated service departments for warranty, service, and repairs. Don’t forget to visit the Raymarine website to register your product for extended warranty benefits: http://www.raymarine.co.uk/display/?id=788. Region Contact •... -
Page 85: Operation Instructions
Operation instructions For detailed operation instructions for your product, refer to the documentation that accompanies your display. All product documentation is available to download from the Raymarine website: www.raymarine.com/manuals. Viewing product information (LightHouse™ 2) You can view information about your unit from the Diagnostics menu on a compatible multifunction display. - Page 86 1. Select Settings, from the Homescreen. The Getting started tab contains hardware and software information for your MFD. 2. You can view further information about your MFD, or view information about products networked using SeaTalkhs ® and SeaTalkng ® / NMEA 2000, by selecting the Network tab, then: i.
-
Page 87: Chapter 9 Technical Specification
Chapter 9: Technical specification Chapter contents • 9.1 CP370 Technical specification on page 88 • 9.2 CP470 Technical specification on page 89 • 9.3 CP570 Technical specification on page 90 Technical specification... -
Page 88: Cp370 Technical Specification
9.1 CP370 Technical specification Physical specification Dimensions • Width: 299.4 mm (11.79 in). • Height: 205.6 mm (8.1 in). • Height (including connectors): 285.6 mm (11.2 in). • Depth: 84.4 mm (3.3 in). Weight 1.435 kg (3.16 lbs) Power specification... -
Page 89: Cp470 Technical Specification
9.2 CP470 Technical specification Physical specification Dimensions • Width: 299.4 mm (11.79 in). • Height: 205.6 mm (8.1 in). • Height (including connectors): 285.6 mm (11.2 in). • Depth: 84.4 mm (3.3 in). Weight 1.539 kg (3.39 lbs) Power specification Nominal supply voltage 12 V / 24 V dc 10.8 V to 31.2 V dc... -
Page 90: Cp570 Technical Specification
9.3 CP570 Technical specification Physical specification Dimensions • Width: 352.5 mm (13.9 in). • Height: 248.1 mm (9.8 in). • Height (including connectors): 328.1 mm (12.9 in). • Depth: 109.9 mm (4.3 in). Weight 6.35 kg (14.0 lbs) Power specification Nominal supply voltage 12 V / 24 V dc 10.8 V to 31.2 V dc... -
Page 91: Chapter 10 Spares And Accessories
Chapter 10: Spares and accessories Chapter contents • 10.1 Spares and accessories on page 92 • 10.2 Network hardware on page 93 • 10.3 Network cable connector types on page 94 • 10.4 RayNet to RayNet cables and connectors on page 95 •... -
Page 92: Spares And Accessories
Dual Speed and Temperature CHIRP transducer CP470, CP570 A80345 cable Single B75/B175 operation cable CP470, CP570 A80328 Paired CHIRP transducer Y-cable CP470, CP570 A102146 Compatible transducers Refer to the Raymarine website for a list of transducers that are compatible with your sonar module: www.raymarine.com/transducers. -
Page 93: Network Hardware
10.2 Network hardware Item Part number Notes HS5 RayNet network switch A80007 5–port switch for network connection of multiple devices featuring RayNet connectors. Equipment with RJ45 SeaTalk connectors can also be connected using suitable adapter cables. RJ45 SeaTalk network switch E55058 8–port switch for network connection of multiple SeaTalk... -
Page 94: Network Cable Connector Types
10.3 Network cable connector types There are 2 types of network cable connector — RayNet, and RJ45 SeaTalk RJ45 SeaTalk connector. RayNet connector. -
Page 95: Raynet To Raynet Cables And Connectors
10.4 RayNet to RayNet cables and connectors Description Standard RayNet connection cable with a RayNet (female) socket on both ends. Right-angle RayNet connection cable with a straight RayNet (female) socket on one end, and a right-angle RayNet (female) socket on the other end. Suitable for connecting at 90° (right angle) to a device, for installations where space is limited. -
Page 96: Raynet To Rj45 Adapter Cables
10.5 RayNet to RJ45 adapter cables Description Adapter cable with a RayNet (female) socket on one end, and a waterproof (female) socket on the other end accepting the following cables with an RJ45 SeaTalk waterproof locking (male) plug: • A62245 (1.5 m). •... -
Page 97: Rj45 Seatalk Hs Network And Patch Cables
10.6 RJ45 SeaTalk network and patch cables Description RJ45 SeaTalk network cables have an RJ45 SeaTalk (male) plug on one end, and a waterproof RJ45 SeaTalk (male) plug with locking collar on the other end. RJ45 SeaTalk patch cables have an RJ45 SeaTalk (male) plug on each end. - Page 99 Index Battery connection..........49 Distribution ............49 Distribution panel..........50 Grounding............51 Accessories Sharing a breaker ..........50 Network adapter cables ........96 Power cable extension ..........51 Network cables............95 Product information ..........86 Network hardware ..........93 Product recycling (WEEE) ......... 11 RayNet cables............95 Product support............84 Cable bend radius ...........
- Page 102 Raymarine Marine House, Cartwright Drive, Fareham, Hampshire. PO15 5RJ. United Kingdom. Tel: +44 (0)1329 246 700 www.raymarine.com a brand by...
Need help?
Do you have a question about the CP370 and is the answer not in the manual?
Questions and answers