Table of Contents
Advertisement
Advertisement
Chapters
Table of Contents

Related Manuals for Arbonia Sabiana Energy Smart Series


Summary of Contents for Arbonia Sabiana Energy Smart Series
- Page 1 INSTALLATION, USE AND MAINTENANCE INSTRUCTIONS Appliances for residential ventilation Via Piave, 53 20011 Corbetta (MI) ITALY • • Tel. +39.02.97203.1 ric. autom. Fax +39.02.9777282 - +39.02.9772820 • E-mail: info@sabiana.it Internet: www.sabiana.it • E 11/18 D 11/18 Cod. 4051026...
- Page 3 Gentile cliente, la ringraziamo per la fiducia accordataci con l’acquisto di un nostro prodotto. Se Lei avrà la costanza di seguire attentamente le indicazioni contenute nel presente manuale, siamo certi che potrà apprezzare nel tempo e con soddisfazione la qualità della nostra macchina. La preghiamo di leggere attentamente le indicazioni contenute nel manuale che riguardano l’uso corretto del nostro prodotto, in conformità...
- Page 4 Carefully read the following instruction booklet before starting up the machine. Attention! Carefully turn off the electrical supply before removing the protections Attention! Carefully turn off the electrical supply before removing the protections Operations which may be carried out by the user Interventions to be carried out exclusively by an installer or authorised technician.
- Page 5 English RISK OF INJURY! - ESSENTIAL SAFETY For safety purposes, during installation, maintenance RULES and repairs, abide by the following: It is dangerous to touch the appliance with parts of • Always wear work gloves. your body wet and with bare feet. •...
- Page 6 English - USE AND STORAGE - SCOPE OF THE MANUAL BEFORE INSTALLING THE APPLIANCE This instruction manual is intended for the machine user, owner and technical installer and must always READ THIS MANUAL CAREFULLY be available for consultation. Residential ventilation appliances convey outdoor air The instruction manual indicates the intended use of through the cross-flow heat exchanger and distribute the machine, its technical features and provides indi-...
- Page 7 English RANGE Integrated Integrated Version Side Integrated Electric Modulating Flow Automatic Energy Model Equip- Acoustic Humidity Resistance Electric Configuration Flow Rate Class ment Insulation Sensor Power Resistance Control Default LH ENY-S-170 STANDARD Reversible Default LH ENY-S-270 STANDARD Reversible Default LH ENY-S-360 STANDARD Reversible...
- Page 8 English DIMENSIONS Ø C Model (mm) (mm) (mm) (mm) (mm) (mm) (mm) ENY - S - 170 93.5 212.5 1041 ENY - S - 270 1041 ENY - S - 360 1041...
-
Page 9: Eny - Sp - 280 Eny - Spm - 280
English DIMENSIONS Model Ø C (mm) (mm) (mm) (mm) (mm) (mm) (mm) Heat Exchangers Standard Enthalpy Heat Exchangers ENY - SP - 180 ENY - SPM - 180 1041 ENY - SP - 280 ENY - SPM - 280 1041 ENY - SP - 370 ENY - SPM - 370 ENY - SP - 460 ENY - SPM - 460 ENY - S - 460... -
Page 10: Table Of Contents
English MACHINE DIMENSIONS WITH PACKAGING WEIGHT Model (KG) (mm) (mm) (mm) Heat Exchangers Standard Enthalpy Heat Exchangers Heat Exchangers Standard Enthalpy Heat Exchangers ENY - S - 170 1200 ENY - S - 270 1200 ENY - S - 360 1200 ENY - S - 460 1140... -
Page 11: Weight (Kg)
English TECHNICAL DATA / ENERGY - S Model ENY-S-170 ENY-S-270 ENY-S-360 ENY-S-460 Length Width Height 1041 1041 1041 Diameter of Connections DN125 DN160 DN160 DN180 Weight Maximum Flow Rate m3/h Available Static pressure at maximum flow rate Flow rate of reference m3/h Available Static pressure at flow rate of reference... -
Page 12: Eny-Sp-180
English TECHNICAL DATA / ENERGY - SP Model ENY-SP-180 ENY-SP-280 ENY-SP-370 ENY-SP-460 Length Width Height 1041 1041 Diameter of Connections DN125 DN160 DN160 DN180 Weight Maximum Flow Rate m3/h Available Static pressure at maximum flow rate Flow rate of reference m3/h Available Static pressure at flow rate of reference... -
Page 13: Eny-Spm-460
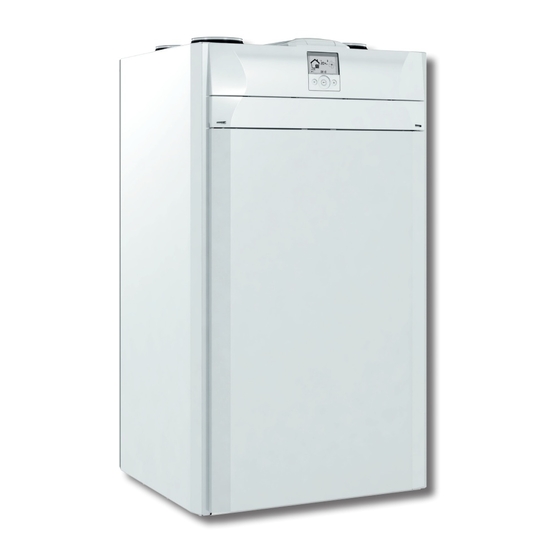
English TECHNICAL DATA / ENERGY - SPM (Models fitted with enthalpy heat exchangers) Model ENY-SPM-180 ENY-SPM-280 ENY-SPM-370 ENY-SPM-460 Length Width Height 1041 1041 Diameter of Connections DN125 DN160 DN160 DN180 Weight Maximum Flow Rate m3/h Available Static pressure at maximum flow rate Flow rate of reference m3/h Available Static pressure... - Page 14 English DESCRIPTION OF MACHINE COMPONENTS 1 - Appliance for residential ventilation 2 - Power board 3 - T-EP capacitive touch controller 4 - Heat exchanger 5 - Hanging bracket 6 - Power cord 7 - Spacer foot 8 - Condensate drain plug 9 - Cable gland PG7 10 - Shank label (to use for right side connection) 11 - Suction cup...
- Page 15 English I N S TA L L AT I O N (O P E R AT I O N (Fig. 1) CARRIED OUT EXCLUSIVELY BY QUALIFIED PERSONNEL) Attention! Installation of the appliance for res- idential ventilation must only be carried out by qualified personnel to avoid damage or injury.
- Page 16 English - Positioning the appliance (Fig.2) 1 - Position the appliance by hooking it to the hanging bracket (1). 2 - Position the supplied spacer foot (2) to guarantee that the appliance is level. 3 - Secure the appliance to the wall (3). 4 - Mount the condensate drain at the bottom of the appliance.
- Page 17 English - Condensate drain connection FLOOR INSTALLATION OF APPLIANCE - OPTIONAL ACCESSORY- The connection for the condensate drain is located underneath the appliance: As an alternative, the residential ventilation appliance can be installed using the floor stands. Connect the condensate drain to the domestic sewage system using a duct or pipe (siphoned).
- Page 18 English • When the appliance is connected electrically the ELECTRICAL CONNECTIONS controller is also powered. - Take the power cord from the accessory bag. General requirements - Couple the cord to the machine. • Before installing the appliance, make sure that the - Plug in the power cord.
- Page 19 English KEY: Item Description Notes N1-L1 230 Volt power terminals Fuse 5x20 FAN 1 230 Volt Power Supply - Fan 1 FAN 2 230 Volt Power Supply - Fan 2 0-10 Volt Signal - Fan 1 Fan 2 with inverse configuration 0-10 Volt Signal - Fan 2 Fan 1 with inverse configuration T1 ÷...
- Page 20 English CONFIGURATION DIP SWITCH (DIP 1) DEFAULT DIP NO. LH Fan Config RH Fan Config (STANDARD CONFIGURATION) Right side connection (supplementary Config.) No Pre-Treatment Air Pre-Treatment Air Present If DIP2 ON and DIP7 OFF If DIP2 ON Electric Resistance ON/OFF Modulating electric resistance Hot water coil with ON/OFF valve FC-FC transmits error signal...
- Page 21 English Connection with remote control 3) Unscrew the top cover to access the electric com- partment where the power board is located. The control is provided by default fitted on the appli- ance, however it can also be remoted by fitting it on the wall.
- Page 22 English Installing controller on the wall...
- Page 23 English T-EP TOUCH CONTROLLER The MAIN SCREEN features the following op- tions: Introduction This device was designed for the control of controlled 1. The preheating icon indicates activation of Anti- mechanical ventilation units. It is suitable for ENERGY freeze mode. SMART units.
-
Page 24: Time For 5 Seconds To Access The Menu
English Description of the Controller AUTO °F °C 7/7a 2/2a Keys: Display - Alerts and alarms • Start and Stop the machine; • Display of current time • Access Technical Menu (only authorised staff): when • Text field the unit is ON, press the keys at the same time for 5 seconds to access the menu. - Page 25 English How to change connection COMMISSIONING (For Appliances not equipped with internal modu- lating electric resistance) The connections can be swapped to allow for flexible installation of the appliances for residential ventilation. The default appliance is set in the version with left The difference in the connections regards the position side connections.
- Page 26 English 4. Position the filters as in the figure based on the The operations related to the connection desired connection: must only be carried out by qualified personnel to avoid damage or injury. a - Open the front panel The units equipped with integrated electric resistance cannot undergo flow configuration inversion.
- Page 27 English Moving the Humidity sensor for Unit ENY-SP The sensor is placed by default in the version with left side connections (standard see picture 5). To position the sensor for the Right side connection (supplementary version) you must: Position of the sensor STANDARD version Position of the sensor RIGHT side version (supplementary)
- Page 28 English Condensate drain connection To set the air flow rate based on the number of fan revolutions, there are two possible types of calibration: Position the condensate drain based on the desired connection: • STANDARD CALIBRATION Unscrew the plug and fix a drain or siphon as •...
- Page 29 English 3. Connect the differential pressure gauge. 6. Use the TOUCH PAD to select the installer menu Press the Enter key to confirm Select the “V” symbol and confirm The message V1 flashes; Perform the setting of the fan V1; access the menu by pressing enter, the display shows: set the nominal design flow rate (m...
- Page 30 English – r – Now proceed with connection of the differential ight onfiguration pressure switch to connections P3 and P4 1. Use a screwdriver to remove the front panel cover. 2. Connect the differential pressure gauge to con- nections P3 and P4. “...
- Page 31 English 3. Turn on the appliance at the ON/OFF key on the 5. Use the TOUCH PAD to select the installer menu display. Press the Enter key to confirm Select the “V” symbol and confirm The message V1 flashes; Perform the setting of the fan V1; access the menu by pressing enter, the display shows: set the nominal de-...
- Page 32 English AUTOMATIC CALIBRATION Now proceed with connection of the differential pressure switch to connections P1 and P2 nLy with utomatiC fLow rate ControL SyStem inStaLLed T u r n t h e a p p l i a n c e by pressing the ON/OFF key on the display.
- Page 33 English 4. The display will show: WARNING:!: In case where one fan cannot be run at the target flow rate, message "Out of Range" is temporarily displayed. Voltage value V1fan speed Then, system steps to next extraction fan balancing or ends the flow rates setting procedure.
- Page 34 English Setting of the weekly program Press “enter” to confirm. There is a choice of 8 weekly programs: 4 preset programs and 4 free programs that can be modified Use the TOUCH PAD to set the current day. at will. Selection of the preset weekly program: Press “enter”...
- Page 35 English Tables of settings for the preset weekly program - Weekly program, family with children, both parents work away from home during the day. Monday - Friday HOUR 0 – 1 1 – 2 2 – 3 3 – 4 4 –...
- Page 36 English Creation of the free weekly program: Programs P5-P6-P7-P8. It is possible to create 4 weekly programs at will, according to your habits and needs. Proceed as follows: 1. Turn on the appliance at the ON/OFF key. 2. Press the ON/OFF and “M” Menu keys at the same time.
- Page 37 English P ......Monday - Friday HOUR 0 – 1 1 – 2 2 – 3 3 – 4 4 – 5 5 – 6 6 – 7 7 – 8 8 – 9 9 – 10 10 – 11 11 –...
-
Page 38: Manual Ventilation Function
English OPERATIONAL (Fig. 1) PROCEDURES USER START AND STOP THE HEAT RECOVERY UNIT To turn the unit on, press the ON/OFF power key as shown in the figure to the right (Fig. 1). If this icon is present, the unit is off. -
Page 39: Automatic Mode
English • MANUAL VENTILATION FUNCTION; • AUTOMATIC MODE; Available for units equipped with air quality sensor Press "M” and scroll with the TOUCH PAD until the (humidity or CO2). “Manual ventilation" mode starts flashing. Press "M” and scroll with the TOUCH PAD until the Then press “Confirm”... -
Page 40: Party Mode
English If, however, the poor comfort conditions persist, then “PARTY” mode is a timed function (default 3 hours). it will mean that the low or high humidity is not due The speed percentage of the “PARTY” mode is set to extraordinary and temporary events, but depends as a parameter by the installer according to the on harsh weather conditions, such as winter frost or customisations requested by the user, starting from... - Page 41 English ACTIVATION OF SETTING THE CLOCK WEEKLY PROGRAM AND THE DAY OF THE WEEK Press “M”; scroll with the wheel until the “clock” icon Press “M” ; scroll with the until TOUCH PAD starts flashing “ ”. the function “ ”...
- Page 42 English SUPPLEMENTARY FUNCTIONS • ANTIFREEZE FUNCTION • BOOSTER MODE • With Integrated Modulating Electric Resistance AUTO This is enabled by a remote control normally located In the event that the unit is installed in a cold climate, in a bathroom or kitchen. we recommend the use of versions with an electric The power board of the centralised unit receives the antifreeze resistance on the external air intake circuit...
- Page 43 English • With preheating Hydronic Coil or ON/OFF For units not equipped with integrated electric resistance, a duct modulating electric resistance is resistance available as a preheating accessory. As an alternative to the use of versions with the electric preheating resistance, a hot water or ON/OFF resistance pre-treatment coil can be used to perform the antifreeze function, mounted on the outdoor air inlet duct.
- Page 44 English • FREE COOLING FUNCTION • Pre-Treatment Function with Geothermal Coil There can be climatic conditions during the year If a hydronic circuit with geothermal or ground water that make it impractical to recover heat from probes is available, it is possible to feed a hydronic extracted air for treating fresh air from outside.
- Page 45 English • Installer Menu TECHNICAL MENU The symbol flashes on the display when the installer menu is opened. Use the TOUCH PAD to 1. Turn on the appliance at the ON/OFF key. choose the desired function between: - day and time setting - initial setting/configuration of fans “V”(see sec- tion “COMMISSIONING”);...
- Page 46 English • “PAr” Parameters Menu This menu allows you to modify the operating pa- rameters of the appliance. With the controller “ON”, press “M” and On/Off simultaneously for 3 seconds. Select the “PAr”menu using the TOUCH PAD and confirm by pressing “Enter”. Select the parameter to be modified by using the TOUCH PAD and confirm by pressing Enter”.
- Page 47 English Table 2 nMAX nMIN Vmax Vmin nMAX nMIN Vmax Vmin Model Model (rpm) (rpm) (Volt) (Volt) (rpm) (rpm) (Volt) (Volt) ENY-S-170 ENY-SP-180 3450 3570 9.58 4.22 ENY-SEL-170 ENY-SPEL-180 ENY-SER-170 ENY-SPER-180 ENY-S-270 ENY-SP-280 2470 2470 ENY-SEL-270 ENY-SPEL-280 ENY-SER-270 ENY-SPER-280 ENY-S-360 ENY-SP-370 2850 3150...
- Page 48 English • “Read” Menu °C This menu allows you to read some operating pa- rameters of the appliance. With the controller “ON”, press “M” and On/Off si- multaneously for 3 seconds. °C Select the “rEAd” menu using the TOUCH PAD and confirm by pressing “Enter”.
- Page 49 English ALARMS Below is a table for troubleshooting the faults that may occur during operation of the machine. Type of Description DL3 Blinking Notes/Solution Signal of Fault General Alarm. Present in case of any fault FAN voltage/speed limits ex- It is recommended to enter the Read Menu to check the FAN ceeded.
- Page 50 English INSTALLER • Unscrew the front panel and remove it. MAINTENANCE The following maintenance interventions must only be carried out by the installer or by qualified per- sonnel: • Inspect the filters and clean them if necessary; • Inspect the heat exchanger and clean it if necessary; •...
- Page 51 English • Checking the fans • Pull the band (A) to remove the heat exchanger. Check the fans once every two years. Always disconnect power before accessing the unit. • Unscrew the front panel and remove it as shown in the chapter on maintenance of the heat exchanger.
- Page 52 English WIRING DIAGRAMS machine in standard configuration) M1-M2 = EC motor M3 = Primary damper motor M4 = Secondary damper motor B1 = Outdoor air temperature probe B2 = Supply air temperature probe B3 = Extracted stale air temperature probe B4 = Exhaust air temperature probe B5-B6 = Electric resistance safety thermostats B7 = Humidity sensor...
- Page 53 English SE-0545 - ENY - S standard wiring diagram...
- Page 54 English SE-0547 - ENY-S wiring diagram with preheating electric resistance...
- Page 55 English SE-0546 - ENY-SP wiring diagram...
- Page 56 English SE-0548 - ENY-SP wiring diagram with preheating electric resistance...
- Page 57 English Additional wiring diagrams CARBON DIOXIDE (CO2) REMOTE SENSOR Interface diagram...
- Page 58 Oggetto: Dichiarazione di conformità UE Object: EU Declaration of conformity La presente dichiarazione di conformità è rilasciata sotto la responsabilità esclusiva del fabbricante. This declaration of conformity is issued under the exclusive responsibility of the manufacturer. Prodotto: Energy Smart - Recuperatori Versione Verticale Product: Energy Smart - Vertical Recovery Units ENY-SP-180, ENY-SP-280, ENY-SP-370, ENY-SP-460,...
Need help?
Do you have a question about the Sabiana Energy Smart Series and is the answer not in the manual?
Questions and answers