Advertisement
Advertisement
Table of Contents

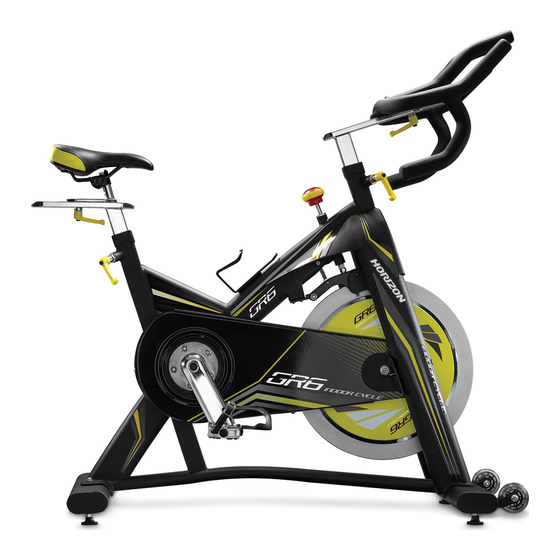
Summary of Contents for Horizon Fitness GR6
- Page 1 GR6 SERVICE MANUAL...
-
Page 2: Table Of Contents
TABLE OF CONTENTS CHAPTER 1: Serial Number Location…………………………………………3 CHAPTER 2: Indoor Cycle Operation………………………………………4 2.1 How to Move the Indoor Cycle…………………………………………4 2.2 How to Adjust the Indoor Cycle…………………………………………4 CHAPTER 3: Basic Maintenance………………………………………………7 3.1 Common Product Questions……………………………………………7 3.2 Basic Maintenance………………………………………………………7 CHAPTER 4: Troubleshooting……………………………………………………9 4.1 Bottom Bracket Noise or Damage………………………………………9 4.2 Hub Axle Replacement…………………………………………………13 4.3 Outer Chain Guard Replacement………………………………………17... -
Page 3: Chapter 1: Serial Number Location
CHAPTER 1: Serial Number Location The serial number is located on the front stabilizer. -
Page 4: Chapter 2: Indoor Cycle Operation
CHAPTER 2: Indoor Cycle Operation 2.1 HOW TO MOVE THE INDOOR CYCLE Due to the weight of the indoor cycle, it is recommended that two people move it. While one person lifts the back of the indoor cycle, the second person firmly holds the handlebar and tips the indoor cycle forward until it rolls on the wheels. - Page 5 Handlebar adjustment Proper position for the handlebar is based primarily on comfort. Typically, the handlebar should be positioned slightly higher than the saddle for beginning cyclists. Advanced cyclists could try different heights to get the arrangement most suitable for you. ...
- Page 6 Tension control and Emergency lever The preferred level of difficulty in pedaling (resistance) can be regulated in fine increments by use of the tension control knob. To increase to resistance, turn the tension control knob clockwise. To decrease the resistance, turn the knob counter clockwise. Important: ...
-
Page 7: Chapter 3: Basic Maintenance
Chapter 3: Basic Maintenance 3.1 COMMON PRODUCT QUESTIONS Are the sounds my indoor cycle makes normal? Our indoor cycles are some of the quietest available because they use belt drives (GR5/6) and chain drives (GR3) and cantilever brake resistance. We use the highest grade bearings and chains/belts to minimize noise. - Page 8 DAILY Wipe down the indoor cycle after each use to remove sweat and moisture. Use soap and water, or a diluted non-abrasive domestic cleaner solution. Rinse to remove detergent residue and then dry off. Before each session, inspect for loose components such as pedals or cranks prior to commencing the next use.
-
Page 9: Chapter 4: Troubleshooting
Chapter 4: Troubleshooting 4.1 BOTTOM BRACKET NOISE OR DAMAGE Symptom: Clicking noise or damage Tools required: 15mm fixed wrench; Cross wrench; Screwdriver; Slotted screwdriver; 14mm socket wrench Solution: Using a 15mm fixed wrench, remove both pedals and remove the stripe of sweating cloth. - Page 10 Remove the crank bolt using a 14mm Socket Wrench, then remove the crank with a crank remover Note: Apply few anaerobic adhesive on the thread of crank screw when reassemble. Remove the bottom bracket with BB tool. Replace with a new bottom bracket and reassemble it with BB tool.
- Page 11 Remove 3 bolts fastened on the chain guard and then remove the chain guard. III. Use a screwdriver to insert between the belt and the big pulley. Turn the flywheel in anti-clockwise direction to remove the belt. Insert the slotted screwdriver to the hole of the crank cap and turn anticlockwise to remove both sides of crank caps.
- Page 12 Take a rope or wire to go through the bottom of spring which has a hook to detach the spring. VII. Remove bolt and nut by a 13~15mm wrench to detach the magnet holder. VIII. Remove the decoration cover on the left side of flywheel with a Philip screwdriver. Use a M5 Allen wrench and turn anticlockwise to remove the bolt and then remove the flywheel dropout.
-
Page 13: Hub Axle Replacement
Slightly knock the hub axle to remove hub axle by a hammer. Then slightly knock out the bearing on other side. XII. Replace with a new bearing. Put a paper board on the flywheel and slightly knock the bearing in by a hammer. XIII. -
Page 14: Outer Chain Guard Replacement
4.3 OUTER CHAIN GUARD REPLACEMENT Symptom: Outer chain guard damaged or noise Tools required: Combination Wrench; Philip Screwdriver Solution: Disassemble the left and right pedal using a 13~15mm Combination Wrench. Pull off the stripe of the sweating cloth. Note: Counter clockwise loosen the right pedal and clockwise loosen the left pedal.


Need help?
Do you have a question about the GR6 and is the answer not in the manual?
Questions and answers