
Related Manuals for Stuv B-35


Summary of Contents for Stuv B-35
- Page 1 Installation Instructions Maintenance Please see our website for more information: www.stuv.com Find us also on: May 2018 93104780...
- Page 2 WELCOME TO THE WORLD OF STÛV! You’ve just chosen a highly efficient gas heating device. We hope you enjoy using it. This document contains recommendations and instructions for installing, using and maintaining your stove. We recommend that you ask a qualified professional to install this Stûv. Installation of the stove, its accessories and the surrounds must comply with all (local and national) regu- lations and (national and European) norms in the country in which it is installed.
-
Page 3: Table Of Contents
CONTENTS ABOUT THE PRODUCT Certification Product datasheets EN2015/1186 Dimensions Technical details Supply pressure and gas categories by country General INSTALLATION Recommendations Checks before installation Position of the device Environment and decorative items for the stove Gas connection Connection to the combustion product outlet pipe Specific combustion product outlet pipe elements Wall-mounted terminal C and vertical terminal C... -
Page 4: About The Product
ABOUT THE PRODUCT Certification Stûv gas heating devices are tested and certified in accordance with the European EN-613 standard. 18GR0782/00 E 7277 Number Contract number 12-06-2018 (EU) 2016/426 (9 March 2016) Issue date Scope 12-06-2028 B (Type testing) Due date Module 0063CQ3617 141100617... -
Page 5: Product Datasheets En2015/1186
B-5170 Bois-de-Villers info@stuv.com - www.stuv.com info@stuv.com - www.stuv.com info@stuv.com - www.stuv.com Model reference: Model reference: Model reference: B-35 (gas type: G20/G25) B-35 (gas type: G31) B-50 (gas type: G20/G25) Energy efficiency rating Energy efficiency rating Energy efficiency rating 5,5 kW... - Page 6 Stûv s.a Rue Jules Borbouse, 4 Rue Jules Borbouse, 4 Rue Jules Borbouse, 4 B-5170 Bois-de-Villers B-5170 Bois-de-Villers B-5170 Bois-de-Villers info@stuv.com - www.stuv.com info@stuv.com - www.stuv.com info@stuv.com - www.stuv.com Model reference: Model reference: Model reference: B-80 (gas type: G20/G25) B-80 (gas type: G31) B-95 &...
- Page 7 Stûv s.a Rue Jules Borbouse, 4 Rue Jules Borbouse, 4 Rue Jules Borbouse, 4 B-5170 Bois-de-Villers B-5170 Bois-de-Villers B-5170 Bois-de-Villers info@stuv.com - www.stuv.com info@stuv.com - www.stuv.com info@stuv.com - www.stuv.com Model reference: Model reference: Model reference: B-100H (gas type: G20/G25) B-100H (gas type: G31)
-
Page 8: Dimensions
Dimensions B-35 351 (ext.) B-35 DF 351 (ext.) installation, usage and maintenance instructions installation, usage and maintenance instructions Stûv GAS - Stûv GAS - 05/2018... - Page 9 Dimensions B-50 521 (ext.) B-50 DF 521 (ext.) installation, usage and maintenance instructions Stûv GAS - 05/2018...
- Page 10 Dimensions B-50 Round B-50 Round DF installation, usage and maintenance instructions installation, usage and maintenance instructions Stûv GAS - Stûv GAS - 05/2018...
- Page 11 Dimensions B-60 (ext.) B-80 1102 1002 806 (ext.) installation, usage and maintenance instructions Stûv GAS - 05/2018...
- Page 12 Dimensions B-95 3 sides B-95 corner installation, usage and maintenance instructions installation, usage and maintenance instructions Stûv GAS - Stûv GAS - 05/2018...
- Page 13 Dimensions B-100 1300 1200 1003 (ext.) B-100 DF 1300 1200 1003 (ext.) installation, usage and maintenance instructions Stûv GAS - 05/2018...
- Page 14 Dimensions B-100H 3 sides 1093 1076 1008 B-100H corner 1097 1076 1003 installation, usage and maintenance instructions installation, usage and maintenance instructions Stûv GAS - Stûv GAS - 05/2018...
- Page 15 Dimensions B-100H 1300 1200 1003 (ext.) B-120 1500 1400 1206 (ext.) installation, usage and maintenance instructions Stûv GAS - 05/2018...
- Page 16 Dimensions B-120 DF 1500 1400 1206 (ext.) B-150 1800 1700 1506 (ext.) installation, usage and maintenance instructions installation, usage and maintenance instructions Stûv GAS - Stûv GAS - 05/2018...
- Page 17 Dimensions B-150 DF 1800 1700 1506 (ext.) C-200 2000 installation, usage and maintenance instructions Stûv GAS - 05/2018...
- Page 18 Dimensions Inspection panel (steel) 124.5 Inspection panel (undercover) installation, usage and maintenance instructions installation, usage and maintenance instructions Stûv GAS - Stûv GAS - 05/2018...
-
Page 20: Technical Details
Technical details B-35 Type C11/C31 Gas type G20 I2H, G20/G25 G25.3 G31 I3P G31 I3P G31 I3P I2E, I2E+ I2ELL I2EK (30) (37) (50) Supply pressure mbar Nominal capacity (Hs) Nominal output Consumption m³/h 0.66 0.62 0.74 Consumption Kg/h 0.457 0.457... - Page 21 Technical details (continued) Type C11/C31 B-80 Gas type G20 I2H, G20/G25 G25.3 G31 I3P G31 I3P G31 I3P I2E, I2E+ I2ELL I2EK (30) (37) (50) Supply pressure mbar Nominal capacity (Hs) Nominal output Consumption m³/h 0.75 0.80 Consumption Kg/h 0.541 0.541 0.541 Burner pressure (hot)
- Page 22 Technical details (continued) B-100H Type C11/C31 Gas type G20 I2H, G20/G25 G25.3 I2E, I2E+ I2ELL I2EK I3P (30) I3P (37) I3P (50) Supply pressure mbar Nominal capacity (Hs) 11.4 Nominal output Consumption m³/h 1.17 1.07 Consumption Kg/h 0.606 0.606 0.606 Burner pressure (hot) mbar 13.5...
-
Page 23: Supply Pressure And Gas Categories By Country
Supply pressure and gas categories by country G20 @ 20 mbar AT, CH, CZ, DK, ES, GB, IE, IT, PT, SE G20 @ 20 mbar DE, LU, PL I2E+ G20/G25 @ 20/25 mbar BE, FR Natural gas I2ELL G25 @ 20 mbar I2EK G25.3 @ 25 mbar I3P(30) -
Page 24: Installation
Made by : Stûv s.a Rue Jules Borbouse, 4 B-5170 Bois-de-Villers info@stuv.com - www.stuv.com installation, usage and maintenance instructions installation, usage and maintenance instructions Stûv GAS - Stûv GAS - 05/2018... -
Page 25: Position Of The Device
Position of the device The steps described below are • The device must be installed at vital for the correct operation and least 100cm from inflammable problem-free use of the device: materials and objects [diagram 2]. • Choose the position of the •... -
Page 26: Gas Connection
The following diameters are used (ØD1/D2) [diagram 2]: - B-35, B-50, B-60 & B-80: Ø100/150mm - B-95, B-100, B-100H, B-120, B-150, C-200: Specific combustion product outlet pipe elements Poujoulat adaptor PGI-Stûv... -
Page 27: Wall-Mounted Terminal C
Wall-mounted terminal C and vertical terminal C The distances mentioned in this • the bottom of a raised min. 50cm section are recommended values protruding balcony or a protruding to avoid pollution and disruption porch if the ventilation system caused by obstacles and nearby is extended beyond front of the openings affecting the emission balcony or porch. -
Page 28: Fitting The Restrictor
Positioning the terminal (continued) Minimum distances to allow between a C11 wall-mounted terminal and: - A ventilation opening for a living room, WC or bathroom (A). - A combustion air input system, if this combustion air passes through a living room (B). -
Page 29: Flue Configurations And Settings For The Restrictor
L (m) N.B.: - The minimum vertical height of the flue is 1 metre (except B-35: 0.5m). - The flue should be measured from where it comes out of the stove to the edge of the terminal. installation, usage and maintenance instructions Stûv GAS -... - Page 30 60° 70° 80° 90° 100° 110° 130° Zone A Zone B Zone C Zone D Natural gas 80° 70° 60° B-35 100° 80° 60° Natural gas 100° 80° 60° B-50 80° 70° 60° 60° Natural gas B-60 100°...
-
Page 31: Dismantling The Door
Dismantling the door > To put the door back again, follow the steps in reverse order. Warning: make sure the set screws on the glass are tightened again [diagram 1&2] to make sure the stove is sealed. Fitting the decorative frame >... -
Page 32: Fitting The Glasses (For 3 Sides And Corner Appliances)
Dismantling the glasses (for 3 sides and corner aplliances) - continued Fitting the glasses (for 3 sides and corner appliances) >Monteer de zijglazen zonder ze volledig vast te zetten [diagram1-2]. >Plaats het voorglas, draai de schroeven aan [diagram 3-4]. > Steek de veren tussen de zijglazen en de kachel in (schuif en schuif dan) [schéma 5]. -
Page 33: Putting Together The Decorative Kit For The Combustion Chamber
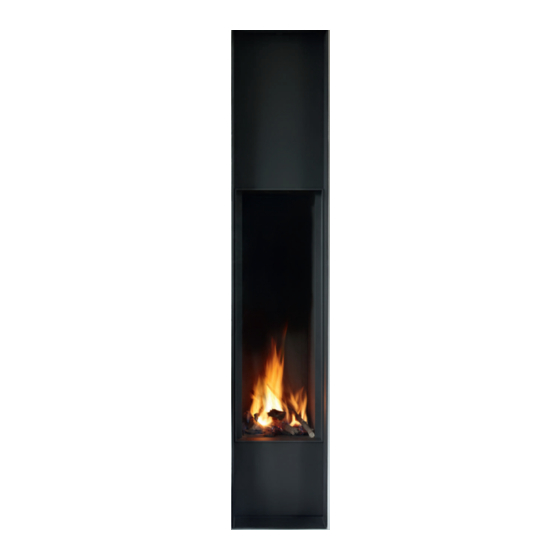
Putting together the decorative kit for the combustion chamber Safety Do not put cinders, vermiculite chips, logs or pebbles in the immediate vicinity of the pilot burner (shaded area in diagram 1). Make sure that the pilot can always burn freely above the main burner. - Page 34 Putting together the decorative kit for the combustion chamber (continued) B-35 Kit contents: - 4 logs - 1 bag of cinders Arrange the cinders on the grill and the burners, then the logs, as shown. Warning: do not open the bag of cinders above the burners to prevent dust getting in.
- Page 35 Putting together the decorative kit for the combustion chamber (continued) B-50 Kit contents: - 5 logs - 2 bags of cinders - 1 bag of vermiculite chips Arrange the cinders and vermiculite chips on the grill and the burners, then the logs, as shown.
- Page 36 Fitting and dismantling the decorative frame B-60 Kit contents: - 6 logs - 2 bags of cinders - 1 bag of vermiculite chips Arrange the cinders and vermiculite chips on the grill and the burners, then the logs, as shown. Warning: do not open the bags of cinders and vermiculite chips above the burners to prevent dust...
- Page 37 Putting together the decorative kit for the combustion chamber (continued) B-80 Kit contents: - 7 logs - 2 bags of cinders - 1 bag of vermiculite chips Arrange the cinders and vermiculite chips on the grill and the burners, then the logs, as shown.
- Page 38 Putting together the decorative kit for the combustion chamber (continued) B-95 & C-200 Kit contents: - 7 logs - 3 bags of cinders Arrange the cinders on the grill and the burners, then the logs, as shown. Warning: do not open the bags of cinders above the burners to prevent dust getting in.
- Page 39 Putting together the decorative kit for the combustion chamber (continued) B-100H Kit contents: - 8 logs - 4 bags of cinders - 1 bag of vermiculite chips Arrange the cinders and vermiculite chips on the grill and the burners, then the logs, as shown.
- Page 40 Putting together the decorative kit for the combustion chamber (continued) B-100 & B-120 Kit contents: - 11 logs - 3 bags of cinders Arrange the cinders on the grill and the burners, then the logs, as shown. Warning: do not open the bags of cinders above the burners to prevent dust getting in.
- Page 41 Putting together the decorative kit for the combustion chamber (continued) B-150 Kit contents: Arrange the cinders on the grill and the burners, then the logs, as - 13 logs shown. - 5 bags of cinders Warning: do not open the bags of cinders above the burners to prevent dust getting in.
-
Page 42: Use
Using for the first time Before lighting the device for the is completely normal. It is better first time, make sure all packaging to keep children and pets away material and stickers have been from the device and make sure the removed. -
Page 43: Remote Control
Remote control Stûv gas stoves come with a remote control. The remote control system is made up of 3 parts: the remote control [diagram 1], the receiver [diagram 2] and the gas control unit [diagram 3]. The gas control unit and the receiver are behind the inspection panel. - Page 44 Using the remote control installation, usage and maintenance instructions installation, usage and maintenance instructions Stûv GAS - Stûv GAS - 05/2018...
- Page 45 Using the remote control (continued) installation, usage and maintenance instructions Stûv GAS - 05/2018...
- Page 46 Using the remote control (continued) installation, usage and maintenance instructions installation, usage and maintenance instructions Stûv GAS - Stûv GAS - 05/2018...
- Page 47 Using the remote control (continued) installation, usage and maintenance instructions Stûv GAS - 05/2018...
-
Page 48: Maintenance
MAINTENANCE Safety It is essential that the device and the whole system for the removal of combustion products are cleaned and checked every year by a qualified, approved gas professional. The inspection and maintenance must certify that the device is working properly and without any risks. -
Page 49: Cleaning Anti-Glare Glass (Optional Extra)
Cleaning anti-glare glass (optional extra) Premium anti-glare glass (optional In the first few hours the device is on, Most importantly, do not use: extra) has a special coating to a thin layer of white might settle on - An alkali or a cleaning product with minimise the reflection. -
Page 52: Stûv Extended Warranty And Statutory Warranty
The list is available on our normal use, website, www.stuv.com If you fill in your warranty form The internal lining of the within 30 days, Stûv will give you an 2. - Page 53 Complete your warranty form online at www.stuv. com! Your responsibility As a user, you also have an important role to play when it comes to getting the most out of your Stûv. We recommend: – making sure that it is installed...
-
Page 54: Acceptance Of The Work
ACCEPTANCE OF THE WORK PLEASE COMPLETE IN CAPITAL LETTERS. THE BUYER SURNAME ....................FIRST NAME .................... ADDRESS WHERE THE WORK TOOK PLACE .......... POSTCODE ..................... TOWN ....................COUNTRY ....................THE INSTALLER COMPANY ....................YOUR STÛV GAS STOVE MODEL ....................SERIAL NO....................INSTALLATION DATE ................ -
Page 55: Contacts
Jules Borbouse 4 01680 Vantaa T 51 33 10 93 B-5170 Bois-de-Villers (Belgium) T 400 872 858 Importer for Estonia info@stuv.com – www.stuv.com www.takkamaailma.com Tulering Kaminasalong Oü Importer for Sweden Sopruse 145 – 13417 Tallinn Eldoform Sverige AB T +372 56 249 004 - www.tulering.ee Slipgatan 2 –... - Page 56 Responsible publisher: Gérard Pitance – rue Jules Borbouse 4 – 5170 Bois-de-Villers – Belgium your distributer or visit www.stuv.com 93104780 - installation instructions, usage instructions, maintenance - Stûv GAS...
Need help?
Do you have a question about the B-35 and is the answer not in the manual?
Questions and answers