
Related Manuals for TESTO Saveris Series


Summary of Contents for TESTO Saveris Series
- Page 1 Pharma Solutions Measurement data monitoring system: testo Saveris Software: testo Saveris CFR 4.6 SP1 testo Saveris CFR transport add-on Commissioning instructions...
-
Page 3: Table Of Contents
6.4.3 6.4.4 Assigning an IP address to the Saveris base (optional) ..........22 Commissioning of radio data loggers in testo Saveris ........23 Inserting batteries into Saveris radio data logger ............23 6.5.1 Registering Saveris radio data loggers in the system ..........24... - Page 4 Integration of Ethernet data loggers into testo Saveris (optional) ....... 45 6.9.2 Connecting network cable ....................45 6.9.2.1 Connecting testo Saveris Ethernet data logger to power supply (mains unit) ...... 46 6.9.2.2 Connecting USB cable and installing driver (optional) ............47 6.9.2.3 6.9.3...
- Page 5 Wall mounting of data loggers ..................68 6.10.3 6.10.3.1 Wall mounting of T1/T1D/T2/T2D/Pt/PtD/H4D radio data loggers ........68 Wall mounting of testo Saveris 2 H2 WLAN data loggers ............ 70 6.10.3.2 BT Gateway for testo 182 wall mounting ................70 6.10.3.3 6.10.3.4...
- Page 6 8.4.1 8.4.2 Saveris Ethernet analog coupler U1E ............... 110 Transport data loggers for testo Saveris ............111 testo 182 – BT transport data logger ................ 111 8.5.1 testo 184 · USB Transport data logger ..............111 8.5.2 testo Saveris router ..................113 testo Saveris converter ..................
-
Page 7: About This Document
1 About this document 1 About this document • The instruction manual is an integral part of the testo Saveris measurement data monitoring system. • Keep this documentation to hand so that you can refer to it when necessary. •... -
Page 8: Warning Notices
Never use the Saveris probes to measure on or near live parts. • Only carry out maintenance and repair work on the components of the testo Saveris measurement data monitoring system that are described in the documentation. Follow the prescribed steps exactly when doing the work. -
Page 9: Batteries
(observe local regulations) or return the product to Testo for disposal. • WEEE Reg. No. DE 75334352 4 Support You can find up-to-date information on products, downloads and links to contact addresses for support queries on the Testo website at: www.testo.com. -
Page 10: Commissioning Instructions
This requires a 64-bit operating system from the following list: Server 2016 or compatible next version is generally Windows ® recommended for new installations. Windows ® Server 2016 is required for operating testo Saveris CFR Transport Add-on (0572 1860). • Windows ® Server 2016 Datacenter • Windows ®... - Page 11 Microsoft ® SQL Servers as from SQL Server 2005 are supported. testo Saveris works with an SQL database. If an SQL database is already on the installation PC, a second instance can be created for testo Saveris. Saveris servers require 64-bit Windows operating systems (see “Saveris servers”...
-
Page 12: Network Environment
Network environment 5.1.3 The testo Saveris software is installed as a client / server installation. In the process, the database and Saveris Client are installed on a server computer and the Client and Viewer program components can also be installed on additional client computers. -
Page 13: Commissioning
6 Commissioning 6 Commissioning Flowchart: Configuration for monitoring stationary zones Start Base with GSM module? Insert SIM card Connect USB cable and power supply to base Connect USB cable and power supply to base Connect GSM antenna Insert batteries into probe Insert batteries into probe... - Page 14 6 Commissioning Install software Integrate Ethernet Use Ethernet probe? probe Use converter? Integrate converter Start up hardware using the startup wizard. Create zones Perform test run Configure alarms Mount hardware Launch software...
-
Page 15: Flowchart ("Mobile Monitoring"): Configuration For Transport Monitoring With Saveris Radio Data Loggers
6 Commissioning Flowchart (“Mobile monitoring”): Configuration for transport monitoring with Saveris radio data loggers Start Base with GSM Insert SIM card module? Connect USB cable and power supply to base Connect USB cable and power supply to base Connect GSM antenna Insert batteries into probe... - Page 16 6 Commissioning Install software Integrate extender Connect Saveris base to PC and start up hardware Create zones Configure alarms Launch software Perform test run Mount hardware...
-
Page 17: Commissioning The Saveris Base
6 Commissioning Commissioning the Saveris base Inserting SIM card (optional) 6.3.1 For a Saveris base with integrated GSM module, you must insert the SIM card. The SIM card for sending SMS messages is not included in the scope of delivery and must be purchased separately from a mobile phone provider. -
Page 18: Connecting Network Cable To The Saveris Base
6 Commissioning Connecting network cable to the Saveris 6.3.2 base Undo screw connection and remove. Take cover off Saveris base. Plug the network cable into the Saveris base. Connect the network cable to the Ethernet. -
Page 19: Connecting Gsm Antenna (Optional)
6 Commissioning Connecting GSM antenna (optional) 6.3.3 Fit antenna cable onto the coaxial connector and screw in Connecting Saveris base to power supply You can connect the Saveris base to the power supply via the mains unit which is included or via the 24 V AC/DC plug-in/screw terminal. Power supply via mains unit 6.4.1 Connect mains cable... -
Page 20: Power Supply Via Plug-In/Screw Connection (Optional)
6 Commissioning Ensure that cabling cannot be pulled out using a cable tie at the eyelets for strain relief Connect mains plug to the power supply. The Saveris base automatically starts up and is ready for operation once the language has been selected on the base. Power supply via plug-in/screw connection 6.4.2 (optional) -
Page 21: Connecting Usb Cable (Optional)
6.4.3 For the commissioning, you can connect the Saveris base via a USB cable to the computer on which the testo Saveris Client is installed. For this, first connect the USB cable to the Saveris base. During continuous operation, operate the Saveris base via the network cable, not via the USB cable. -
Page 22: Assigning An Ip Address To The Saveris Base (Optional)
0440 6723 must be present. Undo screw connections (1) and remove base plate (2) from the Saveris base. Plug the USB cable into the testo programming adapter (0440 6723) and connect to the service interface for the Saveris base. -
Page 23: Commissioning Of Radio Data Loggers In Testo Saveris
6 Commissioning Commissioning of radio data loggers in testo Saveris Inserting batteries into Saveris radio data 6.5.1 logger Undo screws on the rear of the Saveris radio data logger. Remove housing cover of the Saveris radio data logger Insert batteries Ensure that you insert the batteries correctly. -
Page 24: Registering Saveris Radio Data Loggers In The System
6 Commissioning Transport tip: If the Saveris radio data loggers are to be sent via air freight, the batteries must be removed beforehand to avoid inadvertent radio communication. Registering Saveris radio data loggers in 6.5.2 the system You can register a maximum of 15 radio data loggers on the Saveris base directly via radio. - Page 25 6 Commissioning With the H2D/H4D Saveris radio data logger, the external humidity probe must be plugged in. Hold the connect key on the rear of the Saveris radio data logger pressed down until the LED on the Saveris radio data logger starts to flash orange.
-
Page 26: Bt Gateway For Testo 182
If there is no radio link to the Saveris base, even after a change of location of the Saveris radio data logger, register a router on the Saveris base; see section 6.9.5, testo Integrating a Saveris router (optional). In order to complete the commissioning of the Saveris radio data logger, the latter still has to be configured using the startup wizard. -
Page 27: Configuring The Bt Gateway For Testo 182
Check the network settings of your PC. The gateway must be detected as an RNDIS device (driver is loaded automatically). Configuring the BT Gateway for testo 182 6.6.3 1 Open the configuration interface for the gateway via the browser. -
Page 28: Configuring Operation Via Wlan
Optional: carry out NTP (time server) configuration. The NTP servers transmit the date and time to the gateway. If necessary, the NTP servers already entered by Testo can be adjusted Make a note of the gateway’s newly assigned IP address. -
Page 29: Configuring Operation Via Ethernet / Lan
Optional: carry out NTP (time server) configuration. The NTP servers transmit the date and time to the gateway. If necessary, the NTP servers already entered by Testo can be adjusted. Make a note of the gateway’s newly assigned IP address. -
Page 30: Carrying Out Firmware Updates
Remove USB flash drive with the firmware update package from the USB port. Reinsert USB wireless stick into USB 2. Restart BT Gateway for testo 182 with the new firmware: unplug and plug in the power supply. The Gateway is now ready for operation. -
Page 31: Installing Saveris Mail Services
6 Commissioning Insert CD with the testo Saveris software into the CD-ROM drive. If the installation program does not start automatically, open Windows ® Explorer and start the file index.html on the CD. Once you have for instance received the installation file via e-mail, use the Setup.exe file at the highest level of the installation medium. - Page 32 6 Commissioning • An email account must be set up on the Microsoft Exchange server for the user account used for MAPI mail. • The name of the Microsoft Exchange server must be known for the installation. • MAPI mail must be installed on the Saveris server. The following applies to this PC: A Microsoft Exchange server must be accessible.
-
Page 33: Installing Smtp Mail
6 Commissioning Click on [Continue]. Enter the user name (Domain user) of the email mail box on the Microsoft Exchange server. Enter Password Repeat Password. Click on [Continue]. MAPI mail is installed. Installing SMTP mail 6.7.2.2 The following requirements must be met for the installation of SMTP mail: The name of the SMTP server must be known. -
Page 34: Installing Testo Saveris Cfr Transport Add-On
RegTestoDevCerts.exe application in the folder. Optional: If you are using the testo 184 transport data logger, you can install the 3 software versions which are needed for different applications. To do this, run the relevant Windows installer in the sub- folders: 1. -
Page 35: Initial Commissioning Of The Hardware
After completing the installation, restart the computer and log in with the same user name as before. Setting up a connection to the AWS bucket in the testo Saveris CFR software Start the testo Saveris Client software. In order to be able to connect an AWS bucket, the required permissions →... - Page 36 6 Commissioning The startup wizard is launched. [Next >]. Click on IP address Enter the of the Saveris base. This is located on the Saveris Info Base base in the window. Click on [Continue]. Settings for base instrument of the Saveris base are displayed.
- Page 37 6 Commissioning Click on [Units] to select the temperature unit for the system (Celsius °C or Fahrenheit °F). For using the external SMS gateway USE AN RV50, the option EXTERNAL GATEWAY must be checked. In addition, the IP address and the ports (sending and receiving entered ports) need to be [SMS Gateway]...
- Page 38 6 Commissioning To distribute the data loggers/probes already registered on the system to stationary or mobile zones (for Saveris mobile), depending on the purpose: Click on [Add stationary zone] [Add mobile zone]. Open the selection list via the button and select the zone which the data logger should be assigned to.
- Page 39 6 Commissioning Enter the in the field of the same name. You can for example find the PIN in the documents for your SIM card. The number of the SMS centre can be read out from the SIM card. If the PIN entered is incorrect, the Saveris base must be shut down and started up again with a different SIM card.
- Page 40 6 Commissioning Connection type Click in the cell of the data logger which needs to be assigned to a Saveris router. The cell is shown as a selection list. Use the button to open the selection list and select the Saveris router which the data logger needs to be assigned to.
-
Page 41: Configuring Hardware
6 Commissioning [Connect] Press the key on all data loggers and Saveris routers one after the other to synchronize the components. Close the dialogue with [OK]. The hardware is now ready for operation. For how to mount the hardware on the wall for example, see section 6.10.3 Wall mounting of data loggers Configuring hardware Use the installation instructions for the initial commissioning of the system. - Page 42 6 Commissioning Enter the IP address of the Saveris base. This is located on the Saveris base in the Info Base window. Click on [Continue]. Click on [Units] to change the temperature unit for the system. [MKT] Click on (Mean Kinetic Temperature) to simulate the effect of temperature fluctuations over a specific period of time.
-
Page 43: Integrating Testo Saveris 2 H2 Wlan Data Logger
6 Commissioning Integrating testo Saveris 2 H2 WLAN data 6.9.1 logger This section only describes the integration of the H2 WLAN data logger into a measurement system, not the integration of other WLAN data loggers. - Page 44 6 Commissioning...
-
Page 45: Integration Of Ethernet Data Loggers Into Testo Saveris (Optional)
6 Commissioning Integration of Ethernet data loggers into 6.9.2 testo Saveris (optional) In addition to the wireless Saveris data loggers, you can use data loggers that are connected to the Ethernet interface of the Saveris base. This enables data transfer from data loggers to the base even over long stretches if you do not wish to use a Saveris router or Saveris converter. -
Page 46: Connecting Testo Saveris Ethernet Data Logger To Power Supply (Mains Unit)
The procedure for connecting the power supply via the plug-in/screw terminal is the same as for the Saveris router; see section 6.9.5.1 Connecting testo Saveris router to power supply (mains unit). Place the housing cover on the data logger and screw it down. -
Page 47: Connecting Usb Cable And Installing Driver (Optional)
Open the cover of the service interface on the Saveris Ethernet data logger. Connect the USB cable to the testo programming adapter (0440 6723) and plug into the service interface With the H4E Saveris Ethernet data logger, the external humidity probe ... -
Page 48: Integrating Testo Saveris Analog Coupler (Optional)
This means the Saveris analog coupler thereby enables you to integrate additional measurement parameters other than temperature and humidity into the testo Saveris measurement data monitoring system. Integration of a Saveris analog coupler involves three steps: Connect transmitter to the Saveris analog coupler. - Page 49 6 Commissioning Click on [Next >]. Commission new data logger dialogue is displayed. [Next >]. Leave default setting and click on Saveris analog couplers can always only be included in the configuration as additional elements and cannot be used as replacements for existing ones.
- Page 50 6 Commissioning Click on [Next >]. The list of the data loggers recently registered on the Saveris base is shown. [New stationary zone]. Click on Open the selection list via the button and select the zone which the data logger should be assigned to. Click on [Next >].
- Page 51 6 Commissioning Click on [Next >]. If a Saveris router is registered on the Saveris base, the configuration of the connection type for the probes is shown. If you have not registered a router, continue as from step 25. Click in the Connection type cell of the data logger which needs to be...
-
Page 52: Integrating Testo Saveris Transmitter
Ethernet module in the relevant instruction manuals for the transmitters. When using the Ethernet module, transmitters are integrated into testo Saveris in the same way as Ethernet data loggers, see section 6.9.2 Integration of Ethernet data loggers into testo Saveris (optional). -
Page 53: Connecting Testo Saveris Router To Power Supply (Mains Unit)
• Data loggers and Saveris router should be mounted so that the antennas are pointing upwards. The radio link between the data loggers and the testo Saveris • router, as well as between the Saveris router and the Saveris base, should as far as possible not be impaired by structural conditions (walls, shelves, etc.). - Page 54 6 Commissioning Take housing cover off router. Unscrew and remove cover cap of cable opening Loosen clamping screws Feed cabling through the cable opening and insert into the clamps It is not necessary to note the polarity. Tighten clamping screws. Leaktightness and strain relief on the probe housing is only guaranteed when using a PG screw connection.
-
Page 55: Registering Testo Saveris Router
Screw on housing cover Insert protective caps The procedure for wall mounting a Saveris router is the same as for a data logger, see section 6.10.4 Wall mounting of testo Saveris T1/T1D/T2/T2D/Pt/PtD/H4D WiFi data loggers Registering testo Saveris router 6.9.5.3 You can register a maximum of 30 Saveris routers to the Saveris base. -
Page 56: Assigning Data Loggers
Assigning data loggers 6.9.5.4 To assign a data logger to a Saveris router, both must be registered on the Saveris base. Start All programs | Testo, click on Testo Saveris startup Under wizard. - Page 57 6 Commissioning The welcome dialogue for the startup wizard is displayed. Click on [Next >]. System status dialogue is displayed with the General tab. Switch to the Integrate router tab. direct connection type means that the data logger is directly registered on the Saveris base or a Saveris converter.
-
Page 58: Connecting Saveris Routers In Series
A Saveris converter can be connected upstream of the router cascade. All Saveris routers are connected to the power supply and registered on the Saveris base. Under Start All programs | Testo, click on Testo Saveris startup wizard. - Page 59 6 Commissioning The welcome dialogue for the startup wizard is displayed. Click on [Next >]. System status dialogue is displayed with the General tab. Switch to the Integrate router tab. Click on [Chain routers]. Chain routers window is opened.
- Page 60 6 Commissioning Select Saveris routers in the order in which they should be connected in series starting from the Saveris base (from left to right). Click on [OK]. Check assignment in the structure diagram and click on [OK]. Position the Saveris routers in their mounting locations to check the radio links.
-
Page 61: Integrating Saveris Converter (Optional)
The procedure for preparing the commissioning of a converter is the same as with a Saveris Ethernet data logger, see section 6.9.2 Integrating testo Saveris Ethernet data logger (optional). Registering radio data logger or Saveris router on the Saveris converter Briefly press the connect key on the rear of the Saveris converter. -
Page 62: Integrating Saveris Cockpit Unit (Optional)
VPN, please contact our support team. The procedure for preparing the commissioning of a Saveris extender is the same as with an Ethernet data logger, see section 6.9.2 Integrating testo Saveris Ethernet data logger (optional). Integrating Saveris cockpit unit (optional) 6.9.8 The Saveris cockpit unit is used to start and stop tours manually and to display the readings of the assigned Saveris radio data loggers during transport. -
Page 63: Registering Saveris Cockpit Unit
6 Commissioning tour data can be printed out by a Testo printer via infrared (0554 0549). A cockpit unit can save several different tours with time marks. A maximum of 50 Saveris cockpit units can be integrated into a testo Saveris measurement data monitoring system. - Page 64 6 Commissioning The Saveris cockpit unit can be connected briefly to the PC via the USB port for power supply while registering on the Saveris base. The driver search, which opens automatically on the PC, can be closed. [ ▲ ] [ ▼...
-
Page 65: Fitting Saveris Cockpit Unit In The Driver's Cab And Connecting It To A Power Supply
6 Commissioning Fitting Saveris cockpit unit in the driver's cab and 6.9.8.2 connecting it to a power supply Do not fit the Saveris cockpit unit while driving. Ensure that the Saveris cockpit unit does not obstruct your line of vision while driving. -
Page 66: Installation Of The Components
6 Commissioning 6.10 Installation of the components It is absolutely essential to follow the notes in section 2 Safety and disposal when installing the Saveris components. Do not install the Saveris base and the data loggers at their locations until the measurement system is functioning as expected. The Li-ion rechargeable batteries in the Saveris base and in the Saveris Ethernet data loggers cannot be charged at sub-zero temperatures. -
Page 67: Setting Up Saveris Base With The Stand
6 Commissioning Place Saveris base on the wall bracket and secure with screw 6.10.2 Setting up Saveris base with the stand When selecting the location for the Saveris base, take into account the following points: • The Saveris base must be on a level, non-slip surface. •... -
Page 68: Wall Mounting Of Data Loggers
6 Commissioning 6.10.3 Wall mounting of data loggers Wall mounting of T1/T1D/T2/T2D/Pt/PtD/H4D radio 6.10.3.1 data loggers When selecting the location, take into account the following points: • The range of the radio data logger must not be exceeded. • Attach the radio data logger in such a way that the readings cannot be falsified, e.g. - Page 69 6 Commissioning Push the radio data logger onto the wall bracket until it clicks into place. The Saveris T1/T1D/T2/T2D/Pt/PtD/H4D radioi data loggers can be protected against impact or high-pressure cleaning with the Saveris protective housing (order no. 0572 0200). The two halves of the protective housing are force fitted together, even if the screw connection has already been loosened.
-
Page 70: Wall Mounting Of Testo Saveris 2 H2 Wlan Data Loggers
6 Commissioning Wall mounting of testo Saveris 2 H2 WLAN data 6.10.3.2 loggers The wall bracket ensures that the WLAN data logger is kept securely in place. Mounting materials are not included in the scope of delivery. Select appropriate mounting materials according to the required mounting location. - Page 71 The maximum range of the reader in free field is at most 30 metres (Bluetooth ® • The BT Gateway for testo 182 may only be operated inside buildings (protection class IP20). Wall mounting Make sure that the USB wireless ...
-
Page 72: Removing Components From The Wall Bracket
6 Commissioning Removing components from the wall bracket 6.10.3.4 Using a narrow slotted screwdriver, unlock the data logger on the wall bracket Remove data logger from the wall bracket by moving upwards as shown. 6.10.4 Checking the measurement system again Perform another test run on the measurement system;... -
Page 73: Performing Test Run
6 Commissioning 6.11 Performing test run The test run must be performed to ensure flawless operation of the measurement system. 6.11.1 Checking system availability Wait for the first connection between the Saveris base and the data loggers to check the system availability. In the navigation area click on System. -
Page 74: Performing System Test
Additional lines and signature line appear on the printout as defined in the software in the System main menu. A Saveris base backup is recommended after a successful system test, see section 7.1.2 testo Saveris base backup. Only for mobile monitoring... -
Page 75: Maintenance
7 Maintenance 7 Maintenance Data backup Creating backup 7.1.1 Automatic backup of the Saveris data 7.1.1.1 Backup settings function enables automatic cross-project backup of the readings which are in the database on a daily basis. The backup files can be imported into a new project using the Restore database function. -
Page 76: Testo Saveris Base Backup
7 Maintenance Select destination directory. Name file. Click on Save. testo Saveris base backup 7.1.2 Saveris base is started up and connected to the PC. Launch testo startup wizard. Enter IP address of the Saveris base. Projects [Base backup] Click on the tab. -
Page 77: Checking The Database Capacity
2 minutes, then the database can save data for much longer than ten years in this configuration. • Since the testo Saveris software does not generate an alarm when the database is full, the capacity of the database should be checked Projects... - Page 78 7 Maintenance Database backup Creates a backup file for all projects. Administrator rights are required and the directory where the backup file is to be saved must be enabled for the network service. Restore database Loads the previously saved backup file and thus enables access to the saved project data.
- Page 79 7 Maintenance System Security menu Menu function Description Permissions Limits zone access to certain user accounts. Audit trail Display, save or export audit trail file. Hash code Generates a hash code Creates a vi2 file for each data logger with Raw data export all measurement data from the Saveris base (not from the database) for verification...
-
Page 80: Replacing Components
If the Saveris base is replaced, a new project must be created. If necessary, contact our support team. Deleting components 7.3.1 Under Start All programs | Testo, click on Testo Saveris startup wizard. The welcome dialogue for the startup wizard is displayed. [Next >]. -
Page 81: Adding New Components
7 Maintenance Click on [De-register component]. De-register component dialogue is displayed. Activate the checkbox in front of the component that needs to be de- registered from the system. Before deleting a Saveris router, you should assign the assigned Saveris radio data loggers directly to the Saveris base to ensure data availability. - Page 82 7 Maintenance Register new Saveris radio data logger on the Saveris base. Launch testo Saveris startup wizard. The startup wizard launches. [Next >]. Click on Commission new probedialogue is displayed. [Next >]. Leave default setting and click on ...
- Page 83 7 Maintenance To distribute the Saveris radio data loggers already registered on the system to stationary or mobile zones (for Saveris mobile) according to their purpose: click on [Add stationary zone] [Add mobile zone]. Open the selection list via the button and select the zone which the Saveris WiFi data logger should be assigned to.
- Page 84 7 Maintenance Click on [Next >]. If a Saveris router is registered on the Saveris base, the configuration of the connection type for the Saveris radio data loggers is shown. If you have not registered a Saveris router, continue as from step 17. Click in the Connection type cell of the Saveris radio data logger which...
-
Page 85: Re-Registering Components
Register new data logger on the Saveris base. Launch testo Saveris startup wizard. The startup wizard launches. -
Page 86: Calibration And Adjustment
Saveris software. Ensure that an external humidity probe always remains attached to the Saveris radio or Saveris Ethernet data logger with which it was adjusted. Does not concern the testo Saveris 2 H2 data loggers. External calibration and adjustment 7.4.2 Advantages: accuracy, through separate measurement as per a suitable calibration standard, e.g. -
Page 87: Changing Batteries
7 Maintenance This involves the Saveris data logger removed from the system not being replaced and no measurement data being recorded during the calibration and adjustment. Press the connect key on the Saveris data logger once to enforce a final data transmission. Send the Saveris data logger to the calibration laboratory, without removing it as a component in the startup wizard. -
Page 88: Changing The Saveris Radio Data Logger Batteries
3 years with Energizer batteries L91 photo lithium for freezer applications (for operation below -10°C). You can check the status of the Saveris data logger’s batteries via the testo Saveris software. To do this, select the Saveris data logger you would like to test under System radio data logger. - Page 89 7 Maintenance Undo screws on the rear of the Saveris data logger. Remove housing cover of the Saveris data logger Change batteries Ensure that you insert the batteries correctly. The correct polarity is illustrated in the respective battery compartment. Place housing cover on the housing of the Saveris data logger. Screw cover tightly onto the housing.
-
Page 90: Changing The Saveris Ethernet Data Logger / Saveris Analog Coupler Batteries
7 Maintenance Changing the Saveris Ethernet data logger / 7.5.2.1 Saveris analog coupler batteries The batteries in the Saveris Ethernet data loggers and the Saveris analog couplers are wearing parts which have to be replaced after approx. 2 years. In the event of a power failure, data loss cannot be ruled out for all components. -
Page 91: Update
If the control switch is not actuated through the cover, the component cannot be operated. Update • To make the most of the performance of the testo Saveris measurement data monitoring system, the system should be updated regularly. • Software and firmware updates should always be carried out together. -
Page 92: Uninstalling Software
7.6.1.1 In Windows, switch to System control Programs and functions. Programs and functions, click on Testo Saveris Professional server. Right mouse click and select Uninstall. Confirm dialogue window with Yes. The software is uninstalled Restart the PC. Installing software 7.6.1.2... -
Page 93: Performing Firmware System Update
Saveris base's type plate Firmware system update V1.X valid for testo Saveris systems with Saveris base order no. 0572 0120, 0572 0121, 0572 0160, 0572 0161 Firmware system update V2.X valid for testo Saveris systems with base order no. - Page 94 7 Maintenance • You must acknowledge all outstanding alarms before a firmware system update. • ATTENTION: During the firmware update process, never disconnect the power supply/network supply or the PC connection. • During the update, measurements, data storage and data communication are continued so there is no data loss.
-
Page 95: Carrying Out A Testo Saveris Cockpit Unit Firmware Update
After the system update, the new firmware version is shown for each component in the Saveris software under the System menu item. The firmware version view is only updated when the software is restarted. Carrying out a testo Saveris cockpit unit 7.6.3 firmware update •... - Page 96 7 Maintenance Open Windows ® Explorer and click on FWUPDATE. Remove the file included under FWUPDATE. Switch to the destination directory where you saved the new firmware file you downloaded. Copy the new firmware file of the Saveris cockpit unit into the FWUPDATE directory.
-
Page 97: Technical Data
8 Technical data 8 Technical data testo Saveris base Feature Value Memory 40,000 values per channel (total max. 18,000,000 values) Dimensions 225 x 150 x 49 mm Weight Approx. 1510 g Protection class IP42 Housing material Die-cast zinc / plastic Radio frequency 868 MHz / 2.4 GHz... -
Page 98: Radio Data Loggers For Testo Saveris
8 Technical data Radio data loggers for testo Saveris General 8.2.1 The technical data specified in the following table are valid for all Saveris radio data loggers. Special data for the individual data logger types can be found in the following sections. -
Page 99: Testo Saveris T2 / T2D
Value Protection class IP68 Conformity with standards DIN EN 12830 Operating temperature -35 to +50°C testo Saveris T2 / T2D 8.2.3 Saveris radio data logger with external probe connection and internal NTC, door contact. Feature Value Probe type (internal) Measuring range (internal) -35 to +50°C... -
Page 100: Testo Saveris T3 / T3D
8 Technical data testo Saveris T3 / T3D 8.2.4 2-channel radio data logger with two external TC probe connections (TC characteristics can be selected). Feature Value Probe type Measuring range TC type J -100 to +750°C TC type K -195 to +1350°C TC type S 0 to +1760°C... -
Page 101: Testo Saveris H3 / H3D
Resolution 0.01°C Connection 1 x Pt100 via mini-DIN socket Protection class IP 68 Operating temperature -20 to +50°C testo Saveris H3 / H3D 8.2.6 Humidity radio data logger Feature Value Probe type Humidity sensor 0 to 100% RH Measuring range -20 to +50°C... -
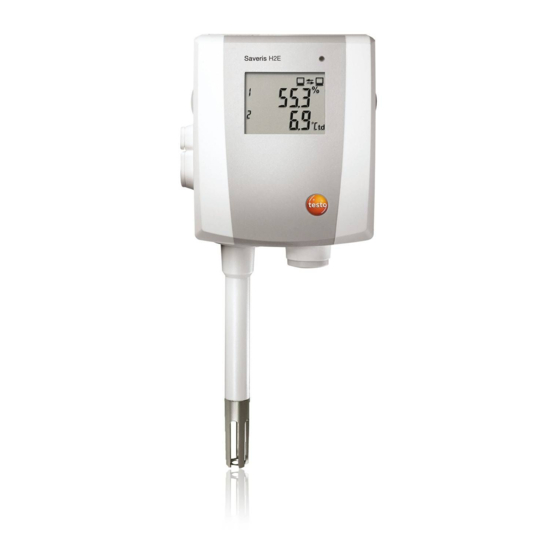
Page 102: Testo Saveris H2D
Protection class IP 54 Weight Approx. 254 g Connection 1 x humidity/temperature probe (∅ 12 mm or ∅ 4 mm) via mini-DIN socket testo Saveris 2 H2 8.2.9 WLAN data logger Feature Value Sensor type 1 x NTC / humidity external... - Page 103 95 x 75 x 30.5 mm Weight (including batteries) Approx. 240 g EN 12830-compliant Door contact Wall bracket Included in the scope of delivery External probes (digital) for testo Saveris 2 H2 0572 2162 0572 2163 0572 2164 0572 2165 Feature Measurement °C/°F...
-
Page 104: Ethernet Data Loggers For Testo Saveris
17.2 g 23.8 g 17.4 g 40.8 g Ethernet data loggers for testo Saveris General 8.3.1 The technical data specified in the following table are valid for all Saveris Ethernet data loggers. Special data for the individual data logger types can be found in the following sections. -
Page 105: Testo Saveris Pte
8 Technical data testo Saveris PtE 8.3.2 Ethernet data logger with external Pt100 probe connection. Feature Value Probe type Pt100 Measuring range -200 to +600°C Accuracy ±0.1°C (0 to +60°C) ±0.2°C (-100 to +200°C) ± 0.5°C (remaining measuring range) at 25°C Resolution 0.01°C... -
Page 106: Testo Saveris H4E
8 Technical data testo Saveris H4E 8.3.4 Humidity Ethernet data logger Feature Value Probe type Humidity sensor Measuring range 0 to 100% RH -20 to +70°C Accuracy See external probe ±0.2°C Resolution 0.1% / 0.1°Ctd 0.1°C Protection class IP 54 Weight Approx. -
Page 107: Testo Saveris T4E
8 Technical data testo Saveris T4E 8.3.6 4-channel Ethernet data logger with 4 external TC probe connections. Feature Value Probe type Measuring range TC type S 0 to +1760°C TC type T -200 to +400°C TC type J -100 to +750°C TC type K -195 to +1350°C... -
Page 108: Testo Saveris H1E
±0.03% RH/K ±1 digit Resolution 0.1% RH / 0.1°Ctd 0.1°C Connection Mini-DIN service interface is accessible externally Weight Approx. 230 g testo Saveris H1E 8.3.8 Humidity Ethernet data logger 1% Feature Value Probe type Humidity sensor Measuring range 0 to 100% RH -20 to +70°C... -
Page 109: Analog Couplers For Testo Saveris
8 Technical data Analog couplers for testo Saveris Saveris wireless analog coupler U1 8.4.1 Feature Value Measuring range 2-wire: 4 to 20 mA 4-wire: 0/4 to 20 mA, 0 to 1/5/10 V Accuracy / resolution (max. Current accuracy: ± 0.03 mA (min. 0.75 µA / 15 bit / typ. -
Page 110: Saveris Ethernet Analog Coupler U1E
8 Technical data Saveris Ethernet analog coupler U1E 8.4.2 Feature Value Measuring range 2-wire: 4 to 20 mA 4-wire: 0/4 to 20 mA, 0 to 1/5/10 V Accuracy / resolution (max. Current accuracy: ± 0.03 mA (min. 0.75 µA / 15 bit / typ. -
Page 111: Transport Data Loggers For Testo Saveris
8 Technical data Transport data loggers for testo Saveris testo 182 – BT transport data logger 8.5.1 Feature Value Measuring range -30°C to +50°C Accuracy ± 0.5°C Resolution 0.1°C Sensor type Digital temperature sensor (semi-conductor basis) Measurement channels 1 (internal) Measurement parameters Temperature (°C, °F) - Page 112 8 Technical data Feature Value Probe type T1, T2, T3: internal NTC temperature sensor T4: internal PT1000 temperature sensor Measurement channels 1 internal Measurement Temperature [°C, °F] parameters [unit] Measuring range T1, T2, T3: -35 to 70°C T4: -80 to 70°C Accuracy T1, T2, T3: ±0.5 K T4: ±0.8 K (-80 to -35.1°C), ±0.5 K (-35.0 to 70°C)
-
Page 113: Testo Saveris Router
ISO 17025, RTCA/DO-160G Probe type T1, T2, T3: internal NTC temperature sensor T4: internal PT1000 temperature sensor testo Saveris router Feature Value Housing dimensions (W x H 80 x 100 x 38 mm x D) -
Page 114: Testo Saveris Converter
8 Technical data testo Saveris converter Feature Value Housing dimensions (W x H 80 x 100 x 35 mm x D) Antenna length 81 mm Weight Approx. 190 g Power supply 6.3 V DC mains unit; alternatively via 24 V AC/DC plug-in/screw terminals, PoE, power consumption <... -
Page 115: Bt Gateway For Testo 182
Radio, Ethernet Number of radio probes Max. 100 Radio frequency 868 MHz Wall bracket Included BT Gateway for testo 182 Feature Value Housing material PC ABS Dimensions (W x H x D) Approx. 95 x 68 x 48 mm Weight... -
Page 116: Testo Saveris Cockpit Unit
-30 to +65°C Storage temperature -40 to +85°C Display Graphical LCD Interfaces USB, radio, infrared for Testo printers Number of radio probes Max. 2 zones each with 4 radio probes (max. 32 channels) Mounting Wall bracket with sucker and telescopic... - Page 120 Testo SE & Co. KGaA Testo-Strasse 1 D-79853 Lenzkirch Germany Phone: +49 7653 681-0 Fax: +49 7653 681-7699 Email: info@testo.de www.testo.de 0971 2503 en 02 V04.6-SP1...
Need help?
Do you have a question about the Saveris Series and is the answer not in the manual?
Questions and answers