
Subscribe to Our Youtube Channel
Related Manuals for Den-Sin C-150D


Summary of Contents for Den-Sin C-150D
- Page 1 C-150-200D DIESEL POWERED HEAVY DUTY COLD WATER HIGH PRESSURE CLEANER USER GUIDE & SPARE PARTS MANUAL www.densin.com...
-
Page 2: Introductions
This document or part of it may not be photocopied, or in any other way reproduced, or translated to other languages without the prior written consent of DEN-SIN. This machine is a High Pressure Cleaner producing water jet under high-pressure, which is why severe injuries can occur if the safety precautions are not observed. -
Page 3: Table Of Contents
Pump spare-parts kit ......................21 Un-loader valve assembly C-150D ..................22 Unloader valve assembly spare-parts list ................22 Repair kit Unloader valve C-150D ..................24 Un-loader valve assembly C-200D ..................25 Un-loader valve assembly C-200D spare-parts list ............. 25 Repair kit Unloader valve ....................27 Safety valve assembly C-200D ................... -
Page 4: Getting Acquainted With Your High Pressure Cleaner
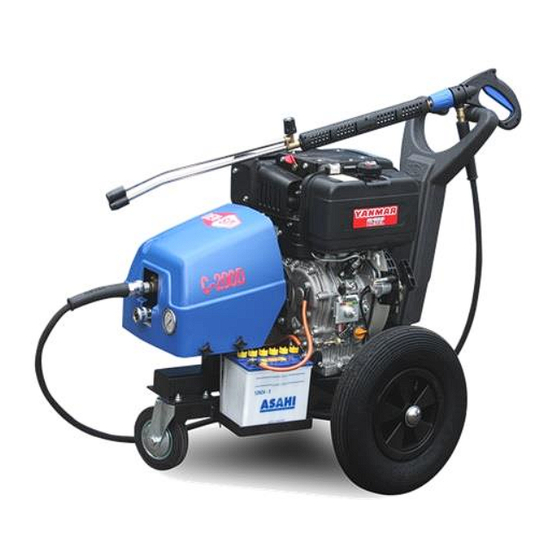
1. Getting acquainted with your High Pressure Cleaner Fast and efficient cleaning The DEN-SIN series of High Pressure Cleaners C-150D & C-200D enables you to get more cleaning done in less time, fully independent of power supply. This DEN-SIN High Pressure Cleaner offers you high performance yet a compact design. The compact design enables the machines to be agile within inconvenient places even at staircases, and the high performance gives you the opportunity to solve an array of cleaning tasks. -
Page 5: Unpacking
1. Getting acquainted with your High Pressure Cleaner Unpacking Remove the High Pressure Cleaner and its accessories from the packing material. For transport and packing reasons some accessories may be supplied disassembled. Make sure all components are present: High-pressure machine itself ... -
Page 6: Operations
12) When pausing during operation turned off the main switch of the machine and ensures that the trigger/gun is locked. 13) Only use high-pressure hoses, connections and nozzles specified by DEN-SIN. 14) IMPORTANT – Do not use the machine in a possible explosive environment in accordance with EN-50014. -
Page 7: Safety And Protection Information
2. Safety and Protection information 2. Safety and protection information General safety & application guidelines 1) It is not allowed to clean asbestos containing surfaces with high-pressure, unless using special equipment. 2) Persons under the influence of alcohol, drugs or medicine should not operate the machine. -
Page 8: Important Medical Information
Inform the doctor of the cause of the injury. Show this card to the doctor. DEN-SIN -a division of Nilfisk-Advance Pte Ltd. 17 Link Road, Singapore 619034 Tel: +65 6268 1006 Fax: +65 62684916 MEDICAL ALERT NOTE TO PHYSICIAN... -
Page 9: Safety Precautions
2. Safety and Protection information Safety precautions The following protective clothing and devices should be worn both by personnel operating the water blaster system and equipment and by those working nearby: WARNING Eye protection- Operators must wear visors and goggles to guard against spray and flying debris. -
Page 10: Maintenance And Troubleshooting
3. Maintenance and Troubleshooting 3. Maintenance and troubleshooting Maintenance Subject Matter / Procedure Lubrication Oil renewal of the pump, gearbox and engine crankcase is to be completed the first time after no more than 50 hours of use. Oil renewal is hereafter to be completed in every 500 hours of use. Renewal of oil in pump: Turn off the High Pressure Cleaner. -
Page 11: Troubleshooting
3. Maintenance and Troubleshooting Troubleshooting Symptom Cause and Rectification The engine will not No fuel. start / run. Refuel the engine (For any further, refer to the separately supplied engine manual. The strain filter is clogged or the water supply from the tap is The pressure drops and the High insufficient. - Page 12 3. Maintenance and Troubleshooting (Continued) Symptom Cause and Rectification Noisiness The pump sucks air. One or more valve springs are broken or down. Extraneous matter in the valves. Crankcase or motor bearings worn out. Inspect the low-pressure supply. Replace springs. Clean the valves. Replace the bearings.
-
Page 13: Service Instructions
3. Maintenance and Troubleshooting Service instructions Detach the high pressure hose, dump back hose, inlet hose, safety valve, and parts on the pump head before serving the pump. (Please refer to Pump assembly (Page 17) unless otherwise stated.) Servicing the valves: 1. - Page 14 3. Maintenance and Troubleshooting 4. If the seal assemblies (Pos: 30~33) are in the head (Pos: 36) use the reversible pliers to grab the seal retainer on the outside ring, twist the retainer in either direction and lift out. 5. Pull out the guide ring (Pos: 31) with your finger. 6.
- Page 15 3. Maintenance and Troubleshooting Pump head (Pos: 36) to drive end (Pos: 9) Installation: 1. Turn the crankshaft to align the plungers as shown. 2. Place the head evenly onto the plungers and push it until it makes contact with the drive end of the pump.
-
Page 16: Available Accessories
4. Spare Part List 4. Available accessories Accessories part no.: Chemical injector. 700550021 Rotary brush. 700550462 Foam injector 700550156 Foam lance. 700550464 Foam sprayer. 700550463 Extension hose with quick couplings. from 10 - 50 m Please inquire Industrial drain cleaner (1 front, 3 rear jets). 700550508 Container for sandblasting grid, including regulator. -
Page 17: Chassis Assembly
4. Spare Part List Chassis assembly C-150-200D Page 16... -
Page 18: Chassis Assembly Spare-Parts List
4. Spare Part List Chassis assembly spare-parts list Pos: Part no.: Qty.: Description: 700530283 Engine 6Hp recoil start C-150D 700530087 Engine 10Hp electric start C-200D 700520128 Cabinet 700510008 Lock nut 700520521 Castor wheel bracket 700510041 Screw 700510053 Rubber mount 700520466... -
Page 19: Gear Box Assembly
4. Spare Part List Gear box assembly Gear-box assembly spare-parts list Pos: Part no.: Qty.: Description: Oil sight glass Filler plug 3/8” Snap ring Ø40 700021414 Bearing Gear wheel, engine side Screw Flange for pump 700540316 Dowty seal M8 Screw Gasket Gearwheel, pump side 700505214... -
Page 20: Pump Assembly
4. Spare Part List Pump assembly C-150-200D Page 19... -
Page 21: Pump Assembly Spare-Parts List
Bearing 700560055 Snap ring 700560056 Crank shaft C-150D 700560058 Crank shaft C-200D 700560066 Key for Ø24mm Shaft Kit C Seal 700560062 Pump head pre-assembly (Ø18) 1-47 700560002 Pump complete for C-150D 1-47 700560003 Pump complete for C-200D C-150-200D Page 20... -
Page 22: Pump Spare-Parts Kit
4. Spare Part List Pump spare-parts kit Part no.:/ Kit description Pos: Qty.: Individual components Part no.: Kit A – 700560004 Complete valve Pump Valves Kit O-ring (1 SET) Kit B – 700560008 Pistons (Ø18) Piston Ø18 (1 SET) Kit C – 700560011 O-ring Oil seals Oil Seal... -
Page 23: Un-Loader Valve Assembly C-150D
4. Spare Part List Un-loader valve assembly C-150D C-150-200D Page 22... - Page 24 4. Spare Part List Unloader valve assembly spare-parts list Pos: Part no.: Qty.: Description: Valve Housing Seat Kit E Shutter Unloader Spacer O-Ring Anti-Extrusion Ring Kit E O-Ring O-Ring Piston Coupling O-Ring Kit E Anti-Extrusion Ring Adjustable Piston Spring Holder Plate Spring Locking Nut Regulation Nut...
-
Page 25: Repair Kit Unloader Valve C-150D
4. Spare Part List Repair kit Unloader valve C-150D Part no.:/ Kit description Pos: Qty.: Description Seat Shutter Unloader O-Ring Anti-Extrusion Ring O-Ring Kit E - 700540991 (Unloader Valve Seal Kit) O-Ring O-Ring Anti-Extrusion Ring O-Ring O-Ring C-150-200D Page 24... -
Page 26: Un-Loader Valve Assembly C-200D
4. Spare Part List Un-loader valve assembly C-200D Safety Valve Inlet C-150-200D Page 25... - Page 27 4. Spare Part List Un-loader valve assembly C-200D spare-parts list Pos: Part no.: Qty.: Description: Valve Housing Seat Kit E Shutter Unloader Spacer O-Ring Anti-Extrusion Ring Kit E O-Ring O-Ring Piston Coupling O-Ring Kit E Anti-Extrusion Ring Adjustable Piston Spring Holder Plate Spring Locking Nut Regulation Nut...
-
Page 28: Repair Kit Unloader Valve
4. Spare Part List Repair kit Unloader valve Part no.:/ Kit description Pos: Qty.: Description Seat Shutter Unloader O-Ring Anti-Extrusion Ring O-Ring Kit E - 700540991 (Unloader Valve Seal Kit) O-Ring O-Ring Anti-Extrusion Ring O-Ring O-Ring Safety valve assembly C-200D Safety valve assembly spare-parts list C-200D Pos: Part no.:... -
Page 29: Lance Assembly
4. Spare Part List Lance assembly Lance assembly spare-parts list Pos: Part no.: Qty.: Description: 700551473 Double Barrel Lance Complete + Noz15045 C-150D 700551474 Double Barrel Lance Complete + Noz1505 C-200D 700550077 Nozzle Guard Double 700550015 Nozzle 15045 C-150D 700550056... -
Page 30: Trigger Gun Assembly
4. Spare Part List Trigger gun assembly Trigger gun assembly spare-parts list Pos: Part no.: Qty.: Description: Body Anti Extrusion Ring O-Ring Washer Kit F Pin Press Sphere Seat Sphere 5/16 Spring S.S Kit F O-Ring Plug Pipe Coupling G1/4F Outlet SW Top Bushing O-Ring Anti Extrusion Ring... - Page 31 4. Spare Part List Trigger Safety Lock Lever Pivot D4x22 Lever Pivot D5x33 Right Trigger Cover Right Label Left Trigger Cover Left Label Screw 700551522 Quick Coupling Female Complete 1-30 700551511 Trigger Gun Complete Trigger Gun Repair Kits Part no.:/ Kit description Pos: Qty.: Individual components Part no.:...
-
Page 32: Recommended Spare-Parts
For Machine: Valve Pistons Kit Oil Seal Water Seal Complete C-150D 700560004 700560008 700560011 700560009 C-200D 700560004 700560008... -
Page 33: Declaration And Warranty
Accessories or equipment furnished by DEN-SIN but manufactured by others, shall carry the warranty that its manufacturer has conveyed to DEN-SIN, and which may be passed on to the purchaser. The original warranty period of any article, which has been repaired or replaced by DEN-SIN, shall not thereby be extended. -
Page 34: Spare Parts Request Form
6. Spare Parts Request Form 6. Spare Parts Request Form Company Name: Delivery Address: Country: Postal Code: Contact Name: Contact Number: Fax Number: Mobile Number: Email: Part Number Description QTY Machine Model or Serial Number Special Instructions: C-150-200D Page 33... -
Page 35: Maintenance Log Book
7. Maintenance Log Book 7. Maintenance Log Book This maintenance logbook will assist you to keep track on the servicing of your equipment. Please record after service your machine. Purchase date of the machine: Service Description Date Remarks C-150-200D Page 34...
Need help?
Do you have a question about the C-150D and is the answer not in the manual?
Questions and answers