
Related Manuals for Den-Sin MERMAID E500-S


Summary of Contents for Den-Sin MERMAID E500-S
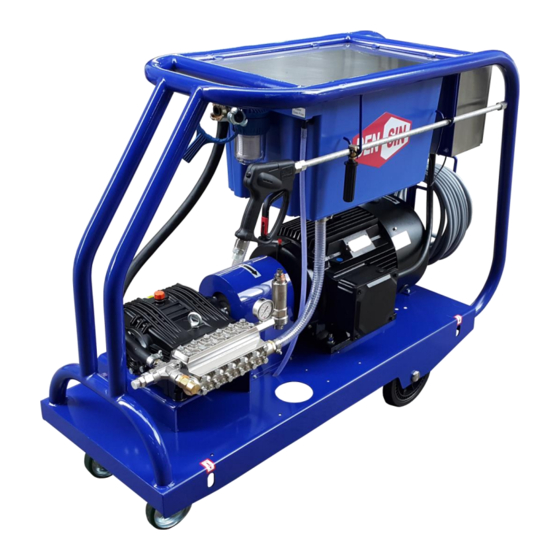
- Page 1 Electrical Powered Heavy Duty Cold Water High HIGH PRESSURE CLEANER USER GUIDE & SPARE PARTS MANUAL Original Instruction www.densin.com...
-
Page 2: Introductions
Introductions Congratulations on your purchase of the DEN-SIN MERMAID E500-S Water Blaster. DEN-SIN makes no warranty of any kind with regards to this material, including, but not limited to, the implied warranties of merchantability and fitness for a particular purpose. - Page 3 This machine is designed to deliver clean water or non-aggressive water. Using any other water source or sea water will damage the pump unless authorized in writing by Den-Sin. Prior to beginning work, all equipment must be inspected to ensure that it is in safe working condition.
-
Page 4: Table Of Contents
Rotating Nozzle Type 2: Barracuda ..................46 Rotating nozzle assembly spares-parts list ................46 Sand and & slurry blasting kit ....................48 El-box assembly spare-parts list .................... 50 5. Wiring diagram (380~480V, 50/60Hz) ..............51 6. Warranty ....................... 52 Page 3 of 52 MERMAID E500-S STD08... -
Page 5: Fast And Efficient Cleaning
The DEN-SIN Mermaid E500-I enables you to get more cleaning done in less time. This DEN-SIN cold water Blaster offers you high performance and a design optimized for heavy duty use. The design of the surrounding frame safeguard the vital parts during transport and use, and the high performance gives you the opportunity to solve an array of blasting tasks. -
Page 6: Applications
Remove the Water Blaster and its accessories from the packing material, if any. For transport and packing reasons some accessories are supplied disassembled. Standard items: Trigger Gun High Pressure Machine Manual/Spares Parts Nozzle High Pressure Hose Water Coupling MERMAID E500-S STD08 Page 5 of 52... -
Page 7: Sv- Safety Valve Operation
Unloader valve system is a system to regulate the pressure for the machine. The setting of the unloader valve system is factory set. Do not try to reset the setting. There should about 5% water dump back into the water tank if the nozzle is use correctly Page 6 of 52 MERMAID E500-S STD08... -
Page 8: Hose Type
Always switch off and depressurize the machine before CAUTION attach or dettached the hose to the machine. Machine ID Plate The information contained in this user guide is subject to change without notice. NOTE Page 7 of 52 MERMAID E500-S STD08... -
Page 9: Machine Highlights
Pressure Gauge Hot Surface Indication HP Water Outlet HOT SURFACE is used to caution user of hot surface that may cause injuries. Any maintenance work to be done after the surfaces had cool down. Page 8 of 52 MERMAID E500-S STD08... - Page 10 Barrigate the area of working zone to prevent people entering the working zone. 2. When equipment is clear, remove all locks. Turn on the main switch, unlock the trigger gun lock and start the normal operating procedure to start using the high pressure machine. Page 9 of 52 MERMAID E500-S STD08...
- Page 11 This is to ensure a smooth by-pass operation, and prevents any unwanted pressure spikes when the gun is shut. See pg. 30 for proper setting/ adjustment of valve when required. Safety Valve: Tempered Proof Sealant Page 10 of 52 MERMAID E500-S STD08...
- Page 12 1. Getting acquainted with your Water Blaster Electrical Components To prevent unauthorized usage or sabotage, the electrical box & main switch is equipped with locks. Locks Lock Page 11 of 52 MERMAID E500-S STD08...
-
Page 13: Machine Installation / Setup
Step 5. Turn on the water supply tap and fill the water tank with water. When water tank is full, the water will be cut off. Step 6. Connect the main power cord to a grounded 3-phase main power supply. Page 12 of 52 MERMAID E500-S STD08... - Page 14 Refer to the ID-plate located at the electrical box or frame. Do not let the machine recycle the water (running with Spray-gun CAUTION trigger not activated) for more than 10 minutes; this can cause serious damage to the seals Page 13 of 52 MERMAID E500-S STD08...
-
Page 15: Safety And Protection Information
Caution must be observe when working with trigger gun . Do not work continuously without rest in between jobs. Release any residual pressure from the gun when the machine is shut down CAUTION Page 14 of 52 MERMAID E500-S STD08... - Page 16 Inform the doctor of the cause of the injury. Show this card to the doctor. DEN-SIN - a division of Nilfisk Pte Ltd. No.5 Tuas Ave 2, Singapore 639445 Tel: +65 6268 1006 Fax: +65 62684916 MEDICAL ALERT...
-
Page 17: Safety Devices
6) The front castor can be locked in place to prevent the machine from rolling from an incline surface of not more than 10 Castor Wheel with brake Stainless Steel Electrical Box Warning Pictogram Page 16 of 52 MERMAID E500-S STD08... -
Page 18: Transporting The Machine
6) Check the travel path is clear. 7) Ensure load is evenly distributed. Do not lift the machine from the frame. Only trained personal is require to do the lifting. Make sure the load evenly distributed. WARNING Page 17 of 52 MERMAID E500-S STD08... -
Page 19: Safety Precautions
Hose protection- Protect user from high pressure water injuries incase hose connection is loose. The following protective clothing and devices should be worn both by personnel operating the water blaster system and equipment and by those working nearby. WARNING Page 18 of 52 MERMAID E500-S STD08... -
Page 20: Safe Use Of Machine Guidelines
13) When pausing during operation, turned off the main switch of the machine and ensures that the trigger/gun is locked. 14) Only use high-pressure hoses, connections and nozzles specified by DEN-SIN . 15) IMPORTANT – Do not use the machine in a possible explosive environment in accordance with EN-50014. -
Page 21: Safe Application Guidelines
• When laying hoses, handle them with care. Also, check each hose to be sure it is marked with the manufacturer's symbol, a serial number, and the maximum operating pressure. Only use high-pressure hoses, connections and nozzles specified by DEN-SIN. • Pad the hose at sharp corners or suspend it where necessary. -
Page 22: Maintenance And Troubleshooting
(Range 5-6bar) Cleaning of motor • Clean the motor fan cover. ( to • Clean the motor fan blade. ensure sufficient airflow ) Do NOT operate the machine with damaged or fan cover removed! Page 21 of 52 MERMAID E500-S STD08... -
Page 23: Machine Do`s And Don`ts
O-ring seals and maintaining correct seals preventing water leaks. pressure. Used oil must be properly disposed. Do not dispose used oil into the environment that will cause pollution to the environment. WARNING Page 22 of 52 MERMAID E500-S STD08... -
Page 24: Troubleshooting
For any further inconveniences, not mentioned in this user guide or any damages of the machine, we strongly suggest you to make contact with your dealer for the repair or possible replacement of any original spare-parts NOTE Page 23 of 52 MERMAID E500-S STD08... -
Page 25: Service Instructions
• head easily Mount the new plunger on the piston • guide. Attention! Do not damage the ring. Remove the head from the plunger use a • plastic hammer. Attention, head is heavy Page 24 of 52 MERMAID E500-S STD08... - Page 26 Turn in the piston nut with a torque • moment of 15 Nm • Turn screws in(1 & 4 in the middle) Fix the head pushing against the with torque of 50Nm. • crankcase Page 25 of 52 MERMAID E500-S STD08...
- Page 27 Reassemble the in reverse order. The M10 bolt (pos 48) must be tightened in an alternative and uniform way with a suitable torque wrench to the specified setting (page 30). Page 26 of 52 MERMAID E500-S STD08...
- Page 28 Reassemble the in reverse order and pay extra care to the orientation of the spacer (pos 17). The M10 bolt (pos 50) must be tightened in an alternative and uniform way with a suitable torque wrench to the specified setting (page 30). Page 27 of 52 MERMAID E500-S STD08...
- Page 29 Check “O” ring and packing, replace where necessary. Clean all the parts and replace the worn parts with the corresponding parts in the repair kit. Reassemble the in reverse order and pay extra care to the orientation of parts during assembly. Page 28 of 52 MERMAID E500-S STD08...
- Page 30 Reassemble the in reverse order. When reassembling the plungers, ensuring all parts are dry and free from dirt. Tighten the M13 nut (pos 16) with a suitable torque wrench to the specified setting in page 30. Page 29 of 52 MERMAID E500-S STD08...
- Page 31 Torque specification • Valve Cover Bolts ............. 50 Nm (5.0 kgm) (37 lbs.ft) Piston Nut ............... 15 Nm (1.5 kgm) (11 lbs.ft) Connecting Rod Screws ............... 30 Nm (3.0 kgm) (22 lbs.ft) Page 30 of 52 MERMAID E500-S STD08...
-
Page 32: Spare Parts List
4. Spare parts list 4. Spare parts list Main Chassis Assembly MERMAID E500-S STD08 Page 31 of 52... -
Page 33: Main Chassis Assembly Spare-Parts List
Ball Valve ½” (Water Drain) 700540270 Hose Nipple 1”-1/2” (Water Drain) 700530708 EL Box Complete E500 700540316 Dowty Seal M8 700510009 Bolt M8 x 16 Allen 700510005 Washer Flat M8 700510004 Locknut M8 700520121 Pipe Clamp MERMAID E500-S STD08 Page 32 of 52... -
Page 34: Motor & Pump Assembly
700520018 COUPLING HALF (PUMP) 700540319 NIPPLE 1/2" BSPP 700540056 DOWTY SEAL 1/2" 700540982 UNLOADER ASSEMBLY 700540270 HOSE NIPPLE 700550004 DOWTY SEAL 3/8" 700950014 HOSE 1” BLACK 700540345 NIPPLE 1/2"NPTM-3/8"BSPM 700540959 ADPATOR 3/8"-M-M-1/4"F SS MERMAID E500-S STD08 Page 33 of 52... - Page 35 BOLT 5/8" X 2 1/2" HEX 700510081 WASHER FLAT 18/38.5X 700510082 WASHER SPRING 5/8" 700510083 NUT 5/8" 700540261 ELBOW 1/2" NPT F-F 700510025 CONTRA BUT ½” 700540771 ELBOW 1/2” 700540264 HOSE CLIP 1” MERMAID E500-S STD08 Page 34 of 52...
-
Page 36: Filter Assembly
1/2" FILTER c/w 25 MESH 700520507 FILTER CARTRIDGE 1/2", 5" 700540100 NIPPLE 1/2 NPT - 1/2 BSPM 700540056 DOWTY SEAL 1/2" 700540987 Coupling Crawl ½” F End 700540986 COUPLING Crawl Hose End 3/4” Pump assembly MERMAID E500-S STD08 Page 35 of 52... -
Page 37: Pump Assembly Spare-Parts List
4. Spare parts list Pump assembly spare-parts list MERMAID E500-S STD08 Page 36 of 52... - Page 38 Oil Plug 700505163 Plug G1” Brass 700505164 Plug Brass 700505165 Pump Head 700505166 Oil Plug G1/2 700505167 Bolt M10x30 Pump assembly spare-parts list Pos: Part no.: Qty.: Description: 700505168 Bolt M10x35 700505071 Bolt M6x10 MERMAID E500-S STD08 Page 37 of 52...
-
Page 39: Pump Spares Kit List
(1 Kit for Complete Pump Repair) Brass Ring Kit 155(*) – 700505199 High Pressure Seal Kit Dia 16 Water Seal Kit Low Pressure Seal Kit Dia 16 (1 Kit for Complete Pump Repair) O-Ring Dia 36.14x41.36x2.62 MERMAID E500-S STD08 Page 38 of 52... -
Page 40: Un-Loader Valve Assembly
4. Spare parts list Un-loader valve assembly MERMAID E500-S STD08 Page 39 of 52... -
Page 41: Un-Loader Valve Assembly Spare-Parts List
Set Screw M4 Knob O-ring 3.53x7.52 4028 NBR 90 NERO 700540970 UNLOADER PRES.SHUTTER 700540971 UNLOADER PRES.SHUTTER SPRING Backup Washer 20.8 x 23.7 x T1.4 Fitting 1/2” 1-25 700540982 Un-loader Valve Complete 700540983 Complete Repair kit MERMAID E500-S STD08 Page 40 of 52... -
Page 42: Safety Valve Assembly
SPRING TENSIONAL SPRING HOLDER LOCK NUT M22 RETAINER RING 1-18 700540958 UNLOADER ASSEMBLY 720 Bar (BLACK SPRING) Safety valve assembly Repair kit Pos: Part no.: Qty.: Description: 700540961 REPAIR KIT SAFETY VALVE 720BAR MERMAID E500-S STD08 Page 41 of 52... -
Page 43: Trigger / Gun / Lance & Hose Assembly
Stem Seal + O-ring 700551233 Brass Spacer Ring 700551234 Spring, S.S. 700551235 Piston + seat 700551236 O-ring, Ni85 700551237 Back-up ring 700551238 Front Plug, M18x1.5 700551239 Parallel Pin, Ø6x25.8mm * Part for Trigger Repair Kit MERMAID E500-S STD08 Page 42 of 52... -
Page 44: Trigger / Gun/ Lance & Hose Assembly Spare-Parts List
Lance connection ½” male – 3/8” female BSPP 700550141, (1 SET) Lance pipe 1000mm Length (Standard) Lance Length 1000mm Bushing for Side Handle (Standard) Nozzle holder Side Handle complete Lance connection ½” male – 3/8” female BSPP MERMAID E500-S STD08 Page 43 of 52... -
Page 45: Rotating Nozzle Type 1
Rotating Nozzle Type 2: Rotating Nozzle Spare-parts list Pos: Part no.: Qty.: Description: 700551396 ROTATING NOZZLE 050 COMPLETE 60Hz Rotating Nozzle Repair Kit Pos: Part no.: Qty.: Description: 700551397 ROTATING NOZZLE REP KIT 050 60Hz Page 44 of 52 MERMAID E500-S STD08... - Page 46 Note: Do not point the lance at any person at any time. Ensure the rotating nozzle is pointing down before starting to blast. This will increase the life-span of the rotating nozzle. WARNING Page 45 of 52 MERMAID E500-S STD08...
-
Page 47: Rotating Nozzle Type 2: Barracuda
Multi Jet Seal, Shaft Small 700551156 Multi Jet Washer 700551184 Multi Jet Garter Spring 700551142 Multi Jet Spring 1-19 700551035 Rotating Nozzle, Barracuda 22kpsi 700551165 Multi Jet Springe (Optional) 700551107 Multi Jet Adaptor (For connecting to Gun) Page 46 of 52 MERMAID E500-S STD08... - Page 48 * Not Shown After every 20-40 hrs, the rotating nozzle must be flushed or refilled with Auto Transmission Fluid (ATF) *For Troubleshooting and Maintenance please refer to manual that comes with the Rotating Nozzle Page 47 of 52 MERMAID E500-S STD08...
-
Page 49: Sand And & Slurry Blasting Kit
High Pressure Water Nozzle 700550235 60HZ Nozzle Adaptor 700550242 Venturi Housing 700550232 O-Ring 700550295 Boron Carbide Nozzle 700550231 Dowty Seal 700540314 Nipple 700540149 700550484 - S/BLAST'G EQPT WB+NOZ0005 COMPLETE ( 60Hz ) • Page 48 of 52 MERMAID E500-S STD08... - Page 50 CAUTION !!!! : When servicing the Electrical Components Only a qualified electrical trained personal to service or perform any troubleshooting on the electrical control box. Improper connection may cause damage to the equipment or person using the machine. Page 49 of 52 MERMAID E500-S STD08...
-
Page 51: El-Box Assembly Spare-Parts List
700951506 Cable 4G10mm sq Grey 1-18 700530830 EL-Box STD Complete (380~480V 50/60Hz) Incoming/Motor Wire Pos: Part no.: Qty.: Description: 700951506 16.7m Cable 4G 10mm(Incoming) 700530329 1.3m Cable 7G 6mm (Motor to EL Box) Page 50 of 52 MERMAID E500-S STD08... -
Page 52: Wiring Diagram (380~480V, 50/60Hz)
5. Wiring diagram (380~480V, 50/60Hz 5. Wiring diagram (380~480V, 50/60Hz) Page 51 of 52 MERMAID E500-S STD08... -
Page 53: Warranty
Accessories or equipment furnished by DEN-SIN but manufactured by others, shall carry the warranty that its manufacturer has conveyed to DEN-SIN, and which may be passed on to the purchaser. The original warranty period of any article, which has been repaired or replaced by DEN-SIN, shall not thereby be extended.
Need help?
Do you have a question about the MERMAID E500-S and is the answer not in the manual?
Questions and answers