Table of Contents
Advertisement
TABLE OF CONTENTS
Safety Notices ...................................................................................................... 1
Introduction .......................................................................................................... 3
Testing Samples (Quick Start) ........................................................................................... 3
Features............................................................................................................................. 3
Keypad Definitions ............................................................................................................. 4
Power Key......................................................................................................................................... 4
Up and Down Arrow Keys ................................................................................................................. 4
Enter Key .......................................................................................................................................... 4
Escape Key ....................................................................................................................................... 4
Right and Left Arrow Keys ................................................................................................................ 4
Home Key ......................................................................................................................................... 4
Specifications..................................................................................................................... 5
Installation and Setup.......................................................................................... 7
Removing Shipping Screws ............................................................................................... 7
Unit Positioning .................................................................................................................. 7
Power Connection ............................................................................................................. 8
Printing Capabilities ........................................................................................................... 8
Startup .................................................................................................................. 9
Settings............................................................................................................... 11
Units................................................................................................................................. 12
Selecting a Language ...................................................................................................... 12
LCD Contrast ................................................................................................................... 13
TW Bias Access Code ..................................................................................................... 14
Output Options................................................................................................................. 14
Selecting Grain................................................................................................... 17
Measuring Moisture ........................................................................................... 19
Preparing To Measure Moisture ...................................................................................... 19
Loading the Hopper ......................................................................................................... 20
Grain Calibrations.............................................................................................. 23
Entering New Grain Calibrations ..................................................................................... 23
Modifying Grain Information............................................................................................. 24
Test Weight Bias.............................................................................................................. 24
Issue Number.................................................................................................................................. 25
Calibration Values (K1-K9).............................................................................................................. 26
GAC®500XT
11001-1435-200701
i
Advertisement
Table of Contents

Related Manuals for Dickey-John GAC 500XT


Summary of Contents for Dickey-John GAC 500XT
-
Page 1: Table Of Contents
TABLE OF CONTENTS Safety Notices ...................... 1 Introduction ......................3 Testing Samples (Quick Start) ................... 3 Features..........................3 Keypad Definitions ......................4 Power Key............................4 Up and Down Arrow Keys ......................... 4 Enter Key ............................4 Escape Key ............................4 Right and Left Arrow Keys ........................ - Page 2 TABLE OF CONTENTS Diagnostics ......................27 Cell Test .......................... 27 Null Test, 5KHz, and 2MHz Tests ....................28 Self Check Test ..........................28 Test Network ........................... 29 Temperature ........................30 Weight ..........................30 Weight Check ..........................31 Weight Table ........................... 32 Display Test........................
-
Page 3: Safety Notices
OPERATOR’S MANUAL SAFETY NOTICES Safety notices are one of the primary ways to call attention to potential hazards. This Safety Alert Symbol identifies important safety messages in this manual. When you see this symbol, carefully read the message that follows. Be alert to the possibility of personal injury or death. - Page 4 OPERATOR’S MANUAL 2 SAFETY NOTICES GAC®500XT 11001-1435-200701...
-
Page 5: Introduction
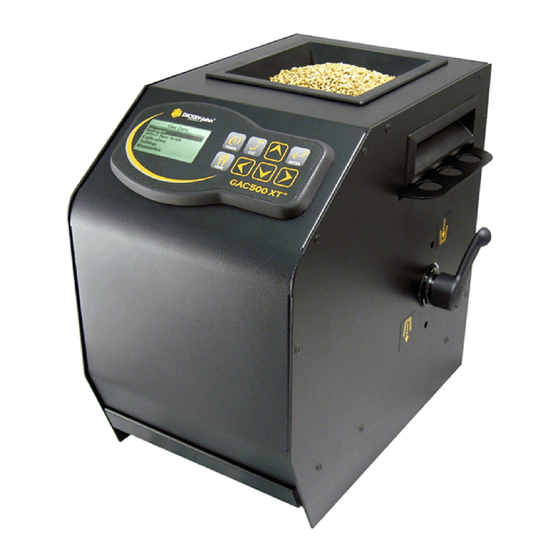
OPERATOR’S MANUAL INTRODUCTION ® The DICKEY-john Grain Analysis Computer GAC 500XT quickly tests grain and automatically calculates moisture content, temperature, and approximate test weight (density) of the sample. The unit measures empty cell characteristics, prompts for sample loading, tests the sample, and displays the results. -
Page 6: Keypad Definitions
OPERATOR’S MANUAL Figure 1 GAC500XT Display And Keypad POWER ENTER HOME POWER Power key KEYPAD DEFINITIONS POWER KEY Turns the unit ON and OFF. UP AND DOWN ARROW KEYS Up and Down Arrow keys The Up and Down Arrow keys are used to select menu items, increment/ decrement digits, or select characters. -
Page 7: Specifications
• Classes/types of grain or seed: calibration bulletins may be obtained through the DICKEY-john website (www.dickey-john.com) or by requesting a calibration bulletin at: DICKEY-john Corporation 5200 DICKEY-john Road... - Page 8 OPERATOR’S MANUAL 6 INTRODUCTION GAC®500XT 11001-1435-200701...
-
Page 9: Installation And Setup
After unpacking, inspect for damage that might have occurred during transit. Save all packing material until inspection is complete. If damage is found, immediately file a claim with the carrier. Also notify your DICKEY-john Sales Representative. REMOVING SHIPPING SCREWS Once the GAC500XT is placed in a level location, remove the shipping screws. -
Page 10: Power Connection
Power Plug (rear of GAC500XT) PRINTING CAPABILITIES The GAC500XT will print to a DICKEY-john Strip Printer PRTS (110v) and PRTSI (220v) in a column format, as illustrated in Figure 4 or any serial printer. For additional printer output information, refer to the SETTINGS section. -
Page 11: Startup
Press the Power key to turn on the unit. The Startup screen will appear (Figure 5) immediately followed by the Main Menu screen (Figure Figure 5 Startup Screen DICKEY-john Corp. GAC500 XT Figure 6 Main Menu Screen Corn Measure Select New Grain... - Page 12 OPERATOR’S MANUAL 10 STARTUP GAC®500XT 11001-1435-200701...
-
Page 13: Settings
OPERATOR’S MANUAL SETTINGS The GAC500XT settings can be customized to customer preferences by modifying: • Measurement units • Language • LCD contrast • Access code • Output options To change Setting preferences: 1. Highlight Settings on the Main screen using the Up or Down Arrow keys on the keypad. -
Page 14: Units
OPERATOR’S MANUAL Figure 8 Units Screen Units *English Metric SELECTING A LANGUAGE To change the Language settings: 1. Highlight LANGUAGE on the Settings screen using the Up or Down Arrow keys. 2. Press Enter to display the Language screen. The selected language is indicated with an asterisk (*) next to the label (Figure 3. - Page 15 OPERATOR’S MANUAL LANGUAGE STANDARD USED English, French, German, Italian ISO 8859-1 Portuguese, Swedish, Finnish, Spanish Czech/Slovak, Polish, Serbian/ ISO 8859-2 Croatian, Hungarian Greek ISO 8859-7 Turkey ISO 8859-9 Romanian ISO 8859-16 Russian, Bulgarian Windows 1251 NOTE: ESC key pressed at any time will abort any active operation The GAC default output from the printer port (Figure...
-
Page 16: Lcd Contrast
“0000”. Creating a new Access Code will ensure that only authorized personnel change the test weight bias. If the changed access code is lost, contact DICKEY-john Technical Support for assistance at 1-800-637-3302. To change the Test Weight Bias Access Code: 1. -
Page 17: Output Options
OPERATOR’S MANUAL Figure 12 Test Weight Bias Access Code Screen Settings TW Bias Access Code Enter Access Code 0 0 0 OUTPUT OPTIONS Output Options determines what information can be printed on the printer ticket. – Radix point: Can be modified from a period (.) to a comma (,) –... - Page 18 OPERATOR’S MANUAL 16 SETTINGS GAC®500XT 11001-1435-200701...
-
Page 19: Selecting Grain
OPERATOR’S MANUAL SELECTING GRAIN To select a new grain: 1. At the Main screen, select the SELECT NEW GRAIN option. 2. Press the Enter key to access the Select Grain screen (Figure 14). The current grain selection is displayed at the top of the list marked with an asterisk (*). - Page 20 OPERATOR’S MANUAL 18 SELECTING GRAIN GAC®500XT 11001-1435-200701...
-
Page 21: Measuring Moisture
OPERATOR’S MANUAL MEASURING MOISTURE The Main screen appears immediately after all startup self tests have been successfully completed and is the primary screen through which all other screens are accessed. PREPARING TO MEASURE MOISTURE 1. Confirm the grain selection is correct. The selected grain is displayed on the top of the Main screen (Figure 15). -
Page 22: Loading The Hopper
OPERATOR’S MANUAL 4. Press the Enter key to perform the EMPTY CELL TEST. A progress bar will appear on the screen. Pressing the Home or Escape key during the Empty Cell Test will abort the test. 5. Once the test has been performed, the unit will provide steps to load a grain sample (Figure 17). - Page 23 OPERATOR’S MANUAL 4. Once the grain has entered the cell, close the Grain Loader/Striker (push in to close) and press the Enter key. A message will appear on the display indicating the measurement is taking place (Figure 19). The status bar will indicate the progress of the grain measurement. Figure 19 Measurement Window Measuring...
- Page 24 OPERATOR’S MANUAL 22 MEASURING MOISTURE GAC®500XT 11001-1435-200701...
-
Page 25: Grain Calibrations
OPERATOR’S MANUAL GRAIN CALIBRATIONS ENTERING NEW GRAIN CALIBRATIONS 1. Select the CALIBRATION option from the Main screen by using the Up or Down Arrow keys. 2. Pressing the Enter key will display the Calibration screen (Figure 21). Figure 21 Calibration Screen Calibration *Corn Corn Hi Moist... -
Page 26: Modifying Grain Information
OPERATOR’S MANUAL MODIFYING GRAIN INFORMATION Modifications can be made to existing grain information. Information that can be modified includes: • Grain (Label) Name • Test Weight Bias • Issue Number • Calibration (K1-K9) Values GRAIN (LABEL) NAMES To change the Grain Name: 1. -
Page 27: Issue Number
An issue number can be modified to update a specific grain calibration or to enter a calibration for a new grain into the GAC. Updating the issues numbers are not required. Refer to the DICKEY-john website for the latest grain calibrations at www.dickey-john.com. -
Page 28: Calibration Values (K1-K9)
Co r n Issue 00307N CALIBRATION VALUES (K1-K9) Calibrations are published on the DICKEY-john website, located at www.dickey-john.com on an annual basis. To maintain current calibration values, these K numbers must be periodically updated. To change the Calibration Values: 1. Select the appropriate K number to be updated on the Grain Information screen. -
Page 29: Diagnostics
NOTE: Diagnostics screens are view only and are used for 2. Press the Enter key to display the Diagnostics screen (Figure 28). troubleshooting purposes. Figure 28 Contact DICKEY-john Technical Diagnostics Screen support for assistance at 1-800-637-3302. Diagnostics Cell Test Temperature... -
Page 30: Null Test, 5Khz, And 2Mhz Tests
CARE) and repeat testing once the cell is cleaned. If measurements are out of range after cleaning, contact your distributor or DICKEY-john Service Department at 1-800-637-3302. Outside of the U.S., contact DICKEY-john Europe at 00 33 (0) 1 41 19 21 80. Figure 31 Self Check Screen... -
Page 31: Test Network
OPERATOR’S MANUAL TEST NETWORK Ensure the cell is empty and in the upright position before performing the network test. Empty cell measurements will be taken. Ambient measurements are required to perform network calculations. Ensure an empty cell measurement is used prior to performing the D1 and D2 measurement. -
Page 32: Temperature
OPERATOR’S MANUAL 4. Once empty cell measurements are complete, the display will prompt for either a measurement or to repeat the empty cell test. Press the Enter key to measure D1 and D2, or the Right Arrow key to repeat empty cell measurements. -
Page 33: Weight Check
OPERATOR’S MANUAL Figure 36 Weight Screen Weight Weight Check Weight Table WEIGHT CHECK To access the Weight Check function: 1. Select the WEIGHT option from the Diagnostics screen. 2. Press the Enter key and a message will display advising to close the loader/striker and that the cell must be empty (Figure 37). -
Page 34: Weight Table
OPERATOR’S MANUAL Figure 39 Weight Check Screen - Grain Measurement Weight Check Grams 164.24 Counts: 33826 ENTER = Repeats WEIGHT TABLE The Weight Table is for diagnostic purposes only and is set during factory calibration. This information may be requested for troubleshooting purposes during a service call. -
Page 35: System Information
OPERATOR’S MANUAL Figure 41 Display Test Screen ............... -
Page 36: System Voltages
OPERATOR’S MANUAL SYSTEM VOLTAGES System Voltages provides GAC voltages useful for troubleshooting. To access the System Voltages screen: 1. Select the SYSTEM VOLTAGES option from the Diagnostics screen. 2. Press the Enter key and the System Voltages screen will display (Figure 43). -
Page 37: Troubleshooting
However, care must be taken when transporting the GAC500XT long distances or shipping the unit for service to the DICKEY-john Service Center. Failure to observe and comply with the following procedures for long distance shipping will result in the voidance of the GAC500XT warranty. -
Page 38: Error Codes
OPERATOR’S MANUAL ERROR CODES The GAC500XT contains a microprocessor to control the grain sample measurements and self-checks to determine the integrity of the internal electronics. If any limit is exceeded or malfunctions occur, an error code will display. ERROR 1 Probable Cause: 1. - Page 39 1. The unit has detected a software error. Corrective Action: 1. Contact DICKEY-john Service Department. ERROR 21 Probable Cause: 1. The measurement cell exceeded low limit. Corrective Action: 1. Repeat test. If error recurs, contact DICKEY-john Service Department. TROUBLESHOOTING 37 GAC®500XT 11001-1435-200701...
- Page 40 OPERATOR’S MANUAL ERROR 22 Probable Cause: 1. The measurement cell exceeded high limit. Corrective Action: 1. Repeat test. If error recurs, contact DICKEY-john Service Department. ERROR 23 Probable Cause: 1. The measurement cell weight is too low. Corrective Action: 1. Increase the sample size and repeat the test.
- Page 41 OPERATOR’S MANUAL ERROR 33 Probable Cause: 1. Cell count error is encountered. Corrective Action: 1. Contact DICKEY-john Service Department. ERROR 34 Probable Cause: 1. Grain calibration constants entry error. Corrective Action: 1. Verify and re-enter correct constants. ERROR 35 Probable Cause: 1.
- Page 42 1. Replace the power supply or mobile adapter. ERROR 41 Probable Cause: 1. Display voltage is too low. Corrective Action: 1. Contact DICKEY-john Service Department. ERROR 42 Probable Cause: 1. Display voltage is too high. Corrective Action: 1. Contact DICKEY-john Service Department.
-
Page 43: Replacement Parts
OPERATOR’S MANUAL ERROR 46 Probable Cause: 1. Negative cell voltage is too high. Corrective Action: 1. Contact DICKEY-john Service Department. REPLACEMENT PARTS Mobile Power Adapter 467950190 Wall Power Adapter 467950150 TROUBLESHOOTING 41 GAC®500XT 11001-1435-200701... - Page 44 OPERATOR’S MANUAL 42 TROUBLESHOOTING GAC®500XT 11001-1435-200701...
- Page 45 DICKEY-john WARRANTY DICKEY-john warrants to the original purchaser for use that, if any part of the product proves to be defective in material or workmanship within one year from date of original installation, and is returned to DICKEY-john within 30 days after such defect is discovered, DICKEY-john will (at our option) either replace or repair said part.
Need help?
Do you have a question about the GAC 500XT and is the answer not in the manual?
Questions and answers