Zeiss LSM 880 Basic User's Manual
Confocal light microscopy with airyscan
Hide thumbs
Also See for LSM 880:
- Operating manual (690 pages) ,
- Notes on device safety and installation requirements (50 pages) ,
- User manual (25 pages)
Table of Contents
Advertisement
Quick Links
Advertisement
Table of Contents

Related Manuals for Zeiss LSM 880


Summary of Contents for Zeiss LSM 880
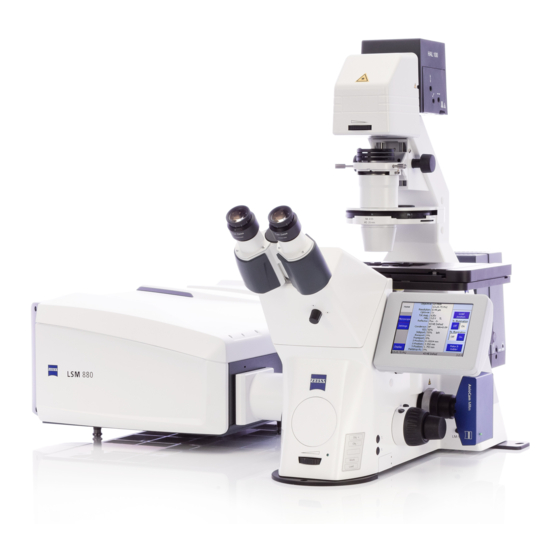
- Page 1 Zeiss LSM 880 with Airyscan Confocal Light Microscopy Basic User Guide...
-
Page 2: Table Of Contents
Contents Brief Description...................... 4 Reference ........................ 4 Location ........................4 Suggestion for “Materials and Methods” ............... 5 Information to be added to the acknowledgements section ......... 5 People and Contacts ....................6 WARNINGS and Advice ................... 6 Optics ........................7 Laser Lines ........................ - Page 3 Smart Setup ....................... 17 Lasers ........................18 Imaging Setup ......................18 Acquisition Mode ...................... 21 Channels ........................22 Definite Focus 2 ......................23 Multidimensional Acquisition ..................23 Z-Stack ........................23 Time Series ........................ 24 Tile Scan ........................24 Positions ........................25 Regions ........................
-
Page 4: Brief Description
19 frames per second at 512 x 512-pixel image resolution. The LSM 880 with Airyscan highlights the needs of your research for quantitative data in live cell experiments at superior resolutions. -
Page 5: Suggestion For "Materials And Methods
Airyscan detector, a 63x Plan-Apochromat 1.4NA DIC oil immersion objective (Zeiss) and the 405 nm, 488 nm and 561 nm laser lines. The Zeiss Zen 2.3 (black edition) software was used to control the microscope, adjust spectral detection for the emission of 4′,6-diamidino-2-phenylindole (DAPI), Green Fluorescent Protein (GFP) and... -
Page 6: People And Contacts
(book slots accordingly). For all downstream image analysis image analysis a free software license is available for ZEN lite at ZEISS website. Alternatively, you can use FIJI. Contact the responsible people in case of any doubt or any... -
Page 7: Optics
Optics Laser Lines 405 nm (30 mW) Multi-line - 458/488/514 nm (25 mW) 561 nm (20 mW) 633 nm (5 mW) Detectors 2 Photo-Multiplier Tube (PMT) 1 Gallium Arsenide Phosphide (GaAsP) 1 Airyscan (32 GaAsP) ... -
Page 8: Objective
Objectives Magnification ZEISS System EC Plan-NEOFLUAR Plan-APOCHROMAT Plan-APOCHROMAT Colour and Chromatic Colour and Chromatic Colour and Chromatic Class Correction Correction Correction Aperture (A) Immersion Free Working Distance 0.55 0.19 (mm) Cover Glass (mm) 0.17 0.17 0.17 Differential Differential Interference Contrasting Methods... -
Page 9: Filter-Sets For Incident Light
Filter-Sets for Incident Light Filter Cube Excitation Filter Dichromatic Mirror Emission Filter Emission Colour DAPI G 365 BP 445/50 Blue BP 470/40 BP 525/50 Green BP 565/30 BP 620/60 BP - bandpass filter These have predefined Buttons in the Locate Tab. Emission Filters for Airyscan and Fast Airyscan Position Wavelengths... -
Page 10: Additional Equipment
Features: 2x Intel® Xeon® E5-2623 v3 3.0 GHz (quad-core); 64GB DDR4-2133 MHz ECC RAM (12 free slots); 4x 2TB 4 TB RAID 10; NVIDIA Quadro K2200 4GB OS: Windows 7 Ultimate Embedded x64 Available Software: Zeiss Zen 2.3 Monitor Brand: HP® ... -
Page 11: System Overview
System Overview 1- Confocal PC 7- FLIM PC 2- Confocal Monitor 8- FLIM Monitor 3- Microscope Body 9- FLIM Laser 4- Confocal Module 10- FLIM Detectors 5- Airyscan Module 6- Confocal Lasers Know your fluorophores You can use resources such as the FPBase or the Thermofisher... -
Page 12: System Protocols
System Protocols Start Up 1. Take the dust cover off; 2. Turn on the Main Switch and wait a few seconds; 3. Turn on the Systems/PC Switch; 4. Start up the Computer and wait until you see the Windows start up screen; 5. -
Page 13: Shutdown
Shutdown 1. Save your images in Users folder in the D drive; 2. Close Zen Black; 3. A window to save any unsaved images/profiles should appear if there are any, DO NOT overwrite other users’ experiment profiles! 4. A Laser Off window appear: a. -
Page 14: Zen 2.3 (Black Edition) Guidelines
ZEN 2.3 (black edition) Guidelines The ZEN 2.3 (black edition) can be equipped with several modules, applications and licenses. This guideline is strictly specific for the ZEN 2.3 (black edition) version available on the microscope’s computer. General User Interface The user interface is divided into three main sections, the Controller Section (1), the Image Display Section (2), and the Image and Document Manager Section (3), with a menu bar above and a system information bar below. -
Page 15: Sample Localization
Sample Localization In the Locate Tab you can find and inspect your sample using the eye pieces. First choose the objective you want to use either through this tab or using the touchscreen to the left of the microscope. Use the preset buttons to quickly change between the configurations for red, green, blue fluorescence, transmitted light and off. -
Page 16: Image Acquisition
Image Acquisition Below is a general overview of each section, in the next few pages you can find more details on how to use each section. Save and Load your Experiment profile. The software quickly creates a new acquisition setup for your fluorophores. Live –... -
Page 17: Smart Setup
Smart Setup Clicking this opens a new window (shown below) where you can select your fluorophores from a list. If your fluorophores aren’t in the list check their data sheets for the excitation/emission wavelengths and find an equivalent fluorophore from the list to select. To each fluorophore you can also assign a display colour to distinguish the different fluorophores. -
Page 18: Lasers
Lasers Confocal uses laser lines instead of lamps to acquire the images, so you must turn on the lasers you need for your fluorophores. If you used Smart Setup it should turn the needed lasers on automatically. The lasers are not instantly ready to use and may require warming up, during this the laser line numbers are highlighted in red. - Page 19 To make sure you don’t forget anything follow this order when setting up the lightpath: 1. First select the laser line(s) you will need, if you haven’t turned them on yet you Laser -> Optic Components -> Detector will get a prompt to do so; (2) 2.
-
Page 21: Acquisition Mode
Acquisition Mode In this tab you can control the dimensions of the image, the speed of acquisition and zoom. You shouldn’t have need to change any options in this tab beyond the ones detailed below. Click (X*Y) to show a list of predefined square frame sizes for Confocal. -
Page 22: Channels
Channels Here you can select which tracks to acquire, set the pinhole size, laser power and the detector’s Master Gain. What you see in this tab varies depending on the Image Setup you made earlier, meaning you could see from one to four channels in a single track. For Confocal Mode Each track has a single pinhole opening which should be set for 1 Airy Unit (AU) to achieve true confocal images. -
Page 23: Definite Focus 2
Definite Focus 2 Definite Focus uses infrared light to keep your sample focused avoiding thermal and vibrational drift, which will make your field-of-view change over time. It works by measuring the refractive index mismatch between glass and your sample. Hence it only works is the refractive index of your sample is different from glass, for example water-based media, such as agarose pads or cell culture medium will work, whereas curing mounting media such as Mowiol or Prolong Gold for example will NOT work once cured, intermediate mounting media,... -
Page 24: Time Series
Using the optimal distance between slices ensures the best coverage and 3D reconstructions, while avoiding excessive bleaching and photo-toxicity on your sample (see Nyquist sampling). Briefly, if you use a step size smaller than what the Nyquist sampling theorem recommends you will not gain any more information and you will likely increase bleaching and photo-toxicity on your sample by imaging the same “information”... -
Page 25: Positions
Positions Positions allows you to save the coordinates of frames you may find interesting during sample examination so you can acquire them later. Just click add and the coordinates of the current frame will be saved. Regions The pixel by pixel image acquisition of the confocal allows you to acquire only Regions Of interest (ROIs) instead of the whole frame.
Need help?
Do you have a question about the LSM 880 and is the answer not in the manual?
Questions and answers