Table of Contents
Advertisement
INSTALLATION AND SERVICE MANUAL
Part number E864
EC230/600, EC230/700, EC230/960, EC380/740, EC380/980, EC380/1220, EC380/1400 and EC380/1900
LEC230/600, LEC230/700, LEC230/960, LEC380/740, LEC380/980, LEC380/1220,
LEC380/1400 and LEC380/1900
Please read and understand these instructions before commencing installation and leave this manual with the customer for future reference.
Andrews. Built to perform.
Advertisement
Table of Contents

Related Manuals for andrews ECOflo Series


Summary of Contents for andrews ECOflo Series
- Page 1 EC230/600, EC230/700, EC230/960, EC380/740, EC380/980, EC380/1220, EC380/1400 and EC380/1900 LEC230/600, LEC230/700, LEC230/960, LEC380/740, LEC380/980, LEC380/1220, LEC380/1400 and LEC380/1900 Please read and understand these instructions before commencing installation and leave this manual with the customer for future reference. Andrews. Built to perform.
- Page 2 UK users is drawn to their responsibilities under the Health and Safety Regulations 1993. All installation and service on Andrews Water Heaters must be carried out by properly qualified personnel and, therefore, no liability can be accepted for any damage or malfunction caused as a result of intervention by unauthorised personnel.
-
Page 3: Table Of Contents
Contents Contents General and safety information General information British standards and codes of practice Health and safety regulations 1993 Effectiveness in combating legionella Technical data ECOflo range Dimensions and clearances 2.2.1 ECOflo models EC230/600, EC230/700, EC230/960 2.2.2 ECOflo models EC380/740, EC380/1220, EC380/1400, EC380/1900 ErP data Installation Introduction... - Page 4 Contents 3.27.4 Horizontal flue kit/fittings - 380 litre models AWH part no: B292 supplied components 3.27.5 Vertical flue kit/fittings - 380 litre models AWH part no: B294 supplied components 3.28 Flue systems 3.28.1 Optional components for 100/150mm dia (concentric) flue 3.28.2 ECOflo 380/1900 horizontal fittings pack - part no: B292 3.28.3...
- Page 5 Contents Correx powered anodes Flushing water heater Draining water heater Filling water heater 6.10 Sediment and limescale 6.10.1 To remove sediment and limescale 6.11 To replace a correx anode 6.12 Drain valve and tank access panel 6.13 Cleaning the storage vessel 6.14 Descaling 6.15...
-
Page 6: General And Safety Information
General and Safety Information General and safety information General description The Andrews Water Heater has been designed for use with NATURAL GAS OR LPG and is manufactured to give an efficient, reliable and long service life. To ensure the continued, trouble-free operation of your heater at... - Page 7 General and Safety Information BS EN 806 (Parts 1 - 5) Specifications for installations inside buildings conveying water for human consumption. BS EN 12897 Water supply. Specification for indirectly heated unvented (closed) storage water heaters. IGE/UP/1A,1B Strength/tightness testing and direct purging. IGE/UP/2 Installation pipework.
-
Page 8: Health And Safety Regulations 1993
Andrews Water Heaters should only be used in the manner and purpose for which they are intended and in accordance with the instructions in this manual. Although the heaters have been... -
Page 9: Technical Data
Technical Data Technical data ECOflo Range Model Reference – Natural Gas EC230/600 EC230/700 EC230/960 EC380/740 EC380/980 EC380/1220 EC380/1400 EC380/1900 Natural gas, category 1²H Gas consumption G20 3.41m³/h 4.09m³/h 5.43m³/h 4.09m³/h 5.43m³/h 6.82m³/h 7.92m³/h 11.33m³/h Heat input gross 36.6 kW 43.9 kW 58.3 kW 43.9 kW 58.3 kW... -
Page 10: Dimensions And Clearances
Technical Data Dimensions and clearances 2.2.1 ECOflo models EC230/600, EC230/700 & EC230/960 100 mm 500mm Clearance for clearance ue system Flue exhaust outlet " BSP Gas connection Combustion air inlet 450mm service clearance T&P Valve connection ON/OFF Switch Thermostat knob "... -
Page 11: Erp Data
Technical Data ErP data ECOflo Natural Gas 230/600 230/700 230/960 380/740 380/980 230/600 230/700 230/960 380/740 380/980 Declared load profile Water heating energy efficiency class Water heating energy efficiency Annual energy consumption Annual energy consumption Other load profiles for which the water heater is suitable to use and the corresponding water heating energy efficiency and annual electricity consumption... -
Page 12: Installation
Installation Installation Introduction THE LAW REQUIRES THAT INSTALLATION IS CARRIED OUT BY A PROPERLY QUALIFIED PERSON Installations must be carried out in accordance with Gas Safety (Installation and Use) Regulations 1998, Building Regulations, The Water Supply (Water Fittings) Regulations 1999 and any requirements of the local Gas Supplier, Local Authority, Water and Fire Authorities and the current British Standards and Codes of Practice listed in Section 1. -
Page 13: Features
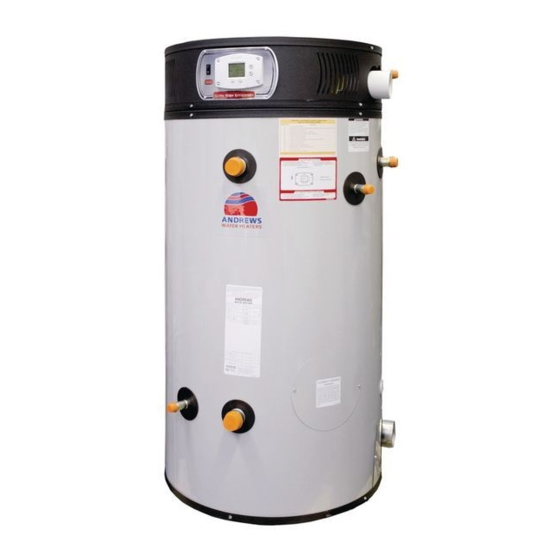
Installation Features ECOflo is the latest addition to the Andrews range of condensing storage water heaters and is designed for large domestic, commercial and industrial applications. The high efficiency units incorporate Vitraglas® silica glass lined tanks to provide protection against the corrosive effect of hot water and therefore a longer working life. -
Page 14: Ignition Module
This can be accomplished by depressing the red button on the control panel once the water temperature of the tank has dropped below 71°C. Please contract Andrews Water Heaters (details listed on the Data Plate) if continued high limit switch operations occur. 3.3.5... -
Page 15: Cleanout
A collector high limit switch is used to monitor the ambient temperature between the first pass collector and the exhaust collector. This is a manually re-settable switch. If this switch continues to trip, please contact Andrews Water Heaters. 3.3.9 Access Lid Access for servicing the water heater from the top is easy. -
Page 16: Technical Detail
Vitraglas® lined tank – Andrews Water Heater tanks are protected from the corrosive effects of hot water by an exclusive ceramic porcelain-like coating. Our high silica Vitraglas® lining provides a tough interior surface. -
Page 17: Determining Required Flue Length
Installation The overall length is reduced if an elbow or condensate trap is fitted (see below). 3.4.1 Determining required flue length 1. Determine the total length of straight concentric flue pipe (in metres) required for the installation. 2. Add 1.2 metres of flue for every 90°C elbow. 3. -
Page 18: Heat Exchanger
The intake tee adapts to the concentric flue pipe and has an elbow to connect to the combustion air intake pipe. The 100/150 mm dia. Andrews’ concentric flue pipe will then run to the horizontal or vertical flue terminal. Maximum concentric flue for this product is 16 metres. Each additional 90°... -
Page 19: Gas Connections
1. All equipment is carefully manufactured, inspected and packed. 2. Any claims for damage or shortage in shipment must be filed immediately with Andrews Water Heaters as detailed on the warranty card 3.12 Location Locate water heater in front of final position before removing crate. -
Page 20: Location
Installation 3.14 Location KEEP APPLIANCE AREA CLEAR AND FREE OF COMBUSTIBLE MATERIALS, PETROL AND OTHER FLAMMABLE VAPOURS AND LIQUIDS. This water heater MUST be installed indoors. This water heater MUST be located in an area where the general public does not have access. 3.15 Chemical vapour corrosion Corrosion of the internal flue ways and concentric flue system will occur if air for combustion contains certain chemical... -
Page 21: Typical Propane Bulk Storage Tank Installation
Installation 3.17 Typical propane bulk storage tank installation BULK SUPPLY TANK Gas cock Regulator set to give 37 mbar (14.86" wg) Gas emergencey propane control at entry Regulator normally fitted at 1" Heavy steel sleeved pipe tank through wall Steel liner sealed to pipe at inside end Fig. -
Page 22: Approximate Time/Temperature Scald Chart
Installation 3.19 Approximate time/temperature scald chart The following chart details the relationship of water temperature and time with regard to scald injury. This may be used as a guide in determining the safest water temperature for the installation. APPROXIMATE TIME/TEMPERATURE RELATIONSHIPS IN SCALDS 48.8°C More than 5 minutes 51.6°C 1½... -
Page 23: Gas Supply - Natural Gas
British Standards and Codes of Practice listed in Section 1 of this manual. Andrews Water Heaters are unregulated and a second stage regulator must be installed to give an inlet pressure to the appliance as follows:... -
Page 24: Electrical Supply
Installation PROPANE: 37mbar (14.86 in wg) When using propane cylinders, connect a minimum number of 47kg cylinders, as listed below, together with a manifold before connecting to the union. Use a minimum pipe size of ¾in bore. Two 47kg Cylinders LEC230/600, LEC230/700 and LEC380/740 Three 47kg Cylinders... -
Page 25: Wiring Diagram
Installation 3.24.1 Wiring diagram Powered anodes ON/OFF GN/Y Switch Correx powered 230V anode control T.B. T.B. Combustion blower GN/Y 230V Transformer GN/Y Igniter 230V Ground T.B. Flame sensor Igniter relay GN/Y Gas valve Blower relay T Stat High limit Y/BK Fig. -
Page 26: Flue Systems
Installation 3.25 Flue systems Andrews Water Heaters’ ECOflo is a Balanced Flue, Gas Water Heater where all air for combustion is obtained from the outside atmosphere and all flue gases are discharged to the outside atmosphere. The flue system is a single concentric (pipe within... -
Page 27: Maximum Flue Distances (Horizontal Or Vertical)
Installation Note The overall length does not include the 1m terminal. The Combustion 1m terminal is not to be included in determining the via ‘T’ piece overall length of the flue. 3.26.1 Maximum Flue Distances (Horizontal or Exhaust Vertical) 100mm Number of 90°... -
Page 28: Horizontal Flue Kit/Fittings - 230 Litre Models Awh Part No: B291 Supplied Components
Installation 3.27.2 Horizontal flue kit/fittings pack – 230 litre models AWH part no: B342 supplied components Part Description Part Number Exhaust Outlet Tee c/w Condense Outlet (82500) E860 100mm to Concentric Exhaust Connector (75412) E861 Air intake Tee Piece Connector (82501) E862 Condense Syphon (87436) E863... -
Page 29: Vertical Flue Kit/Fittings - 380 Litre Models Awh Part No: B294 Supplied Components
Installation 3.27.5 Vertical flue kit/fittings pack – 380 litre models AWH part no: B345 supplied components Part Description Part Number Exhaust Outlet Tee c/w Condense Outlet (82500) E860 100mm to Concentric Exhaust Pipe (75413) E865 Air intake Tee Piece Connector (82501) E862 Condense Syphon (87436) E863... -
Page 30: General
Please contact Andrews Technical Support Department if advice is needed for a particular installation. If installed on a roof valley, the terminal should be at least 1m above the highest part of the roof structure and 2.5m from any... -
Page 31: Ecoflo 230 & 380 Litre Flue System
Installation Warning The flue system must be properly installed. Ensure the inner flue is securely sealed at all the joints otherwise incomplete combustion may result. Do not exceed maximum flue lengths including elbows. 3.28.5 ECOflo 230 & 380 Litre flue systems The ECOflo uses a concentric flue system,150mm outside diameter with an inner flue of 100mm diameter. -
Page 32: Ecoflo 230 & 380 Vertical/Horizontal Flue System
Installation 3.28.6 ECOflo 230 & 380 Vertical/horizontal flue system Fig. 9 Height of concentric section above heater 205mm Height of concentric sample point 115mm (+/– 5mm) Height of centre line of 90° bend 178mm (+/– 5mm) Total height to centre line of bend 500mm (+/–... -
Page 33: Flue System Typical Installation
Installation 3.28.7 Flue systems typical installation K, N Likely flue positions requiring a flue terminal guard Fig. 10 Terminal Positions with Minimum Distance Directly below an opening, air brick, opening window etc. Above an opening, air brick, opening window etc Horizontal to an opening, air brick, opening window etc. -
Page 34: Installing The Horizontal Flue Terminal
Installation 3.28.8 Installing the horizontal flue terminal Note The horizontal flue terminal supplied may be used through outside walls up to 600mm (24in) thick. Hole through wall 1. Horizontal flue Terminal (Through the Wall) supplied Flue terminal a) Cut an opening of at least 165mm (6.5in) diameter through to the outside. -
Page 35: Installing The Vertical Flue Terminal
Installation 3.28.9 Installing the vertical flue terminal 2. Vertical Flue Terminal (Through the Roof) a) Determine the exact location where the roof flue terminal will exit the roof, ensuring the flue system clears all obstructions. For pitched roofs, the flue cap must be the distance above the roof line as specified (300mm to base of Flue Clamp, minimum). - Page 36 Installation f) The last pipe section may be cut to fit the distance required to reach the water heater flue connections. If a flue condensate trap is specified, install the supplied tap with crimped end into the gasketed end of the elbow (horizontal flue installations) and clamp the condensate tee and elbow together.
-
Page 37: Air Supply And Ventillation
Installation 3.29 Air supply and ventilation 3.29.1 Concentric flue systems The following notes are intended to give guidance: Where the heater is to be installed in a room, NO VENTS ARE REQUIRED. Where the heater is to be installed in a COMPARTMENT, permanent air vents are required in the COMPARTMENT at high and low level. -
Page 38: Water Quality And Treatment
This problem can be minimised by reducing the water temperature in the heater and by fitting suitable water pre- treatment equipment. When installing Andrews Water Heaters in hard water areas we would recommend that a water treatment specialist is consulted. -
Page 39: Water Connections
Installation 3.31 Water connections 3.31.1 Vented systems The water heater can be fed from a cold water feed cistern or static water tank. A safety valve must be fitted as specified in BS 6644 Clause 9. Minimum 1 bar water pressure is required to allow correct operation. -
Page 40: Unvented Systems
The water heater can be used on unvented hot water storage systems with the addition of an Unvented Systems Kit, part number B290, available from Andrews Water Heaters. See Parts List on page 44. The wall bracket assembly (shown below) is available as an optional extra (AWH Part No – B173). - Page 41 Installation Typical water service layout for unvented system is shown in Fig 19. Balanced Cold Water Hot Water Service Take Off (Optional) Secondary Return Pipe Cold Water Inlet Valve Check Valve Bronze Pump To Drain Fig. 19 Issue 2 14/07/16...
-
Page 42: Commissioning
Commissioning Commissioning Caution DO NOT OPERATE THE WATER HEATER UNTIL THE STORAGE VESSEL IS COMPLETELY FILLED WITH WATER, WITH WATER RUNNING FROM ALL HOT TAPS. Open the main gas supply cock after all connections to the gas control are completed. Test all connections, using propriety leak detection fluid. -
Page 43: Air/Gas Mixture Adjustment
Commissioning Air/Gas mixture adjustment The water heater gas/air mixture is adjusted at the factory for the proper mixture for optimum combustion and ignition for the type of gas listed on the rating label. The water heater should operate properly without requiring adjustment with the gas type shown on the rating label. -
Page 44: Percentage
Commissioning CO² Percentage (Natural Gas) Model Reference Input rating Combustion Flue Gas Volume Vent Temperature kW/hr Cubic metres/hr °C EC230/600 36.6 11.0%/10 ppm 50 – 60 EC230/700 43.9 10.3%/20 ppm 50 – 60 EC230/960 58.6 9.7%/10 ppm 55 – 60 EC380/740 43.9 10.4%/15 ppm... -
Page 45: Operating Instructions
Operating Instructions Operating instructions Warning Water heaters are heat-producing appliances. To avoid damage or injury, there must be no materials stored against the water heater or flue system and proper care must be taken to avoid unnecessary contact (especially by children) with the water heater and flue system. UNDER NO CIRCUMSTANCES SHOULD FLAMMABLE MATERIALS, SUCH AS GASOLINE OR PAINT THINNER BE USED OR STORED IN THE... -
Page 46: General Instructions
Operating Instructions General instructions 5.1.1 To fill the water heater 1. Close the water heater drain valve by turning the knob or valve stem clockwise. If alternative water connections are provided but not used, make certain they are plugged (i.e. side connections). -
Page 47: Lighting Instructions
To avoid unnecessary inconvenience and expense, make sure the tank is actually leaking before contacting Andrews Water Heaters. Caution This water heater is equipped with an energy cut out device to prevent overheating. Should overheating... -
Page 48: Burner Flame Check
Operating Instructions Burner flame check If the water heater is to remain idle for 30 days or more, or is subjected to freezing temperatures while shut off, the water heater and piping should be fully drained and the drain valve should be left fully open. -
Page 49: Temperature Selection Procedure (Auto-Ignition)
Operating Instructions Temperature selection procedure For energy efficient operation of your water heater, the suggested initial temperature setting is 49°C. Condensation does not mean your tank is leaking. Over 40% of reported tank leaks on installation’s are proven to be condensation. -
Page 50: Water Heater Display And Control Buttons
Operating Instructions 5.7.1 Water heater display and control buttons Temperature Setpoint Shown flashing in display in Degrees F or Degrees C only when temp is adjusted Range 70 - Max. °F Range 21 - Max °C Temperature up button Sequence of operation indicator reads ‘Idle’... -
Page 51: To Decrease Setpoint Temperature
Operating Instructions 5.7.3 To decrease Setpoint temperature 1. Depress and hold ‘Temperature Down’ button until desired setpoint temperature appears in the display (Fig. 28). Fig. 28 2. ‘Setpoint’ indicator begins flashing in the display after ‘Setpoint’ flashes pressing ‘Temperature Down’ button (Fig. 29). Fig. -
Page 52: To Change Temperature Format In Display From °F To °C Or °C To °F
Operating Instructions 5.7.4 To change temperature format in display from °F to °C or °C to °F 1. Press ‘SELECT’ button until °F/ °C is displayed (Fig. 31). °F/°C Fig. 31 2. Press ‘SET’ button to change temperature format. Symbol °F/ °C will flash (Fig. - Page 53 Operating Instructions 4. Press ‘SET’ button to confirm °F or °C format. F°/ °C will stop flashing. Setpoint display will appear in the format selected (°F or °C) in 10 seconds (Fig. 35). °F/°C °F Symbol ‘°F/°C’ stops flashing Fig. 35 5.
-
Page 54: Burner Flame Check
Operating Instructions Burner flame check At the time of installation and at periodic intervals (about every 3 months), a visual check of the pilot and burner flames should be made to determine if they are burning properly. The burner flames should be blue with yellow tips. A blue-orange flame is characteristic of operation on liquefied petroleum (LP) gas. -
Page 55: Direct Spark
Operating Instructions 5.10 Direct spark “DIRECT SPARK” IGNITION (DSI) SYSTEM COMPONENTS (ALL MODELS EXCEPT EC380/1900) Honeywell S9380B1001C Direct Spark Ignition Control, CE listed. 3 Trials for Ignition, 30 second pre-purge timing, 4 second trial for ignition, 24 volt input to control and integrated temperature/high limit control. -
Page 56: Servicing
Servicing Servicing The following maintenance should be performed by a qualified service technician at the minimum periodic intervals suggested below. In some installations, the maintenance interval may be more frequent depending on the amount of use and the operating conditions of the water heater. Regular inspection and maintenance of the water heater will help to insure safe and reliable operation. -
Page 57: Introduction
Servicing 7. Monthly drain off a gallon of water to remove silt and sediment. WARNING! This water may be HOT. 8. All models are equipped with a cleanout opening to aid in removal of hard water deposits from the tank bottom. If this water heater operates under hard water conditions, the following should be performed at least every 3 months: Drain the water heater. -
Page 58: Annually
Servicing Annually Annual checks of the ignition systems, temperature controls and any other controls are necessary to ensure continued safe and efficient operation. The entire combustion system must be sealed for this water heater to function correctly. Replace any damaged parts. Please see pages 86 &... -
Page 59: Draining Water Heater
Servicing Draining water heater The water heater must be drained if it is to be shut down and exposed to freezing temperatures. Maintenance and service procedures may also require draining the water heater. 1. Turn off the water heater electrical disconnect switch. 2. -
Page 60: To Remove Sediment And Limescale
Servicing Note Example: Initial inspection shows ½ inch of scale accumulation. Therefore, the water can be de-scaled once a year. 6.10.1 To remove sediment and limescale 1. Drain the heater. Refer to DRAINING THE WATER instructions in this section. 2. Remove outer cover plate from lower side of water heater jacket. -
Page 61: Cleaning The Storage Vessel
Servicing 6.13 Cleaning the storage vessel The storage vessel should be checked and cleaned annually. Scale formation in the base of the vessel may occur, particularly in hard water areas, and is normally associated with high usage and high water temperatures. It is characterised by a rumbling noise when the main burner is lit. -
Page 62: Combined Temperature/Pressure Relief Value
Servicing 6.16 Combined temperature/pressure relief valve At least twice a year, the temperature and pressure relief valve should be checked to ensure that it is in operating condition. To check the relief valve, lift the lever at the end of the valve several times. -
Page 63: Accessing Service Mode On The Water Heater Display (Service Personnel Only)
Servicing 6.18 Accessing service mode on the water heater display (Service personnel only) The display has a ‘service mode’ for changing the maximum setpoint and accessing information in aiding servicing of the water heater. This procedure is for service and installation personnel only. -
Page 64: Sequence Of Modes Available In 'Service Mode' By Pressing The 'Select' Button
Servicing 6.18.1 Sequence of modes available in ‘Service Mode’ by pressing the ‘Select’ button Error code shown in water heater display Error Code Number (Display/Reset). This is only shown if there is an operating error in the ‘User Mode’ (Fig. 40). Fig. - Page 65 Servicing 2c. Water Temperature - Lower Sensor (Displays if there are two sensors) (Fig. 44). idle Fig. 44 3. Flame Current of Pilot Flame Sensor (Displays only in the Heating Cycle) (Fig. 45). µA Flame Current Fig. 45 4. Setpoint (Display/Change) (Fig. 46). setpoint idle Fig.
- Page 66 Servicing 6. Differential (Display only – shows the differential of the thermostat) (Fig. 48). °F Differential idle Fig. 48 7. Software Version (Display only) (Fig. 49). Soft idle Fig. 49 No current error codes 8. Error Code History (Displays if there are present error codes or up to 10 previous error codes).
-
Page 67: To Change The Maximum Setpoint Limit (Max Setpoint) For The Temperature Setpoint
Servicing 6.18.2 To change the Maximum Setpoint Limit (Max Setpoint) for the temperature setpoint Warning Setting the water temperature to the maximum set point can result in scalding hot water delivered to the taps. It is highly recommended that the maximum setpoint be adjusted to the lowest temperature possible for the needs of the installation. -
Page 68: Display Of Water Temperature
Servicing 5. 30 Seconds after the last button press, the Water Heater Display will go back to ‘User Mode’. It will read ‘Max Setpoint’ without showing a temperature value if the temperature setpoint is at the maximum setting. The Water Heater Display can be set back to the ‘User Mode’... -
Page 69: To Display Flame Sense Current Of The Pilot Flame Sensor
Servicing 6.18.4 To display flame sense current of the pilot flame sensor The pilot flame sense current is available only when the burners are in operation. Flame Current µA 1. Make sure the status displays ‘Heating’ or draw enough hot Heating water to start the burners. -
Page 70: To Display And Change Temperature Format (°F/°C)
Servicing ‘Setpoint’ flashes 4. To lower the temperature setpoint, press the ‘Temperature Down’ button until the desired temperature is shown on the water heater display (Fig. 63). setpoint °F idle Fig. 63 ‘Setpoint’ stops flashing 5. When the desired setpoint is reached on the water heater display, press the ‘Set’... - Page 71 Servicing Changes to ‘°C’ 3a. Press ‘Temperature Up’ button to change temperature format to °C (Fig. 67). °F/°C °C ‘°F/°C’ Flashes Fig. 67 Changes to ‘°C’ 3b. Press ‘Temperature Down’ button to change temperature ‘°F/°C’ format to °F (Fig. 68). Flashes °F/°C °F...
-
Page 72: How To Reset The Control From Lockout Conditions
Servicing 6.19 How to reset the control from Lockout conditions Warning The following procedure is for service and installation personnel only. Resetting lockout conditions without correcting the malfunction can result in a hazardous condition. If an error code is displayed (except for #4, low flame sense current), the water heater will be in a ‘lockout condition’... -
Page 73: Error Codes And Error History Display
Servicing 6.19.3 Error codes and error history display If there is an operating problem with the water heater, an error code number will appear on the water heater display with ‘Service Needed’ to the right of the ‘Status’ indicator. The error code label is located below the water heater display and the following section in this Installation and Operating Instruction Manual explains the error codes with corrective actions to repair... - Page 74 Servicing Error code index 4. Press the ‘Temperature Down’ button to change to the previous code index, code #9 (Fig. 78). idle Fig. 78 Stored error code for code index #9 5. Press the ‘Select’ button for code index #9 to view if there are any code numbers (Fig.
-
Page 75: Diagnostic Error Codes And Troubleshooting Procedures For Honeywell Intergrated Controls
Servicing 6.20 Diagnostic error codes and troubleshooting procedures for Honeywell integrated controls (24 volt flue damper model series) Error code Definition of code Cause of problem and actions taken to correct Low flame sense Determine flame sense current in the Service mode with the water heater operating. - Page 76 Servicing Definition of code Error code Cause of problem and actions taken to correct Lower sensor Resistance of lower sensor out of operating range. Check readings faulty continuity of wire harness to lower sensor, and if O.K., replace lower sensor. Flame rod shorted Pilot flame sensor rod is shorted to ground.
-
Page 77: Procedure For Checking Thermostat Sensors
Servicing 6.21 Procedure for checking thermostat sensors Set the thermostat above water temperature (See temperature adjustment section) and observe system through one (1) complete cycle. Make sure system operates as desired. To check the upper sensor or lower sensor assembly, compare the resistance of the sensor terminals (blue leads for upper sensor, yellow and black lead for lower sensor) as measured by an ohmmeter to the water temperature as measured by an... -
Page 78: Fault Finding
Fault Finding Fault finding Main power light is not on Make sure that the water heater is plugged in. When the switch is on, is there 230V between L1 and N on the terminal block? If not, check for loose wire connections on the ‘Power Switch Wire Harness.’... -
Page 79: Main Valve Does Not Turn On
Fan did not post purge Check ‘Pressure Switch’ (exhaust pressure switch) as previously mentioned. Check ‘Collector Limit Switch’ as previously mentioned. If the above switches are functioning, please contact the Technical Support Department at Andrews Water Heaters for further assistance. Issue 2 14/07/16... -
Page 80: Parts List And Illustrations
Parts List and Illustrations Parts list and illustrations EC230/960, LEC230/960, EC230/600, LEC230/600, EC230/700, LEC230/700, EC380/740, LEC380/740, EC380/980, LEC380/980, EC380/1220, LEC380/1220, EC380/1400 & LEC380/1400 General assembly Fig. 81 Issue 2 14/07/16... - Page 81 Parts List and Illustrations Item Part Number Description EC230/ LEC230/ EC230/ LEC230/ EC230/ Number Z575 Combustion Surround Assy • • • • • Z576 Combustion System Assy • Z577 Combustion System Assy • Z578 Combustion System Assy • Z579 Combustion System Assy •...
- Page 82 Parts List and Illustrations Item Part Number Description Qty LEC230/ EC380/ LEC380/ EC380/ LEC380/ Number 1220 1220 1400 1400 • • • • • Z575 Combustion Surround Assy Z576 Combustion System Assy Z577 Combustion System Assy Z578 Combustion System Assy Z579 Combustion System Assy Z580...
- Page 83 Parts List and Illustrations Item Part Number Description EC380/ LEC380/ EC380/ LEC380/ Number • • • • Z575 Combustion Surround Assy • Z576 Combustion System Assy • Z577 Combustion System Assy Z578 Combustion System Assy Z579 Combustion System Assy • Z580 Combustion System Assy •...
-
Page 84: Ec380/1900 And Lec380/1900 General Assembly
Parts List and Illustrations EC380/1900 and LEC380/1900 General assembly Fig. 83 Issue 2 14/07/16... - Page 85 Parts List and Illustrations Item Part Number Description EC380/ LEC380/ Number 1900 1900 Z273 Combustion Surround Assy • • Z274 Combustion System Assy • Z275 Combustion System Assy • Z276 Collector Cover Second Pass • • Z277 Screw-Second Pass Collector Cover •...
-
Page 86: Ec230/600 To Lec380/1400 Combustion System Assembly
Parts List and Illustrations EC230/960, LEC230/960, EC230/600, LEC230/600, EC230/700, LEC230/700, EC380/740, LEC380/740, EC380/980, LEC380/980, EC380/1220, LEC380/1220, EC380/1400 & LEC380/1400 Combustion system assembly Fig. 84 Issue 2 14/07/16... - Page 87 Parts List and Illustrations Item Part Number Description EC230/ LEC230/ EC230/ LEC230/ EC230/ Number Z618 Blower/Gas Valve assy • Z619 Blower/Gas Valve assy • Z620 Blower/Gas Valve assy • Z621 Blower/Gas Valve assy • Z622 Blower/Gas Valve assy • Z623 Blower/Gas Valve assy Z624 Blower/Gas Valve assy...
- Page 88 Parts List and Illustrations Item Part Number Description Qty LEC230/ EC380/ LEC380/ EC380/ LEC380/ Number 1220 1220 1400 1400 Z618 Blower/Gas Valve assy Z619 Blower/Gas Valve assy Z620 Blower/Gas Valve assy Z621 Blower/Gas Valve assy Z622 Blower/Gas Valve assy • Z623 Blower/Gas Valve assy •...
- Page 89 Parts List and Illustrations Item Part Number Description EC380/ LEC380/ EC380/ LEC380/ Number Z618 Blower/Gas Valve assy Z619 Blower/Gas Valve assy Z620 Blower/Gas Valve assy Z621 Blower/Gas Valve assy Z622 Blower/Gas Valve assy Z623 Blower/Gas Valve assy Z624 Blower/Gas Valve assy Z625 Blower/Gas Valve assy Z626...
-
Page 90: Ec380/1900 And Lec380/1900 Combustion System Assembly
Parts List and Illustrations EC380/1900 and LEC380/1900 Combustion system assembly Fig. 86 Issue 2 14/07/16... - Page 91 Parts List and Illustrations Item Part Number Description EC380/ LEC380/ Number 1900 1900 Z040 Blower-EBM (only) • • Z290 Hose Tubing 3/16" ID • • Z291 Screw 10-32 x 3/4 SHCS • • Z292 Gasket Venturi to Blower • • G125 Gas Valve •...
-
Page 92: Ec230/600 To Lec380/1400 Combustion Surround
Parts List and Illustrations EC230/960, LEC230/960, EC230/600, LEC230/600, EC230/700, LEC230/700, EC380/740, LEC380/740, EC380/980, LEC380/980, EC380/1220, LEC380/1220, EC380/1400 & LEC380/1400 Combustion surround Fig. 87 Issue 2 14/07/16... - Page 93 Parts List and Illustrations Item Part Number Description EC230/ LEC230/ EC230/ LEC230/ EC230/ Number Z609 Surround Head • • • • • Z610 Screw 8-18 x 14 • • • • • Z611 Ignition Control Assy • • • • •...
-
Page 94: Ec380/1900 And Lec380/1900 Combustion Surround
Parts List and Illustrations EC380/1900 and LEC380/1900 Combustion surround Fig. 88 Issue 2 14/07/16... - Page 95 Parts List and Illustrations Item Part Number Description EC380/ LEC380/ Number 1900 1900 Z284 Rivet 8-32 x 49 • • Z285 Keeper Latch & Catch • • Z286 Screw 8-32 x 1/2" RHCR • • Z287 Surround Ring • • E885 Control Assy •...
-
Page 96: Ec230/600 To Lec380/1400 Ignition Control System
Parts List and Illustrations EC230/960, LEC230/960, EC230/600, LEC230/600, EC230/700, LEC230/700, EC380/740, LEC380/740, EC380/980, LEC380/980, EC380/1220, LEC380/1220, EC380/1400 & LEC380/1400 Ignition control assembly Fig. 89 Issue 2 14/07/16... - Page 97 Parts List and Illustrations Item Part Number Description EC230/ LEC230/ EC230/ LEC230/ EC230/ Number Z611 Ignition Control Assy • • • • • Z282 Screws 6-32 x 3/8" • • • • • Z659 Terminal Block • • • • •...
- Page 98 Parts List and Illustrations Item Part Number Description Qty LEC230/ EC380/ LEC380/ EC380/ LEC380/ Number 1220 1220 1400 1400 Z611 Ignition Control Assy • • • • • Z282 Screws 6-32 x 3/8" • • • • • Z659 Terminal Block •...
- Page 99 Parts List and Illustrations Item Part Number Description EC380/ LEC380/ EC380/ LEC380/ Number Z611 Ignition Control Assy • • • • Z282 Screws 6-32 x 3/8" • • • • Z659 Terminal Block • • • • Z281 Nut-Keeps 6-32 •...
-
Page 100: Ec380/1900 And Lec380/1900 Ignition Control Assembly
Parts List and Illustrations EC380/1900 and LEC380/1900 Ignition control assembly Fig. 91 Issue 2 14/07/16... - Page 101 Parts List and Illustrations Item Part Number Description EC380/ LEC380/ Number 1900 1900 E885 Control Assy • • Z260 Terminal Strip • • Z305 Screw 8-18 x 1/2 • • Z306 Keeps Nut 6-32 • • Z259 Terminal Strip Flat Mount •...
-
Page 102: Concentric Flue Component List (100/150Mm Dia.)
Parts List and Illustrations Concentric flue component list (100/150mm dia.) Fig. 92 Issue 2 14/07/16... - Page 103 Parts List and Illustrations Part Ref. Description Part Number 90° Elbow with Clamp 5136162 Horizontal Flue Terminal B342-B343 Wall Bracket (not shown) 5136163 1000mm Cuttable Flue with Clamp 5136159 500mm Flue with Clamp 5136160 Condensate Trap Tee c/w Syphon 5136164 Flat Roof Plate E207 Angled Roof Plate...
-
Page 104: Unvented System Kit B290 - Parts List
Parts List and Illustrations 8.10 Unvented system kit B290 - Parts list Fig. 93 Part Ref. Description Part Number Combined Pressure Reducing Valve/Strainer C784 Check Valve Assembly C785 Expansion Valve C786 Expansion Vessel (25 Litre) C782 Temperature/Pressure Relief Valve C380 Tundish from Expansion Valve and T/P Valve C384 Hose Assembly... -
Page 105: Appendix
Appendix Appendix Dismantling, disposal and recycling Warning Only qualified competent persons should remove and dismantle the appliance. Before removing and dismantling please ensure you safely remove the power supply and isolated the appliance from the water and gas connections. Dispose of the appliance correctly according to the laws and regulations in force. - Page 106 Issue 2 14/07/16...
- Page 107 © Copyright All technical and technological information contained in these technical instructions, as well as any drawings and technical descriptions supplied, remain our property and shall not be multiplied without our prior consent in writing. Subject to alterations.
- Page 108 Technical 0345 070 1057 0345 070 1057 0345 070 1057 ICOM ICOM Website ebsite Energy Association Energy Association andrewswaterheaters.co.uk andrewswaterheaters.co.uk Twitter T T witter witter @AndrewsWH @AndrewsWH Andrews. Built to perform. Andrews. Built to pe Andrews. Built to pe form.
Need help?
Do you have a question about the ECOflo Series and is the answer not in the manual?
Questions and answers