Table of Contents
Advertisement
Available languages
Available languages
Quick Links
Download this manual
See also:
Installation Manual
R
INSTRUCTIONS
INSTRUCTIONS
BEDIENUNGSANLEITUNG
BEDIENUNGSANLEITUNG
VZ-C10
VZ-C10
ENGLISH / DEUTSCH
Check out our Internet Homepage for additional information at: http://www.wolfvision.com/support
Weitere technische Informationen finden Sie auf unserer Internet Homepage unter: http://www.wolfvision.com/support
Advertisement
Chapters
Table of Contents

Related Manuals for WolfVision VZ-C10


Summary of Contents for WolfVision VZ-C10
- Page 1 INSTRUCTIONS INSTRUCTIONS BEDIENUNGSANLEITUNG BEDIENUNGSANLEITUNG VZ-C10 VZ-C10 ENGLISH / DEUTSCH Check out our Internet Homepage for additional information at: http://www.wolfvision.com/support Weitere technische Informationen finden Sie auf unserer Internet Homepage unter: http://www.wolfvision.com/support...
- Page 2 Precautions WARNING! Risk of electric shock Dangerous voltage inside Please follow these precautions: USE THIS MACHINE ONLY WITH THE CORRECT VOLTAGE AS SHOWN ON THE TYPE LABEL ! DO NOT EXPOSE THE UNIT TO EXTREME HEAT OR MOISTURE ! DURING TRANSPORTATION PROTECT THE UNIT FROM EXCESSIVE SHOCKS ! Make sure that sufficient air circulation for cooling the unit is possible (ventilation slots on the left and right side of the unit! If there is any abnormality (abnormal noise, smell, smoke etc.) turn the power off immediately and contact your...
-
Page 3: Table Of Contents
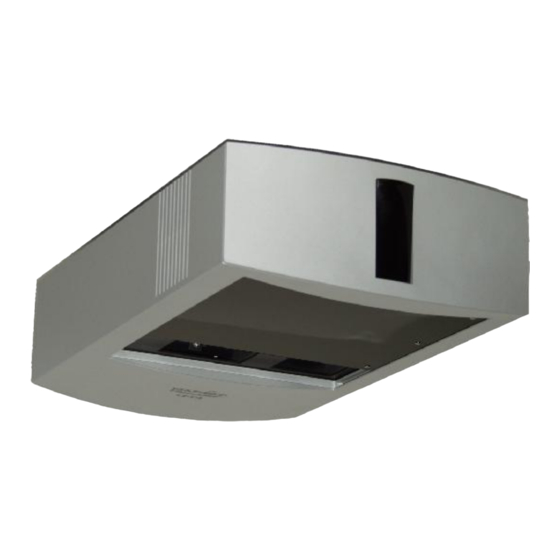
Wolf Vision Inc., 655 Sky Way, Suite 119, San Carlos, CA 94070 / USA Tel. (650)802-0786 and 1-800-356WOLF, Fax: (650)802-0788, E-Mail: wolfvision.usa@wolfvision.com Asian distribution: WolfVision Asia, 27 Woodlands Ind. Park E1, #01-04 Hiang Kie Ind. Bldg. IV, Singapore 757718 Tel. ++65 - 366 9288, Fax: ++65 - 366 9280, E-mail: info@wolfvisionasia.com Canadian distribution: WolfVision Canada Inc., 5460 Canotek Road, Unit 94, Ottawa, ON, K1J 9G9 Canada... - Page 4 #1 Mirror light #1 Mirror light #1 Mirror light #1 Mirror light #2 Mirror camera #2 Mirror camera #2 Mirror camera #2 Mirror camera #3 Infrared-sensor 1 (bottom) #3 Infrared-sensor 1 (bottom) #3 Infrared-sensor 1 (bottom) #3 Infrared-sensor 1 (bottom) #4 Infrared-sensor 2 (front side) #4 Infrared-sensor 2 (front side) #4 Infrared-sensor 2 (front side)
-
Page 5: Connections
CONNECTIONS S/HD SXGA SERIAL IR SENSOR Video EXTERN IN PREVIEW #26 Main POWER switch #33 RGBHV output 15-pin (switchable) #27 FUSE (see page 13) #34 EXTERNAL Input for Computers (see page 11) #28 POWER connection #35 RGBHV output BNC connectors (switchable) #29 DVI output (see page 15) (Sync-settings see page 11) #30 USB port (see page 10) -
Page 6: How The Visualizer Works
5. Press the POWER key (#23) on the remote control. INSTALLATION When the unit is turned on for the first time, the Height Adjustment starts automatically. The VZ-C10 is pre-set When the unit is turned on for the first time, the Height Adjustment starts automatically. The VZ-C10 is pre-set When the unit is turned on for the first time, the Height Adjustment starts automatically. -
Page 7: Installation
28.50" 120"(10.00') 1.37" 1.82" 2.73" 3.64" 23.24" 30.98" 130"(10.83') 1.48" 1.97" 2.95" 3.94" 25.10" 33.47" Use the calculation program on WolfVision's 140"(11.67') 1.59" 2.11" 3.17" 4.23" 26.95" 35.94" internet homepage to calculate the exact 150"(12.50') 1.70" 2.26" 3.39" 4.52" 28.82"... -
Page 8: Working On The Working Surface
Using a bottom light has the disadvantage that the Synchronized Lightfield of the top light no longer marks the pick-up area of the built-in camera. When switching off the top light, the VZ-C10 also switches the white balance adjustment from "one-push" white balance to "auto-tracking" white balance. This compensates automatically the varying color... -
Page 9: Working With Transparencies
WORKING WITH TRANSPARENCIES WORKING WITH TRANSPARENCIES WORKING WITH TRANSPARENCIES WORKING WITH TRANSPARENCIES WORKING WITH TRANSPARENCIES WORKING WITH TRANSPARENCIES WORKING WITH TRANSPARENCIES The working surface of the Visualizer (#9) has a special crystalline white The working surface of the Visualizer (#9) has a special crystalline white The working surface of the Visualizer (#9) has a special crystalline white The working surface of the Visualizer (#9) has a special crystalline white The working surface of the Visualizer (#9) has a special crystalline white... -
Page 10: Preset Function
PRESET FUNCTION PRESET FUNCTION WolfVision Visualizers offer the possibility of programming three Presets for the functions: Zoom, Focus, Iris, WolfVision Visualizers offer the possibility of programming three Presets for the functions: Zoom, Focus, Iris, WolfVision Visualizers offer the possibility of programming three Presets for the functions: Zoom, Focus, Iris, WolfVision Visualizers offer the possibility of programming three Presets for the functions: Zoom, Focus, Iris, Light, Image, Text, Positive/Negative and Black/White. -
Page 11: Text Enhancement
(landscape) format. Only 50% of the So the camera could only use 50% of its pixels to pick up a pixels are used to vertical (portrait) page. WolfVision's "Image turn" mode solves pick up the letter this problem. -
Page 12: Infrared Remote Control
External Infrared (IR) Sensor In some rooms the 2 built-in infrared receivers of the VZ-C10 may not be enough. In this case connect the supplied external infrared receiver to the IR-sensor plug (#38) and position the IR-sensor somewhere on the ceiling (or in the room) where the users normally point the remote control at. -
Page 13: Automatic Lamp Changer
AUTOMATIC LAMP CHANGER The VZ-C10 is fitted with an automatic lamp changer. If one lamp fails, there is no need to replace it immediately, as the automatic lamp changer automatically switches to the second lamp. When the unit changes lamps there is an on-screen message saying: "Changing lamp". -
Page 14: Transportation
TRANSPORTATION IMPORTANT Please make sure that you pack up the Visualizer in the supplied box as explained in this graphic. This is very important to avoid damage to sensitive parts of the unit! -
Page 15: On-Screen Menu / Camera Menu
MENU ON-SCREEN MENU / CAMERA-MENU For standard use of the WolfVision Visualizer it is NOT necessary to enter the Visualizer's menu and change settings. Inexperienced users should not try to make any adjustments there. For entering the Visualizer's menu press the Menu key (#19) for 1 second. -
Page 16: Technical Data
Upgradeable firmware yes (updates downloadable from www.wolfvision.com) USB-software included on CD-ROM (for Windows 98/ME/2000/XP, updates available at www.wolfvision.com) Light source standard halogen lamp (12V/100W), 3200 Kelvin (constant light spectrum) Automatic lamp changer yes (with built-in spare lamp) -
Page 17: Troubleshooting
TROUBLESHOOTING Symptoms: Check points: - Is the main power switch (#26) switched to "I"? No power - Check the fuses (#27) - see page 13. - Is the glass over the mirrors (#2, #3) dirty? - see CLEANING page 12. Bright and hazy spots in the picture Low light - Is the lamp worn out or not correctly placed in the socket? - see page 13... - Page 18 #1 Mirror light #1 Mirror light #1 Mirror light #1 Mirror light #2 Mirror camera #2 Mirror camera #2 Mirror camera #2 Mirror camera #3 Infrared-sensor 1 (bottom) #3 Infrared-sensor 1 (bottom) #3 Infrared-sensor 1 (bottom) #3 Infrared-sensor 1 (bottom) #4 Infrared-sensor 2 (front side) #4 Infrared-sensor 2 (front side) #4 Infrared-sensor 2 (front side)
- Page 19 Vorsichtmaßnahmen ACHTUNG! Elektroschockrisiko - Gefährliche Netzspannung im Gerätinneren Angeführte Vorsichtsmaßnahmen unbedingt beachten: DAS GERÄT NUR MIT DER AUF DEM TYPENSCHILD ANGEGEBENEN NETZSPANNUNG VERWENDEN! DAS GERÄT VOR FEUCHTIGKEIT SCHÜTZEN! BEIM TRANSPORT DAS GERÄT VOR ERSCHÜTTERUNG SCHÜTZEN! Es ist darauf zu achten, dass eine ausreichende Luftzirkulation zur Kühlung des Gerätes möglich ist (Lüftungsschlitze links und rechts unbedingt freihalten)! Bei jeder Art von Störungsanzeichen (abnormale Geräusche, Geruch, Rauchentwicklung etc.) das Gerät abschalten.
- Page 20 Wolf Vision Inc., 655 Sky Way, Suite 119, San Carlos, CA 94070 / USA Tel. (650)802-0786 and 1-800-356WOLF, Fax: (650)802-0788, E-Mail: wolfvision.usa@wolfvision.com Asien Vertrieb: WolfVision Asia, 27 Woodlands Ind. Park E1, #01-04 Hiang Kie Ind. Bldg. IV, Singapore 757718 Tel. ++65 - 366 9288, Fax: ++65 - 366 9280, E-mail: info@wolfvisionasia.com Kanada Vertrieb: WolfVision Canada Inc., 5460 Canotek Road, Unit 94, Ottawa, ON, K1J 9G9 Canada...
- Page 21 #1 Umlenkspiegel Licht #1 Umlenkspiegel Licht #1 Umlenkspiegel Licht #1 Umlenkspiegel Licht #2 Umlenkspiegel Kamera #2 Umlenkspiegel Kamera #2 Umlenkspiegel Kamera #2 Umlenkspiegel Kamera #3 Infrarot-Sensor 1 (Unterseite) #3 Infrarot-Sensor 1 (Unterseite) #3 Infrarot-Sensor 1 (Unterseite) #3 Infrarot-Sensor 1 (Unterseite) #4 Infrarot-Sensor 2 (Vorderseite) #4 Infrarot-Sensor 2 (Vorderseite) #4 Infrarot-Sensor 2 (Vorderseite)
-
Page 22: Anschlüsse
ANSCHLÜSSE: S/HD SXGA SERIAL IR SENSOR Video EXTERN IN PREVIEW #26 Netzhauptschalter #33 RGBHV Ausgang 15-Pol (schaltbar) #27 Sicherung (siehe Seite 13) #34 EXTERNER Eingang für Computer (siehe Seite 11) #28 Netzanschluss #35 RGBHV Ausgang BNC-Stecker (schaltbar) #29 DVI Ausgang (siehe Seite 15) (Sync-Einstellungen siehe Seite 11) #30 USB Anschluss (siehe Seite 10) #36 PAL/NTSC Y/C (S-Video) Ausgang (siehe unten) -
Page 23: Funktionsweise Des Visualizers
Beim ersten Einschalten des Gerätes, startet das "Height Adjustment" (Höheneinstellungs-) Programm automatisch. Der VZ-C10 wurde werkseitig auf eine Distanz von 2 m voreingestellt. Bei den meisten Installationen differiert die Der VZ-C10 wurde werkseitig auf eine Distanz von 2 m voreingestellt. Bei den meisten Installationen differiert die Der VZ-C10 wurde werkseitig auf eine Distanz von 2 m voreingestellt. - Page 24 1.48" 1.97" 2.95" 3.94" 25.10" 33.47" Verwenden Sie das Rechenprogramm auf 140"(11.67') 1.59" 2.11" 3.17" 4.23" 26.95" 35.94" www.wolfvision.com um die exakte Position 150"(12.50') 1.70" 2.26" 3.39" 4.52" 28.82" 38.42" und die Bildgröße zu berechnen. 160"(13.33') 1.80" 2.41" 3.61" 4.81"...
-
Page 25: Digital Zoom
Röntgenbilder oder Dias, empfohlen. Röntgenbilder oder Dias, empfohlen. Wenn eine Lichtbox benützt wird, sollte das Licht des VZ-C10 mit der LIGHT-Taste (#18) abgeschaltet werden. Wenn eine Lichtbox benützt wird, sollte das Licht des VZ-C10 mit der LIGHT-Taste (#18) abgeschaltet werden. -
Page 26: Weißabgleich
Raumbeleuchtung ein- und ausgeschaltet wird. Raumbeleuchtung ein- und ausgeschaltet wird. Raumbeleuchtung ein- und ausgeschaltet wird. Raumbeleuchtung ein- und ausgeschaltet wird. Die Standardeinstellungen des VZ-C10 sind folgende: Die Standardeinstellungen des VZ-C10 sind folgende: Die Standardeinstellungen des VZ-C10 sind folgende: Die Standardeinstellungen des VZ-C10 sind folgende:... -
Page 27: Preset-Funktion
PRESET FUNKTION PRESET FUNKTION WolfVision Visualizer bieten die Möglichkeit drei fixe Einstellungen für die folgenden Funktionen zu speichern: WolfVision Visualizer bieten die Möglichkeit drei fixe Einstellungen für die folgenden Funktionen zu speichern: WolfVision Visualizer bieten die Möglichkeit drei fixe Einstellungen für die folgenden Funktionen zu speichern: WolfVision Visualizer bieten die Möglichkeit drei fixe Einstellungen für die folgenden Funktionen zu speichern:... -
Page 28: Kontrastanhebung Für Text
A4 Seite verwendet werden. um die Vorlage darzustellen. WolfVision's Image Turn (Bilddreh) Modus löst dieses Problem. Platzieren Sie Ihr vertikales Schriftstück (Brief etc.) einfach in Image Turn Funktion: horizontaler Richtung auf der Arbeitsfläche und zoomen Sie es 90% der Pixel komplett ein. -
Page 29: Infrarot Fernbedienung
INFRAROT FERNBEDIENUNG Bitte beachten Sie, dass eine Infrarot-Fernbedienung nur bis zu einer gewissen Distanz zum Gerät einsetzbar ist. Gegenstände, welche die Sichtverbindung zwischen Fernbedienung und Visualizer verstellen, sowie schwache Batterien beeinträchtigen die Steuerung. Wenn der Visualizer nur noch aus nächster Nähe bzw. überhaupt nicht TELE WIDE mehr mit der Fernbedienung zu steuern ist, müssen meist nur die... -
Page 30: Automatischer Lampenwechsler
LIGHT AUTOMATISCHER LAMPENWECHSLER Der VZ-C10 ist mit einem automatischen Lampenwechsler ausgestattet. Bei Ausfall einer Lampe, muss diese nicht sofort ersetzt werden. Durch den automatischen Lampenwechsler schaltet das Gerät automatisch auf die zweite Lampe um. Während diesem Vorgang erscheint die Meldung "Changing lamp" am Bildschirm. - Page 31 TRANSPORT WICHTIG Bitte vergewissern Sie sich, dass Sie den Visualizer genau nach unten stehender Anleitung in die mitgelieferte Box einpacken. Dies ist sehr wichtig, um Beschädigungen an sensiblen Teilen des Gerätes zu verhindern!
-
Page 32: On-Screen Menü / Kamera-Menü
FIRMWARE (SOFTWARE) UPGRADE Die Firmware (Geräte-Software) Ihres Visualizers (inklusiv On-Screen Hilfe-Texte) kann einfach auf die aktuellste Version aktualisiert werden. Laden Sie die aktuellste Firmware und das WolfVision Firmware Update Utility Programm von WolfVision’s Internet Homepage (www.wolfvision.com/support) herunter. Verbinden Sie den seriellen Anschluss des Visualizers mit dem seriellen Anschluss des Computers, über ein gekreuztes RS232 Kabel (Null-... -
Page 33: Technische Daten
Reflektionsfreier Bereich gesamte Arbeitsfläche Upgratebare Firmware (Geräte-Software) ja (Updates können von www.wolfvision.com heruntergeladen werden) USB-Software inkludiert auf CD-ROM (für Windows 98/ME/2000/XP, Updates erhältlich unter www.wolfvision.com) Lichtquelle Standard Halogen Lampe (12V/100W) , 3200 Kelvin (konstantes Lichtspektrum) Automatischer Lampenwechsler ja (mit eingebauter Ersatzlampe) Anwenderprogrammierbare Presets 3 (plus 8 fixe Presets über RS232), funktionsbezogene Presets ebenso möglich... -
Page 34: Störungssuche
Abtastbereich und dies nicht an den Einstellungen Ihres Monitors oder Projektors liegt, dann können Sie die Größe des Lichtfeldes einstellen, indem Sie das "Height Adjustment"-Programm des VZ-C10 nochmals aus- führen. Dies ist ein Bestandteil des On-Screen Menüs und ist in der Installationsanleitung beschrieben. - Page 35 #1 Umlenkspiegel Licht #1 Umlenkspiegel Licht #1 Umlenkspiegel Licht #1 Umlenkspiegel Licht #2 Umlenkspiegel Kamera #2 Umlenkspiegel Kamera #2 Umlenkspiegel Kamera #2 Umlenkspiegel Kamera #3 Infrarot Sensor 1 (Unterseite) #3 Infrarot Sensor 1 (Unterseite) #3 Infrarot Sensor 1 (Unterseite) #3 Infrarot Sensor 1 (Unterseite) #4 Infrarot Sensor 2 (Vorderseite) #4 Infrarot Sensor 2 (Vorderseite) #4 Infrarot Sensor 2 (Vorderseite)
- Page 36 #1 Mirror light #1 Mirror light #1 Mirror light #1 Mirror light #2 Mirror camera #2 Mirror camera #2 Mirror camera #2 Mirror camera #3 Infrared-sensor 1 (bottom) #3 Infrared-sensor 1 (bottom) #3 Infrared-sensor 1 (bottom) #3 Infrared-sensor 1 (bottom) #4 Infrared-sensor 2 (front side) #4 Infrared-sensor 2 (front side) #4 Infrared-sensor 2 (front side)
Need help?
Do you have a question about the VZ-C10 and is the answer not in the manual?
Questions and answers