THUNDER TIGER Sparrowhawk XXT Instruction Manual

THUNDER TIGER Sparrowhawk XXT Instruction Manual

Brushless powered 4wd offroad buggy
Hide thumbs Also See for Sparrowhawk XXT:

Advertisement

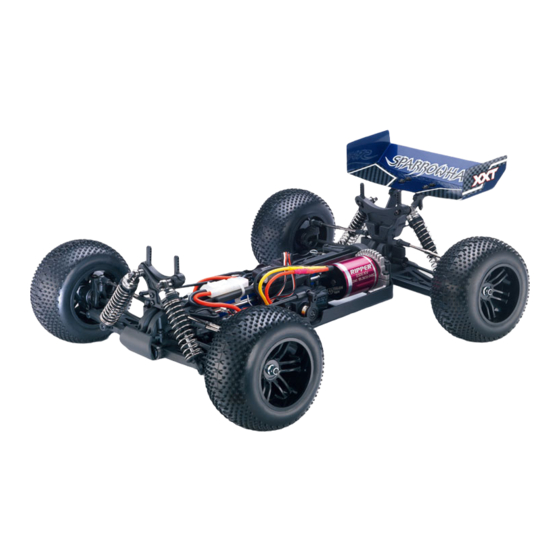
1/10 BRUSHLESS POWERED 4WD OFF-ROAD BUGGY/TRUGGY
No.6541-F
This radio control model car is not a toy! Before beginning operation, please read this manual thoroughly.
本產品為高性能模型非一般玩具,操作前請詳閱本產品說明書。
The contents are subject to change without prior notice due to product improvements and specification changes.
本套件所附之零件可能跟圖示有所差異。因產品後續之設計研發或功能不斷改善之原因,我們將保留產品規格變更權力,不再另行通知使用者。
Thunder Tiger Corporation guarantees this model kit to be free from defects in both material and workmanship. The total monetary value under
warranty will in no case exceed the cost of the original kit purchased. This warranty does not cover any components damaged by use or modification.
Part or parts missing from this kit must be reported within 60 days of purchase. No part or parts will be sent under warranty without proof of
purchase. To receive part or parts under warranty, the service center must receive a proof of purchase and/or the defective part or parts. Should
you find a defective or missing part, contact the authorized Thunder Tiger Service/Distributor nearest you. Under no circumstances can a dealer
or distributor accept return of a kit if assembly has started.
本公司對於製造過程中產生之瑕疵,負完全品質保證責任。
保證事項僅限於產品本身與隨產品所附之零配件。
品質保證不包含下列事項
因使用、組裝或調整本產品所發生之損壞。
其他所有非產品本身品質所造成之損壞。
1:10
無刷動力四驅越野車/卡車
Instruction Manual
操作說明書
WARRANTY
品質保證事項
No.6542-F

Advertisement

Table of Contents
loading

Summary of Contents for THUNDER TIGER Sparrowhawk XXT

  • Page 1 品質保證事項 Thunder Tiger Corporation guarantees this model kit to be free from defects in both material and workmanship. The total monetary value under warranty will in no case exceed the cost of the original kit purchased. This warranty does not cover any components damaged by use or modification.
  • Page 2: Table Of Contents

    Thank you for your purchase of this Thunder Tiger product. You should enjoy many hours of fun and excitement from this advanced R/C model. Thunder Tiger strives to bring you the highest level of quality and service we can provide. We race and test our cars around the world to bring you state-of-the-art products.
  • Page 3: Items Required For Operation 周邊配件 2

    3-Channel digital 2.4G pistol radio system 六角扳手, 1.5mm / 2.0mm / 2.5mm / 3.0mm with Standard Servo. 3動作發射機、接收機及伺服機 4-Way Wrench ACE R/C BLC-40C speed control RIPPER IBL36/33-540C (SPARROWHAWK XXT) 4向六角螺帽套筒板手 車用無刷馬達速控器40A RIPPER IBL36/39-540C (SPARROWHAWK XXB) 車用無刷馬達 EQUIPMENT NEEDED 需求配件 (Not included in the kit 不包含在此套件內)...
  • Page 4: Charging The Battery Pack 電池包充電 3

    LiPo batteries. Make sure you understand how to use your LiPo batteries. Be aware that THUNDER TIGER/ACE RC shall not be liable for any special, indirect, incidental, or consequential damages arising out of the installation and/or use of LiPo batteries in THUNDER TIGER models.
  • Page 5: Preparing The Chassis 操作前,車體準備 4

    PREPARING THE CHASSIS 操作前,車體準備 a. Remove the body pins (2 pcs.) and detach the body. b. Straighten antenna and insert into antenna tube. c. Put the antenna wire through the antenna pipe. (Do not cut or shorten antenna wire.!) Push the antenna pipe into the chassis mount hole.
  • Page 6: The Ace Rc Cougar Ps3I Radio And Blc-40C Brushless

    The ACE RC Cougar PS3i Radio and BLC-40C Brushless Power System 熟悉2.4GHz電控系統及無刷馬達速控器及馬達安裝 Transmitter Antenna 天線 Power Indicator 電源指示燈 Edit Buttons 選單按鈕 LCD Display 選單屏幕 Digital Steering Trim lever 轉向微調撥桿 Digital Throttle Trim lever 油門微調撥桿 Digital Steering D/R(Dual Rate) lever 轉向角度大小調整鈕 AUX Ch Button 預備頻道切換鈕...
  • Page 7 1. Transmitter Antenna: Straighten up the antenna before operating the model. 2. Power Indicator: The LED light indicates power is "on" or "off". 3. Edit Buttons: The Left and Right buttons are the "functions" selecting keys. The up (+) and down (-) buttons are the keys for adjusting values .
  • Page 8: Radio Operation 遙控器操作 7

    RADIO OPERATION 遙控器操作 關 OFF ON 開 a. When turning radio system on. Turn the transmitter on first, then turn on the ESC. b. When turning the radio system off. Turn the ESC off first, then turn off the transmitter. c.
  • Page 9: Operating Radio Steering Function 遙控器設定

    OPERATING RADIO STEERING FUNCTION 遙控器設定-轉向 a. Check the radio steering functions. With the radio transmitter and receiver on, turn the steering wheel to the left. The front tires/wheels should turn left accordingly. If not, flip the steering servo reverse switch. b.
  • Page 10: Blc-40C Esc Setup Programming 速控器設定 9

    1. 請依上圖所示接線,完成後打開發射機的電源,再開ESC的電源,(先確定遙控器的"前進"定義與ESC的"前進"定義是否一致,請 先將遙控車墊高,使四個輪子可以空轉)打開後ESC會先發出一組開機音,接著自動抓取中立點,完成後會再發出確認音,如果 沒有確認音,即表示ESC沒有抓到中立點尚未完成設定,請檢查發射機電源是否開啟,若沒有時請將它打開即可自動偵測,並支 援50%:50%及70%:30%的遙控器切換模式,自動完成中立點設定。 2. 輕推遙控器上的油門撥桿往前進方向推,先不管車輪是否正轉,只要馬達有起動運轉即可,然後迅速將油門控制撥桿推到後退的 位置不要放開,如果是呈煞車狀態,表示目前遙控器的前進定義與電子變速器的定義一致,(如果只有停頓一下就立即反轉,表示 遙控器與變速器的定義相反,請將遙控器上油門位置的正反轉開關切到相反方向)放開油門控制撥桿使它回到中立點,關掉ESC電 源再重新開啟,重新抓取中立點後,再往前進方向推一次,此時遙控車應呈前進狀態,請檢視車輪旋轉方向是不是在前進,如是 即表示目前所有設定都是正確,可以下場試車了,如果這時車輪運轉方向是後退,請將電子變速器連接到馬達的三條輸出線中的 任意兩條對調,即可改變馬達的運轉方向了。(在大部份情況下油門正反轉設定跟ESC的設定相反時,ESC不會抓取中立點,不 同廠牌的遙控器會有不同的差異)。注意!!!應注意電源輸入端的極性不可逆接,一旦逆接會使ESC產生嚴重的短路並燒毀。 3. 先用較小齒數的馬達齒安裝,試跑2~3分鐘後檢查一下馬達跟ESC的溫度是否會相差很多,如果兩者的溫度相近表示目前搭配適合, 可依據場地賽道的特性來改變齒比,但仍須留意ESC及馬達的溫度,建議應該把溫度控制在攝氏95度以內,超過攝氏100度時馬達 的磁鐵其實已會開始退磁,整體效率也會開始下降,導致馬達溫度攠速上昇,銅線阻抗也開始變大,反而消耗掉電池的部份電 量,變成熱消耗掉而已。 4. 若兩者溫差過高時,就要依據ESC或馬達兩個何者較高來做一些調整,如果ESC的溫度在約攝氏80度以內,表示可以加大馬達齒 輪比或換用Kv值略大的馬達試試看,以增加車速,但同時也要注意馬達溫度,同樣把握一個原則,先用較輕的齒比搭配,再依兩 者的溫昇來調整齒比。如改用較高電壓的電池時一定要換較低Kv值的馬達或更換較輕馬達齒輪比,因為同一個馬達的內部阻抗是 固定的,若使用不同的電壓輸入的話其消耗電流會有很大的不同,沒有注意ESC的規格隨意配用馬達或變動輸入電壓的話很容易 使ESC燒毀,以下為一個簡例說明: 輸入電壓7.2V時,一個內阻為0.18 的馬達會消耗40A的電流 (I=V/R 即 7.2/0.18=40) =288W 輸入電壓11.1V時,一個內阻為0.18 的馬達會消耗61.6A的電流 (I=V/R 即11.1/0.18=61.6)=684W 輸入電壓雖然只提高3.9V,但是功率卻多了一倍,所以我們強烈的建議使用者在使用較高電壓前一定要先檢查ESC的溫度,同時 降低馬達的Kv值,再依兩者的溫昇來調整齒比。 BLC-40C ESC SETUP PROGRAMMING 速控器設定 (ESC Setting Card is not included in the kit 速控器設定卡需另購) Driving forward ■
...
  • Page 11: Driving Basic 操控基本動作 10

    DRIVING BASIC 操控基本動作 Stop (Neutral) Brake Reverse Acceleration 停止(中立點) 煞車 後退 加速 SHOCK ADJUSTMENT 避震器懸吊調整 Hard Suspension Soft Suspension 懸吊較硬 懸吊較軟 Use the included shock clips to adjust for spring pre-load. 使用內附的避震器調整環,調整車身高度。更詳細的調整方式請參考設定表。 WHEEL AND TIRE PREPARATION 輪胎及輪轂 a. Remove wheel lock nut using the 4-way wrench and detach wheels. b.
  • Page 12: Driving Tips 操控的小技巧 11

    DRIVING TIPS 操控的小技巧 a. Hold your elbows in and keep the b. Squeeze the throttle trigger or pull the c. Squeeze the throttle trigger and transmitter antenna pointing straight throttle stick gently and steer the car release. Repeat this action to control to left and right.

This manual is also suitable for:

Sparrowhawk xxb

Table of Contents