Sign In
Upload
Download
Table of Contents
Contents
Add to my manuals
Delete from my manuals
Share
URL of this page:
HTML Link:
Bookmark this page
Add
Manual will be automatically added to "My Manuals"
Print this page
×
Bookmark added
×
Added to my manuals
Manuals
Brands
VARISCO Manuals
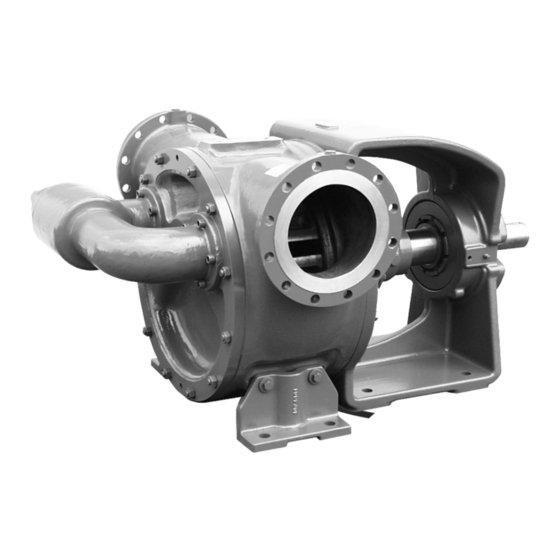
Water Pump
V Series
Instructions for the installation, use and maintenance
VARISCO V Series Instructions For The Installation, Use And Maintenance
Hide thumbs
Also See for V Series
:
Operating manual
(36 pages)
1
2
Table Of Contents
3
4
5
6
7
8
9
10
11
12
13
14
15
16
page
of
16
Go
/
16
Contents
Table of Contents
Bookmarks
Table of Contents
Table of Contents
1 Identification
Field of Application
2 Warranty
3 General Instructions
In Case of Breakdown
Instruction Book Identification
Manufacturer
Nameplate Information
Pag
Type of Pump
4 Safety and Accident Prevention Information
5 In Case of Emergency
6 Handling and Transport
Method of Transport
7 Installation
8 Starting
9 Operating Problems
The Pump Fails to Prime
Low Capacity
Excessive Pump Noise
Motor Overload
The Pump Wears out Quickly
10 Routine Maintenance
Lubrication
Packed Gland Seal
Mechanical Shaft Seal
Axial Rotor Adjustement
Regulation of the By-Pass Relief Valve
11 Disassembly
Removing the Cover
Removing the Idler
Removing the Idler Pin
Removing the Casing
Removing the Ball Bearings
Removing the Packed Gland (Cast Iron Pumps from V6 to V25)
Removing the Packed Gland (Cast Iron Pumps from V25-2 to V200)
Removing the ST5, ST6 Mechanical Seal (Cast Iron Pumps from V6 to V25)
Removing the ST4, ST5, ST6 Single Mechanical Seal
Removing the ST7 Double Mechanical Seal
Removing the ST8 Double Mechanical Seal
Removing the Shaft Bush
Removing and Disassembling the By-Pass Relief Valve
12 Assembly
Mounting the Ball Bearing
Mounting the Shaft Bush
Mounting the Shaft and Rotor
Mounting the ST5, ST6 Mechanical Seal (Cast Iron Pumps from V6 to V25)
Mounting the ST4, ST5, ST6 Mechanical Seal
Mounting the ST7 Double Mechanical Seal
Mounting the ST8 Double Mechanical Seal
Mounting the Bushes
13 Storage
14 Spare Parts
15 Disposal
Advertisement
Quick Links
1
Type of Pump
2
Installation
3
Spare Parts
Download this manual
See also:
Operating Manual
GB
V V
V V
Instructions for the
installation, use and
Series
maintenance of pumps
Table of
Contents
Previous
Page
Next
Page
1
2
3
4
5
Advertisement
Table of Contents
Need help?
Do you have a question about the V Series and is the answer not in the manual?
Ask a question
Questions and answers
Related Manuals for VARISCO V Series
Water Pump VARISCO V Series Operating Manual
Internal gear pumps with magnetic coupling (36 pages)
Water Pump VARISCO V25-2 Instructions For The Use And Maintenance
(146 pages)
Water Pump VARISCO SaxMag V Series Operating Manual
Internal gear pumps with magnetic coupling (36 pages)
Water Pump VARISCO V25 Instructions For The Installation, Use And Maintenance
(16 pages)
Water Pump VARISCO V-TRM Use And Maintenance Manual
Magnetic drive type cycloidal pumps (12 pages)
Water Pump VARISCO M Series Instructions For Use And Maintenance Manual
Progressing cavity pumps (27 pages)
Water Pump VARISCO JS Series Instructions For The Use And Maintenance
Self-priming centrifugal pumps (56 pages)
Water Pump VARISCO K Series Instructions For Use And Maintenance Manual
Submersible pumps (52 pages)
Water Pump VARISCO TITAN 2GL Use And Maintenance Instructions
(19 pages)
Water Pump VARISCO DUO JD Instructions For The Use And Maintenance
Vacuum-prime engine-driven self-priming centrifugal pump (64 pages)
Water Pump VARISCO ST-R Series Instructions For Use And Maintenance Manual
Self-priming trash pumps (16 pages)
Water Pump VARISCO GS Series Operating And Maintenance Manual
Gear pump (72 pages)
Water Pump VARISCO J2 180 Manual
(24 pages)
Water Pump VARISCO J Instructions For The Installation, Use And Maintenance
Self-priming centrifugal pumps (13 pages)
Water Pump VARISCO JB Instructions For The Use And Maintenance
Self-priming centrifugal engine driven pumps (76 pages)
This manual is also suitable for:
V25-2
V20
V25
V30-2
V60-2
V70-2
...
Show all
V50-3
V80-2
V90-2
V85-2
V100-2
V120-2
V180
V150-2
V151
V200
Table of Contents
Print
Rename the bookmark
Delete bookmark?
Delete from my manuals?
Login
Sign In
OR
Sign in with Facebook
Sign in with Google
Upload manual
Upload from disk
Upload from URL


Need help?
Do you have a question about the V Series and is the answer not in the manual?
Questions and answers