Table of Contents
Advertisement
Advertisement
Table of Contents

Related Manuals for IMET SIRIO 370 SH-E


Summary of Contents for IMET SIRIO 370 SH-E
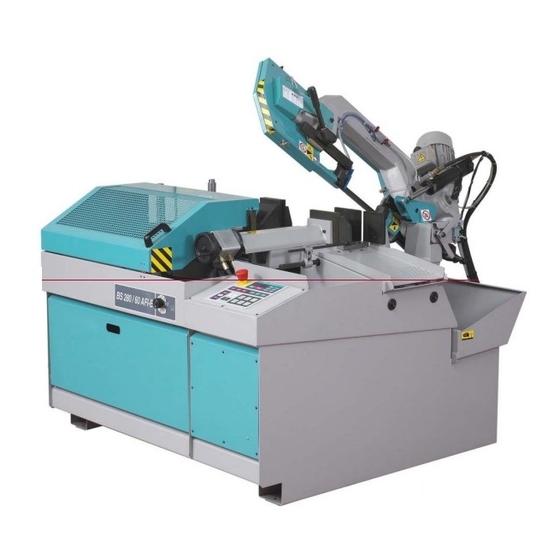
- Page 1 USER’S INSTRUCTIONS IMET Spa Loc. Tre Fontane - Cisano Bergamasco Tel. 035/4387911 - Fax. 035/787066 Web site: www.imetsaws.com E-mail: imet@imetsaws.com Metal Cutting Circular Saw SIRIO 370 SH-E Semiautomatic – Hydropnematic - Electronic USER’S INSTRUCTIONS SIRIO 370SH-Eeng ED.2008 rev.00 1/62...
- Page 2 USER’S INSTRUCTIONS SIRIO 370SH-Eeng ED.2008 rev.00 2/62...
- Page 3 USER’S INSTRUCTIONS We recommend to read carefully the information here included in order to install, use and maintain correctly and safely this machine. Please refer always to this instruction manual in case of assistance service need and keep it carefully for all the machine life.
- Page 4 |-------------------------------------------------------------------------------------------------------------------------------| DECLARATION OF CONFORMITY CE |-------------------------------------------------------------------------------------------------------------------------------| according to the law that transposes the Machine Directives THE MANUFACTURER : IMET S.p.A Località Tre Fontane 24034 - CISANO BERGAMASCO –BG- ITALIA HEREBY DECLARES THAT in designing and manufacturing the machine described here below , we have considered the most important requirements of safety and health dictated by the European Directives of the Machine Security.
- Page 5 USER’S INSTRUCTIONS 3 - MACHINE NOISE The decibel pointed out in the workplace in the conditions under described is appointed to the simoultaneous working of some machine parts in motion ( it depends on the detailed cycle ) added to that one of the tool when is cutting the workpiece.
-
Page 6: Guarantee Norms
USER’S INSTRUCTIONS 4 - GUARANTEE NORMS I.ME.T. offers a wide range of sawing machines and accessories, destined to who buys/uses them as part of a commercial or professional activity. The manufacturer grants that this product has been strongly controlled and that there are no defects in the used and working materials for a period of 12 months from the date of the delivery note. -
Page 7: Table Of Contents
USER’S INSTRUCTIONS 5 - SUMMARY pag. 1- PREMESSA 2 – CONFORMITY DECLARATION 3 – AIR NOISE 4 – GUARANTEE NORMS 5 – Index 6 – Technical characteristics 7 – Installation – minimum requirements 8 – Moving and transit 9 – Fittings/optionals 10 –... -
Page 8: Technical Characteristics
USER’S INSTRUCTIONS TECHNICAL CHARACTERISTICS Semiautomatic, electronic circular cut off sawing machine of vertical slide type, recommended for cutting high resistance steel profiles and solids. Electropneumatic working with hydraulic control of the head speed. In compliance with E.C Safety Standards and the Norms of Electromagnetic Compatibility (EMC). - Page 9 USER’S INSTRUCTIONS 7 - INSTALLATION The machine can work according to the parameters provided by the manufacturer if it is rightly installed and the minimum requirements are observed, as follows : - Machine must be used indoor and with temperatures from +5 to + 40 ° C. - The relative humidity of the environment must not go over 95%.
- Page 10 USER’S INSTRUCTIONS 8 – TRANSPORT & LIFTING For the transport of the machine only the methods indicated below are possible. However, be sure that the means of transport snd lifting are able to stand the machine's weight and its packing (about 500 Kg): WARNING The personnel in charge of loading, unloading and moving the machines should use protective gloves.
- Page 11 USER’S INSTRUCTIONS Use the iron plate already fixed to the highest part of the machine to lift it up. The weight is shown on the packing outside and in the technical data of this manual book also -see par.2- ( it concerns the total weight : only the floor stand weight is 120 kg.
-
Page 12: Blade Choice
USER’S INSTRUCTIONS Standard adjustable bar stop - fixed on the right side , it is necessary to make more cuts with the same lenght. Blade speed variator ESC - this electronic device is an inverter that change continuously the revolution speed of blade motor and allows to cut a lot of different materials, from light alloys to hardened and inox steel. - Page 13 USER’S INSTRUCTIONS - thin toothing (big teeth) for cutting solid materials or pieces that need a long piece of blade (for example the central part of a “U” profile ), or more soft materials as aluminium, copper, soft bronze. By choosing the right one you can avoid a lot of working errors and you can get a good blade penetration and the necessary space for the chips.
- Page 14 USER’S INSTRUCTIONS 11. INSTRUCTIONS FOR USE AND WARNINGS This machine can make semiautomatic work cycles, however at the end of each one the operator has to remove the material that has been cut and possibly change the cutting conditions. Therefore the saw sometimes must be manually adjusted and then it works in semiautomatic cycle (so the operator is not indispensable).
- Page 15 USER’S INSTRUCTIONS On some parts of the machine there are some stickers which warn about the safety measures that have to be taken by the operator who runs it. Their meaning (easy to understand) is indicated in the following chart SIRIO 370SH-Eeng ED.2008 rev.00 14/62...
- Page 16 USER’S INSTRUCTIONS 11.2 - OPERATOR’S SAFETY This section illustrates the safety protections applied on the saw, according to the current legislation in the field of safety. 11.2.1. ELECTRIC EQUIPMENT – Norm EN 60204-01 . Electric board closed with screws - general switch .
-
Page 17: Machine Description
USER’S INSTRUCTIONS 12 - MACHINE DESCRIPTION, E.C. SAFETY NORMS, SUGGESTIONS FOR USE It is a semiautomatic, electronic hydro-pneumatic circular sawing machine, of vertical slide type. Suitable for cutting metal profiles and solids from 45 deg. right to 60 deg. left. It is not suitable to cut wood and assimilated materials (cfr. - Page 18 USER’S INSTRUCTIONS In case the machine is supplied with additional equipment make sure that it is adaptable to the machine. Fit to the right side of machine the lenght stop device -pos.1/dr.RI0336-: with this you can easily cut pieces at the same lenght. Place also the lever –pos10/RI0336- to rotate the gear head.
-
Page 19: Blade Mounting
USER’S INSTRUCTIONS 13.3 - ELECTRICAL CONNECTION Verify that the voltage and the power frequency are compatible with numbers reported in the technical data plate ( It is placed on the right side of the head column) a difference over 10% causes some working unevenness more or less manifested. - Page 20 USER’S INSTRUCTIONS Place the blade -pos.4/dr.RI0062- orienting the teeth in the rotation direction shown by the PRINTED ARROW - pos.5/dr.RI0326- on the coverblade guard and make the blade holes agree with the holes of the fixed flange -pos. 5/dr.RI0062-. Reassemble the closing flange -pos.3/dr.RI0062, the spring -pos.2/dr.RI0062 and the screw po-pos.1/dr.RI0062-. Before tighting the screw, please wheel the blade forward ( in the clockwise sense ) to cancel the being shake between the driving pin and the holes Adjust the position of the nozzle and of the blade brush, then lock their screws, see dr.
- Page 21 USER’S INSTRUCTIONS - 15 - SYSTEM STARTING By turning on the system, the display shows the release software code (example 3.5) during the loading of the set up data from the permanent memory "Eeprom". Then, for a time of about 2 seconds, it shows the identification code of the machine (for example 4.0, SIL, or something else).
-
Page 22: Functioning
USER’S INSTRUCTIONS CYCLE STOP (21): it allows to stop the semiautomatic or automatic cutting cycle in each moment and to push other buttons of the manual commands. FUNCTION 1 = F1 (26): If the led light is on, the returning stroke can be done with the tool in movement; if it is off with the tool stopped. - Page 23 USER’S INSTRUCTIONS MACHINE CYCLE TIME = by led light (5) on. The display is in seconds "S" (more often), in minutes "n" or in hours " ". Please note that the indicator adapts itself automatically to the passed time. FUNCTIONING TIME OF THE MOTOR BLADE = by led light (6) on. Display as in “MACHINE CYCLE TIME”. The usual case is “...
- Page 24 USER’S INSTRUCTIONS P5 - maximum point of the blade’s approach (DOWN) P6 - point of cutting start P7 - point of cutting end) 15.3.4. - SPECIAL FUNCTIONS of the key TEST (for qualified technicians or assistance staff only) If you push the key TEST (10) together with the button COOLANT ON (23) you can enter a menu used by the technical assistance (the display shows: In, DAC, .., and so on in case you push any bottons).
- Page 25 USER’S INSTRUCTIONS 15.5 - CUTTING SETTING Put the work piece you have to cut in the vice by keeping 2/3 mm between the piece and the jaws necessary for a better using of automatic closing, and place it a little back from the cutting line. By indexed clamping lever you can slide the whole vice left/right -drRI0322-.
- Page 26 USER’S INSTRUCTIONS 15.6 - SEMIAUTOMATIC CYCLE Set the bar, so that it goes over the cutting line, and lock it; select the blade speed, select the functions, the cooling distribution and start the cycle by pushing the button START-pos.20/dr.RI0055-. Adjust the cooling flow that reaches the blade and after the rapid feeder cycle start the cutting cycle by selecting the speed with regulator - pos.4/dr.RI0064.
- Page 27 USER’S INSTRUCTIONS on the display you can read “bLOCCO” and it is not possible to push other keys but only OPEN VICE - pos.18/dr.RI0055 or CLOSE VICE -pos.19/dr.RI0055. After this turn again the back selector (9) on MARCIA (RUN). 15.9 - HEAD ROTATION FOR OBLIQUE CUTTING It is possible to make cuts from 45°...
-
Page 28: Regulations
USER’S INSTRUCTIONS 16 - ADJUSTMENTS FOR SIRIO 370 SH-E ( disconnect machine from electrical supply ) 16.1 - VICE - There is the possibility to adjust the force of the anti-bur arm -pos.2/dr.RI0339 trough the screw - pos.3/dr.RI0339+ grub screw -pos.4/dr.RI0339- in the case that the cut piece is not rightly tighted: ulnlock the grub screw, unscrew the central screw to increase the stroke of cup springs and re-lock grub screw. -
Page 29: Machine Running-In
USER’S INSTRUCTIONS 11.1 - Periodic maintenance DAILY -Do it daily or more frequently if you make a demanding work. Remove the chips from the machine by conveying the most little into the chip tray in the base- 2/RI0336- that must be taken away and emptied before the chips arriving to the MAX level ;... - Page 30 USER’S INSTRUCTIONS The presence of bronze or ferrous particles in the replaced oil is normal. The heating of the mechanical parts ( and the oleodynamic parts for semautomatic/ automatic machines ) is part of the usual working and anyhow does not exceed the foreseen thermic limits Please see the OIL AND LUBRICANTS TABLE (RI0108) to choose the most suitable one and to compare the different types...
- Page 31 USER’S INSTRUCTIONS 5 = Tap of the coolant 6 = Chip tray tank too full 7 = Electropump of the coolant 8 = The tank is empty or dirty 9 = Excessive heating that determins the interventation of the thermoprotectors 10 = Excessive gap of the head guides 11 = Reducer bearings demaged or to be regulated 12 = Level of the head oil...
-
Page 32: Machine Demolition
USER’S INSTRUCTIONS 22 - MACHINE DEMOLITION This paragraph may give some informations about the macrooperations of machine disassembly for its scrapping. Special procedures are not required but it is necessary to take only some cares to avoid damages in the last phase of the machine life. - Page 33 USER’S INSTRUCTIONS 17.2 OILS AND LUBRICANTS (Comparation table marked RI0108): SIRIO 370SH-Eeng ED.2008 rev.00 32/62...
-
Page 34: Spare Parts
USER’S INSTRUCTIONS 18 - MAINTENANCE - for qualified technicians --------------------------------------------------------------------------------------------------------------------------------------------- IMPORTANT ----------------------------------------------------------------------------------------------------------------------------------------------- If you want to make some special maintenance/disassembly/resetting operations on the machine, it is necessary to know all information for working in safe conditions. And then the knowledge of the interventation techniques, proper of the qualified technicians, allow to solve easier all problems found by the user during the machine’s life. - Page 35 USER’S INSTRUCTIONS SIRIO 370SH-Eeng ED.2008 rev.00 34/62...
- Page 36 USER’S INSTRUCTIONS SIRIO 370SH-Eeng ED.2008 rev.00 35/62...
- Page 37 USER’S INSTRUCTIONS SIRIO 370SH-Eeng ED.2008 rev.00 36/62...
- Page 38 USER’S INSTRUCTIONS SIRIO 370SH-Eeng ED.2008 rev.00 37/62...
- Page 39 USER’S INSTRUCTIONS +++++++++++++++++++++ SIRIO 370SH-Eeng ED.2008 rev.00 38/62...
- Page 40 USER’S INSTRUCTIONS SIRIO 370SH-Eeng ED.2008 rev.00 39/62...
- Page 41 USER’S INSTRUCTIONS SIRIO 370SH-Eeng ED.2008 rev.00 40/62...
- Page 42 USER’S INSTRUCTIONS SIRIO 370SH-Eeng ED.2008 rev.00 41/62...
- Page 43 USER’S INSTRUCTIONS SIRIO 370SH-Eeng ED.2008 rev.00 42/62...
- Page 44 USER’S INSTRUCTIONS ++++++++++++++++++++ SIRIO 370SH-Eeng ED.2008 rev.00 43/62...
- Page 45 USER’S INSTRUCTIONS +++++++++++++++++++++ SIRIO 370SH-Eeng ED.2008 rev.00 44/62...
- Page 46 USER’S INSTRUCTIONS SIRIO 370SH-Eeng ED.2008 rev.00 8/62...
- Page 47 USER’S INSTRUCTIONS SIRIO 370SH-Eeng ED.2008 rev.00 9/62...
- Page 48 USER’S INSTRUCTIONS SIRIO 370SH-Eeng ED.2008 rev.00 10/62...
- Page 49 USER’S INSTRUCTIONS SIRIO 370SH-Eeng ED.2008 rev.00 11/62...
- Page 50 USER’S INSTRUCTIONS COD. ITALIANO ENGLISH FRANCOISE DEUTSCH SIRIO 370 SHE 3F 30+60RPM 400V SIRIO 370 SHE 3PH SIRIO 370 SHE 3PH 076302 SEGATRICE SEMIAUT. 30+60RPM 400 30+60RPM 400 ATTACCO RAP.ARIA TEDESCO MASCH AIGNEP 261-DN7,5MM- AIR RAPID SCHNELLFIXKUPPL.MIT 100010 1/4" CONNECT. 1/4" DN7,5 VERSCHRAUB ALBERO FRESA SIRIO BLADE SHAFT SIRIO...
- Page 51 USER’S INSTRUCTIONS BUSSOLA DISTANZ.D.8X12X20 SPACER DIA. DISTANZHUELSE 179636 BRUN 8X12X20 D.8X12X20 BUSSOLA FILET.3/8"PASS.D.40X6 THREADED SPACER 180452 3 CIL.SIRIO 3/8" D.40X63 BUSSOLA TIRANTE SERB.OLIO AFE (GREZZO=AVP 182480 D.16X30) OIL TANK BUSH AF-E CAPPUCCIO PRESSOST.CAP-1 PNEUMATIC SWITCH DRUCKWAECHTER 182962 31060 GUM COVER DECKEL CAP-1 CARRELLO MORSA PNEUMATIC VICE...
- Page 52 USER’S INSTRUCTIONS CONNETTORE 2 VIE=C12209N21 DIN 2WEGE 43650=CNN1=USR102/ 2WAYS CONNECTOR STECKVERBINDUNG 260125 C12209N21 DIN C12209N2 CONNETT.RADDR.4P= S11209NRO21AC 4 WAYS /DC24VP.12DIN43650A CONNECTION 260175 KA132R54T S112009NRO COPERCHIO POTENZIOM.SH-E/SHI- POTENTIOMETER 265795 E LAMIERA COVER SH_E/SHI-E COPERCHIO SCATOLA INVERTER BOX 265808 INVERTER LAM COVER COPERCHIO CHIUS.LATER.SIRIO370 SIDE CLOSING...
- Page 53 USER’S INSTRUCTIONS DADO ES.M8 UNI5588 HEXAGONAL NUT M8 ETAU ECROU POUR SECHSKANTIGE 307720 6.S BRUNITO UNI5588 6.S RENFORT MUTTER M8 6.S DADO IN GABBIA INOX 307930 M12 FORO 1 4X14 NUT M12 14X14 DISTANZIALE CARRIAGE APP.CUSCINETTO VSF CONNECTION 322035 SIRIO 370 STACER VTF DISTANZIALE WHEEL ADJUSTING...
- Page 54 USER’S INSTRUCTIONS GHIERA KM5 M25X1,5 497110 PERNO OSC.B S280 RING KM5 M25X1,5 GHIERA KM7 M35x1,5 NUTMUTTER KM7 497200 VTF 500 RING KM7 M35X1,5 M35X1,5 VTF500 GHIERA KM10 M50X1,5 RING KM10 M50X1,5 NUTMUTTER KM10 497483 BS350 BS340PR M50X1,5 BS340PR GHIERA GP PESANT.M35X1,5 499820 AUTOB LOCCANTE...
- Page 55 USER’S INSTRUCTIONS MANOMETRO PANN.111.10.040 10BA PANEL MANOMETER 539317 R POST.FL.PSI 1/8" 111.10.040 MANOMETRO FRONT.111-12-040 12 FRONT MANOMETER DRUCKLUFTMANOMETE 539534 BAR 1/8 CON PSI 111-12-040 R 111-12-040 MOLLA RITORNO MORSE D.30 FILO4 (MORSE RAPIDE E VICE RETURN 545458 PNEUM.1 EFFET SPRING D.30 MOLLA TAZZA 40X20,4X2,5 MANDRI SPINDLE CUP...
- Page 56 USER’S INSTRUCTIONS PIASTRA SOST.MOTORE SIRIO MOTOR PLATE 658150 HOLDER SIRIO 370 PIASTRA CILINDR.TESTA CYLINDER IRON 658216 SIRIO370 PLATE SIRIO 370 PIASTRA ATTACCO PNEUMATIC VICE 658290 MORSE PN.D.35 6OX10 PLATE DIA. 35 PIASTRA PORTA REGISTRO MISURA ALUMINIUM STOP 658505 SIRIO HOLDER PIASTRINA ESPANS.
- Page 57 USER’S INSTRUCTIONS RACC.ARIA GOM.RAP. ELBOW 715370 8-1/4"CIL.= 8115 AGNEP CONNECTION 8-1/4" ELBOW RACCORDO GOM.3/8"M CONNECTION 3/8"M 715880 X 3/8"F CRO MATO X 3/8"F ELBOW RACCORDO GOMITO CONNECTION G- KNIEVERBINDUNG G- 716145 G-4MF=5020A1/4 AMF=5020A1 AMF=5020A1 RACC.ARIA STRAIGHT DIR.RAP.D.4 1/8"=RD CONNECTION D.4 716856 1/8"...
- Page 58 USER’S INSTRUCTIONS BRUNITA WASHER 35X8X5 EIBE 38X8X5 RONDELLA 35X10X6 BURNISHED 742431 BRUNITA WASHER 35X10X6 RONDELLA APPOGGIO SS9X15X1.2 DIN988 HRC45E CILINDRI SUPPORT WASHER DICHTRING SS9X15X1,2 744500 PN/IDR. SS9X15X1,2 DIN988 RONDELLA STAMPATA PRINTED WASHER 744611 5X15X1,2 5X15X1,2 RONDELLA STAMP.12X30X4 PRINTED WASHER GEDRUCKTER 744987 BRUNITA 12X30X4...
- Page 59 USER’S INSTRUCTIONS D.75x20 D.75X20 D.75X20 D.75X20 SPIA OLIO HFTX.15-1/2 786300 SIGHT OIL TL 1-2 OELSCHAUGLAS TL 1-2 SPINA EL.SPIROL 4X18 ELASTIC PIN 4X18 SCHWERSPANNSTIFT 788045 DIN7343 DIN7343 DIN 1481 4X18 SPINA EL.SPIROL 8X28 ELASTIC PIN 8X28 SCHWERSPANNSTIFT 790630 DIN7343 DIN7343 DIN 1481 8X28 790961 SPINA ELASTICA 8X50 ELASTIC PIN 8x50...
- Page 60 USER’S INSTRUCTIONS SERB.OLIO AFE LUNG OIL TANK AFE (GREZZO=AVP D.10X375) TUBOFLEX OLIO SAE100 R6 3/8"28 BAR- FLEXIBLE TUBE OIL GUMMISCHLAUCH 933697 DIAM.9,5x16 SAE100 R6 SAE100 R6 3/8"28 TUBETTO ARIA RILSAN AIR TUBE 2X4 PA 934306 2X4 PA 11 RILSAN TUBETTO ARIA RILSAN AIR TUBE RILSAN DRUCKLUFTLEITUNG 934695...
- Page 61 USER’S INSTRUCTIONS 4X10 CL.10.9 NB601 CL.10.9 CL.10.9 VITE TCE BOMBATA FILLISTER HEAD SCHRAUBE DIN 7984 8.8 970248 6X12 CL.10.9 NB601 SCREW 6X12 M6X12 VITE TCE BOMBATA FILLISTER HEAD SCHRAUBE TCE 8X12 970273 8X12 CL.10.9 NB601 SCREW 8X10 CL.10.9 VITE TCE BOMBATA GRUB SCREW 8X16 SCHRAUBE 8X16 970278...
- Page 62 USER’S INSTRUCTIONS VITE TE 14X30 988564 RIBASSATA SCREW TE 14X30 VIS TE 14X30 VITE TE 14X30 CL.8.8 SCREW TE 14X30 988565 UNI5739 CL.8.8 UNI5739 VITE TE 6X20 CL.8.8 SCREW TE 6X20 SCHRAUBE DIN 912 8.8 994600 UNI5739 CL.8.8 UNI5739 M6X20 VITE TE 8X20 CL.8.8 SCREW TE 8X20 SCHRAUBE 8X20 CL.8.8...
Need help?
Do you have a question about the SIRIO 370 SH-E and is the answer not in the manual?
Questions and answers