
Related Manuals for Brother Dream Quilter 15


Summary of Contents for Brother Dream Quilter 15
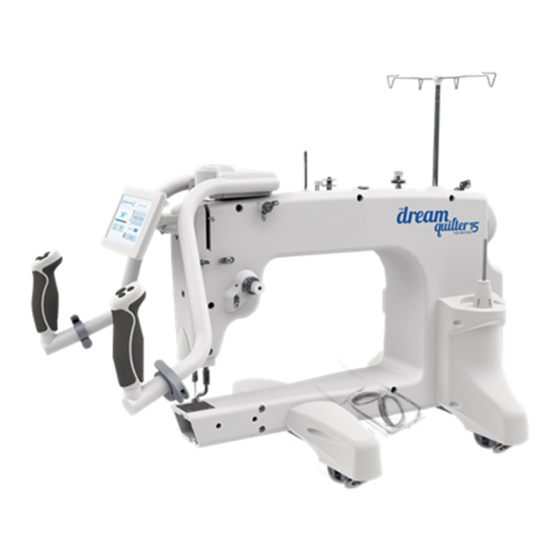
- Page 1 Sit Down Instruction Manual Copyright Jan 01, 2017 Jim M. Bagley, GraceWood, Inc (Reproduction Prohibited) Version 1.0...
-
Page 2: Table Of Contents
Table of Contents IMPORTANT SAFETY INSTRUCTIONS IMPORTANT SAFETY INSTRUCTIONS Specifications and Overview Specifications and Overview Parts List Step 1: Attaching the Thread Mast Step 2a: Connecting the Front Display Step 2b: Connecting the Side Display Step 3: Plugging In The Cables Threading the Quilting Machine Winding Bobbins Installing the Bobbin Case... -
Page 3: Important Safety Instructions
IMPORTANT SAFETY INSTRUCTIONS When using an electrical machine, basic safety precautions should always be followed, including the following: Read all instructions before using (this machine). DANGER - To reduce the risk of electric shock: 1. The machine should never be left unattended when plugged in. Always unplug this machine from the electric outlet immediately after using and before cleaning. -
Page 4: Important Safety Instructions
Important Safety Instructions GROUNDING INSTRUCTIONS This product must be grounded. In the event of malfunction or breakdown, grounding provides path of least resistance for electric current to reduce the risk of electric shock. This product is equipped with a cord having an equipment-grounding conductor and a grounding plug. The plug must be plugged into an appropriate outlet that is properly installed and grounded in accordance with all local codes and ordinances. -
Page 5: Specifications And Overview
Specifications and Overview • Height: 480 mm, 19” • Width: 395 mm, 15.5” • Length: 585 mm, 23” • Weight: 42 Lbs • Quilting Arm Length: 15” W 8.5” H • Maximum SPM: 1800 • Minimum SPM: 90 • Input Voltage: 110-220 VAC •... -
Page 6: Specifications And Overview
Specifications and Overview 1. Thread Mast Base 2. Bobbin Thread Guide 3. Bobbin Thread Tensioner 4. Bobbin Thread Cutter 5. Bobbin Wind Stand 6. Bobbin Sensor 7. Dual Thread Tension Guide 8. Small Thread Tensioner 9. Large Thread Tensioner 10. Thread Guides 11. -
Page 7: Parts List
Parts List Sewing Machine Parts 5in Screen with Cable Side Mount Bracket (1) Foot Pedal (1) Thread Mast (1) and Stylus (1) Bobbin Case (1) Bobbin (3) Needle (11) Oil Bottle (1) Pre-installed (2) Pre-installed (1) Pre-installed Screen Mount Cap (1) Lint Brush (1) Timing Spacer (1) Power Cable (1) -
Page 8: Step 1: Attaching The Thread Mast
Step 1: Installing the Thread Mast Parts Needed: Thread Mast (1) Screw the Thread mast to the Sewing Machine. The thread mast acts as a guide for the Thread thread, and Mast makes it less likely to get snagged or looped around any object. -
Page 9: Step 2B: Connecting The Side Display
Step 2b: Connecting the Side Display Parts Needed: Display Screen (1) (with cable and clip) Side Mount Bracket (1) M5 x 6mm SBHCS (2) Screen Mount Cap (1) 2-1b Connect the Side Mount Bracket using the (2) M5 x 6mm SBHCS. Side Mount Bracket M5 x 6mm... -
Page 10: Step 3: Plugging In The Cables
Step 3: Plugging in the Cables Parts Needed: Power Cable (1) Foot Pedal (1) 3-1: Plug in the Foot Pedal Cable into the sewing 3-3: When you are ready to begin sewing, machine. turn on the machine using the power switch located on the back of the machine. -
Page 11: Threading The Quilting Machine
Threading the Quilting Machine 1. Place thread on the cone style thread stand. Needle Diagram 2. Pull the thread through both loops of the thread mast. 3. Put the thread through the top hole on the thread Front View Side View guide, wrap the thread around and through the bottom Shank hole of thread guide at the middle of the machine. -
Page 12: Winding Bobbins
Winding Bobbins 1. Place the thread on the thread stand. 2. Pass the thread through the hooks in the thread mast. Thread 3. Pull the thread through the bobbin thread guide at the back of the Mast quilting machine. 4. Loop the thread around the spring hook and around the thread tensioner. -
Page 13: Installing The Bobbin Case
Installing the Bobbin Case 1. Remove the Bobbin Case by pulling on the 2. Place the full Bobbin into the Bobbin Case. lever. Note: The bobbin thread needs to slide into the slit on the Bobbin Case. Bobbin Pull the Case Lever To Bobbin... -
Page 14: Thread Tension
Thread Tension If the thread is Proper Tension properly tensioned the Top Thread top thread and the Fabric bobbin thread will knot in the middle of the Thread fabric layers. Knot Bottom Fabric Bobbin Thread Too Much Top Tension Decrease Tension If the bobbin thread is being pulled through the top layer of fabric you... -
Page 15: Adjusting Thread Tension
Adjusting Thread Tension Note: The thread tension will need to be adjusted anytime the thread is changed. Follow the process When the thread is below to adjust the thread tension for the thread you pulled the bobbin have selected. See page 30 for more information about will turn clockwise. -
Page 16: Foot Pedal
The Foot Pedal The foot pedal has a front press and a back kick feature. The front press control the stitching speed of the sewing machine. The back kick controls the needle up/down function of the sewing machine. The foot pedals front press control the stitch speed of the sewing machine. -
Page 17: Final Checklist
Final Checklist Before you begin sewing make sure that: • The mast is attached and tightened securely • The bobbin winder was able to fill a bobbin and stops when full • The quilting machine is threaded correctly • The display hub is secured •... -
Page 18: Main Screen Options
Main Screen Options The Main Screen provides access to the different sewing methods and access the Settings menu. Maximum Mode This mode allows you to set the maximum speed of the machine. When sewing in this mode the maximum machine speed is fixed. To get consistent stitch lengths you must adjust your fabric movements to match the speed of the machine. -
Page 19: Sewing Modes
Sewing Modes Needle Position Indicator Pedal This button is for the default needle Indicator Mode Indicator position when sewing is stopped. This can also be changed by holding the back kick on the foot pedal for at least three seconds. Mode Indicator This button indicates which sewing mode is currently active. -
Page 20: Settings
Settings Settings Measurements The settings menu allows access to information regarding the sewing machine. Handle Switch System This screen displays the number of stitches sewn and hours the machine has run. Screen Calibration Overspeed Use this screen to calibrate when the Sound touch screen is not properly set to where touched. -
Page 21: System Info
System Info Machine Rev. Machine software version current on users machine. Display Rev. Machine Rev. Display Rev. Display software version current on users display. Stitch Count Number of stitches completed since the last reset. Hours Run Stitch Count Hours Run Number of hours run since the last Reset reset. -
Page 22: Repair Kit
Repair Kit This section contains direction for cleaning and maintaining the quilting machine, and instruction to repair simple issues. Every sewing machine includes a basic repair kit, which includes parts to make simple repairs to your machine. Timing Spacer - 1 A tool to make timing your machine easier and more consistent. -
Page 23: The Needle Plate
The Needle Plate Parts Needed: Flat Head Screw Driver 1. Place your needle plate on your sewing machine and rotate hand wheel to ensure needle plate ori- entation so that all screw holes are visible and needle enters the middle of the needle plate without contacting the needle plate at any point. -
Page 24: The Hook Holder
The Hook Holder Parts Needed: 3mm Allen Wrench 1. Rotate your hook assembly so that the positioning guide is at the highest point during rotation. 2. Attach your hook holder to your sewing machine with a M5 X 10 FHCS (don’t tighten the screw during this step) with the hook holder’s finger in the middle of the hook assembly’s positioning guide. -
Page 25: Hopping Foot
Hopping Foot Adjustment Parts Needed: 3mm Allen Wrench 1. Using the hand wheel on the back of your machine, rotate your machine until the needle bar is in the lowest position. 2. Attach your hopping foot to the press bar using a M3 Thumb Screw (don’t tighten during this step) Press Bar M3 Thumb... -
Page 26: Timing The Machine
Timing The Machine Parts Needed: 1. 2mm Allen Wrench 2. Timing Spacer 1. Loosen all three hook assembly set screws with a M2 allen wrench by inserting the wrench into the machines timing hole when each set screw aligns with the hole. 2. -
Page 27: Changing A Needle
Changing A Needle 1. Raise the Needle to the Highest Point. 2. Loosen the thumb screw that secures the needle. 3. Remove the old needle and insert the new one. 4. Hand tighten the thumb screw while holding the Needle in place. Note: Change the needle if it gets bent or if it begins to get dull. -
Page 28: Cleaning Bobbin Area
Cleaning Bobbin Area 1. Remove the bobbin case. 2. Remove all lint and any cloth and thread remnants. Note: You can use canned/compressed air to clean this area out as well. Clean the inside of the hook assembly Clean the area Cleaning Bobbin Case around the hook assembly... -
Page 29: Oiling The Machine: Head
Oiling the Machine: Head We recommend oiling your machine regularly to keep it operating smoothly. It is recommended that you oil your machine every 20 hrs of use. If you use the machine frequently, we recommend oiling at the beginning of each project. Oil before use if you have not used your machine for more than 30 days. The head of the machine and the hook assembly are the only areas that require regular lubrication. -
Page 30: Oiling The Machine: Hook
Oiling the Machine: Hook Frequency: Once every other bobbin change. 1. Remove the Bobbin Case. 2. Ensure all lint and thread remnants have been removed. 3. Rotate the hand wheel so that the needle is halfway down, about a quarter turn. This will put the hook in the optimal position to be oiled. -
Page 31: Troubleshooting
Troubleshooting 14+ Troubleshooting Instruction Issue Cause Solution Troubleshooting Mechanics Hopping foot in lowest position 0.5mm away from needle plate Critical distances check if not working/stitching Make sure Timing is correct See timing instructions (page 24) properly or making noise Check there is a proper distance between hook See hook holder instructions (page 22) holder and hook assembly Machine stitching troubleshooting... -
Page 32: Troubleshooting
Troubleshooting Issues Cause Solution Machine stitching troubleshooting - continued Thread tension too tight Decrease tension (page 25) Inspect for accidental double wrapping of thread on thread guides, make sure Machine not threaded correctly thread mast is directly over thread spool, make sure thread spool is correctly installed Move machine quicker within speed... -
Page 33: Needle Information
Needle Information Shank - The part of the needle that is held in the Needle Diagram needle bar Front View Side View Shaft - The long narrow part of the needle. The Shank diameter measurement is based on the shaft Groove - Allows the thread to pass through the fabric more easily Eye - The hole near the tip of the needle for the... -
Page 34: Thread Information
Thread Information Things to consider when choosing a thread: • The manufacturer of the thread matters (for thread weights and quality of thread) • The weight and ply of the thread. For example: 40/3 means 40 weight 3 ply • Not every manufacturer uses the same sizing scales. Sometimes it is easiest to examine and compare threads to find the size you want •... -
Page 35: Additional Tips
Additional Tips Thread Thread weight is usually stamped on the edge of the spool or printed on the top or bottom of the decrease spool. Thread becomes heavier as weight designations • 60 weight, a very thin/fine thread • 50 weight •... - Page 36 The Grace Company 2225 South 3200 West Salt Lake City, UT 84119 Phone: 1-800-264-0644 Fax: 801-908-8888 www.graceframe.com 1-800-264-0644 www.graceframe.com Model: GC140 5000843 115-230 V~, 50-60 Hz, 400 W HOUSEHOLD USE ONLY USAGE MENAGER SEULEMENT CONFORMS TO UL STD. 1594 CERTIFIED TO CSA STD. C22.2 No. 68 Date Code: 1511...
Need help?
Do you have a question about the Dream Quilter 15 and is the answer not in the manual?
Questions and answers