Table of Contents
Advertisement
Quick Links
Advertisement
Table of Contents

Related Manuals for Sealite SL-60


Summary of Contents for Sealite SL-60
- Page 1 SL-60 2–3NM+ Solar Marine Lantern Installation & Service Manual Version 5.5...
- Page 2 Battery Voltages December 2015 A. Burns Contact details January 2016 J. Dore Update: Flash Code June 2017 A.Dixon M.Nicholson Update: battery replacement procedure November 2017 A.Dixon Update: Flash Code June 2019 M.Dutka M.Nicholson Latest products and information available at www.sealite.com...
-
Page 3: Table Of Contents
Optional GPS Synchronisation ..............Page 16 Lantern Status ....................Page 17 Optional GPS Synchronisation................Page 18 Optional IR Remote Control ................Page 20 Sealite IR Controller / Universal Remote Compatibility ......Page 20 IR Controller Functions .................. Page 21 ................. Page 21 Normal Operation..................Page 21 Read ...................... -
Page 4: Introduction
As a commitment to producing the highest quality products for our customers, Sealite has been independently Sealite lanterns comply with requirements of the US Coast Guard in 33 CFR part 66 for Private Aids To Navigation. -
Page 5: Sl-60 Model
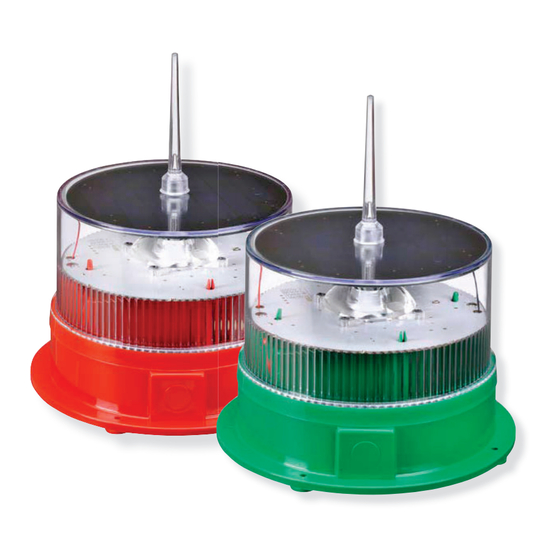
2–3NM+ Solar Marine Light SL-60 Model The Sealite SL-60 is the most popular and versatile 2–3NM+ solar marine light available. Made from tough, durable polycarbonate and using the latest high-intensity LEDs, no expense has been spared in the design and development of this lantern. Installation takes just minutes, and a permanent ON/OFF switch allows for easy storage. - Page 6 SL-60 2–3NM+ Solar Marine Light Standard Base Optional 200mm Bolt Pattern Base Latest products and information available at www.sealite.com...
-
Page 7: Installation
6. To test place dark cover (towel or jacket) on top of light to activate sensor, light will come on. Rotary Switch B Lantern Base ON / OFF Switch User Replaceable Battery Rotary Switch A Intensity Setting Latest products and information available at www.sealite.com... - Page 8 Adhesives or locking compounds are not required. Grab the spike and remove as shown below. You may need to apply slight pressure to the area around the top of the lantern in order to remove the bird spike. Latest products and information available at www.sealite.com...
-
Page 9: Selecting An Intensity/Power Setting
2–3NM+ Solar Marine Light Selecting an Intensity/Power Setting Intensity/power settings on Sealite lanterns operate via DIP switches, located near the rotary switches intensity of the lantern. Setting the lantern to 25% intensity will reduce the power consumption to 25% of the normal 100% setting and the range by 20% - 40% depending on the maximum intensity. Refer draw of the light to local sunlight conditions. -
Page 10: Selecting A Flash Code
The unit may take up to one minute to activate a new manual. Example: SWITCH FLASH CODE FL 3 S Note – if setting the lantern to a demanding duty-cycle such as steady-on, the power setting must be reduced to ensure reliable operation Latest products and information available at www.sealite.com... -
Page 11: Flash Codes
SL-60 2–3NM+ Solar Marine Light Flash Codes on site without the need for external devices. For the latest version of this document visit www.sealite.com, or email info@sealite.com Symbols Fixed Morse code ( ) contains letter 10-second interval. The amount of power your lantern draws through the night depends on the duty cycle, i.e. the amount of 10% duty cycle. - Page 12 FL 5 S FL 15 S 14.0 FL 5 S LFL 15 S 11.0 FL 5 S OC 15 S FL 5 S LFL 20 S 18.0 FL 5 S FL 26 S 25.0 Latest products and information available at www.sealite.com...
- Page 13 FL (2) 12 S 10.0 FL (2) 12 S FL (2) 15 S 11.0 FL (2) 15 S 11.0 Q (2) 15 S 13.8 FL (2) 20 S 15.0 FL (2) 25 S 22.0 Latest products and information available at www.sealite.com...
- Page 14 VQ (3) 15 S 13.7 FL (2) + LFL 16 S FL (3) 20 S 12.5 FL (3) 20 S 15.5 FL (3) 20 S 12.0 FL (3) 20 S 15.2 FL (3) 20 S 15.0 Latest products and information available at www.sealite.com...
- Page 15 FL (5) 20 S 11.2 FL (5) 20 S 11.0 SWITCH Controller FLASH CODE OFF ON OFF ON OFF ON OFF ON OFF ON Q (6) 10 S FL (6) 15 S FL (6) 15 S Latest products and information available at www.sealite.com...
- Page 16 MO (A) 10 S MO (D) 10 S MO (A) 15 S 11.0 MO (U) 15 S 11.8 MO (U) 15 S 10.7 MO (U) 15 S 10.1 MO (B) 15 S 10.5 Latest products and information available at www.sealite.com...
-
Page 17: Lantern Status
There is one red and one yellow status LED. The red status LED is used to indicate the health of the lantern’s power system. The yellow status LED is used to indicate the operational status of the lantern. These indicator LED’s can be viewed at the base of the lens. Latest products and information available at www.sealite.com... -
Page 18: Optional Gps Synchronisation
2–3NM+ Solar Marine Light Optional GPS Synchronisation The SL-60 is available with optional GPS synchronisation to provide the user with the ability to install No additional power supplies, aerials or control systems are required, and with its microprocessor- over a wide range of environmental conditions. - Page 19 1 minute before resuming normal operation. Flashing Battery Voltage Battery Voltage is above 4V. this may indicate a problem ON 1.5 seconds is above 4V with the solar regulator. OFF 1.5 seconds Latest products and information available at www.sealite.com...
-
Page 20: Optional Ir Remote Control
Sealite IR Controller / Universal Remote Compatibility If you lose your Sealite IR Controller, the following Universal Remote Controller has been tested for compatibility: RCA Type RCR312WR programmed for Phillips TV Type Code 10054... -
Page 21: Ir Controller Functions
The light will return to normal operation once it has not detected a valid key press for 30 seconds. The Read to the Flash Code. 75% and 4 for 100%. by the sunrise level. Levels are in the range of 1 to 9. Flash Code Flash Code Numbers Latest products and information available at www.sealite.com... -
Page 22: Intensity
Always On: the light sensor is disabled and the light is turned on and then synchronised to every other will still charge the battery pack. Read Operation Mode Set Operation Mode to Always on Set Operation Mode to Standby Mode Set Operation Mode to Dusk to dawn Latest products and information available at www.sealite.com... -
Page 23: Lux
Assume the current Lux settings are at the factory preset values of 2. This sets the ambient light level to be lower than the default 100 lux. The light will turn on when its surroundings are darker. Latest products and information available at www.sealite.com... -
Page 24: Error / Acknowledge Indication
In order to change intensity settings using the IR Remoter Control, the lamp must be powered. The lamp can detect a change in switch settings if they are changed while the light is powered down. A=3, B=1. Latest products and information available at www.sealite.com... -
Page 25: Hibernation Mode (Advanced Users)
Mode and depending on the current calendar month setting will either Hibernate or enter Dusk-to- Dawn mode. By default, Hibernation mode is disabled. Note you can only use this command once a valid hibernation start & end date has been stored in the lantern. Latest products and information available at www.sealite.com... -
Page 26: Storage Mode (Advanced Users)
In this example, we want the lantern to hibernate each year from Dec 10th, through to February 15th, and the lantern is located inside a storage warehouse. The required key sequence is: Command IR Controller Key Press Store the Hibernation Date Range Enable Hibernation Latest products and information available at www.sealite.com... - Page 27 By pressing the following key sequence the lantern will enter Storage Mode: The lantern will leave storage mode when exposed to daylight or if the power switch is turned OFF and ON again. Latest products and information available at www.sealite.com...
-
Page 28: Maintenance And Servicing
Replacing the battery- Don’t throw the unit out!! The SL-60 lanterns are the only compact marine lantern with a double sealed battery compartment. This provides the user with the ability to change the battery after years of operation. ‘OFF’. -
Page 29: Troubleshooting
2–3NM+ Solar Marine Light Long Term Storage Instructions If the SL-60 is to be placed in storage for an extended period, being more than 5 months, please follow the below steps. 1. The 3.6V NiMH Battery must be stored in a fully charged condition. - Page 30 SL-60 2–3NM+ Solar Marine Light Notes Latest products and information available at www.sealite.com...
- Page 31 SL-60 2–3NM+ Solar Marine Light Notes Latest products and information available at www.sealite.com...
- Page 32 We believe technology improves navigation sealite.com info@sealite.com Sealite Pty Ltd Sealite Asia Pte Ltd Sealite United Kingdom Ltd Sealite USA LLC Australia Singapore +61 (0)3 5977 6128 +65 6908 2917 +44 (0) 1502 588026 +1 (603) 737 1311...
Need help?
Do you have a question about the SL-60 and is the answer not in the manual?
Questions and answers