Table of Contents
Advertisement
w w w . m a g u r a . c o m
s e r v i c e @ m a g u r a . d e
Table of Contents
1. Introduction
2.
Safety instructions before the first ride
3. Safety instructions before every ride
9. Bleeding and Filling
10. Trouble Shooting
14. Spare parts exploded view
WARNING:
This symbol means possible danger for your health and even life if you do not follow
the instructions given resp. if the necessary safety measures are not followed.
ATTENTION:
This symbol warns you of inappropriate handling that might cause heavy damage to
the material and/or the environment.
NOTE:
This symbol is giving you additional information about the general handling of the
product or gives hints to paragraphs of this manual which have to be read carefully.
3
4
4-5
5
6-9
9-11
11-13
13-15
15-16
17
18
19
19
20-21
2
w w w . m a g u r a . c o m
s e r v i c e @ m a g u r a . d e
1. Welcome to the Brake People!
Congratulations! You have purchased a fully
hydraulic MAGURA disc brake proudly „Made
in Germany". You will be enthusiastic about
the awesome braking power and the very little
maintenance that is necessary on our stop-
pers. You are not alone, millions of users
worldwide rely on them and every day we're
becoming more.
Brake lever (master cylinder)
MAGURA Julie
On the fully hydraulic MAGURA disc brake systems Julie and Clara the braking force
is transmitted to the braking surface by a mineral oil column. The movement of the lever
blade moves a piston, which is integrated in the brake lever (master cylinder). The
piston pushes the mineral oil column through the brake hose in the direction of the
brake caliper, where two pistons, on which the brake pads are fixed, are pushed out.
The friction between the brake pads and the rotor is slowing down the bicycle and cau-
ses a heating of both the rotor and the brake caliper.
Never touch either the rotor or the brake caliper after long braking as this
may cause serious burns.
You will be pleased to find out that the MAGURA Clara and Julie disc brakes offer a
superior braking power even with little hand force applied, no matter what the weather
conditions should be. Particularly in wet weather conditions disc brakes are much more
responsive than rim brakes and transmit their enormous power shortly after activating
the brake lever.
Disc brakes do not cause a wear of your rims. In case of insufficient mounting conditi-
ons they might however cause a squealing noise during braking, mainly in wet weather
conditions.
This manual contains important information about the safe installation, ope-
ration and maintenance of your MAGURA disc brake. We urge you to read it
carefully, become familiar with its contents and follow our recommendations to
help make your new braking experience enjoyable and trouble free.
All steps will be explained on the Julie model. Any differences with the
Clara model will be clearly mentioned.
although the Clara and Julie disc brake systems are relatively simple you
should not overestimate your technical skills! We therefore advise you to leave
the following works to a trained technician of a professional bike shop.
In case of any further questions or problems we warmly recommend to visit our
website www.magura.com where you will always find the newest and hottest tips about
all our products. Stay tuned with the Brake People! Thank you for your confidence in
our products, enjoy your ride and your new MAGURA disc stoppers!
Happy trails!
3
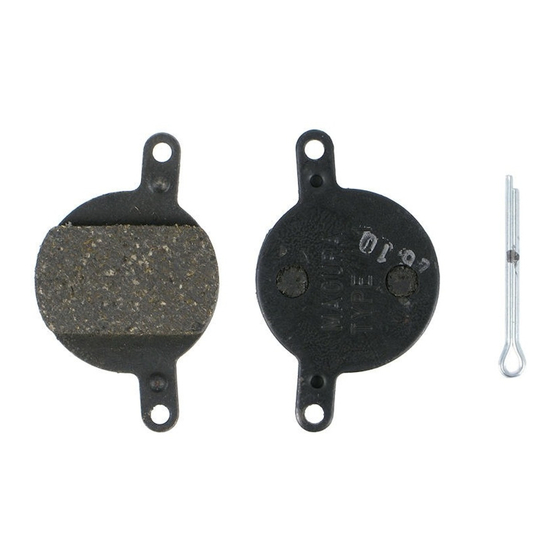
Brake caliper and rotor
MAGURA Julie
Advertisement
Table of Contents

Related Manuals for Magura Clara 2002


Summary of Contents for Magura Clara 2002
-
Page 1: Table Of Contents
Never touch either the rotor or the brake caliper after long braking as this may cause serious burns. 12. Accessories You will be pleased to find out that the MAGURA Clara and Julie disc brakes offer a superior braking power even with little hand force applied, no matter what the weather 13. Warranty conditions should be. -
Page 2: Transport Of The Bicycle
w w w . m a g u r a . c o m w w w . m a g u r a . c o m s e r v i c e @ m a g u r a . d e s e r v i c e @ m a g u r a . -
Page 3: Brake Installation
Because of the large variety of forks and frames avai- (Torx T7 key) lable on the market it is impossible for MAGURA to test all possible combinations. If you mount any of our brake systems always make sure that the brakes are in conformity with the bicycle. - Page 4 In case of a constantly dragging disc brake causing noise your frame is badly aligned. In such a case you should contact your dealer who can care with the MAGURA Gnann-o- 7. Exception Julie rear caliper: Contrary to all other MAGURA disc brakes the mat disc optimizer for a totally even surface of the disc brake mounts.
-
Page 5: Shorten The Hose
Hold the hose carefully so that it cannot snap away! Cut the hose squarely! the same nylon hose that is used on MAGURA rim brakes. The Clara is a high- The sleeve nut can be re-used. The olive and the insert (only Clara) cannot be pressure system and comes with a reinforced hose, the „MAGURA Disc Tube“... -
Page 6: Maintenance
Brake Oil: MAGURA disc brakes use a transmission medium low viscosity mineral Never squeeze the lever blade without the brake pads in place and the oil, the biodegradable MAGURA Blood. Contrary to DOT brake liquid the MAGURA Blood wheel mounted. If this happened by accident push back the pistons with moun- does not irritate human skin or strip the paint of your frame. -
Page 7: Repairs
2. Prepare a new hose: the nylon hose of the Julie disc brake is identical with the one of the MAGURA rim brakes. Clamp the hose as shown with the help of the two After the installation of a new hose you will always have to refill the brake. -
Page 8: The Disc Brake Wheel
Tighten the MAGURA Blood mineral oil. Fill the syringe completely and make sure that there are no cover screw until the cover is flush with the reservoir. Use only the original Torx T7 air bubbles inside. -
Page 9: Accessories
MAGURA is giving a 5 years leak proof warranty on brake levers (master cylinder) flat blade screwdriver. and brake calipers. Watch out for the red order form of the warranty card in this manual (page12) and order your warranty certificate. - Page 10 w w w . m a g u r a . c o m w w w . m a g u r a . c o m JULIE s e r v i c e @ m a g u r a . d e s e r v i c e @ m a g u r a .
Need help?
Do you have a question about the Clara 2002 and is the answer not in the manual?
Questions and answers