
Related Manuals for Gigaset E370


Summary of Contents for Gigaset E370
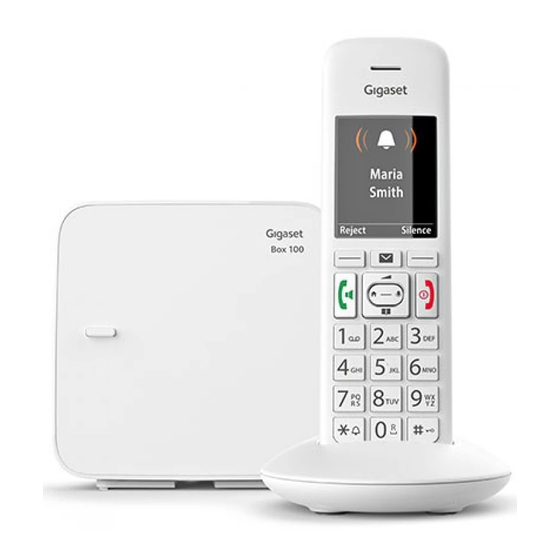
- Page 1 E370 You can find the most up-to-date user guide at www.gigaset.com/manuals User guide online on your smartphone or tablet: Download the Gigaset Help app...
-
Page 2: Table Of Contents
Contents Contents Overview ................4 Handset . - Page 3 Box 100 INT 1 Calls...
-
Page 4: Overview
Overview Overview Handset 10 Key 1 Select network mailbox Press and hold 1 Display 11 Control key / Menu key ( page 11) 2 Status bar ( page 70) Open a menu; navigate in menus and entry Icons display current settings and operating fields;... -
Page 5: Illustration In The User Guide
Illustration in the user guide Illustration in the user guide Warnings, which, if not heeded, can result in injury to persons or damage to devices. Important information regarding function and appropriate handling or functions that could generate costs. Prerequisite for being able to carry out the following action. Additional helpful information. -
Page 6: Safety Precautions
Use only rechargeable batteries that correspond to the specification (see list of permitted batteries www.gigaset.com/service). Never use a conventional (non-rechargeable) battery or other battery types as this could result in significant health risks and personal injury. Rechargeable batteries, which are noticeably damaged, must be replaced. -
Page 7: Getting Started
Getting started Getting started Contents of the package • One base, • One power adapter for the base, • One phone cable, • One handset • One battery cover • Two batteries • One charging cradle including power adapter • One user guide Models with multiple handsets, per handset: •... - Page 8 Base Base ¤ Insert the phone cable into the connection socket at the rear of the base until it clicks into place. ¤ Insert the power cable from the power adapter into the connection socket ¤ Depending on the model, if included in the delivery: Click the cover into place in the notches on the back of the base (not if mounting on a wall).
- Page 9 Handset Setting up the handset for use The display is protected by a plastic film. Please remove the protective film! Inserting the batteries Only use rechargeable batteries, as this could otherwise result in significant health risks and personal injury. For example, the outer casing of the batteries could be destroyed or the batteries could explode.
- Page 10 Handset Changing the display language You can change the display language, if the telephone has been set to an incomprehensible language. ¤ Press the centre of the control key ¤ Press the keys slowly and successively . . . the Example language settings display appears, the set language Deutsch...
-
Page 11: Using The Telephone
Getting to know your telephone Using the telephone Getting to know your telephone Switch the handset on/off ¤ Switch on: When the handset is switched off, press and hold the End call key ¤ When the handset is in idle status, press and hold the End call key Switch off: Lock/unlock the keypad The keypad lock prevents any accidental use of the telephone. - Page 12 Getting to know your telephone Extra-loud function During a call or when listening to a message, make the volume for the handset or the loudspeaker very loud. ¤ Press the control key Press the control key until you reach the highest level. The extra-loud setting only applies for the duration of the call.
- Page 13 Getting to know your telephone Menu guidance The functions of your telephone are displayed in a menu that consists of several levels. Menu overview page 72 Selecting/confirming functions Confirm selection using OK or press the centre of the control key One menu level back using Back Change to idle status...
- Page 14 Getting to know your telephone Entering text Input position ¤ to select an entry field. The cursor flashes in the active New Entry entry field, the title and the text entered turn orange and are shown in large font. First Name: ¤...
-
Page 15: Making Calls
Making calls Making calls Making calls ¤ . . . use to enter the number briefly press the Talk key ¤ Press and hold the Talk key . . . use to enter the number Cancel dialling: Press the End call key Information for Calling Line Identification: page 20 If the display backlight is deactivated, you can reactivate it by pressing any key. - Page 16 Making calls Dialling from the call list The call lists ( page 30) contain the most recent accepted, outgoing and missed calls. ¤ . . . use to select Call Lists . . . use Example to select a list .
- Page 17 Making calls Information about the caller The caller's phone number is displayed. If the caller's number is saved in the directory, the name is displayed. The caller's number will be transferred ( page 20). Accepting/rejecting call waiting A call waiting tone indicates a call during an external call. The number or the name of the caller is displayed if the phone number is transferred.
- Page 18 Making calls Internal consultation call / Internal transfer Call an external participant and transfer the call to an internal participant or hold a consultation call with him or her. ¤ . . . the list of handsets is opened . . . use to select a handset or Call all .
- Page 19 Making calls Listening in to an external call You are conducting an external call. An internal participant can listen in to this call and take part in the conversation (conference). The Listening In function must be activated. Activating/deactivating internal listening in ¤...
-
Page 20: Provider-Specific Functions (Network Services)
Provider-specific functions (network services) Provider-specific functions (network services) Network services depend on the network (analogue fixed line network or IP telephony) and on the network provider (service provider) and must be requested from that provider if required. You will find a description of the features on your network provider's website or at one of their store branches. - Page 21 Provider-specific functions (network services) Calling Line Identification for outgoing calls Switching Calling Line Identification on/off for all calls These settings apply to all registered handsets. ¤ . . . use to select Select Services All Calls Anonym. Change ( = activated) Deactivating Calling Line Identification for the next call ¤...
- Page 22 Provider-specific functions (network services) Call divert When diverting a call, the call is forwarded to another connection. ¤ . . . use to select Select Services Call Divert . . . then Switch on/off: Status: . . . use to select On or Off Enter the number for call diverting: ¤...
- Page 23 Provider-specific functions (network services) Calls with three participants Consultation calls Make another external call during an external call. The first call is Consultation placed on hold. ¤ Ext. Call . . . use to enter the number of the second participant .
-
Page 24: Directory
Directory Directory The local directory is unique to the handset. However, it is possible to send entries to other handsets. Opening the directory ¤ Briefly press in idle status Directory entries Number of entries: up to 200 Information: First name and surname, up to three telephone numbers, anniversary with alert, VIP ringtone with VIP icon Length of the entries: Numbers: max. - Page 25 Directory For Caller Melody (VIP): the telephone number of the caller must be supplied. Searching for/selecting a directory entry ¤ . . . use to browse searched names ¤ . . . use to enter initial letters (max. 8 letters) . . . the display jumps to the first name starting with these initial letters .
- Page 26 Directory Copying number to the directory Copy numbers to the directory: • From a list e.g. the call list or the redial list • From the text of an SMS • When dialling a number The number is displayed or highlighted. ¤...
- Page 27 Directory Copying individual entries ¤ . . . use to select the desired entry Options Copy entry Internal . . . use to select the receiving handset OK . . . the entry is copied Copy the next entry after successful transfer: Press Yes or No Use vCard via SMS to send a directory entry in vCard format by SMS.
-
Page 28: Message Lists
Message lists Message lists Notifications about missed calls, messages on the network mailbox, received SMS messages and missed alarms are saved in the messages list. As soon as a new message arrives, an advisory tone will sound. The Example Message key also flashes (if activated page 29). - Page 29 Message lists Activating/deactivating Message key flashing Receipt of new messages is displayed by a flashing message key on the handset. This type of alert can be activated/deactivated for each message type. In idle status: ¤ Press keys . . . the number 9 System appears in the display .
-
Page 30: Call Lists
Call lists Call lists The telephone saves different types of calls (missed, accepted and outgoing calls) in lists. List entry The following information is displayed in the list entries: Example • The list type (in the header) All calls • Icon for the type of entry: Frank Missed calls,... -
Page 31: Network Mailbox
Network mailbox Network mailbox The network mailbox has been requested from the network provider. Entering a number ¤ . . . use to select Answer Machine Network Mailbox OK . . . to enter or amend the network mailbox number Save To activate/deactivate the network mailbox use the phone number and a function code of your network provider. -
Page 32: Additional Functions
Emergency call Additional functions Emergency call You can set up up to four numbers as emergency numbers. If the activated Emergency function is activated, you can trigger an emergency call with the right display key SOS when the handset is idle. Calls Emergency call The display key SOS is shown in red on a... - Page 33 Emergency call Setting up emergency call In order to be able to use the function you must • save the emergency numbers and • activate the emergency function. The police, ambulance service or fire service must not be used for an emergency call. Storing emergency numbers ¤...
-
Page 34: Calendar
Calendar Calendar You can remind yourself of up to 30 appointments. June 2018 In the calendar, the current day is outlined in white; on days with appointments, the numbers are displayed in colour. When a day Mo Tu We Th Fr Sa Su is selected, it will be outlined in colour. - Page 35 Calendar Displaying missed appointments/anniversaries The following appointments and anniversaries are saved in the Missed Alarms list: • The appointment/anniversary call was not acknowledged. • The appointment/anniversary was notified during a phone call. • The handset was switched off at the time of the appointment/anniversary. The last 10 entries are stored.
-
Page 36: Timer
Timer Timer Setting the timer (countdown) ¤ . . . use to select Additional Features Timer . . . then ¤ Enable/disable: Activation: . . . Select with On or Off ¤ Set the duration: Duration . . . Use to enter the hours and minutes for the timer Min.: 00:01 (one minute);... -
Page 37: Baby Monitor
Baby monitor Alarm An alarm is shown on the display and indicated by the selected ringtone melody. The alarm sounds for 60 seconds. If no key is pressed, the alarm is repeated after 5 minutes. After the second repetition, the alarm call is deactivated for 24 hours. During a call, the alarm is only indicated by a short tone. - Page 38 Baby monitor Activating and setting the baby monitor ¤ . . . use to select Additional Features Baby Monitor activated Baby Monitor OK . . . then Switch on/off: ¤ 07:15 Activation: . . . use to select On or Off Enter destination: INT 1 ¤...
-
Page 39: Eco Dect
ECO DECT ECO DECT The device range is set to maximum as default. This guarantees the best connection between the handset and the base station. In idle status, the handset will not function (as it is not transmitting). Only the base station will maintain contact with the handset via a low wireless signal. -
Page 40: Protection Against Unwanted Calls
Protection against unwanted calls Protection against unwanted calls Time control for external calls Date and time have been set. Enter a time period during which the handset should suspend Example ringing to indicate external calls e.g. during the night. ¤ Time Control . - Page 41 Protection against unwanted calls Black list When the black list function is activated, calls from black list numbers are not indicated or are only indicated in the display. These settings apply to all registered handsets. Displaying/editing the black list ¤ .
-
Page 42: Sms (Text Messages)
SMS (text messages) SMS (text messages) It is possible to send SMS messages as soon as the telephone has been connected. Calling Line Identification is enabled ( page 20). The network provider supports the SMS service. If no SMS service centre is entered, the submenu SMS only consists of the entry Settings. - Page 43 The incoming SMS message list contains all the received SMS messages and those SMS messages that could not be sent due to an error. New SMS messages are indicated on all Gigaset handsets by the icon on the display, the flashing Message key and an advisory tone.
- Page 44 SMS (text messages) Open the SMS message list • With the Message key: . . . the messages list is opened The messages list shows the number of SMS messages it SMS: contains: bold = new messages, not bold = read messages Open list: .
- Page 45 SMS (text messages) The +-icon is not copied for international area codes. ¤ You should then enter "00" at the start of the number. SMS with vCard The vCard is an electronic business card. It is indicated by the icon in the SMS text. A vCard can contain a name, home number, work number, mobile number and a birthday.
- Page 46 SMS (text messages) Entering/changing the SMS service centre / Setting the send service centre ¤ . . . use to select Settings Service Centres . . . use to select SMS service centre ( = current send service centre) Edit . . . then Activate send service centre: Active Send: .
- Page 47 SMS (text messages) SMS troubleshooting Calling Line Identification permanently withheld (CLIR) or Calling Line Identification not activated. Error occurred while sending SMS. Connection to SMS service centre failed, see self-help. Self-help with errors You cannot send messages • You have not requested the CLIP service (Calling Line Identification Presentation). ¤...
-
Page 48: Expanding The Functionality Of The Telephone
Multiple handsets Expanding the functionality of the telephone Multiple handsets Up to six handsets can be registered to the base station. Each registered device is assigned an internal number (1 – 6) and an internal name (INT 1 – INT 6). The number or name assigned can be changed. If all internal numbers have already been assigned at the base station: de-register a handset that is no longer needed... - Page 49 Multiple handsets Registering a handset to multiple base stations Your handset can be registered to up to four base stations. The active base station is the base station to which the handset was last registered. The other base stations remain saved in the list of available base stations.
- Page 50 Multiple handsets Changing the handset name and internal number When registering multiple handsets, they will automatically be assigned the names INT 1, INT 2, etc. Each handset will automatically be assigned the lowest unassigned internal number. The internal number is shown as the name of the handset on the display e.g. INT 2. You can change the names and the numbers of handsets.
-
Page 51: Repeater
Repeater without encryption, e.g. Gigaset repeater prior to Version 2.0 • Repeater with encryption, e.g. Gigaset repeater later than Version 2.0 Further information about the Gigaset repeater can be found in the repeater user guide and at www.gigaset.com. Repeater without encryption Activate Maximum Range/deactivate No Radiation ¤... -
Page 52: Operation With A Router
Operation with a router Operation with a router When operating on the analogue connection of a router, any echoes that may occur can be reduced by activating XES mode 1 (XES = eXtended Echo Suppression). If the XES mode 1 does not sufficiently suppress the occurring echoes: activate XES mode 2. ¤... - Page 53 Operation with a PABX Saving an access code (outside line code) Setting the access code (e.g. "0") for dialling using the fixed line network. ¤ . . . use to select Settings Telephony Access Code . . . then Fixed line network: ¤...
-
Page 54: Adjusting The Telephone Settings
Handset Adjusting the telephone settings Handset Changing the language ¤ . . . use to select Settings Language . . . use select language Select ( = selected) If the handset has been set to an incomprehensible language: ¤ Press the keys slowly one after the other . - Page 55 Handset Colour scheme You can choose from a range of colour combinations for the display. ¤ . . . use to select Settings Display Colour Schemes . . . use to select the desired colour scheme Select ( = selected) Display backlight The display backlight always illuminates when the handset is taken out of the base station/ charging cradle or when a key is pressed.
- Page 56 Handset In idle status ¤ . . . use to select Audio Settings Handset Volume OK . . . then ¤ For the earpiece: Earpiece: . . . use to set the volume ¤ For the speaker: Speaker . . . use to set the volume ¤...
- Page 57 Handset Switching the ringtone on/off Switching the ringtone off permanently ¤ Press and hold . . . the following icon appears in the status bar Switching the ringtone on permanently ¤ Press and hold Switching the ringtone off for the current call ¤...
- Page 58 Handset Fast access to numbers and functions Number keys: It is possible to assign a number from the directory to the keys Display keys: The left display key has a function preset by default, but the key can be re- assigned.
- Page 59 Handset Assigning display keys / Changing assignments ¤ Press and hold the left display key in idle status . . . the list of possible key assignments is opened . . . use to select function OK . . . possible options: Open the list of handsets registered to the same base Quick Dial Assign a number from the directory to the display key...
- Page 60 System System Date and time To ensure you have the correct time for incoming calls and to use the alarm clock and calendar, for example, the date and time must be set. If the date and time have not yet been set on the handset, the display key Time appears. ¤...
- Page 61 System Changing the system PIN Secure the telephone's system settings with a system PIN. You have to enter the system PIN when you register or de-register a handset, change local network settings, perform a firmware update or reset the phone to default settings. Change the telephone's 4-digit system PIN (default setting: 0000): ¤...
-
Page 62: Appendix
Questions and answers Appendix Questions and answers Possible solutions are available online at www.gigaset.com/service Troubleshooting The display is blank. • The handset is not activated. Press and hold • The battery is empty. Charge the battery or replace it. "No Base" flashes on the display. - Page 63 Questions and answers The caller's number is not displayed. • Calling Line Identification (CLI) is not enabled for the caller. The caller should ask the network provider to enable Calling Line Identification (CLI). • Calling Line Identification Presentation (CLIP) is not supported or enabled by the network provider. Ask the network provider to enable Caller Line Identification Presentation (CLIP).
-
Page 64: Service (Customer Care)
Please have your proof of purchase ready when calling. Please note that if the Gigaset product is not sold by authorised dealers in the national territory the product may not be fully compatible with the national telephone network. It is clearly specified on the box near the CE mark for which country/countries the equipment has been developed. - Page 65 In the case of new devices and their components exhibiting defects resulting from manufacturing and/or material faults within 24 months of purchase, Gigaset Communications shall, at its own option and free of charge, either replace the device with another device reflecting the current state of the art, or repair the said device.
-
Page 66: Manufacturer's Advice
Our environmental statement We at Gigaset Communications GmbH are aware of our social responsibility. That is why we actively take steps to create a better world. In all areas of our business – from product planning and production to sales and waste of disposal –... - Page 67 Manufacturer's advice Care Wipe the device with a damp cloth or an antistatic cloth. Do not use solvents or microfibre cloths. Never use a dry cloth; this can cause static. In rare cases, contact with chemical substances can cause changes to the device’s exterior. Due to the wide variety of chemical products available on the market, it was not possible to test all substances.
-
Page 68: Technical Data
Capacity: 750 mAh Handset operating times/charging times The operating time of your Gigaset depends on the capacity of the battery, its age and the way it is used. (All times are maximum possible times.) Standby time (hours) 320 / 190 * Talktime (hours) Operating time with 1.5 hours of calls per day (hours) - Page 69 Technical data General specifications DECT standard Supported GAP standard Supported No. of channels 60 duplex channels Radio frequency range 1880-1900 MHz Duplex mode Time division multiplexing, 10 ms frame length 100 Hz Repetition frequency of the transmission pulse Duration of the transmission pulse 370 μs Channel grid 1728 kHz...
-
Page 70: Display Icons
Display icons Display icons The following icons are displayed depending on the settings and the operating status of your telephone. Icons in the status bar Icon Meaning Icon Meaning Signal strength (No Radiation off ) Keypad lock activated 1% -100% Battery charge status: white, if Maximum Range on;... - Page 71 Display icons Display icons to indicate . . . Icon Meaning Icon Meaning External call Reminder for appointment Internal call Reminder for anniversary Establishing a call (outgoing call) Alarm call Connection established Countdown timer No connection established/ connection terminated Other display icons Icon Meaning Icon...
-
Page 72: Menu Overview
Menu overview Menu overview Not all functions described in the user guide are available in all countries or from all network providers. Open the main menu: when handset is in idle status press page 24 Handset Directory page 30 Call Lists All calls Outgoing calls Accepted calls... - Page 73 Menu overview Settings Date/Time page 60 Display Screensaver page 54 Large Font page 54 Colour Schemes page 55 Backlight page 55 Language page 54 Registration Register Handset page 48 De-register Handset page 49 Select Base page 49 Telephony Auto Answer page 55 Area Codes page 60...
- Page 74 Menu overview New SMS page 42 Incoming page 43 Draft page 43 Settings Service Centres page 45 Notification page 45...
-
Page 75: Index
Index Index ..........Access code (PABX) Calendar . - Page 76 Index ....Charge status of the batteries Display ..Charging cradle (handset) activating/deactivating new message ......
- Page 77 Index ........Getting started Key (base), registration/paging .
- Page 78 Index Reception booster, see Repeater ......Redial list ......
- Page 79 Index ......Speaker ......Star key .
- Page 80 Issued by Gigaset Communications GmbH Frankenstr. 2a, D-46395 Bocholt © Gigaset Communications GmbH 2018 Subject to availability. All rights reserved. Rights of modification reserved. www.gigaset.com Apple, the Apple logo and iPhone are trademarks of Apple Inc., registered in the U.S. and other countries.
Need help?
Do you have a question about the E370 and is the answer not in the manual?
Questions and answers
HOW DO CHANGE TIME SETTING FOR SEASON OR ZONE?
To change the time setting on the Gigaset E370:
1. Press the display key Time, or if date and time are already set:
2. Use the control key to select Settings → press OK.
3. Select Date/Time → press OK.
4. Set the date in 8-digit format (day, month, year).
5. Set the time in 4-digit format (hours and minutes).
6. Press Save to confirm the settings.
This allows adjustment for seasonal or time zone changes.
This answer is automatically generated