Table of Contents

Related Manuals for Alfa Laval Unique PMO Plus Series


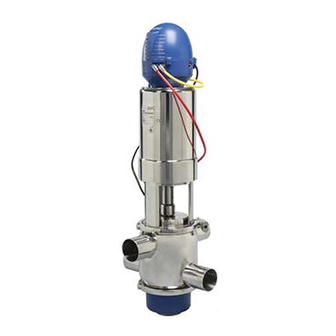
Summary of Contents for Alfa Laval Unique PMO Plus Series
- Page 1 Instruction Manual Effective 11/1/07 ® Unique PMO Plus Series Sanitary Mixproof Valve Revised 1/1/09 sizes 1½", 2", 2½", 3", 4" and 6" Revised 8/1/09 Unique PMO Plus ® ® Unique PMO Plus Mix-Proof Valve Mix-Proof Valve EPM00041ENUS 1107...
-
Page 2: Table Of Contents
Table of Contents The information contained herein is correct at the time of issue but may be subject to change without prior notice. Introduction ................4 Safety ..................5 Installation ................6 Speciications ................. 8 Pneumatic Connections ............10 Position Indication ..............11 Electrical Connections ............ -
Page 3: Introduction
Failure to do so may result in loss of warranty. Where defects appear on the product during the warranty period, Alfa Laval Inc. will back the product and correct the problem. Should the equipment be modiied or not kept in the manner prescribed within this manual, the warranty will become null and void. -
Page 4: Safety
Laval for replacement. Maintain equipment in good working condition. Do Not Make Machine Modifications Alfa Laval offers a full range of products to suit all your needs. Therefore, product modiication is never necessary. Keep Maintenance Safe Replace damaged or worn parts immediately. Never allow old product, debris, or any lubricants to build up on equipment. -
Page 5: Installation
Unique PMO Plus ® Series Sanitary Mixproof Valve Instruction Manual Installation Unpacking The valves should be unpacked immediately upon receipt from the factory and carefully inspected for damage that may be occurred during shipping. The equipment should also be checked against the bill of lading to make sure there are no shortages. - Page 6 ® Installation Unique PMO Plus Series Sanitary Mixproof Valve Instruction Manual Clearances required for removal of actuator/plug assembly for repair. ® Unique PMO Plus Series 1½" 2" 2½" 3" 4" 6" 3.35" 8¼" 10½" 10½" 12¾" 8.66" 2.39" 3.02" 3.52" 4.02"...
- Page 7 Unique PMO Plus ® Series Sanitary Mixproof Valve Instruction Manual Speciications It is important to observe the speciication data during installation, operation and maintenance. Max. Process Pressure Max. Air Pressure 145 PSI — All Sizes 116 PSI — All Sizes Min.
-
Page 8: Speciications
Speciications Unique PMO Plus ® Series Sanitary Mixproof Valve Instruction Manual CIP solution flows for seat lift (viscosity and density similar to water) CV Values Unique PMO Plus ® 1½" 2" 2½" 3" 4" 6" Upper seat lift 12.1 Lower seat push 10.2 The following formula is used to estimate CIP low during seat lifts: Q = Cv ( √... -
Page 9: Pneumatic Connections
Unique PMO Plus ® Series Sanitary Mixproof Valve Instruction Manual Pneumatic Connections Valve Pneumatic Functions: ® Unique PMO Plus Series Out 2 Out 3 Out 1A Valve Pneumatic Connections Actuator ThinkTop Fitting ID Fitting ID Out 1A AC 2 (Blue) Out 2 AC 3 (Yellow) Out 3... -
Page 10: Position Indication
® Position Indication Unique PMO Plus Series Sanitary Mixproof Valve Instruction Manual Valve Position Indication: ® Unique PMO Plus Series Effective 11/1/07, Revised 1/1/09, Revised 8/1/09... -
Page 11: Electrical Connections
Unique PMO Plus ® Series Sanitary Mixproof Valve Instruction Manual Electrical Connections Unique PMO Plus ® Series Mixproof Valve ® ThinkTop , 8-30 VDC #9612-5789-01 (0 Solenoid) Electrical Connection Chart ThinkTop Term. No. Function Remarks +8-30 VDC Power + -Common Power - Ground -----------------------... -
Page 12: Step
® Electrical Connections Unique PMO Plus Series Sanitary Mixproof Valve Instruction Manual Unique PMO Plus ® Series Mixproof Valve ® ThinkTop , 8-30 VDC #9612-5789-54 (3 Solenoids) Electrical Connection Chart ThinkTop Term. No. Function Remarks Solenoid - 1 Output - Valve Open Solenoid - 2 Output - Lower Seat Push Solenoid - 3... -
Page 13: Step
Unique PMO Plus ® Series Sanitary Mixproof Valve Instruction Manual Electrical Connections Unique PMO Plus ® Series Mixproof Valve ® , 110 VAC #9612-9906-01 (0 Solenoid) ThinkTop Electrical Connection Chart ThinkTop Term. No. Function Remarks 110 VAC Power + -Common Power - Ground -----------------------... -
Page 14: Thinktop
Unique PMO Plus ® Series Sanitary Mixproof Valve Instruction Manual Electrical Connections Unique PMO Plus ® Series Mixproof Valve ® ThinkTop , 110 VAC #9612-9906-74 (3 Solenoids) Electrical Connection Chart ThinkTop Term. No. Function Remarks Solenoid - 1 Output - Valve Open Solenoid - 2 Output - Lower Seat Push Solenoid - 3... - Page 15 Electrical Connections/In- ThinkTop ®, structions Instruction Manual Unique PMO Plus ® ThinkTop ® Digital 8 - 30 VDC & 110 VAC PNP/NPN Used with Series Mixproof Valves Effective 11/1/07, Revised 1/1/09, Revised 8/1/09...
- Page 16 ® Automation Unique PMO Plus Series Sanitary Mixproof Valve Instruction Manual ThinkTop ®, Digital 8-30 or 110 VAC NO/NC Features *)The initial current during power-on is higher. Typical values are Tolerance 440 mARCS during 10 ms (the irst half cycle) followed by 270 The tolerance band is ±1.5 mm.
- Page 17 Unique PMO Plus ® Series Sanitary Mixproof Valve Instruction Manual Automation ®, ThinkTop Digital 8-30 or 110 VAC NO/NC Solenoid valves Up to 3 solenoid valves in each unit. Type ....................3/2 or 5/2 valve (only with one 5/2 valve). Air supply ..................
- Page 18 ® Unique PMO Plus Series Sanitary Mixproof Valve Instruction Manual Automation ThinkTop ®, Digital 8-30 or 110 VAC NO/NC A. Digital interface command signals B. Internal connections to solenoid 1-3 C. Feedback signals to digital interface D. Jumper connections **) E.
- Page 19 ® Installation Unique PMO Plus Series Sanitary Mixproof Valve Instruction Manual Step 1 Always read the technical speciications thoroughly (see chapter 3). Always have the ThinkTop ® electrically connected by authorized personnel. Always install the ThinkTop ® before valve or relay is in a safe position. Step 2 1.
- Page 20 Installation Unique PMO Plus ® Series Sanitary Mixproof Valve Instruction Manual Step 5 Fit the ø6 mm (1/4") air tubes to ThinkTop ® (see drawing "Air connections" on page 20). Step 6 Fit the air tubes to the actuator (see drawing "Air connections" on page 20).
- Page 21 ® Installation Unique PMO Plus Series Sanitary Mixproof Valve Instruction Manual Step 9 Make sure the cable gland is completely tightened. Step 10 Set up the ThinkTop ® (see setup diagram page 21 and 22). Effective 11/1/07, Revised 1/1/09, Revised 8/1/09...
- Page 22 Air Connections ® Unique PMO Plus Series Sanitary Mixproof Valve Instruction Manual Air restriction (throttle function) air inlet/outlet Air out 1A Air exhaust Manual hold override Air out 1B (5/2 port solenoid valve only) Solenoid 3/2 or 5/2 Air out 2 3/2 Solenoid valves only Air out 3...
- Page 23 Setup diagram Unique PMO Plus ® Series Sanitary Mixproof Valve Instruction Manual ThinkTop ® setup utilizing local 'I' and 'II' Keys General: 1. Flashing IND means no value set. Notes: - Scroll across, no change Steady IND means value set as shown. - Notes Requires Key Function 2.
- Page 24 ® Setup diagram Unique PMO Plus Series Sanitary Mixproof Valve Instruction Manual LED D, A steady if closed position enabled LED D steady, A flashing if closed position disabled LED D steady, C flashing Actuate the if valve type disabled (LED D lashing) valve to closed position...
- Page 25 Unique PMO Plus ® Series Sanitary Mixproof Valve Instruction Manual Fault Finding Below is stated the meaning of the LEDs' indications for fault inding in connection with the operation of the ThinkTop ® Red lashing: Unit in set-up mode or internal software fault. If internal software fault, re-program unit.
- Page 26 Unique PMO Plus ® Series Sanitary Mixproof Valve Instruction Manual Fault inding and LEDs Yellow steady: Position A (closed valve). Yellow A Yellow steady: Position B (open valve). Yellow B Yellow C Yellow steady: Position C (Seat lift 1-2 or external sensors). Green steady: Solenoid valves activated.
- Page 27 Maintenance Unique PMO Plus ® Series Sanitary Mixproof Valve Instruction Manual Study the instructions carefully. Handle scrap correctly. Always keep spare X-rings in stock. Step 1 ® 1. Remove the ThinkTop from the actuator. 2. Pull out X-ring and replace it. Step 2 1.
- Page 28 ® Unique PMO Plus Series Sanitary Mixproof Valve Instruction Manual Dismantling of ThinkTop Study the instructions carefully. Handle scrap correctly. Always keep spare X-rings in stock. Step 5 To remove the sensor unit untighten screw and pull out the sensor unit. Effective 11/1/07, Revised 1/1/09, Revised 8/1/09...
- Page 29 Maintenance Unique PMO Plus ® Series Sanitary Mixproof Valve Instruction Manual Study the instructions carefully. Handle scrap correctly. Always keep spare X-rings in stock. Step 1 Place sensor unit in base and tighten screw (torque: 1 Nm). Step 2 Assemble base with adapter by turning adapter slightly anticlockwise and tighten the three screws (1.9 Nm).
- Page 30 ® Unique PMO Plus Series Sanitary Mixproof Valve Instruction Manual Assembly of ThinkTop Study the instructions carefully. Handle scrap correctly. Always keep spare X-rings in stock. Step 5 1. Replace X-ring. 2. Mount ThinkTop ® on actuator. Effective 11/1/07, Revised 1/1/09, Revised 8/1/09...
- Page 31 ® Unique PMO Plus Series Sanitary Mixproof Valve Instruction Manual Electrical Connections/In- structions Spare Parts ® ThinkTop P/N 9612578901 8-30 VDC P/N 9612578954 P/N 9612990601 110 VAC P/N 9612990674 Effective 11/1/07, Revised 1/1/09, Revised 8/1/09...
- Page 32 Unique PMO Plus ® Series Sanitary Mixproof Valve Instruction Manual ® ThinkTop Effective 11/1/07, Revised 1/1/09, Revised 8/1/09...
- Page 33 ® Unique PMO Plus Series Sanitary Mixproof Valve Instruction Manual ® ThinkTop ® Pos. Qty. Denomination Unique PMO Series Mixproof ¼" Air Connection Shell complete 9613-4279-01 Screw 9611-99-3458 Washer 9611-99-3459 Sensor unit Digital 8-30 VDC PNP/NPN 9612-5627-01 Sensor unit Digital 110 VAC NO/NC 9612-5627-05 1-3 Solenoid valve 3/2, 24 VDC 9611-99-3324...
-
Page 34: Cleaning Procedures
Unique PMO Plus ® Series Sanitary Mixproof Valve Instruction Manual Cleaning Procedures Recommend Cleaning – General In order to be compliant with the Pasteurized Milk Ordinance (PMO), the Unique PMO Plus ® Series mixproof valves shall be cleaned-in-place (CIP) with the following recommended procedures. - Page 35 ® Unique PMO Plus Series Sanitary Mixproof Valve Instruction Manual Cleaning Procedures Recommend Cleaning – Specific The chart below provides reference to cleaning solution agents, temperature and exposure times necessary during circulation to achieve good cleaning results. All data shown is required for each valve during cleaning. Use clean water, free from chlorides, for mixing with chemical cleaning agents.
- Page 36 Unique PMO Plus ® Series Sanitary Mixproof Valve Instruction Manual Cleaning Procedures Valve Pneumatic Operation During In-Place Cleaning ( Series) ® Unique PMO Plus Each valve seat shall be lifted during the length of the cleaning cycle. Seat lift durations shall not exceed 10 seconds.
- Page 37 ® Unique PMO Plus Series Sanitary Mixproof Valve Instruction Manual Cleaning Procedures Guide Bearing Cleaning When the valves are removed for replacement of wetted parts and / or sealing elastomers, it is important to remove, and hand clean, the three PTFE guide rings (positions 45, 54, 80) and their seating groves before placing the valves back into service.
-
Page 38: Valve Seat Position Indication
Unique PMO Plus ® Series Sanitary Mixproof Valve Instruction Manual Valve Seat Position Indication Test - 1 Upper Valve Seat Position Detection 'C' LED (Seat Lift) 1. Valve at rest (closed) position · "C" LED (Seat Lift) on ThinkTop is illumated. 2. - Page 39 ® Unique PMO Plus Series Sanitary Mixproof Valve Instruction Manual Valve Seat Position Indication Test - 2 Lower Valve Seat Position Detection 'A' LED (Closed Valve) 1. Valve at rest (closed) position · "A" LED (Closed Valve) on ThinkTop is illuminated. 2.
- Page 40 Valve Seat Position Indication Unique PMO Plus ® Series Sanitary Mixproof Valve Instruction Manual Adjustments Upper Valve Seat External Sensor (24VDC or 110VAC) (Position Data Existing on ThinkTop) Lock Nuts The following instructions should be made while the valve is hot from CIP cleaning. (worst case) Valve is in a rest position.
- Page 41 Valve Seat Position Indication ® Unique PMO Plus Series Sanitary Mixproof Valve Instruction Manual Adjustments Upper Valve Seat ThinkTop (Set Position New on ThinkTop) The following instructions can be completed while the valve is at room (ambient) temperature. 1. Enter new 'UPPER SEAT LIFT' position data to the ThinkTop memory in step 5 of the programming sequence using the 'I' and 'II' keys.
- Page 42 Valve Seat Position Indication ® Unique PMO Plus Series Sanitary Mixproof Valve Instruction Manual Test - 3 Regulatory Inspection, Confirm Control System Seat Lifting Interlock During an Operating, active CIP Circuit Description of components to be used for this test: ®...
- Page 43 ® Unique PMO Plus Series Sanitary Mixproof Valve Instruction Manual Valve Seat Position Indication Test procedure listed as follows: 1. Select a Unique PMO Plus mixproof valve for interlock testing. 2. Decide if the cleaning solution will low through the mixproof valve upper or lower body as part of the CIP cleaning circuit for the test.
-
Page 44: Maintenance
Unique PMO Plus ® Series Sanitary Mixproof Valve Instruction Manual Maintenance General Maintenance: Replace all product wetted seals every 12 months. Tools Required for Valve Service · 16mm Wrench · Strap Wrench · 8mm Wrench · 17mm Wrench · 2.5mm Allen Wrench ·... - Page 45 Maintenance ® Unique PMO Plus Series Sanitary Mixproof Valve Instruction Manual Dis-Assemble Valve (Excluding Actuator) 1. Remove ThinkTop (100). 2. Turn magnet (101) counter clockwise by hand and remove from upper actuator stem (1). 3. Turn nut on sensor cable (103) counter clockwise and remove.
- Page 46 Maintenance Unique PMO Plus ® Series Sanitary Mixproof Valve Instruction Manual Lower Sealing Element Assembly (see below) ® *Unique PMO Plus - CP Unique PMO Plus ® 5. Supply compressed air to AC2 (blue ring). 6. Remove upper clamp (64). 7.
- Page 47 ® Unique PMO Plus Series Sanitary Mixproof Valve Instruction Manual Maintenance Lower Plug 16. Supply compressed air to AC1 (Red Ring). 17. Loosen lower plug counter clockwise using a strap wrench while counter holding upper actuator stem (1) with a 16mm wrench. Lower Plug 18.
- Page 48 Unique PMO Plus ® Series Sanitary Mixproof Valve Instruction Manual Maintenance ® *Unique PMO Plus - CP Unique PMO Plus ® 20. Remove O-ring (38) from lower plug stem (75). 21. Remove plug (15). 22. Slide lock (44) along piston rod (29).
- Page 49 ® Unique PMO Plus Series Sanitary Mixproof Valve Instruction Manual Maintenance 27. Remove O-ring (47). 28. Remove lip seal (49). 29. Remove guide ring (45). 30. Remove lip seal (57). 31. Remove guide ring (54) See pages 68 to 73 for part numbers. Effective 11/1/07, Revised 1/1/09, Revised 8/1/09...
- Page 50 Maintenance Unique PMO Plus ® Series Sanitary Mixproof Valve Instruction Manual Study the instructions carefully. Handle scrap correctly. 3. Replacement of seal ring, lower plug Step 1 Cut and remove old seal ring (74) using a knife, screwdriver or similar. Be careful not to scratch the plug. Rotate along circumference Step 2 to fix gasket as shown in the...
- Page 51 ® Unique PMO Plus Series Sanitary Mixproof Valve Instruction Manual Maintenance Study the instructions carefully. Handle scrap correctly. 4. Replacement of seal ring, upper plug Step 1 Remove old seal ring (56) using a knife, screwdriver or similar. Be careful not to scratch the plug. Step 2 Pre-mount seal ring as shown on drawing.
- Page 52 Unique PMO Plus ® Series Sanitary Mixproof Valve Instruction Manual Maintenance Re-Assemble Valve (Excluding Actuator) Note: Lubricate seals with Kluber Paraliq GTE 703 or similar USDA H1 Approved lubricant (#022148-213). ** Lubricate threads with Kluber Paste UH1 84-201 or similar. 1.
- Page 53 Maintenance ® Unique PMO Plus Series Sanitary Mixproof Valve Instruction Manual Re-Assemble Valve (Excluding Actuator) 5. Hand clean and sanitize guide ring (45). 6. Hand clean and sanitize upper sealing element (48). 7. Install guide ring (45). 8. Install *lip seal (49). 9.
- Page 54 Maintenance Unique PMO Plus ® Series Sanitary Mixproof Valve Instruction Manual 10. Install lock (44) onto piston rod (29). 11. Slide upper sealing element (48) onto upper plug (55). 12. Install spindle liner (42) onto upper plug stem (55). 13. Fit upper plug (55), upper sealing element (48) and spindle liner (42) into intermediate piece (37).
- Page 55 ® Maintenance Unique PMO Plus Series Sanitary Mixproof Valve Instruction Manual 15. Install two clamps (43) Note: Align 17. Install plug (15). one clamp with female thread in 18. Install *O-ring (38) on lower plug spindle liner (42). stem (75) 16.
- Page 56 Unique PMO Plus ® Series Sanitary Mixproof Valve Instruction Manual Maintenance Lower Plug 19. Supply compressed air to AC1 (Red Ring). 20. Fit **lower plug stem into ID of upper plug (55) and turn clockwise to tighten by hand. 21. Tighten lower plug clockwise using strap wrench while counter holding upper actuator stem (1) with a 16mm wrench.
- Page 57 Maintenance ® Unique PMO Plus Series Sanitary Mixproof Valve Instruction Manual ® Unique PMO Plus 23. Hand clean and sanitize guide ring (80). 24. Hand clean and sanitize lower sealing element (79). 25. Install guide ring (80). 26. Install *lip seal (77). 27.
- Page 58 Maintenance Unique PMO Plus ® Series Sanitary Mixproof Valve Instruction Manual 28. Install lower sealing element assembly onto body (50). 29. Fit and tighten lower clamp (64). 30. Supply compressed air to AC2 (Blue Ring). 31. Fit the actuator together with the internal valve parts into the valve body (50). 32.
- Page 59 Maintenance ® Unique PMO Plus Series Sanitary Mixproof Valve Instruction Manual 34. Turn sensor (83) clockwise into nylon plug (82) and tighten by hand. 35. Attach sensor cable (103) to sensor (83) and tighten by hand. 36. Turn magnet (101) clockwise into upper actuator stem (1) and tighten by hand. 37.
- Page 60 Unique PMO Plus ® Series Sanitary Mixproof Valve Instruction Manual Maintenance Dismantling of actuator 1. Remove nuts (36) and washers (35). 2. Pull out intermediate piece (37) from the actuator. 3. Remove cover disk (25). 4. Remove retaining ring (24). 5.
- Page 61 Maintenance ® Unique PMO Plus Series Sanitary Mixproof Valve Instruction Manual Dismantling of actuator See pages 68 to 73 for part numbers. Effective 11/1/07, Revised 1/1/09, Revised 8/1/09...
- Page 62 Maintenance Unique PMO Plus ® Series Sanitary Mixproof Valve Instruction Manual Reassembly of actuator Fit guide ring (6) and O-ring (5). NOTE: 2½", 3", 4" and 6" valves only 2. Fit O-rings (7 and 9). Place upper piston (8). 3. Fit stop (4). 4.
- Page 63 Maintenance ® Unique PMO Plus Series Sanitary Mixproof Valve Instruction Manual Reassembly of actuator See pages 68 to 73 for part numbers. Effective 11/1/07, Revised 1/1/09, Revised 8/1/09...
-
Page 64: Parts List
Parts List Unique PMO Plus ® Series Sanitary Mixproof Valve Instruction Manual See pages 68 to 73 for part numbers. Effective 11/1/07, Revised 1/1/09, Revised 8/1/09... - Page 65 Parts List ® Unique PMO Plus Series Sanitary Mixproof Valve Instruction Manual 2½", 3" 4" and 6" Sizes only See pages 68 to 73 for part numbers. Effective 11/1/07, Revised 1/1/09, Revised 8/1/09...
- Page 66 Unique PMO Plus ® Series Sanitary Mixproof Valve Instruction Manual Parts List See pages 68 to 73 for part numbers. Effective 11/1/07, Revised 1/1/09, Revised 8/1/09...
- Page 67 Parts List ® Unique PMO Plus Series Sanitary Mixproof Valve Instruction Manual See pages 68 to 73 for part numbers. Effective 11/1/07, Revised 1/1/09, Revised 8/1/09...
- Page 68 Parts List Unique PMO Plus ® Series Sanitary Mixproof Valve Instruction Manual See pages 68 to 73 for part numbers. Effective 11/1/07, Revised 1/1/09, Revised 8/1/09...
- Page 69 Parts List ® Unique PMO Plus Series Sanitary Mixproof Valve Instruction Manual ® ® Unique PMO Plus Unique PMO Plus - CP See pages 68 to 73 for part numbers. Effective 11/1/07, Revised 1/1/09, Revised 8/1/09...
- Page 70 Parts List Unique PMO Plus ® Series Sanitary Mixproof Valve Instruction Manual Lower Sealing Element (See Below) ® *Unique PMO Plus - CP Unique PMO Plus ® See pages 68 to 73 for part numbers. Effective 11/1/07, Revised 1/1/09, Revised 8/1/09...
- Page 71 Parts List ® Unique PMO Plus Series Sanitary Mixproof Valve Instruction Manual Parts Pos. Qty. Denomination 1½" 2" 2½" 3" 4" 6" Upper stem....9613-0101-02 9613-0101-02 9613-0074-01 9613-0074-01 9613-0074-02 9613-0074-02 Screw ......9611-99-3342 9611-99-3342 9611-99-3342 9611-99-3342 Air itting yellow .... 9611-99-4171 9611-99-4171 9611-99-4171 9611-99-4171 9611-99-4171 9611-99-4171 Air itting red ....
- Page 72 Parts List Unique PMO Plus ® Series Sanitary Mixproof Valve Instruction Manual Parts Pos. Qty. Denomination 1½" 2" 2½" 3" 4" 6" Intermediate piece plug set-up 12 9613-0539-05 9613-0191-21 9613-0192-15 9613-0192-13 9613-0193-17 9613-4859-01 Valve body 11-00 9613-4892-01 9613-0709-01 9613-0710-01 9613-0711-01 9613-0712-01 9613-4848-01 Valve body 12-00 9613-4892-05...
- Page 73 Parts List ® Unique PMO Plus Series Sanitary Mixproof Valve Instruction Manual Parts Pos. Qty. Denomination 1½" 2" 2½" 3" 4" 6" 100 1 ThinkTop Complete (8-30VDC, 0-Solenoids) 9612-5789-01 100 1 ThinkTop Complete (8-30VDC, 3-Solenoids) 9612-5789-54 100 1 ThinkTop Complete (110VAC, 0-Solenoids) 9612-9906-01 100 1 ThinkTop Complete (110VAC, 3-Solenoids)
- Page 74 Parts List Unique PMO Plus ® Series Sanitary Mixproof Valve Instruction Manual Wear Parts Pos. Qty. Denomination 1½" 2" 2½" 3" 4" 6" O-ring, EPDM 9611-99-3555 9611-99-3555 9611-99-3572 9611-99-3572 9611-99-3572 9611-99-3572 O-ring, NBR 9611-99-3633 9611-99-3637 9611-99-3641 9611-99-3641 9611-99-3645 9611-99-5004 O-ring, EPDM 9611-99-3632 9611-99-3636 9611-99-3640 9611-99-3640 9611-99-3644 9611-99-5003 O-ring, FPM 9611-99-3634 9611-99-3638 9611-99-3642 9611-99-3642 9611-99-3646 9611-99-5005...
- Page 75 Parts List ® Unique PMO Plus Series Sanitary Mixproof Valve Instruction Manual Service Kit for Product Wetted Parts (PMO Plus) Denomination 1½" 2" 2½" and 3" 4" 6" 9611-92-6845 9611-92-6016 9611-92-6017 9611-92-6018 9611-92-6849 EPDM 9611-92-6846 9611-92-6013 9611-92-6014 9611-92-6015 9611-92-6850 9611-92-6848 9611-92-6019 9611-92-6020 9611-92-6021...
- Page 76 Unique PMO Plus ® Series Sanitary Mixproof Valve Instruction Manual Parts List Axial Installation Tool Effective 11/1/07, Revised 1/1/09, Revised 8/1/09...
- Page 77 ® Parts List Unique PMO Plus Series Sanitary Mixproof Valve Instruction Manual Axial Installation Tool 1½" 2" 2½" and 3" 4" 6" Pos. Qty. Denomination 9613-0505-01 9613-0505-02 9613-0505-03 9613-0505-07 9613-0505-10 Lower part 9613-0506-01 9613-0509-01 9613-0722-01 Piston 9613-0508-01 9613-0511-01 9613-0721-01 Upper part 9613-0503-01 9613-0510-01 9613-0720-01...
- Page 78 Unique PMO Plus ® Series Sanitary Mixproof Valve Instruction Manual Parts List Radial Installation Tool Effective 11/1/07, Revised 1/1/09, Revised 8/1/09...
- Page 79 ® Parts List Unique PMO Plus Series Sanitary Mixproof Valve Instruction Manual Radial Installation Tool 1½" 2" 2½" and 3" 4" 6" Pos. Qty. Denomination 9613-4260-01 9613-4260-02 9613-4260-04 9613-4260-09 9613-4260-10 Piston 9613-4259-02 9613-4259-04 4613-4259-05 Lower Part 9613-4258-01 9613-4258-01 9613-4258-02 Upper part 9613-0037-02 9613-0037-04 9613-0037-05...
- Page 80 9560 - 58th Place, Suite 300 Kenosha, WI 53144 Tel: 262-605-2600 Fax: 262-605-2667 www.alfalaval.us The information herein is correct at the time of issue, but may be subject to change without prior notice. © 2009 Alfa Laval Inc. EPM00041ENUS 1107...
Need help?
Do you have a question about the Unique PMO Plus Series and is the answer not in the manual?
Questions and answers