
Subscribe to Our Youtube Channel
Related Manuals for Alfa Laval Unique TO


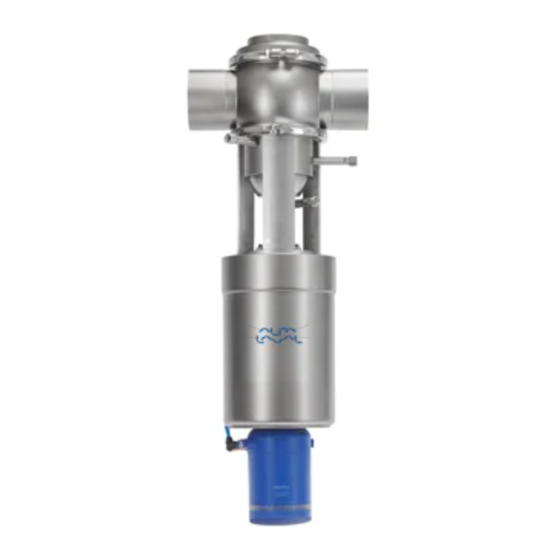
Summary of Contents for Alfa Laval Unique TO
- Page 1 Instruction Manual Unique-TO Mixproof Tank Outlet Valve ESE00156-EN11 2022-10 Original manual...
-
Page 3: Table Of Contents
Table of contents The information herein is correct at the time of issue but may be subject to change without prior notice 1. Declarations of Conformity ..............2. Safety ..................2.1. Important information ................2.2. Warning signs ..................2.3. Safety precautions ................3. -
Page 4: Declarations Of Conformity
EU Declaration Declaration of of of Conformity Conformity Declaration Conformity The Designated Company Alfa Laval Kolding A/S, Albuen 31, DK-6000 Kolding, Denmark, +45 79 32 22 00 Company name, address and phone number Hereby declare that Valve Designation Unique TO... - Page 5 UK Declaration Declaration of of of Conformity Conformity Declaration Conformity The Designated Company Alfa Laval Kolding A/S, Albuen 31, DK-6000 Kolding, Denmark, +45 79 32 22 00 Company name, address and phone number Hereby declare that Valve Designation Unique TO...
-
Page 6: Safety
People People general The public shall not have access to the supplied product. How to to to contact contact Alfa Alfa Laval Laval contact Alfa Laval Contact details for all countries are continually updated on our website. Please visit www.alfalaval.com to access the information directly. -
Page 7: Safety Precautions
(see warning label) Never Never service the valve with valve and pipelines under pressure Never Always use Alfa Laval genuine spare parts. The warranty of Alfa Laval products is dependent on the use of Always Always Alfa Laval genuine spare parts. - Page 8 Warnings are emphasized by means of special signs. STORAGE STORAGE STORAGE Ideally, as a guide Alfa Laval recommend: - Store supplied product as supplied in original packaging - Port opening should be protected against any ingress - Bare steel (not stainless) should be lightly oiled/greased - Store in a clean, dry place without direct sunlight or UV light - Temperature range -5 to 40°C...
-
Page 9: Installation
CAUTION! CAUTION! CAUTION! 1. Complete valve 2. Delivery note Alfa Laval cannot be held responsible for incorrect unpacking. 3. Warning label Step 2 2 2 Step Step Remove upper support Step 3 3 3 Step Step Lift out the valve. - Page 10 3 Installation The instruction manual is part of the delivery. Study the instructions carefully. Fit the warning label supplied on the valve after installation so that it is normally visible. Step Step Step 5 5 5 Inspect the valve for visible transport damages. Inspection! Inspection! Inspection!
-
Page 11: Recycling Information
- At end of use, the equipment must be recycled according to the relevant, local regulations. Besides the equipment itself, any hazardous residues from the process liquid must be considered and dealt with in a proper manner. When in doubt, or in the absence of local regulations, please contact your local Alfa Laval sales company 3.3 General installation... - Page 12 - Overloading Overloading of of of the Overloading the pipelines pipelines pipelines NOTE! NOTE! NOTE! Please follow follow Alfa Alfa Laval Laval installation installation guidelines guidelines (literatur (literatur e e e code code Please Please follow Alfa Laval installation...
-
Page 13: Welding
3 Installation Study the instructions carefully and pay special attention to the warnings! The valve has ends for welding as standard. W W W eld eld carefully/aim carefully/aim at at at stressless stressless welding welding to to to avoid avoid deformation deformation on on on sealing sealing areas. - Page 14 - please see later this section! If there is a risk of foot damage, Alfa Laval recommends to leave a distance of 120 mm (4.7”) below the valve (look at the specific built-in conditions).
- Page 15 3 Installation Study the instructions carefully and pay special attention to the warnings! The valve has ends for welding as standard. W W W eld eld carefully/aim carefully/aim at at at stressless stressless welding welding to to to avoid avoid deformation deformation on on on sealing sealing areas.
-
Page 16: Operation
- Never Never pressurise air connections (AC1, AC3) simultaneously as both valve plugs can be lifted (can cause mixing). Never CAUTION! CAUTION! CAUTION! Alfa Laval cannot be held responsible for incorrect operation. Step 2 2 2 Step Step Never Never... -
Page 17: Fault Finding And Repair
4 Operation Study the maintenance instructions carefully before replacing worn parts. - See 5.1 General maintenance 4.2 Fault finding and repair Pr Pr Problem oblem Repair oblem Cause/r Cause/r esult Cause/r esult esult Repair Repair Leakage at the leakage detection - Particles between valve seats and - Remove the particles plug seals (56/74) -
Page 18: Recommended Cleaning
4 Operation The valve is designed for cleaning in place (= CIP). Study the instructions carefully and pay special attention to the warnings! NaOH = Caustic Soda. HNO = Nitric acid. Internal leakage in the valve is externally visible by means of the leakage outlet. 4.3 Recommended cleaning Step 1 1 1 Step... - Page 19 4 Operation The valve is designed for cleaning in place (= CIP). Study the instructions carefully and pay special attention to the warnings! NaOH = Caustic Soda. HNO = Nitric acid. Internal leakage in the valve is externally visible by means of the leakage outlet. Step Step Step 5 5 5...
- Page 20 4 Operation The valve is designed for cleaning in place (= CIP). Study the instructions carefully and pay special attention to the warnings! NaOH = Caustic Soda. HNO = Nitric acid. Internal leakage in the valve is externally visible by means of the leakage outlet. Step Step Step 8 8 8...
-
Page 21: Maintenance
Study the instructions carefully and pay special attention to the warnings! Always use genuine Alfa Laval spare parts, and keep spare rubber seals and guide rings in stock. Store seals in closed bag. The items refer to the parts list and service kits section. - Page 22 Study the instructions carefully and pay special attention to the warnings! Always use genuine Alfa Laval spare parts, and keep spare rubber seals and guide rings in stock. Store seals in closed bag. The items refer to the parts list and service kits section.
-
Page 23: Dismantling Of Valve
5 Maintenance Study the instructions carefully. The items refer to the parts list and service kits section. Handle scrap correctly. Always use genuine Alfa Laval spare parts. Replace seals if necessary. 5.2 Dismantling of valve Step Step Step 1 1 1 Disassemble valve acc. - Page 24 5 Maintenance Study the instructions carefully. The items refer to the parts list and service kits section. Handle scrap correctly. Always use genuine Alfa Laval spare parts. Replace seals if necessary. Step Step Step 2 2 2 If If If balanced...
- Page 25 5 Maintenance Study the instructions carefully. The items refer to the parts list and service kits section. Handle scrap correctly. Always use genuine Alfa Laval spare parts. Replace seals if necessary. Step Step Step 3 3 3 Remove coupling system and balanced plug according to illustrations (1 to 4).
-
Page 26: Tank Plug, Replacement Of Radial Seal
5 Maintenance Study the instructions carefully. The items refer to the parts list and service kits section. Always use genuine Alfa Laval spare parts. Handle scrap correctly. 5.3 Tank plug, replacement of radial seal Step Step Step 1 1 1 Cut and remove old seal ring (74) using a knife, screwdriver or similar. -
Page 27: Balanced Plug, Replacement Of Axial Seal
5 Maintenance Study the instructions carefully. The items refer to the parts list and service kits section. Always use genuine Alfa Laval spare parts. Handle scrap correctly. Step Step Step 4 4 4 Tool marked with item 1. Place upper tool part including piston. - Page 28 5 Maintenance Study the instructions carefully. The items refer to the parts list and service kits section. Always use genuine Alfa Laval spare parts. Handle scrap correctly. Step Step Step 2 2 2 Pre-mount seal ring as shown on drawing.
-
Page 29: Assembly Of Valve
5 Maintenance Study the instructions carefully. The items refer to the parts list and service kits section. Handle scrap correctly. Always use genuine Alfa Laval spare parts. Replace seals if necessary. Step Step Step 6 6 6 1. Inspect the seal. - Page 30 5 Maintenance Study the instructions carefully. The items refer to the parts list and service kits section. Handle scrap correctly. Always use genuine Alfa Laval spare parts. Replace seals if necessary. Step Step Step 2 2 2 1. Place lip seal (57) in upper plug according to the description in Step 2.1.1 (or spray nozzle if the valve has SpiralClean) and the o-ring (38) in the lower plug 1.1 Installing...
- Page 31 5 Maintenance Study the instructions carefully. The items refer to the parts list and service kits section. Handle scrap correctly. Always use genuine Alfa Laval spare parts. Replace seals if necessary. Step Step Step 3 3 3 Place coupling system and balanced plug according to illustrations ( 1 to 4 ).
- Page 32 5 Maintenance Study the instructions carefully. The items refer to the parts list and service kits section. Handle scrap correctly. Always use genuine Alfa Laval spare parts. Replace seals if necessary. Step Step Step 5 5 5 - Never Never stick your fingers through the valve ports if the actuator Never is supplied with compressed air.
-
Page 33: Dismantling Of Acutator
5 Maintenance Study the instructions carefully. The items refer to the parts list and service kits section. Handle scrap correctly. Always use genuine Alfa Laval spare parts. Replace seals if necessary. 5.6 Dismantling of acutator Step Step Step 1 1 1 1. - Page 34 5 Maintenance Study the instructions carefully. The items refer to the parts list and service kits section. Handle scrap correctly. Always use genuine Alfa Laval spare parts. Replace seals if necessary.
-
Page 35: Assembly Of Actuator
5 Maintenance Study the instructions carefully. The items refer to the parts list and service kits section. Always use genuine Alfa Laval spare parts. Replace seals if necessary. Lubricate the rubber seals before fitting them. 5.7 Assembly of actuator Step... - Page 36 5 Maintenance Study the instructions carefully. The items refer to the parts list and service kits section. Always use genuine Alfa Laval spare parts. Replace seals if necessary. Lubricate the rubber seals before fitting them.
-
Page 37: Technical Data
6 Technical data It is important to observe the technical data during installation, operation and maintenance. Inform the personnel about the technical data. 6.1 Technical data Unique is remote-controlled by means of compressed air. The valve is a normally closed (NC) valve. The valve has two independent plug seals, forming a leakage chamber. - Page 38 76.1 76.1 101.6 101.6 101.6 150 63.5 63.5 63.5 76.1 76.1 76.1 Weight (kg)* Unique TO 12.5 22.5 22.5 12.5 22.5 22.5 Weight (kg)* Unique TO with external cleaning 23.5 23.5 23.5 23.5 - - - *= without tank flange...
-
Page 40: Actuator
Parts list and service kits Always use Alfa Laval genuine spare parts. The warranty of Alfa Laval products is dependent on the use of Alfa Laval genuine spare parts. 7.1 Actuator = actuator kit = Not used in actuator 1½”-2”... - Page 41 Parts list and service kits Always use Alfa Laval genuine spare parts. The warranty of Alfa Laval products is dependent on the use of Alfa Laval genuine spare parts. Parts Parts Parts list list list Pos. Denomination Upper stem Screw...
-
Page 42: Plug Setup 6 (Tank Flange)
Parts list and service kits Always use Alfa Laval genuine spare parts. The warranty of Alfa Laval products is dependent on the use of Alfa Laval genuine spare parts. 7.2 Plug setup 6 (tank flange) = wear parts * = with SpiralClean in leakage chamber... - Page 43 Parts list and service kits Always use Alfa Laval genuine spare parts. The warranty of Alfa Laval products is dependent on the use of Alfa Laval genuine spare parts. Parts Parts Parts list list list Pos. Denomination Plug O-ring, EPDM �...
-
Page 44: Plug Setup 12 (Tank Flange)
Parts list and service kits Always use Alfa Laval genuine spare parts. The warranty of Alfa Laval products is dependent on the use of Alfa Laval genuine spare parts. 7.3 Plug setup 12 (tank flange) = wear parts = with SpiralClean in leakage chamber... - Page 45 Parts list and service kits Always use Alfa Laval genuine spare parts. The warranty of Alfa Laval products is dependent on the use of Alfa Laval genuine spare parts. Parts Parts Parts list list list Pos. Denomination Plug O-ring, EPDM �...
-
Page 46: Plug Setup 6 (Stub Flange)
Parts list and service kits Always use Alfa Laval genuine spare parts. The warranty of Alfa Laval products is dependent on the use of Alfa Laval genuine spare parts. 7.4 Plug setup 6 (stub flange) = wear parts * = with SpiralClean in leakage chamber... - Page 47 Parts list and service kits Always use Alfa Laval genuine spare parts. The warranty of Alfa Laval products is dependent on the use of Alfa Laval genuine spare parts. Parts Parts Parts list list list Pos. Denomination Plug O-ring, EPDM �...
-
Page 48: Plug Setup 12 (Stub Flange)
Parts list and service kits Always use Alfa Laval genuine spare parts. The warranty of Alfa Laval products is dependent on the use of Alfa Laval genuine spare parts. 7.5 Plug setup 12 (stub flange) = wear parts = with SpiralClean in leakage chamber... - Page 49 Parts list and service kits Always use Alfa Laval genuine spare parts. The warranty of Alfa Laval products is dependent on the use of Alfa Laval genuine spare parts. Parts Parts Parts list list list Pos. Denomination Plug O-ring, EPDM �...
-
Page 50: Valve Bodies
Parts list and service kits Always use Alfa Laval genuine spare parts. The warranty of Alfa Laval products is dependent on the use of Alfa Laval genuine spare parts. 7.6 Valve bodies... - Page 51 Parts list and service kits Always use Alfa Laval genuine spare parts. The warranty of Alfa Laval products is dependent on the use of Alfa Laval genuine spare parts. Parts Parts Parts list list list Pos. Denomination Intermediate piece Valve body, upper...
-
Page 52: Installation Kit B
Parts list and service kits Always use Alfa Laval genuine spare parts. The warranty of Alfa Laval products is dependent on the use of Alfa Laval genuine spare parts. 7.7 Installation kit B... - Page 53 Parts list and service kits Always use Alfa Laval genuine spare parts. The warranty of Alfa Laval products is dependent on the use of Alfa Laval genuine spare parts. Parts Parts Parts list list list Pos. Denomination Hose PTFE with stainless steel...
-
Page 54: Installation Kit C
Parts list and service kits Always use Alfa Laval genuine spare parts. The warranty of Alfa Laval products is dependent on the use of Alfa Laval genuine spare parts. 7.8 Installation kit C... - Page 55 Parts list and service kits Always use Alfa Laval genuine spare parts. The warranty of Alfa Laval products is dependent on the use of Alfa Laval genuine spare parts. Parts Parts Parts list list list Pos. Denomination Welding liner...
-
Page 56: Installation Kit G
Parts list and service kits Always use Alfa Laval genuine spare parts. The warranty of Alfa Laval products is dependent on the use of Alfa Laval genuine spare parts. 7.9 Installation kit G... - Page 57 Parts list and service kits Always use Alfa Laval genuine spare parts. The warranty of Alfa Laval products is dependent on the use of Alfa Laval genuine spare parts. Parts Parts Parts list list list Pos. Denomination Welding male part, AISI 316 3/8"...
-
Page 58: Installation Kit H And H2
Parts list and service kits Always use Alfa Laval genuine spare parts. The warranty of Alfa Laval products is dependent on the use of Alfa Laval genuine spare parts. 7.10 Installation kit H and H2... - Page 59 Parts list and service kits Always use Alfa Laval genuine spare parts. The warranty of Alfa Laval products is dependent on the use of Alfa Laval genuine spare parts. Parts Parts Parts list list list Pos. Denomination DIN union DN10...
-
Page 60: Axial Installation Tool
Parts list and service kits Always use Alfa Laval genuine spare parts. The warranty of Alfa Laval products is dependent on the use of Alfa Laval genuine spare parts. 7.11 Axial installation tool... - Page 61 Parts list and service kits Always use Alfa Laval genuine spare parts. The warranty of Alfa Laval products is dependent on the use of Alfa Laval genuine spare parts. Parts Parts Parts list list list Pos. Denomination Complete tool Lower Part...
-
Page 62: Radial Installation Tool
Parts list and service kits Always use Alfa Laval genuine spare parts. The warranty of Alfa Laval products is dependent on the use of Alfa Laval genuine spare parts. 7.12 Radial installation tool... - Page 63 Parts list and service kits Always use Alfa Laval genuine spare parts. The warranty of Alfa Laval products is dependent on the use of Alfa Laval genuine spare parts. Parts Parts Parts list list list Pos. Denomination Complete tool Piston...
-
Page 64: Mounting Tool For Lip Seal
Parts list and service kits Always use Alfa Laval genuine spare parts. The warranty of Alfa Laval products is dependent on the use of Alfa Laval genuine spare parts. 7.13 Mounting tool for lip seal... - Page 65 Parts list and service kits Always use Alfa Laval genuine spare parts. The warranty of Alfa Laval products is dependent on the use of Alfa Laval genuine spare parts. Parts Parts Parts list list list Pos. Denomination Mounting tool for lip seal,...
- Page 66 © Alfa Laval Corporate AB This document and its contents is owned by Alfa Laval Corporate AB and protected by laws governing intellectual property and thereto related rights. It is the responsibility of the user of this document to comply with all applicable intellectual property laws. Without limiting any rights related to this document, no part of this document may be copied, reproduced or transmitted in any form or by any means (electronic, mechanical, photocopying, recording, or otherwise), or for any purpose, without the expressed permission of Alfa Laval Corporate AB.
Need help?
Do you have a question about the Unique TO and is the answer not in the manual?
Questions and answers